


今天模仿着书上的例子,做了下使用Get、Post方法发送请求这个小项目。
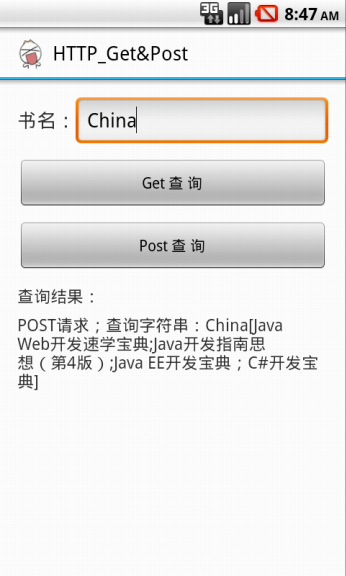
项目分为服务器端和客户端,整个程序是一个图书查询程序,运行效果图如下:
-服务器端
服务器采用的是Tomcat8,附上服务器端函数的百度网盘下载地址:http://pan.baidu.com/s/1pJ08oav
下载下来将其整个放到 X:…Tomcat8\webapps 目录下。
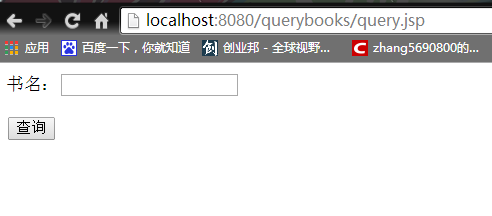
启动Tomcat8并打开浏览器,输入http://localhost:8080/querybooks/query.jsp
如果出现如下界面,则代表服务器端可以了
-客户端
1、首先建立一个新的Android工程
2、因为这个App需要访问Internet资源,所以需要在AndroidMainfest.xml文件中设置“android.permission.INTERNET”权限。
<uses-permission android:name="android.permission.INTERNET" />3、编辑string.xml
<?xml version="1.0" encoding="utf-8"?>
<resources>
<string name="app_name">HTTP_Get&Post</string>
<string name="item">书名:</string>
<string name="hint">请输入书名</string>
<string name="button_get">Get 查 询</string>
<string name="button_post">Post 查 询</string>
<string name="result">查询结果:</string>
<string name="action_settings">Settings</string>
</resources>4、编辑主界面activity_main.xml
<LinearLayout xmlns:android="http://schemas.android.com/apk/res/android"
    xmlns:tools="http://schemas.android.com/tools"
    android:layout_width="match_parent"
    android:layout_height="match_parent"
    android:orientation="vertical"
    android:paddingBottom="@dimen/activity_vertical_margin"
    android:paddingLeft="@dimen/activity_horizontal_margin"
    android:paddingRight="@dimen/activity_horizontal_margin"
    android:paddingTop="@dimen/activity_vertical_margin"
    tools:context="alex.example.http_getpost.MainActivity" >

    <LinearLayout
        android:layout_width="match_parent"
        android:layout_height="wrap_content"
        android:orientation="horizontal" >

        <TextView
            android:layout_width="wrap_content"
            android:layout_height="wrap_content"
            android:text="@string/item"
            android:textSize="18sp" />

        <EditText
            android:id="@+id/etBookName"
            android:layout_width="match_parent"
            android:layout_height="wrap_content"
            android:hint="@string/hint" />
    </LinearLayout>

    <Button
        android:id="@+id/btnGetQuery"
        android:layout_width="match_parent"
        android:layout_height="wrap_content"
        android:layout_marginTop="10dp"
        android:text="@string/button_get" />

    <Button
        android:id="@+id/btnPostQuery"
        android:layout_width="match_parent"
        android:layout_height="wrap_content"
        android:layout_marginTop="10dp"
        android:text="@string/button_post" />

    <TextView
        android:layout_width="match_parent"
        android:layout_height="wrap_content"
        android:layout_marginTop="10dp"
        android:text="@string/result"
        android:textSize="15sp" />

    <TextView
        android:id="@+id/tvQueryResult"
        android:layout_width="match_parent"
        android:layout_height="match_parent"
        android:layout_marginTop="5dp"
        android:textSize="15sp" />

</LinearLayout>
5、最后是MainActivity.java中的核心代码
package alex.example.http_getpost;

import java.util.ArrayList;
import java.util.List;

import org.apache.http.HttpResponse;
import org.apache.http.NameValuePair;
import org.apache.http.client.entity.UrlEncodedFormEntity;
import org.apache.http.client.methods.HttpGet;
import org.apache.http.client.methods.HttpPost;
import org.apache.http.impl.client.DefaultHttpClient;
import org.apache.http.message.BasicNameValuePair;
import org.apache.http.protocol.HTTP;
import org.apache.http.util.EntityUtils;

import android.support.v7.app.ActionBarActivity;
import android.os.Bundle;
import android.view.Menu;
import android.view.MenuItem;
import android.view.View;
import android.view.View.OnClickListener;
import android.widget.Button;
import android.widget.EditText;
import android.widget.TextView;
import android.widget.Toast;

public class MainActivity extends ActionBarActivity {

    @Override
    protected void onCreate(Bundle savedInstanceState) {
        super.onCreate(savedInstanceState);
        setContentView(R.layout.activity_main);

        Button btnGetQuery = (Button) findViewById(R.id.btnGetQuery);
        Button btnPostQuery = (Button) findViewById(R.id.btnPostQuery);

        btnGetQuery.setOnClickListener(new OnClickListener() {

            @Override
            public void onClick(View v) {
                MyClick(v);
            }
        });

        btnPostQuery.setOnClickListener(new OnClickListener() {

            @Override
            public void onClick(View v) {
                MyClick(v);
            }
        });
    }

    @Override
    public boolean onCreateOptionsMenu(Menu menu) {
        // Inflate the menu; this adds items to the action bar if it is present.
        getMenuInflater().inflate(R.menu.main, menu);
        return true;
    }

    @Override
    public boolean onOptionsItemSelected(MenuItem item) {
        // Handle action bar item clicks here. The action bar will
        // automatically handle clicks on the Home/Up button, so long
        // as you specify a parent activity in AndroidManifest.xml.
        int id = item.getItemId();
        if (id == R.id.action_settings) {
            return true;
        }
        return super.onOptionsItemSelected(item);
    }

    public void MyClick(View view) {
        // 设置将要请求的URL
        String url = "http://192.168.1.101:8080/querybooks/QueryServlet";
        TextView tvQueryResult = (TextView) findViewById(R.id.tvQueryResult);
        EditText etBookName = (EditText) findViewById(R.id.etBookName);
        HttpResponse httpResponse = null;
        try {
            // 判断按钮id
            switch (view.getId()) {

            // 提交HTTP GET请求
            case R.id.btnGetQuery:

                // 向url添加请求参数
                url += "?bookname" + etBookName.getText().toString();

                // 第一步:创建HttpGet对象
                HttpGet httpGet = new HttpGet(url);

                // 第二步:使用execute方法发送HTTP GET请求,并返回HttpResponse对象
                httpResponse = new DefaultHttpClient().execute(httpGet);

                // 判断请求响应状态码,状态码为200表示服务端成功响应了客户端的请求
                if (httpResponse.getStatusLine().getStatusCode() == 200) {

                    // 第三步:使用getEntity方法获得返回结果
                    String result = EntityUtils.toString(httpResponse
                            .getEntity());

                    // 去掉返回结果中的"\r"字符,否则会在结果字符串后面显示一个小方格
                    tvQueryResult.setText(result.replaceAll("\r", ""));
                    Toast.makeText(getBaseContext(), "Get", Toast.LENGTH_SHORT)
                            .show();
                }
                break;

            // 提交HTTP POST请求
            case R.id.btnPostQuery:

                // 第一步:创建HttpPost对象
                HttpPost httpPost = new HttpPost(url);

                // 设置HTTP POST请求参数必须用NameValuePair对象
                List<NameValuePair> params = new ArrayList<NameValuePair>();
                params.add(new BasicNameValuePair("bookname", etBookName
                        .getText().toString()));

                // 设置HTTP POST请求参数
                httpPost.setEntity(new UrlEncodedFormEntity(params, HTTP.UTF_8));

                // 第二步:使用execute方法发送HTTP POST请求,并返回HttpResponse对象
                httpResponse = new DefaultHttpClient().execute(httpPost);

                // 判断请求响应状态码,状态码为200表示服务端成功响应了客户端的请求
                if (httpResponse.getStatusLine().getStatusCode() == 200) {

                    // 第三步:使用getEntity方法获得返回结果
                    String result = EntityUtils.toString(httpResponse
                            .getEntity());

                    // 去掉返回结果中的"\r"字符,否则会在结果字符串后面显示一个小方格
                    tvQueryResult.setText(result.replaceAll("\r", ""));
                    Toast.makeText(getBaseContext(), "Post", Toast.LENGTH_SHORT)
                            .show();
                }
                break;

            default:
                break;
            }
        } catch (Exception e) {
            tvQueryResult.setText(e.getMessage());
            Toast.makeText(getBaseContext(), "拒绝访问", Toast.LENGTH_SHORT).show();
        }
    }

}
上面一堆代码中,最有用的就是自定义方法 MyClick(View view)。
到这里运行一下就能出结果了。(注意:上面的ip地址要改成你自己电脑的ip,若用真机测试需要在设置-wlan-中查看真机ip)
ip查询方法:
打开cmd,输入ipconfig回车,下面那个IPv4地址就是。(我是用路由器无线上网)
try语法:
try{
//代码区
}catch(Exception e){
//异常处理
}
代码区如果有错误,就会返回所写异常的处理。
首先要清楚,如果没有try的话,出现异常会导致程序崩溃。而try则可以保证程序的正常运行下去。
try catch 是捕捉try部分的异常,当你没有trycatch的时候,如果出现异常则程序报错,加上trycatch,出现异常程序正常运行,只是把错误信息存储到Exception里,所以catch是用来提取异常信息的,你可以在catch部分加上一句:System.out.println(e.ToString());,如果出现异常可以把异常打印出来。(这里在catch部分加上了一句:Toast.makeText(getBaseContext(), “拒绝访问”, Toast.LENGTH_SHORT).show();)


 9096
9096

 被折叠的 条评论
为什么被折叠?
被折叠的 条评论
为什么被折叠?
 到【灌水乐园】发言


