


1.下载mysql安装包:mysql-5.7.30-linux-glibc2.12-x86_64.tar.gz

2. 卸载自带的mariadb和mysql
检查是否安装了mariadb和mysql,有时候默认安装了
rpm -qa | grep mariadb
rpm -qa | grep mysql
如果没有,就可以安装mysql,如果有,需要先卸载(remove后为上面命令查询到的内容,全文件名)
yum remove mariadb-xxx
如:yum remove mariadb-libs-5.5.52-1.el7.x86_64
3.解压文件,修改目录名方便配置
tar -zxvf mysql-5.7.30-linux-glibc2.12-x86_64.tar.gz -C /usr/local/

4.建立个软连接方便后面操作
ln -s /usr/local/mysql-5.7.30-linux-glibc2.12-x86_64 /usr/local/mysql
5.添加mysql用户,修改mysql目录权限,并用此用户mysql服务程序
groupadd mysql #创建mysql分组
useradd -s /bin/false -M mysql -g mysql

参数说明:
-s(不允许登录
/bin/false是最严格的禁止login选项,一切服务都不能用,
/sbin/nologin只是不允许系统login,可以使用其他ftp等服务
-M(不创建主目录)
-g(加入mysql组)
chown -R mysql:mysql /usr/local/mysql/ #修改mysql目录权限
6. 创建存放数据库的目录,并授权给mysql用户
mkdir /data/mysql -p
chown -R mysql:mysql /data/mysql

7.配置文件,新建配置文件/etc/my.cnf,并修改配置文件
vi /etc/my.cnf
输入内容:
[client]
no-beep
#指定客户端登录时使用的socket
#socket = /tmp/mysql.sock
port = 3306
[mysql]
default-character-set=UTF8MB4
[mysqld]
# binlog 配置
log-bin=/data/mysql/mysql-bin.log
expire-logs-days=14
max-binlog-size=500M
server-id=1
# GENERAL
user=mysql
#bind=0.0.0.0
basedir=/usr/local/mysql
datadir=/data/mysql
log-error = /data/mysql/error.log
plugin_dir = /usr/local/mysql/lib/plugin
port=3306
pid-file=/tmp/mysql.pid
socket=/tmp/mysql.sock
#skip-grant-tables
skip-name-resolve
character-set-server=utf8
default-storage-engine=INNODB
server-id=1
max_connections=2000
#query_cache_size在8.0版本已经移除
query_cache_size=0
table_open_cache=2000
tmp_table_size=246M
thread_cache_size=300
#限定用于每个数据库线程的栈大小。默认设置足以满足大多数应用
thread_stack = 192k
key_buffer_size=512M
read_buffer_size=4M
read_rnd_buffer_size=32M
innodb_data_home_dir = /data/mysql
innodb_flush_log_at_trx_commit=0
innodb_log_buffer_size=16M
innodb_buffer_pool_size=256M
innodb_log_file_size=128M
innodb_thread_concurrency=128
innodb_autoextend_increment=1000
innodb_buffer_pool_instances=8
innodb_concurrency_tickets=5000
innodb_old_blocks_time=1000
innodb_open_files=300
innodb_stats_on_metadata=0
innodb_file_per_table=1
innodb_checksum_algorithm=0
back_log=80
flush_time=0
join_buffer_size=128M
max_allowed_packet=1024M
max_connect_errors=2000
open_files_limit=4161
#query_cache_type在8.0版本已经移除
query_cache_type=0
sort_buffer_size=32M
table_definition_cache=1400
binlog_row_event_max_size=8K
sync_master_info=10000
sync_relay_log=10000
sync_relay_log_info=10000
#批量插入数据缓存大小,可以有效提高插入效率,默认为8M
bulk_insert_buffer_size = 64M
interactive_timeout = 120
wait_timeout = 120
log-bin-trust-function-creators=1
sql_mode=NO_ENGINE_SUBSTITUTION,STRICT_TRANS_TABLES
8.安装mysql(即初始化数据库),进入mysql目录执行以下命令
cd /usr/local/mysql
bin/mysqld --initialize --user=mysql --basedir=/usr/local/mysql --datadir=/data/mysql
可能报错:
(1)bin/mysqld: error while loading shared libraries: libaio.so.1: cannot open shared object file: No such file or directory
缺少安装包libaio和libaio-devel
执行安装命令yum install libaio*
自动安装这两个包
(2)bin/mysqld: error while loading shared libraries: libnuma.so.1: cannot open shared object file: No such file or directory
缺少numactl
执行安装命令yum install numactl

最后初始化成功

9.查看error.log,获取初始密码,并记录下来,稍后用于登录
cat /data/mysql/error.log

10.在/etc/init.d/目录下建立一个mysql的启动程序,并启动mysql
ln -s /usr/local/mysql/support-files/mysql.server /etc/init.d/mysqld
/etc/init.d/mysqld start
![]()

11.配置mysql 开机启动
在centos7环境下对服务的管理已经不再用service 命令了,而是改为systemctl 命令来管理服务
创建systemctl的对mysql服务的配置文件
touch /usr/lib/systemd/system/mysql.service
注意: systemctl中规定服务的配置文件要以.service 为后缀
vi /usr/lib/systemd/system/mysql.service
复制一下代码
[Unit]
Description=MySQL Server
Documentation=http://dev.mysql.com/doc/refman/en/using-systemd.html
After=network.target
After=syslog.target
[Install]
WantedBy=multi-user.target
[Service]
User=mysql
Group=mysql
ExecStart=/usr/local/mysql/bin/mysqld --defaults-file=/etc/my.cnf
LimitNOFILE = 5000
需要注意的地方
(1) --defaults-file=/etc/my.cnf 这个是指向mysql的配置文件,要根据实际情况来管理
(2)如果一个服务器上启动多个mysql实例要怎么使用systemctl启动呢?
可以使用命名不同的方式来管理不同的实例,例如例子中使用的服务名是mysqld.service 可以写成mysql3306.service 和mysql3307.service 这样里面的配置文件也要指定相应的位置。否则启动容易出问题
设置开机启动
systemctl enable mysql

12. 配置环境变量,编辑/etc/profile,方便在任何地方用mysql命令
vim /etc/profile
在文件末尾追加如下内容:
#mysql
export MYSQL_HOME=/usr/local/mysql
export PATH=$PATH:$MYSQL_HOME/bin
source /etc/profile #使/etc/profile生效
13.登录mysql,修改密码
首次登录,提示输入密码时,输入安装时生成的密码
mysql -uroot -p
修改数据库密码
alter user 'root'@'localhost' identified by '123456';
14.创建一个远程登录账号
修改完密码后需要退出重新登录数据库执行如下语句
CREATE USER 'jonas'@'%' IDENTIFIED BY 'Jonas@ft.com';
CREATE DATABASE IF NOT EXISTS controller_db DEFAULT CHARACTER SET utf8mb4; #创建数据库controller_db
GRANT ALL PRIVILEGES ON controller_db.* TO 'jonas'@'%' WITH GRANT OPTION; #授权IDENTIFIED BY 'Jonas@ft.com'
FLUSH PRIVILEGES;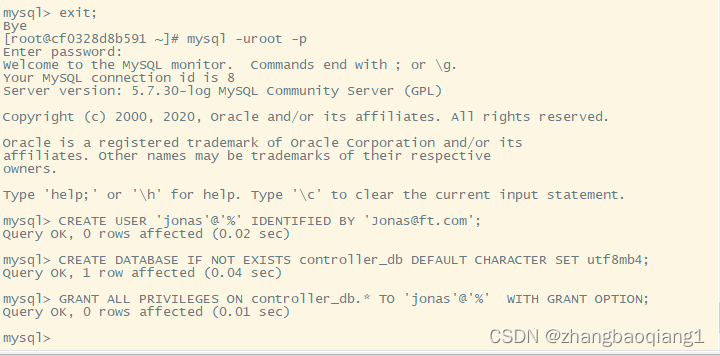
15. 查看防火墙所有开放的端口,看看有没有mysql的3306端口,如果没有就添加
firewall-cmd --state #查看防火墙状态,如果是not running,则启动systemctl start firewalld.service
firewall-cmd --zone=public --list-ports #查看防火墙所有开放的端口
firewall-cmd --zone=public --add-port=3306/tcp --permanent #开放3306端口
firewall-cmd --reload # 配置立即生效
配置文件:/etc/firewalld/zones/public.xml


 758
758


 被折叠的 条评论
为什么被折叠?
被折叠的 条评论
为什么被折叠?
 到【灌水乐园】发言


