


这个文档是用作学习笔记输出,原创地址为小满zs_Vue3,typeScript,nest-js-CSDN博客
感谢大神的分享
1、环境准备
windows系统安装nvm版本管理工具
运行nvm install 16.15.0(记录一下当时的环境)
执行指令 npm init vite@latest
vite是一种构建方式,可以通过它构建很多种类型的前端框架项目
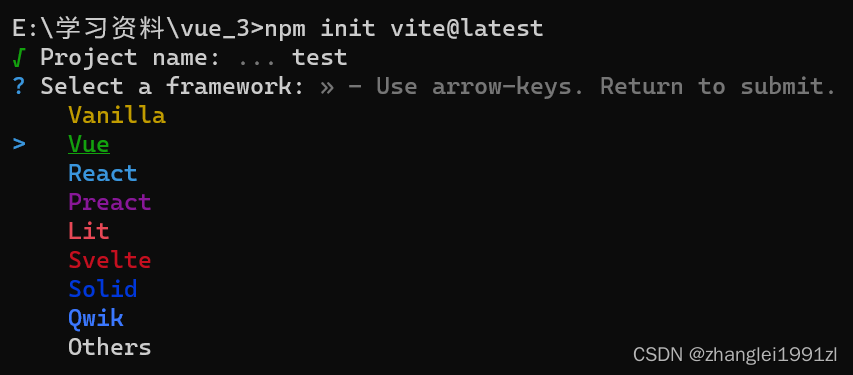
这里选择vue
以及后面的typsScript就好,代码就初始化完成
2、程序启动
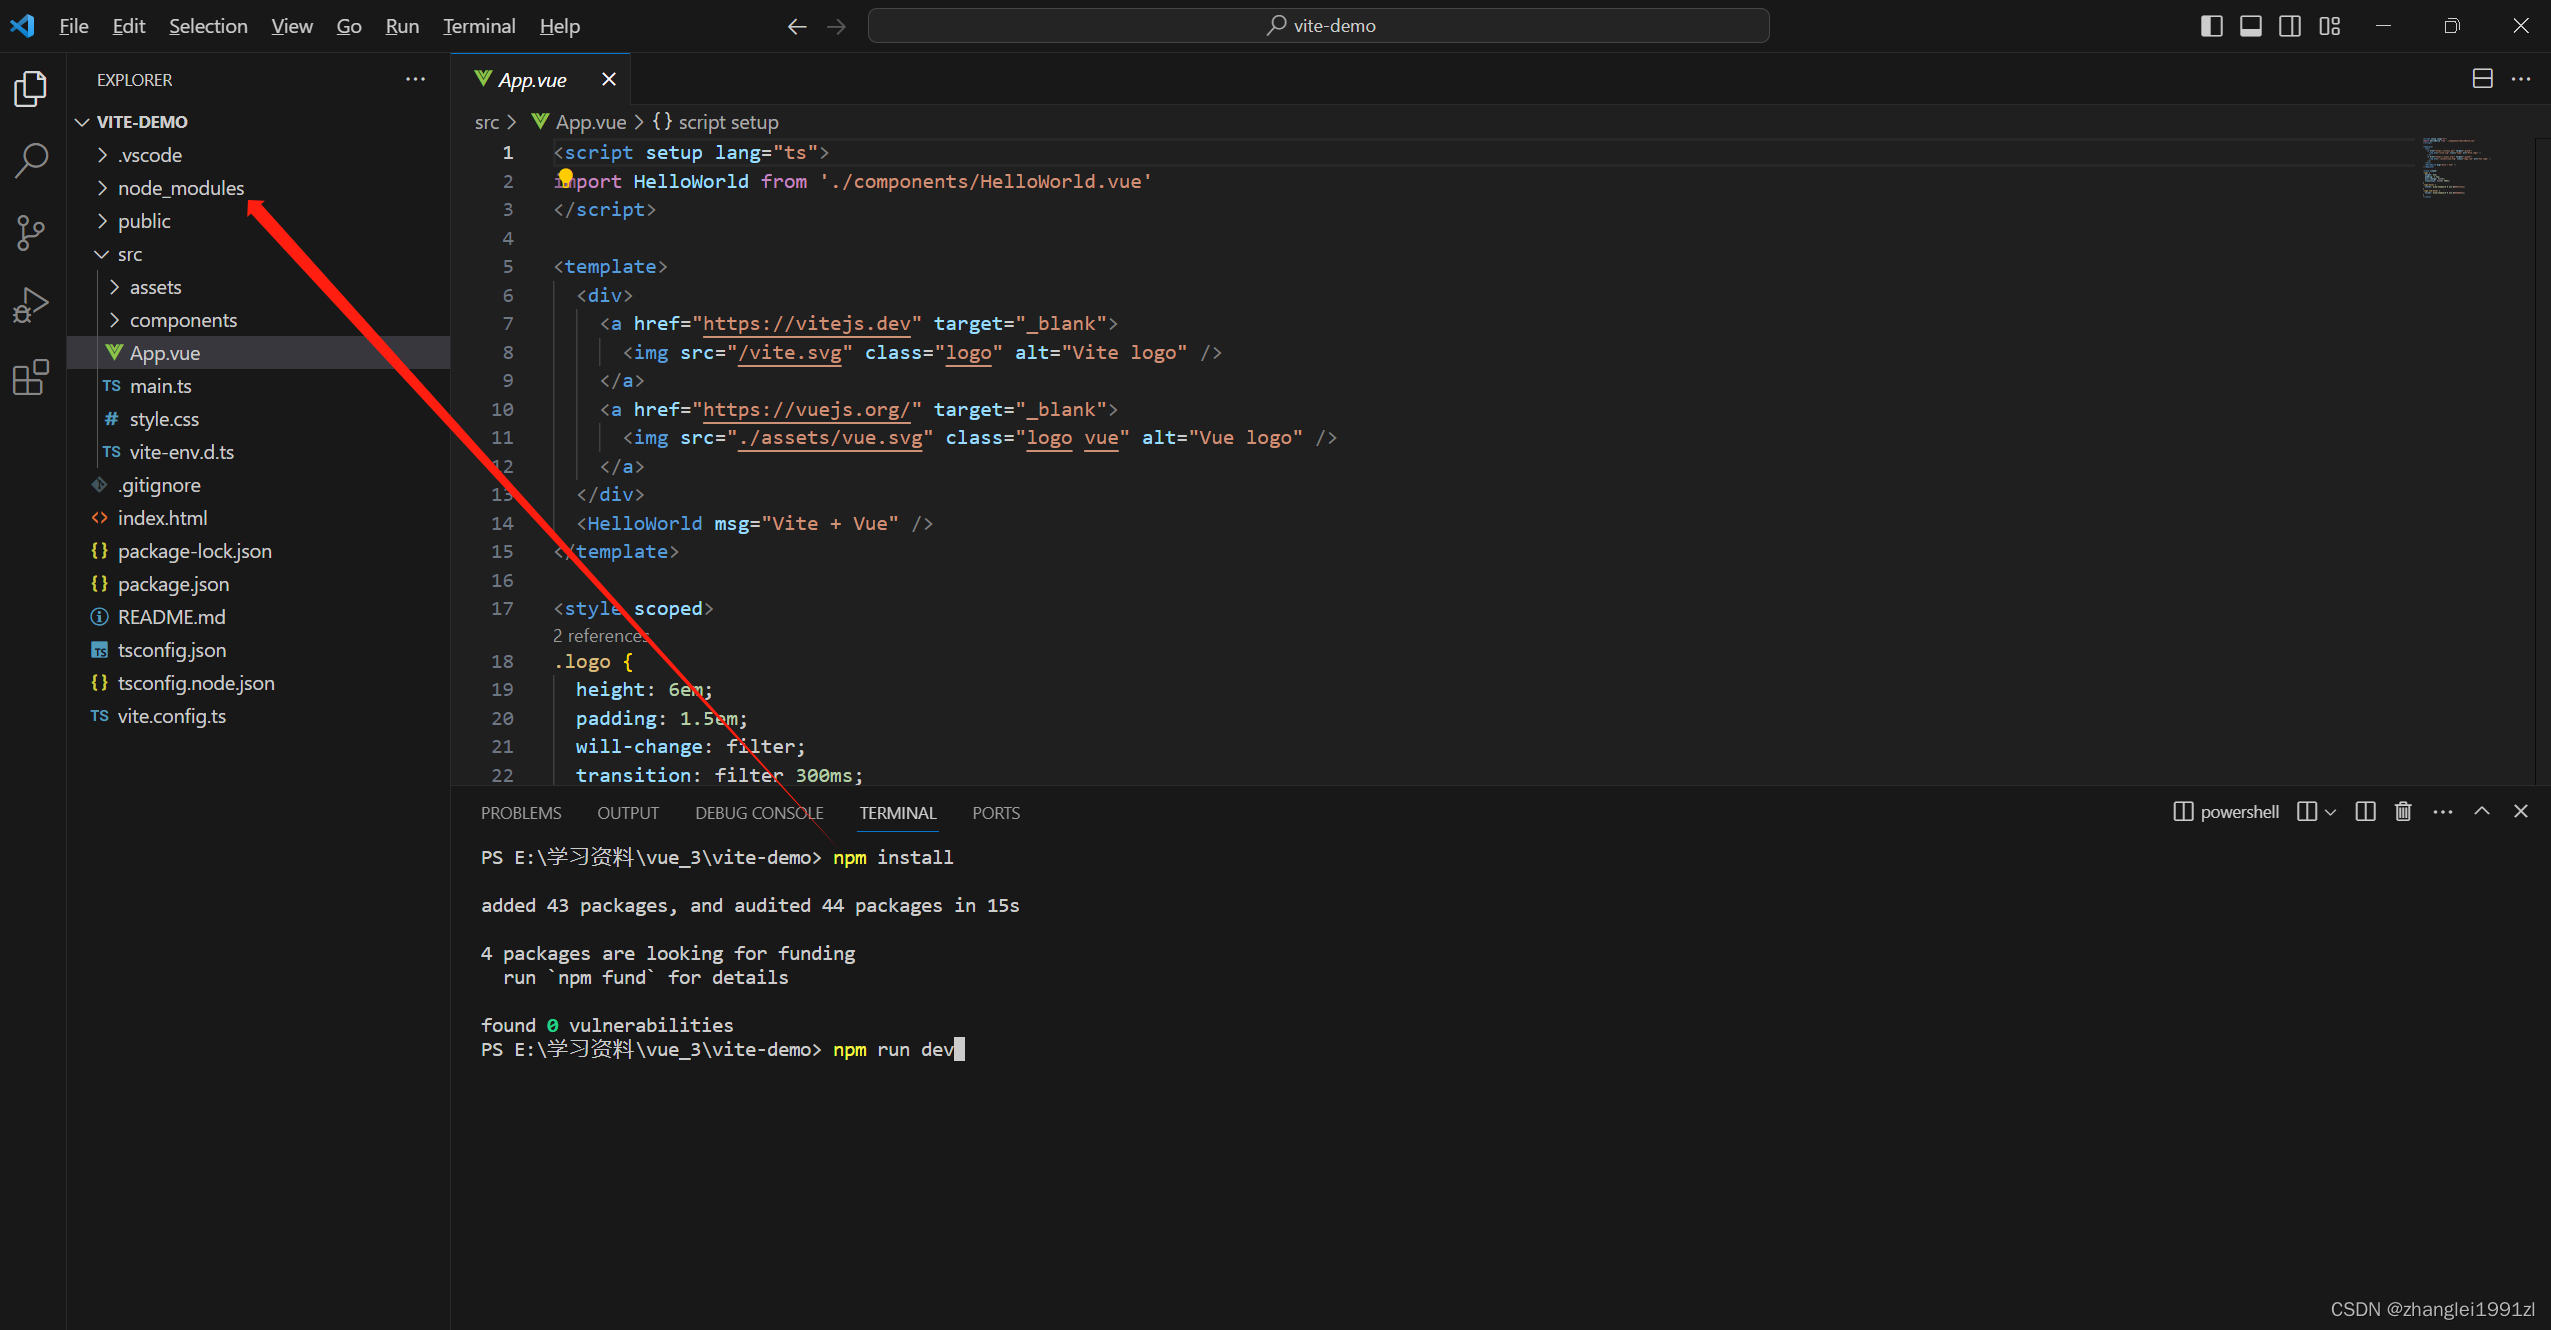
运行npm install 就会根据package.json中的指定版本依赖进行安装,安装后的目录在node_modules中
程序安装完之后,执行npm run dev就可以启动程序
这个指令能执行过程是先在package.json中查找这个指令的具体指令为vite
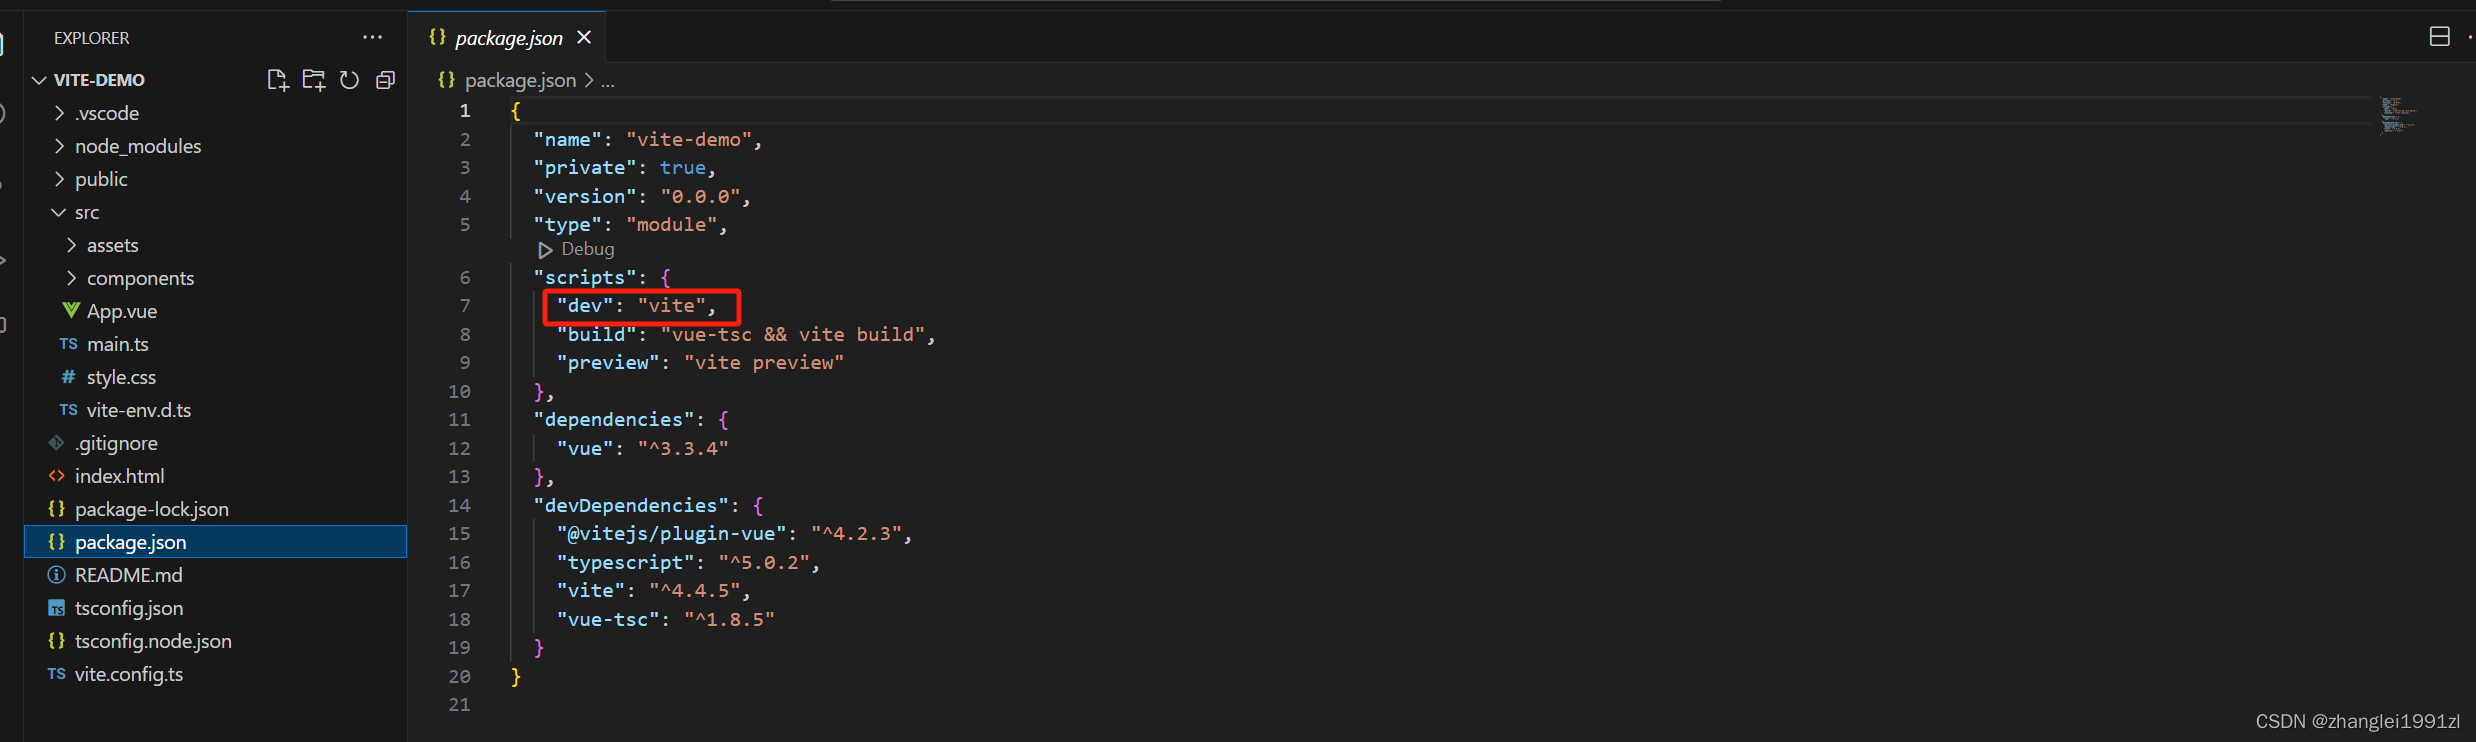
然后在依赖包文件夹中寻找vite的具体指令

然后进一步查找
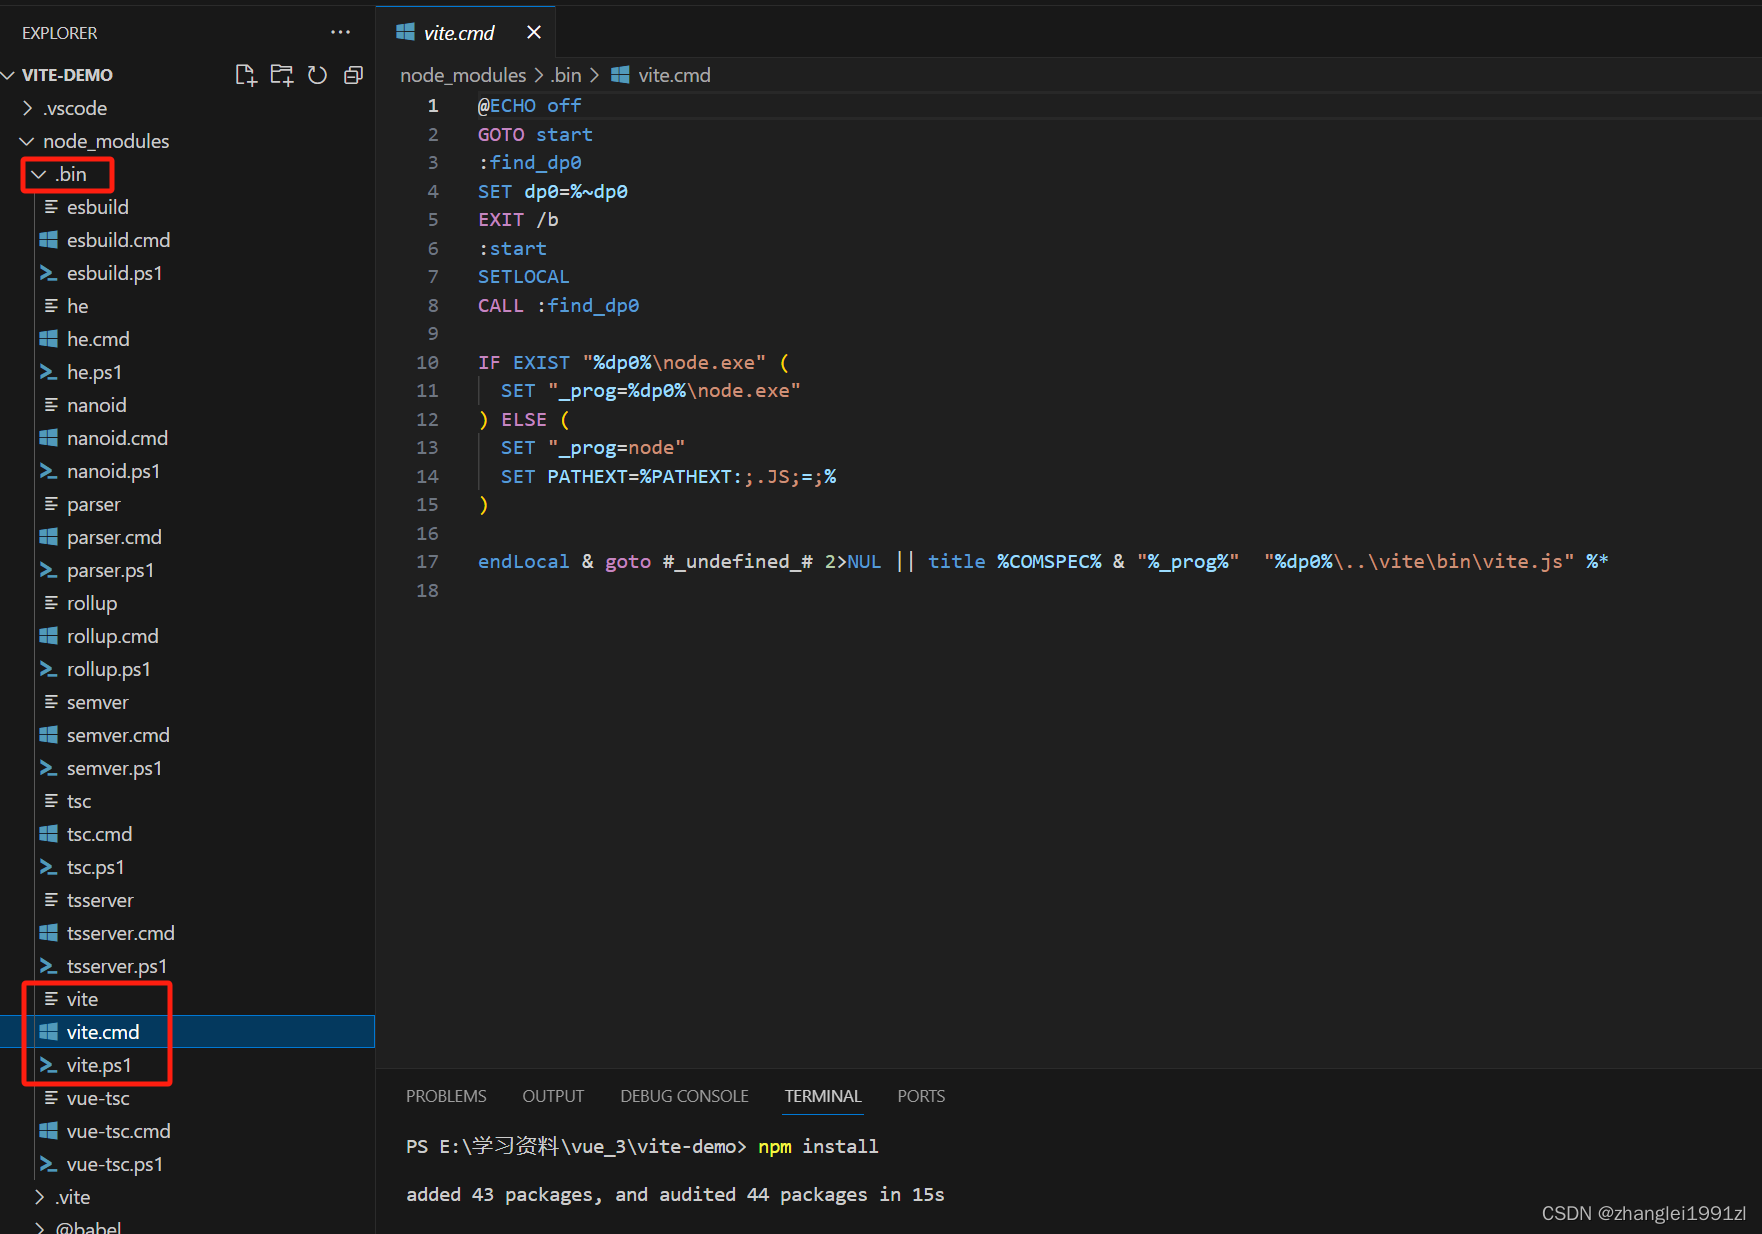
在bin文件夹下有三个vite相关的文件,第一个是linux系统的执行脚本,第二个是windows的执行脚本,第三个是跨平台适应脚本,通过第三个文件的适配去查找当前系统的具体执行脚本
指令的执行查找规则是先从本地的node_modules有没有vite,如果这个找不到则查找全局npm global 中查找vite指令,最后会从系统环境变量中查找
3、模板语法与vue指令
3.1、语法
3.1.1、option风格
这种风格与vue2一致
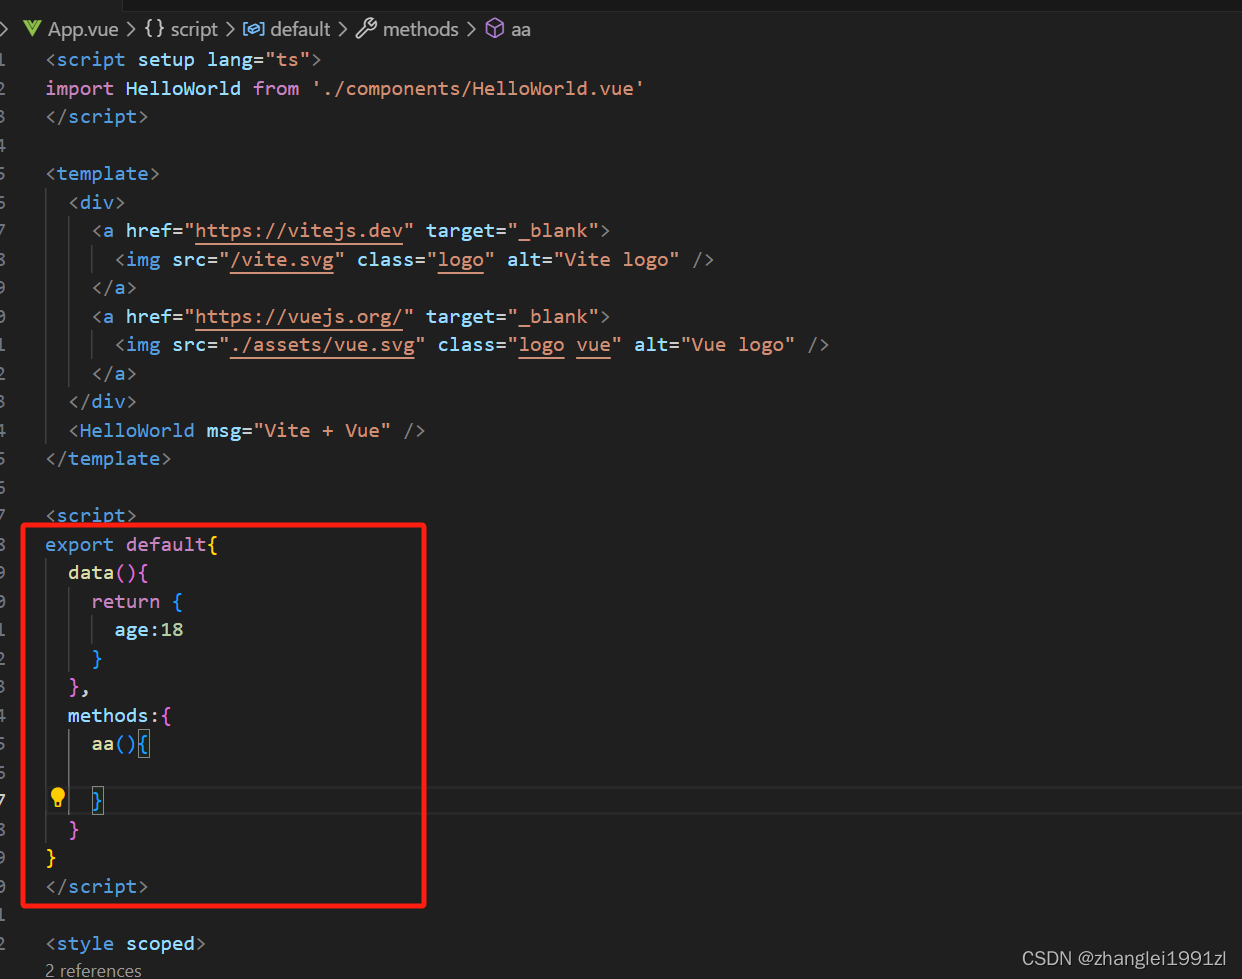
3.1.2、setup风格
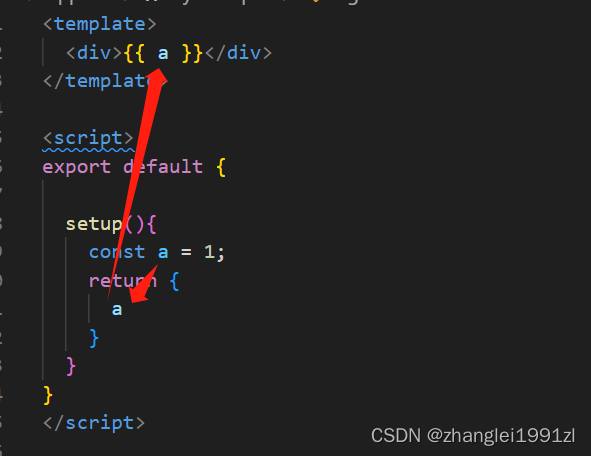
这个地方需要说明的是:
1、setup函数必须全局唯一
2、定义的对象必须return出去才能在<template>标签中通过{{}}引用出来
但是每次都需要将变量return出去比较繁琐,vue3提供了一种语法糖
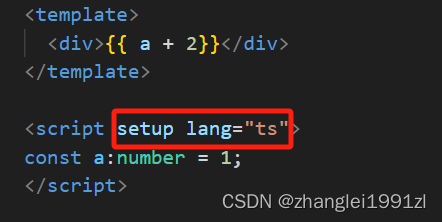
指定语言为typeScript
3.2、指令
vue内置了很多指令,例如v-html 、v-if、v-else等
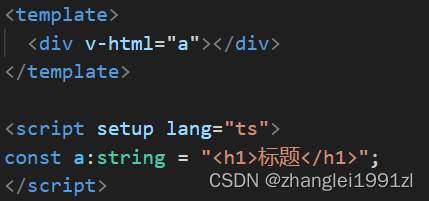
v- 开头都是vue 的指令
v-text 用来显示文本
v-html 用来展示富文本
v-if 用来控制元素的显示隐藏(切换真假DOM)
v-else-if 表示 v-if 的“else if 块”。可以链式调用
v-else v-if条件收尾语句
v-show 用来控制元素的显示隐藏(display none block Css切换)
v-on 简写@ 用来给元素添加事件
v-bind 简写: 用来绑定元素的属性Attr
v-model 双向绑定
v-for 用来遍历元素
v-on修饰符 冒泡案例
v-once 性能优化只渲染一次
v-memo 性能优化会有缓存
4、ref使用
在vue2中要能引用一个变量需要在data中return出去
<template>
  <div v-html="a"></div>
</template>

<script lang="ts">
export default{
  data(){
    return {
      a:"123"
    }
  }
}
</script>
在vue3中则需要通过ref 或者reactive进行声明
在vue中如果想要成为响应式的对象,要么用option风格,在data函数中的return中进行返回,操作直接进行赋值处理
<template>
  <div >{{ Man }}</div>
  <hr>
  <button @click="change">修改</button>
</template>

<script lang="ts">
export default{
  data(){
    return {
      Man:{
        "name":123
      }
    }
  },
  methods:{
    change(){
      this.Man={
        "name":456
      }
    }
  }
}

</script>
在vue3中如果要成为响应式,必须要用ref或者reactive函数处理,这个函数返回的是个class的实现类,要想改变这个对象的值,必须操作这个对象的value属性
<template>
  <div >{{ Man }}</div>
  <hr>
  <button @click="change">修改</button>
</template>

<script setup lang="ts">
import {ref} from 'vue';

const Man = ref({name:'测试'})

const change = ()=>{
  Man.value.name="修改"
}
</script>
除了能进行响应式值的操作之外,ref也能获取到dom元素,进行dom元素的操作
<template>

  <div ref="refDiv">引用Ref</div>
  <button @click="change">修改</button>

</template>

<script setup lang='ts'>
import { ref } from 'vue'

const change = () => {
  refDiv!.value!.innerText = "修改后Ref"
}

const refDiv = ref<HTMLDivElement>()

</script>
只需定义一个名称与dom元素中ref属性一致的响应式对象,参数为空,就能直接操作这个dom元素
除了ref之外,vue3还提供了很多相关的操作
isRef判断是否是Ref对象
import { ref, Ref,isRef } from 'vue'
let message: Ref<string | number> = ref("我是message")
let notRef:number = 123
const changeMsg = () => {
  message.value = "change msg"
  console.log(isRef(message)); //true
  console.log(isRef(notRef)); //false
}
shallowRef创建一个浅引用对象,除非value整个对象变化,内部属性发生变化不会触发渲染
<template>
  <div>
    <button @click="changeMsg">change</button>
    <div>{{ message }}</div>
  </div>
</template>

<script setup lang="ts">
import { Ref, shallowRef } from 'vue'
type Obj = {
  name: string
}
let message: Ref<Obj> = shallowRef({
  name: "修改前"
})

const changeMsg = () => {
  // message.value.name = '修改后'
  message.value={
    name:"修改后"
  }
}
</script>
triggerRef 强制更新页面DOM
<template>
  <div>
    <button @click="changeMsg">change</button>
    <div>{{ message }}</div>
  </div>
</template>


<script setup lang="ts">
import { Ref, shallowRef,triggerRef } from 'vue'
type Obj = {
  name: string
}
let message: Ref<Obj> = shallowRef({
  name: "修改前"
})

const changeMsg = () => {
  message.value.name = '修改后'
 triggerRef(message)
}
</script>
customRef 工厂函数要求我们返回一个对象 并且实现 get 和 set
<template>
  <hr>
  <div>
    {{ name }}
  </div>
  <hr>
  <button @click="change">修改 customRef</button>

</template>

<script setup lang='ts'>
import { customRef} from 'vue'

function myRef<T = any>(value: T) {
  return customRef((track, trigger) => {
    return {
      get() {
        track()
        return value
      },
      set(newVal) {
        value = newVal
        trigger()
      }
    }
  })
}
const name = myRef<string>('修改前')
const change = () => {
  name.value = '修改后';

}
</script>
5、reactive使用
vue3也提供了除了ref之外的响应式对象的函数reactive
使用上与ref有点差异
reactive只能传入引用对象如数组或对象,不能传入基本类型如字符串与数字等
reactive修改值的时候不用带上.value 而ref修改值的时候要带上.value
<template>
  <div>{{ reactiveObj }}</div>
  <div>{{ refObj }}</div>
  <button @click="change">change</button>
</template>

<script setup lang='ts'>
import { ref,reactive} from 'vue'
   //reactive传参必须是引用型对象,如对象,数组;ref可以传基本类型
 const reactiveObj = reactive({name:"123",age:"456"})
 const refObj = ref("123")
 const change = ()=>{
  //修改属性时,reactive不用带上.value进行修改,ref必须带上.value修改
  reactiveObj.name="修改后reactive"
  refObj.value="修改后ref"
 }
</script>
reactive如果传入的是个数组
如果是操作数组元素,在某些vue3版本不能直接替换,否则会破坏响应式,不会进行渲染,原因是通过reactive函数获得的对象是个proxy代理对象,劫持了数组的一些方法,但在vue3.3.4中,本人测了是可以直接渲染出来的,使用的时候注意一下,reactive返回的是个proxy对象就好,不要直接覆盖
<template>
  <div v-for="item in reactiveArr">
    {{ item }}
  </div>
  <button @click="change">change</button>
</template>

<script setup lang='ts'>
import { ref,reactive,readonly,shallowReactive } from 'vue'
 let reactiveArr = reactive<string[]>([])
 const change = ()=>{
  //如果是操作数组元素,在某些vue3版本不能直接替换,否则会破坏响应式,不会进行渲染
  //原因是通过reactive函数获得的对象是个proxy代理对象,劫持了数组的一些方法
  //但在vue3.3.4中,本人测了是可以直接渲染出来的
  //使用的时候注意一下,reactive返回的是个proxy对象就好,不要直接覆盖
  let res = ["123","456"]
  reactiveArr = res
  reactiveArr.push('789')
 }
</script>
reactive与ref一样,都可以用于表单元素的双向绑定
<template>
  <input v-model="reactiveForm.name" />
  <input v-model="reactiveForm.age"/>
  <input v-model="refForm.name"/>
  <input v-model="refForm.age" />
  <button @click="changeForm">show</button>
</template>

<script setup lang='ts'>
import { ref,reactive} from 'vue'
 //reactive 与 ref一样都能进行表单元素的展示
 const reactiveForm = reactive({"name":"reactiveName","age":456})
 const refForm = ref({"name":"refName","age":456})
 const changeForm = ()=>{
  console.log(reactiveForm)
  console.log(refForm)
 }
</script>
readonly可以获取一个只能读不能修改属性值的对象,但原对象的改变会直接影响readonly对象
<template>
  <button @click="changeReadOnly">changeReadOnly</button>
</template>

<script setup lang='ts'>
import { reactive,readonly} from 'vue'
 const reactiveObj2 = reactive({"name":123,"age":23})
 const readonlyObj = readonly(reactiveObj2);

const changeReadOnly = ()=>{
  // readOnly修饰的对象无法进行操作内部的值进行修改
  // readonlyObj.name="456"  无法修改
  // 但readOnly修饰的对象,原对象的属性改变也会进行改变
  reactiveObj2.age=78
  console.log(readonlyObj)
}
</script>
shallowReactive会提供一个浅响应对象,只有第一层级元素发生变化才会触发渲染变化,但只要有任何事件导致触发页面渲染刷新,依然会将shallowReactive修改后的值刷新到页面上,如跟reactive一起使用,reactive触发渲染页面,会将shallowReactive的值一并重新渲染
<template>
  <div>{{ shallowReactiveObj }}</div>
  <button @click="changeShallowReactive">changeShallowReactive</button>
  <div>{{ reactiveObj3 }}</div>
  <div>{{ shallowReactiveObj2 }}</div>
  <button @click="changeReactiveObj">changeReactiveObj</button>
</template>

<script setup lang='ts'>
import { reactive,shallowReactive } from 'vue'

//与shallowRef相似,shallowRef是修改.value才会触发渲染上的改变。shallowReactive是修改第一层级元素才能触发渲染改变
const shallowReactiveObj = shallowReactive<any>({"parentProperty":{"childProperty1":123,"childProperty2":456},"parentProperty2":"123"})
const changeShallowReactive = ()=>{
  // shallowReactiveObj.parentProperty.childProperty1="789" 修改第二层次不会触发渲染
  shallowReactiveObj.parentProperty={"childProperty1":"修改后"}
  console.log(shallowReactiveObj)
}

//但只要触发页面渲染刷新,依然会将shallowReactive修改后的值刷新到页面上,如跟reactive一起使用,reactive触发渲染页面,会将shallowReactive的值一并重新渲染
const shallowReactiveObj2 = shallowReactive<any>({"parentProperty2":{"childProperty21":123,"childProperty22":456}})
const reactiveObj3 = reactive({"name":123})
const changeReactiveObj = ()=>{
  shallowReactiveObj2.parentProperty2.childProperty21="789"
  reactiveObj3.name=456;
}
</script>
6、toRef toRefs toRaw的使用
toRef 可以将对象中的某个元素代理成一个新的对象进行返回,方便只针对对象中某个属性进行操作
<template>
  <div>{{ obj }}</div>
  <div>{{ name }}</div>
  <button @click="change">change</button>
</template>

<script setup lang='ts'>
import { toRef } from 'vue'

const obj = { "name": "张三", "age": 15 }

const name = toRef(obj, "name")

const change = () => {
  name.value = "李四"
  console.log(obj)
}

</script>
但是虽然操作的是属性封装的对象,最终的源码还是会操作在传入的对象中,所以如果是响应式的,值的改变还是会改变视图上的渲染,但如果对象非响应式的,就不会更改视图
以下为大神视频中的源码截图
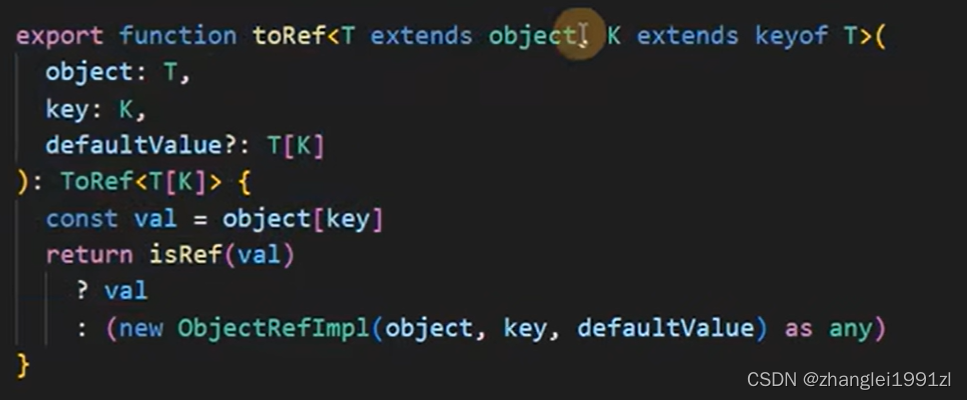
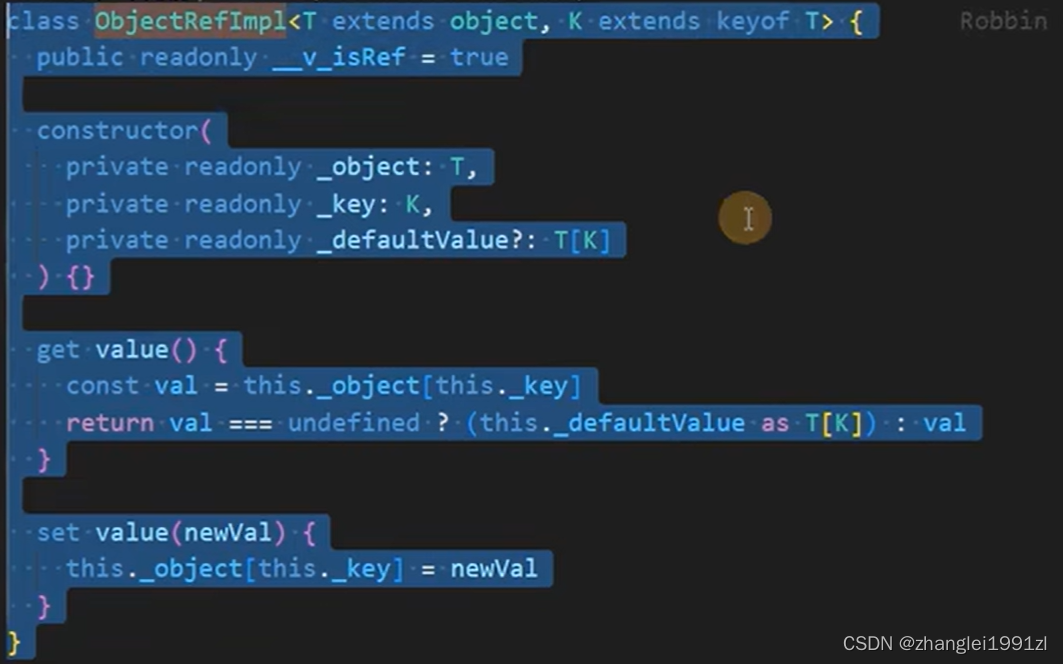 从源码中可以清楚的看到这个封装的类对象最终操作的还是传入的参数对象的值,如果是响应式对象会触发页面的渲染
<template>
  <div>{{ obj }}</div>
  <div>{{ name }}</div>
  <button @click="change">change</button>
</template>

<script setup lang='ts'>
import { reactive, toRef } from 'vue'

const obj = reactive({ "name": "张三", "age": 15 })

const name = toRef(obj, "name")

const change = () => {
  name.value = "李四"
  console.log(obj)
}

</script>
toRefs可以将对象中的所有属性都封装成对象进行返回,方便进行单独元素的操作,这一点在组件的封装,调用某些函数返回某些特定属性值的时候很有用,不用将整个对象都完全返回
<template>
  <div>{{ obj }}</div>
  <div>{{ name }}</div>
  <div>{{ age }}</div>
  <button @click="change">change</button>
</template>

<script setup lang='ts'>
import { reactive,toRefs} from 'vue'

const obj = reactive({ "name": "张三", "age": 15 })

const {name,age} = toRefs(obj)

const change = () => {
  name.value = "李四"
  age.value=28
  console.log(obj)
  console.log(name)
  console.log(age)
}

</script>
toRaw 可以将响应式对象解耦成非响应式对象
但是原响应式的值与解耦出来非响应式的值对象其实还是同一个对象,只是一个会触发页面的渲染,一个不会
<template>
  <div>{{ obj }}</div>
  <div>{{ rawObj }}</div>
  <button @click="change">change</button>
</template>

<script setup lang='ts'>
import { reactive,toRaw} from 'vue'

const obj = reactive({ "name": "张三", "age": 15 })

const rawObj = toRaw(obj)

const change = () => {
  console.log(obj)
  console.log(rawObj)
  rawObj.age=18
  console.log(rawObj)
  obj.age=20
  console.log(obj)
  console.log(rawObj)
}

</script>
7、vue3响应式原理
Vue2 使用的是 Object.defineProperty Vue3 使用的是 Proxy
2.0的不足,对象只能劫持 设置好的数据,新增的数据需要Vue.Set(xxx) 数组只能操作七种方法,修改某一项值无法劫持。数组的length修改也无法劫持
vue3原理解析
下面是自己实现的一个实现响应式的方法,原理就是注入页面的响应事件,然后缓存对象的响应事件,当对象的set方法触发的时候,将缓存下来的对象的响应事件依次触发一下
<!DOCTYPE html>
<html lang="en">

<head>
    <meta charset="UTF-8">
    <meta http-equiv="X-UA-Compatible" content="IE=edge">
    <meta name="viewport" content="width=device-width, initial-scale=1.0">
    <title>Document</title>
</head>

<body>

    <div id="app">

    </div>

    <script type="module">
        import { reactive } from './zl/reactive.js'
        import {effect1} from './zl/effect.js'
        const user = reactive({
            name: "zl001",
            age: 18
        })
        effect1(() => {
            document.querySelector('#app').innerText = `${user.name} - ${user.age}`
        })

        setTimeout(()=>{
            user.name = 'zl002'
            setTimeout(()=>{
                user.age = '23'
            },1000)
        },2000)

    </script>
</body>

</html>
因为是模拟,所以响应事件就写死了,在某个区域直接进行页面数据的渲染
下面定义依赖的收集与触发事件,以及渲染事件
var activeEffect;
var effect1 = function (fn) {
    var _effect = function () {
        activeEffect = _effect;
        fn();
    };
    _effect();
};
const _effect1 = effect1;
export { _effect1 as effect1 };
var targetMap = new WeakMap();
var track = function (target, key) {
    var depsMap = targetMap.get(target);
    if (!depsMap) {
        depsMap = new Map();
        targetMap.set(target, depsMap);
    }
    var deps = depsMap.get(key);
    if (!deps) {
        deps = new Set();
        depsMap.set(key, deps);
    }
    deps.add(activeEffect);
};
const _track = track;
export { _track as track };
var trigger = function (target, key) {
    var depsMap = targetMap.get(target);
    var deps = depsMap.get(key);
    deps.forEach(function (effect) { return effect(); });
};
const _trigger = trigger;
export { _trigger as trigger };
在依赖的收集事件中,会将对象的整体事件缓存为以下的数据结构
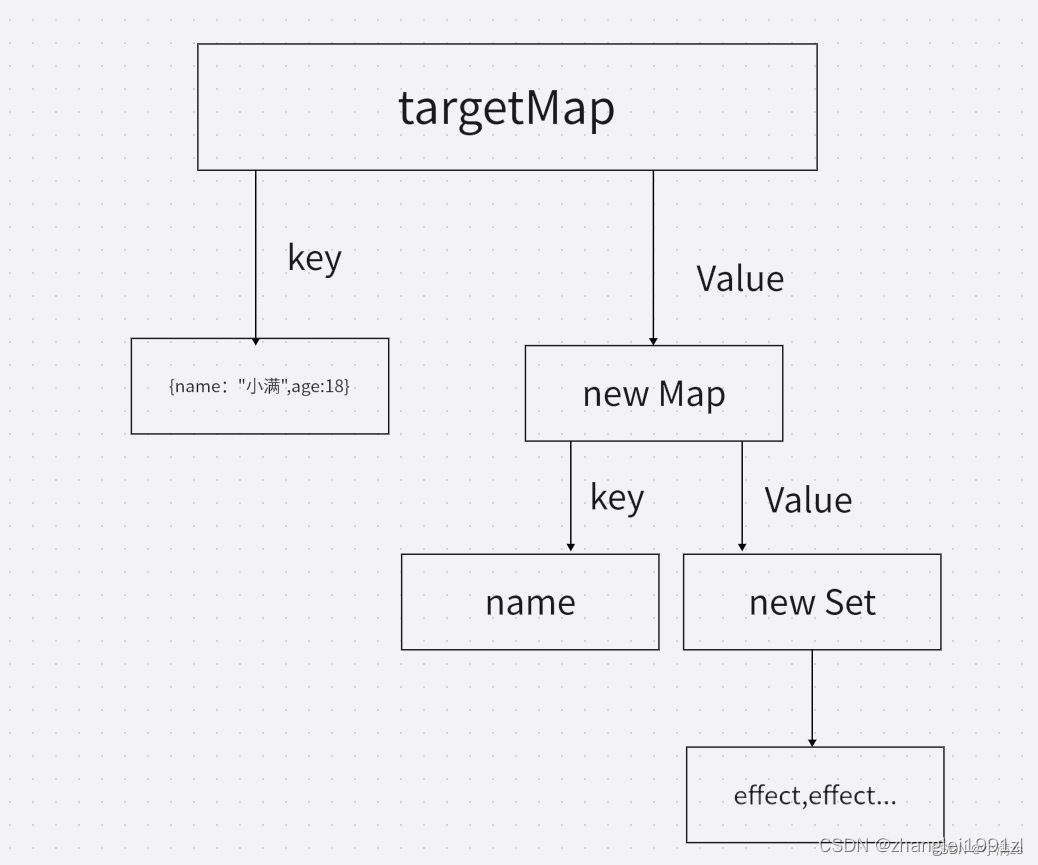
收集事件依赖的时候是针对对象的某个属性进行收集,将这个对象作为key,值为一个map,map中存放这个属性以及这个属性的事件依赖键值对
定义reactive函数
import {track,trigger} from './effect.js'

var reactive = function (target) {
    return new Proxy(target, {
        get: function (target, key, receiver) {
            var res = Reflect.get(target, key, receiver);
            track(target, key);
            return res;
        },
        set: function (target, key, value, receiver) {
            var res = Reflect.set(target, key, value, receiver);
            trigger(target, key);
            return res;
        }
    });
};
export { reactive as reactive };
在reactive返回的代理对象中,get方法针对性的缓存对象指定属性的事件依赖,set方法触发属性值发生变化时页面的触发事件
如果要想实现多层级的监听触发,可以在方法上进行递归操作
import {track,trigger} from './effect.js'

const isObject = (target) => target != null && typeof target == 'object'
var reactive = function (target) {
    return new Proxy(target, {
        get: function (target, key, receiver) {
            var res = Reflect.get(target, key, receiver);
            track(target, key);
            if (isObject(res)) {
                return reactive(res)
            }
            return res;
        },
        set: function (target, key, value, receiver) {
            var res = Reflect.set(target, key, value, receiver);
            trigger(target, key);
            return res;
        }
    });
};
export { reactive as reactive };
这里进行记录一下按照大神视频会踩的坑
1、tsc无法执行,windows要将这个模式调整一下,修改成RemoteSigned
set-ExecutionPolicy RemoteSigned

set-ExecutionPolicy Restricted
2、ts编译成js的时候,可以指定单个文件,并且要带上依赖库,要不然会报错
tsc --lib "es2015" .\src\zl\effect.ts 3、vite模式下无法进行require 操作,编译出的js文件中如果有require模式,要修改
import {track,trigger} from './effect.js'4、编译出来的exports.XXX一直报没有提供名为XXX的export,需要修改导出与引用的语法
export { _effect1 as effect1 };
export { _track as track };
export { _trigger as trigger };


import {track,trigger} from './effect.js'
8、computed
1、computed的使用
方式一:传入对象式,对象中顶一个get与set方法
<template>
  <div>
    <input type="text" v-model="xing">
    <input type="text" v-model="ming">
    {{ fullName }}
    <button @click="changeName">changeName</button>
  </div>
</template>

<script setup lang="ts">
  import {ref,computed} from 'vue';
  const xing = ref("张")
  const ming = ref("三")
  const fullName = computed({
    get:()=>{
      return xing.value+"-"+ming.value
    },
    set:(newVal:string)=>{
      [xing.value,ming.value] = newVal.split("-")
    }
  })

  const changeName = ()=>{
    fullName.value = "李-四"
  }
</script>
<style scoped>
</style>
方式二:函数式,只传入一个函数(get函数),获得的对象的值不允许修改
<template>
  <div>
    <input type="text" v-model="xing">
    <input type="text" v-model="ming">
    {{ fullName }}
    <button @click="changeName">changeName</button>
  </div>
</template>

<script setup lang="ts">
  import {ref,computed} from 'vue';
  const xing = ref("张")
  const ming = ref("三")
  // const fullName = computed({
  //   get:()=>{
  //     return xing.value+"-"+ming.value
  //   },
  //   set:(newVal:string)=>{
  //     [xing.value,ming.value] = newVal.split("-")
  //   }
  // })

  const fullName = computed(()=>{
    return xing.value+"-"+ming.value
  })

  const changeName = ()=>{
    fullName.value = "李-四" //函数式computed对象返回的对象,是个readOnly对象,不允许手动修改
  }
</script>
<style scoped>
</style>
computed示例
<template>
  <div>
      <input placeholder="请输入名称" v-model="keyWord" type="text">
      <table style="margin-top:10px;" width="500" cellspacing="0" cellpadding="0" border>
          <thead>
              <tr>
                  <th>物品</th>
                  <th>单价</th>
                  <th>数量</th>
                  <th>总价</th>
                  <th>操作</th>
              </tr>
          </thead>
          <tbody>
              <tr v-for="(item, index) in searchData">
                  <td align="center">{{ item.name }}</td>
                  <td align="center">{{ item.price }}</td>
                  <td align="center">
                      <button @click="item.num > 1 ? item.num-- : null">-</button>
                      <input v-model="item.num" type="number">
                      <button @click="item.num < 99 ? item.num++ : null">+</button>
                  </td>
                  <td align="center">{{ item.price * item.num }}</td>
                  <td align="center">
                      <button @click="del(index)">删除</button>
                  </td>
              </tr>
          </tbody>
          <tfoot>
              <tr>
                  <td colspan="5" align="right">
                      <span>总价:{{ total }}</span>
                  </td>
              </tr>
          </tfoot>

      </table>
  </div>
</template>

<script setup lang='ts'>
import { reactive, ref,computed } from 'vue'
let keyWord = ref<string>('')
interface Data {
  name: string,
  price: number,
  num: number
}
const data = reactive<Data[]>([
  {
      name: "商品1",
      price: 100,
      num: 1,
  },
  {
      name: "商品2",
      price: 200,
      num: 1,
  },
  {
      name: "商品3",
      price: 300,
      num: 1,
  }
])

let searchData = computed(()=>{
  return data.filter(item => item.name.includes(keyWord.value))
})

let total = computed(() => {
  return data.reduce((prev: number, next: Data) => {
      return prev + next.num * next.price
  }, 0)
})

const del = (index: number) => {
  data.splice(index, 1)
}

</script>

<style scoped lang='less'></style>
2、源码解析
第一步,修改一下第7章的effect的代码
改动点有2个,第一个将构造函数由一个参数改成2个参数,并且将函数修改成返回函数本身,以便computed函数在使用的时候能重新进行获取最新值;第二个,将触发函数进行判断函数本身是否存在第二个函数,如果存在,触发的时候进行调用第二个函数
var activeEffect;
var effect1 = function (fn,scheduler) {
    var _effect = function () {
        activeEffect = _effect;
        _effect.scheduler = scheduler;
        return fn();
    };
    _effect()
    return _effect;
};
const _effect1 = effect1;
export { _effect1 as effect1 };
var targetMap = new WeakMap();
var track = function (target, key) {
    var depsMap = targetMap.get(target);
    if (!depsMap) {
        depsMap = new Map();
        targetMap.set(target, depsMap);
    }
    var deps = depsMap.get(key);
    if (!deps) {
        deps = new Set();
        depsMap.set(key, deps);
    }
    deps.add(activeEffect);
};
const _track = track;
export { _track as track };
var trigger = function (target, key) {
    var depsMap = targetMap.get(target);
    var deps = depsMap.get(key);
    deps.forEach(function (effect) {
        if(effect.scheduler){
            effect.scheduler()
        }
        return effect();
    });
};
const _trigger = trigger;
export { _trigger as trigger };
reactive函数没有改动
import {track,trigger} from './effect.js'

const isObject = (target) => target != null && typeof target == 'object'
var reactive = function (target) {
    return new Proxy(target, {
        get: function (target, key, receiver) {
            var res = Reflect.get(target, key, receiver);
            track(target, key);
            if (isObject(res)) {
                return reactive(res)
            }
            return res;
        },
        set: function (target, key, value, receiver) {
            var res = Reflect.set(target, key, value, receiver);
            trigger(target, key);
            return res;
        }
    });
};
export { reactive as reactive };
编写computed函数
import {effect1} from './effect.js'

var computed = (get)=>{
    let _value = effect1(get,()=>{_dirty=true})
    let catchValue
    let _dirty = true
    class ComputedRefImpl {
        get value() {
            if (_dirty) {
                catchValue = _value()
                _dirty = false;
            }
            return catchValue
        }
    }

    return new ComputedRefImpl()
}
export { computed as computed };
页面调用
<!DOCTYPE html>
<html lang="en">
<head>
    <meta charset="UTF-8">
    <meta http-equiv="X-UA-Compatible" content="IE=edge">
    <meta name="viewport" content="width=device-width, initial-scale=1.0">
    <title>Document</title>
</head>
<body>

    <script type="module">
        import {computed} from './zl/computed.js'
        import {reactive} from './zl/reactive.js'
        window.a = reactive({name: 'a', age: 18})
        window.b = computed(() => {
            console.log('重新计算')
            return a.age + 10
        })

    </script>
</body>
</html>
会发现每次对对象a重新赋值之后,再获取b都会触发重新计算
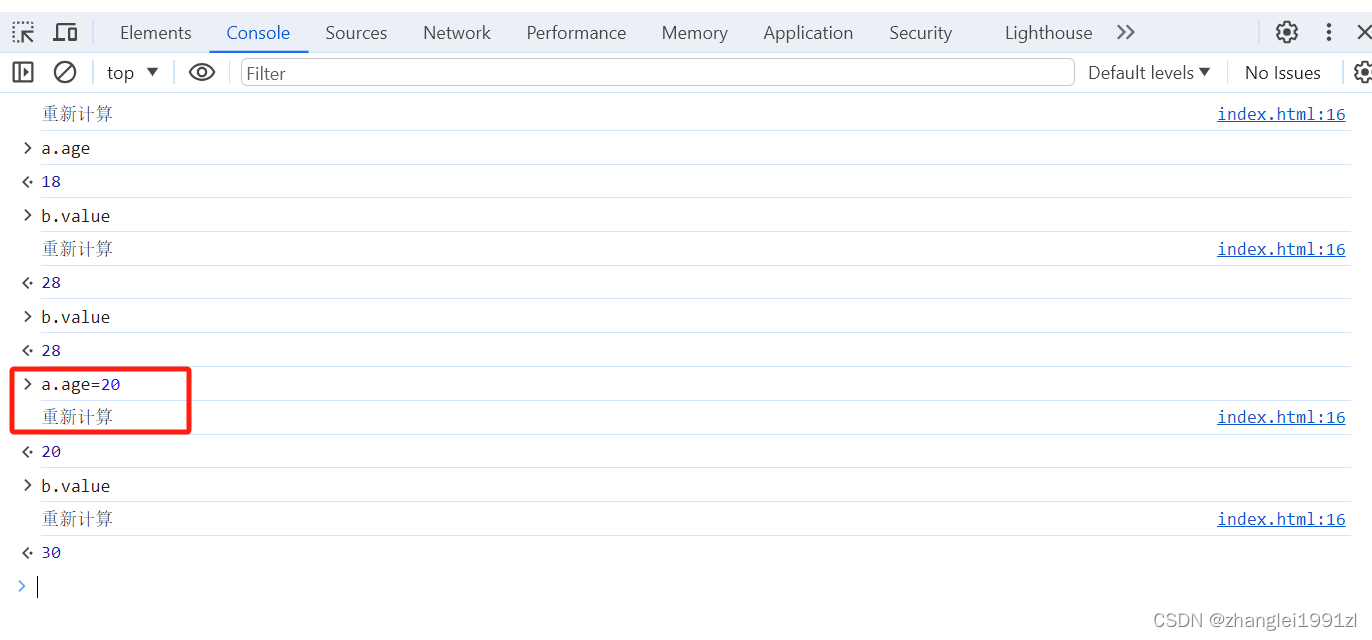
示例中因为 activeEffect是个公共的,所以最后会被computed进行覆盖掉
9、watch
1、简单类型的监听
<template>
  <div>
      <input v-model="name1" type="text">
      <input v-model="name2" type="text">
  </div>
</template>

<script setup lang='ts'>
import { ref, watch} from 'vue'
let name1 = ref("name1")
let name2 = ref("name2")
watch(name1,(newValue,oldValue)=>{
    console.log(oldValue)
    console.log(newValue)
})
</script>

<style scoped lang='less'></style>
2、对象类型监听
如果采用响应式为ref,则必须在监听函数中新增deep:true的属性,否则监听不到
<template>
  <div>
      <input v-model="name1.name" type="text">
      <input v-model="name2" type="text">
  </div>
</template>

<script setup lang='ts'>
import { ref, watch} from 'vue'
let name1 = ref({name:"name1"})
let name2 = ref("name2")
watch(name1,(newValue,oldValue)=>{
    console.log(oldValue)
    console.log(newValue)
},{deep:true})
</script>

<style scoped lang='less'></style>
如果监听的式对象本身,则打印的新值跟旧值是一样的,因为两者都是指向同一个对象
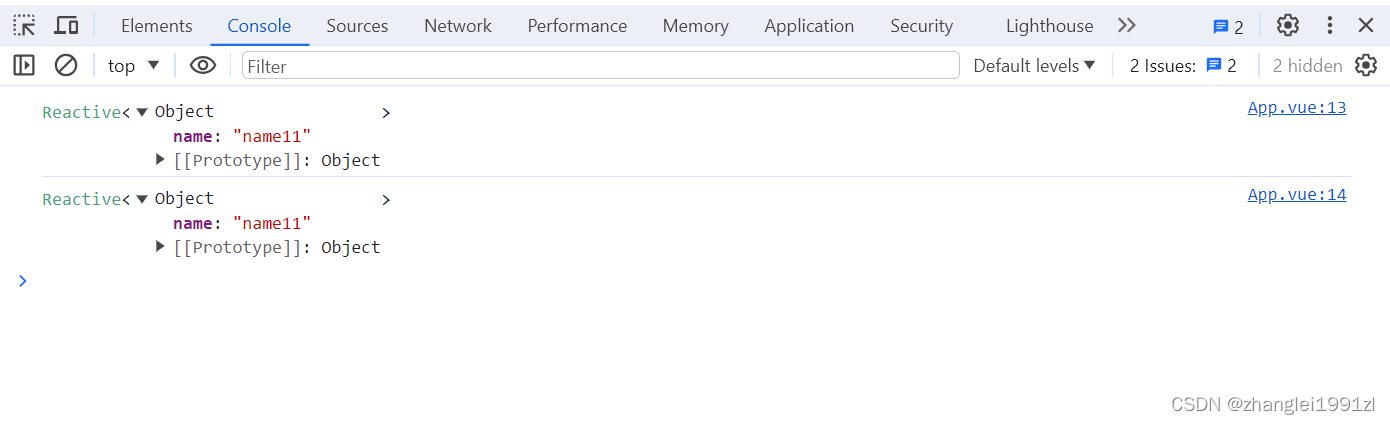
如果采用的是reactive,则不需要deep:true属性也能监听到值的变化,因为reactive构造函数必须传对象,所以在vue3源码内判断是reactive对象,则直接开启了deep模式,但打印的值还是刚刚那个现象,如果监听的是引用对象本身,则新值跟旧值指向的是同一个对象
<template>
  <div>
      <input v-model="name1.name" type="text">
      <input v-model="name2" type="text">
  </div>
</template>

<script setup lang='ts'>
import { ref, watch,reactive} from 'vue'
let name1 = reactive({name:"name1"})
let name2 = ref("name2")
watch(name1,(newValue,oldValue)=>{
    console.log(oldValue)
    console.log(newValue)
})
</script>

<style scoped lang='less'></style>
3、多个数据源监听
可以采用数组的形式传参
<template>
<div>
<input v-model="name1.name" type="text">
<input v-model="name2" type="text">
</div>
</template>
<script setup lang='ts'>
import { ref, watch,reactive} from 'vue'
let name1 = reactive({name:"name1"})
let name2 = ref("name2")
watch([name1,name2],(newValue,oldValue)=>{
console.log(oldValue)
console.log(newValue)
})
</script>
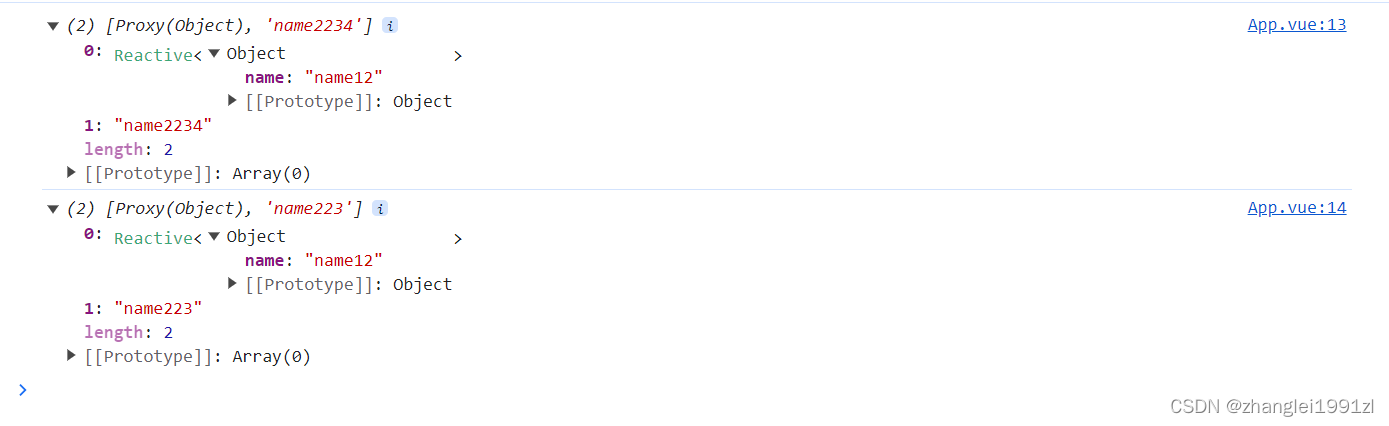
<style scoped lang='less'></style>返回的值也将会是个数组
4、对象中的某个属性监听
传参为一个get函数
<template>
  <div>
      <input v-model="name1.name" type="text">
      <input v-model="name2" type="text">
  </div>
</template>

<script setup lang='ts'>
import { ref, watch,reactive} from 'vue'
let name1 = reactive({name:"name1"})
let name2 = ref("name2")
watch(()=>{return name1.name},(newValue,oldValue)=>{
    console.log(oldValue)
    console.log(newValue)
})
</script>

<style scoped lang='less'></style>
5、 watch函数的参数详解
watch第一个参数监听源
watch第二个参数回调函数cb(newVal,oldVal)
watch第三个参数一个options配置项是一个对象{
immediate:true //是否立即调用一次
deep:true //是否开启深度监听
}
10、watchEffect
使用方法就有点像computed,函数体中的变量的值的变化都能监听到,会在页面刷新之后立即执行一次,然后就是每次监听的对象值发生改变的时候触发
<template>
  <div>
      <input v-model="message" type="text">
      <input v-model="message2" type="text">
  </div>
</template>

<script setup lang='ts'>
import { ref, watchEffect} from 'vue'

let message = ref<string>('')
let message2 = ref<string>('')
 watchEffect(() => {
    //console.log('message', message.value);
    console.log('message2', message2.value);
})
</script>

<style scoped lang='less'></style>
也支持传入一个函数名,函数名会在执行其他函数代码执行前执行
<template>
  <div>
      <input v-model="message" type="text">
      <input v-model="message2" type="text">
  </div>
</template>

<script setup lang='ts'>
import { ref, watchEffect} from 'vue'

let message = ref<string>('')
let message2 = ref<string>('')
 watchEffect((oninvalidate) => {
    //console.log('message', message.value);
    console.log('message2', message2.value);
    oninvalidate(()=>{
      console.log('函数被执行')
    })
})
</script>

<style scoped lang='less'></style>
也可以停止监控,watchEffect函数会返回一个函数,执行这个函数就会停止监控
<template>
  <div>
      <input v-model="message" type="text">
      <input v-model="message2" type="text">
      <button @click="stop">停止监控</button>
  </div>
</template>

<script setup lang='ts'>
import { ref, watchEffect} from 'vue'

let message = ref<string>('')
let message2 = ref<string>('')
let watchFunction =  watchEffect((oninvalidate) => {
    //console.log('message', message.value);
    console.log('message2', message2.value);
    oninvalidate(()=>{
      console.log('函数被执行')
    })
})

const stop = ()=>{
  watchFunction()
}
</script>

<style scoped lang='less'></style>
watchEffect也支持传入一些配置项,例如触发刷新的时机,调试等
<template>
  <div>
      <input v-model="message" type="text">
      <input v-model="message2" type="text">
      <button @click="stop">停止监控</button>
  </div>
</template>

<script setup lang='ts'>
import { ref, watchEffect} from 'vue'

let message = ref<string>('')
let message2 = ref<string>('')
let watchFunction =  watchEffect((oninvalidate) => {
    console.log('message', message.value);
    console.log('message2', message2.value);
    oninvalidate(()=>{
      console.log('函数被执行')
    })
},{
    flush:"post",//刷新时机
    onTrigger (e) {
        console.log(e)//e为当前变化的对象
    }
})

const stop = ()=>{
  watchFunction()
}
</script>

<style scoped lang='less'></style>| pre | sync | post | |
| 更新时机 | 组件更新前执行 | 强制效果始终同步触发 | 组件更新后执行 |
11、组件与生命周期
1、组件
任何一个.vue结尾的文件都可以导入以组件的形式进行使用,vue2中要将组件引入之后放到components对象中,vue3则不需要特别注册
2、生命周期
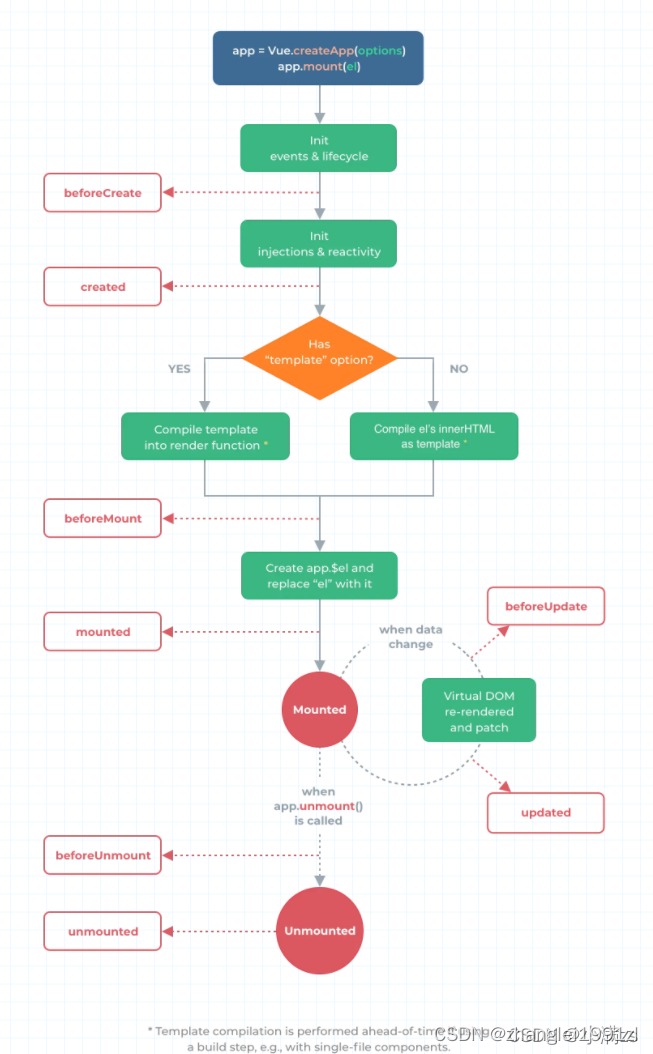
vue3提供了一下钩子函数,可以让开发者在vue生命周期的各个时期进行自己的逻辑开发
onBeforeMount() 在组件DOM实际渲染安装之前调用。在这一步中,根元素还不存在。
onMounted() 在组件的第一次渲染后调用,该元素现在可用,允许直接DOM访问
onBeforeUpdate() 数据更新时调用,发生在虚拟 DOM 打补丁之前。
onUpdated() DOM更新后,updated的方法即会调用。
onBeforeUnmount() 在卸载组件实例之前调用。在这个阶段,实例仍然是完全正常的。onUnmounted() 卸载组件实例后调用。调用此钩子时,组件实例的所有指令都被解除绑定,所有事件侦听器都被移除,所有子组件实例被卸载。
onRenderTracked() 依赖收集时调用
onRenderTriggered() 渲染触发时调用
12、bem架构
bem实际上是block、element、modifier的缩写,分别为块层,元素层,修饰符层
BEM命名约定的模式是:
.block {}

.block__element {}

.block--modifier {}
代码实战
先安装sass模块
npm install sass编写个公共的scss文件
//定义变量,
//如果要在选择器名或属性名使用就用语法#{$变量名}
$block-sel: "-" !default; //块级连接符
$element-sel: "__" !default;//元素连接符
$modifier-sel: "--" !default;//修饰连接符
$namespace:'zl' !default;//命名空间
//定义一个常用的样式,如果要使用,配合@include
//例如这里定义了个bfc样式,引用就需要用@include bfc
@mixin bfc {
    height: 100%;
    overflow: hidden;
}

//混入支持传参,类似于function的定义
@mixin b($block) {
   $B: $namespace + $block-sel + $block; //变量
   .#{$B}{ //插值语法#{}
     @content; //内容替换,类似与一种插槽,可以将自己定义的样式类容替换到这里
   }
}

@mixin flex {
    display: flex;
}

@mixin e($element) {
    $selector:&;
    @at-root { //取消拼接父级
        #{$selector + $element-sel + $element} {
            @content;
        }
    }
}

@mixin m($modifier) {
    $selector:&;
    @at-root {
        #{$selector + $modifier-sel + $modifier} {
            @content;
        }
    }
}
项目中进行预处理,在vite.config.ts中引入这个全局文件
import { defineConfig } from 'vite'
import vue from '@vitejs/plugin-vue'

// https://vitejs.dev/config/
export default defineConfig({
  plugins: [vue()],
  css:{
    preprocessorOptions:{
      scss:{
        additionalData: "@import './src/bem.scss';"
      }
    }
  }
})
代码中就可以直接使用
<template>
    <div class="zl-demo">
        <Menu></Menu>
        <div class="zl-demo__right">
            <Header></Header>
            <Content></Content>
        </div>

    </div>
  </template>

  <script setup lang='ts'>
  import Header from './header/index.vue'
  import Menu from './menu/index.vue'
  import Content from './content/index.vue'

  </script>

<style scoped lang='scss'>
@include b('demo'){
    @include bfc;
    @include flex;
    @include e(right){
        flex:1;
        display: flex;
        flex-direction: column;
    }
}
</style>
相当于简化了类名的简写,如果是公共的模式进行类型约束,就可以用这种方式简写样式
13、父子组件传参与事件
1、父传值给子
父组件通过v-bind绑定一个数据,然后子组件通过defineProps接受传过来的值,
<template>
  <HelloWorld :title="title"></HelloWorld>
</template>

<script setup lang='ts'>
import {ref} from 'vue'
import HelloWorld from './components/HelloWorld.vue'

const title = ref<string>("标题");
</script>

<style scoped lang='less'></style>
子组件通过defineProps进行接收参数,如果想在js代码中使用某个参数,则需要用变量进行接收
<script setup lang="ts">
import { onMounted } from 'vue';
const prpos = defineProps(["title"])
onMounted(()=>{
  console.log(prpos.title)
})

</script>

<template>
  <h1>{{ title }}</h1>

</template>

<style scoped>
.read-the-docs {
  color: #888;
}
</style>
也可以用ts特有的语法进行接收
<script setup lang="ts">
import { onMounted } from 'vue';
const prpos = defineProps<{title:string}>()
onMounted(()=>{
  console.log(prpos.title)
})

</script>

<template>
  <h1>{{ title }}</h1>

</template>

<style scoped>
.read-the-docs {
  color: #888;
}
</style>
如果想在接收参数的时候指定默认值,可以用下面的语法
<script setup lang="ts">

import { onMounted } from 'vue';
const prpos = defineProps({
  title:{
    type:String,
    default:"标题1"
  },
  data:{
    type:Array,
    default:[1,2,3]
  }
})
onMounted(()=>{
  console.log(prpos.title)
})

</script>

<template>
  <h1>{{ title }}</h1>
  <div v-for="item in data">{{ item }}</div>
</template>

<style scoped>
.read-the-docs {
  color: #888;
}
</style>
如果是ts,还可以写成
type Props = {
    title?: string,
    data?: number[]
}
withDefaults(defineProps<Props>(), {
    title: "张三",
    data: () => [1, 2, 3]
})
2、子传递值给父
子组件传递值给父组件都是通过定义事件触发的模式
子组件中通过defineEmits 注册了一个自定义事件,然后在某个时机触发这个事件
<script setup lang="ts">

import { onMounted } from 'vue';
const prpos = defineProps({
  title:{
    type:String,
    default:"标题1"
  },
  data:{
    type:Array,
    default:[1,2,3]
  }
})
onMounted(()=>{
  console.log(prpos.title)
})

//注册emit事件
const emit = defineEmits(["clickTap"])

const clickTap = ()=>{
  //发送事件给父组件
  emit("clickTap",prpos)
}

</script>

<template>
  <h1>{{ title }}</h1>
  <div v-for="item in data">{{ item }}</div>
  <button @click="clickTap">派发给父组件</button>
</template>

<style scoped>
.read-the-docs {
  color: #888;
}
</style>
父组件通过监听获取这个事件
<template>
  <HelloWorld :title="title" @clickTap="getData"></HelloWorld>
</template>

<script setup lang='ts'>
import {ref} from 'vue'
import HelloWorld from './components/HelloWorld.vue'

const getData = (data:any)=>{console.log(data)}

const title = ref<string>("标题");
</script>

<style scoped lang='less'></style>
3、子组件暴露内部属性给父组件
通过defineExpose可以让子组件将一些属性暴露给父组件
<script setup lang="ts">

import { onMounted,ref } from 'vue';
const prpos = defineProps({
  title:{
    type:String,
    default:"标题1"
  },
  data:{
    type:Array,
    default:[1,2,3]
  }
})

const aa = ref("aa")
onMounted(()=>{
  console.log(prpos.title)
})

//注册emit事件
const emit = defineEmits(["clickTap"])

const clickTap = ()=>{
  //发送事件给父组件
  emit("clickTap",prpos)
}

defineExpose({
  prpos
})
</script>

<template>
  <h1>{{ title }}</h1>
  <div v-for="item in data">{{ item }}</div>
  <button @click="clickTap">派发给父组件</button>
</template>

<style scoped>
.read-the-docs {
  color: #888;
}
</style>
父组件先要获得子组件的实例
<template>
  <HelloWorld :title="title" ref="hello" @clickTap="getData"></HelloWorld>
</template>

<script setup lang='ts'>
import {onMounted, ref} from 'vue'
import HelloWorld from './components/HelloWorld.vue'

const getData = (data:any)=>{console.log(data)}

const title = ref<string>("标题");

const hello = ref<InstanceType<typeof HelloWorld>>();
onMounted(()=>{
  console.log(hello.value?.prpos.data)
  console.log(hello.value?.aa)
})
</script>

<style scoped lang='less'></style>
然后才能获取这个的某些属性,如果没有暴露,得到的是undefined
14、全局组件,局部组件,递归组件
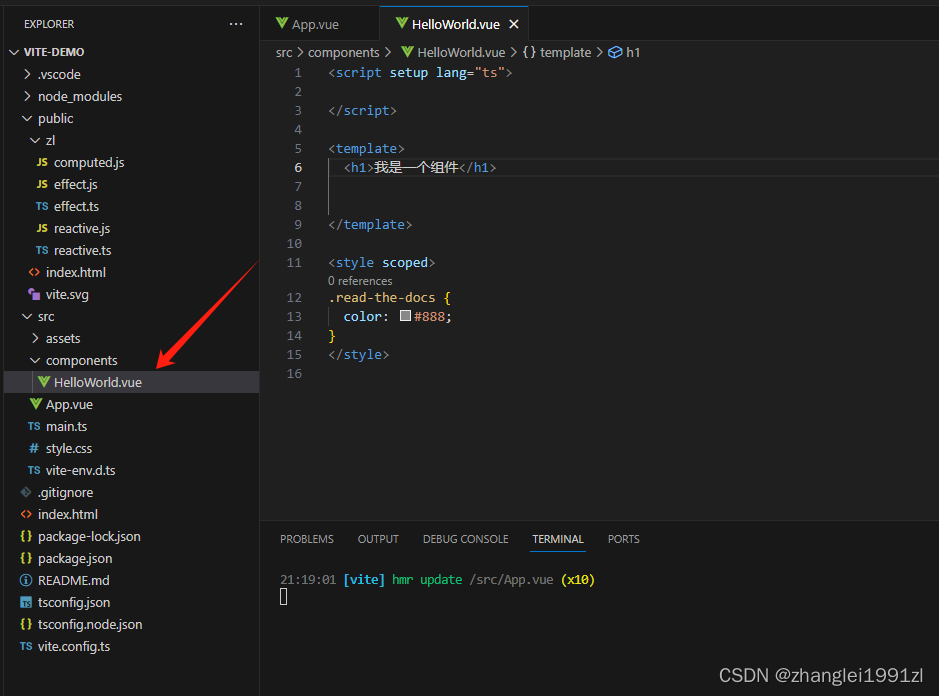
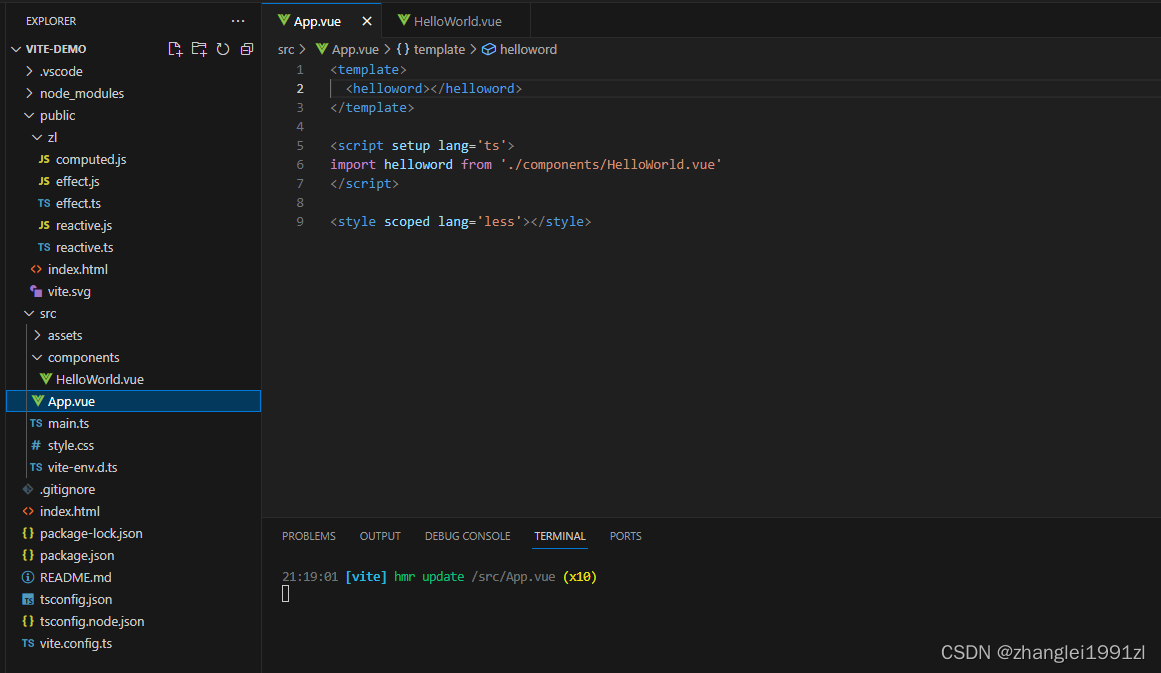
1、局部组件
就像这种定义了vue之后需要在界面中引用的组件称为局部组件
2、全局组件
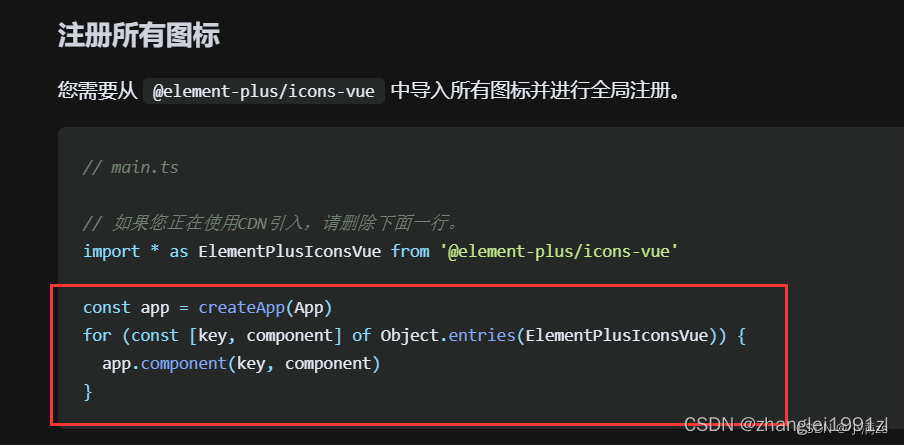
如果一个组件,使用频率很高,每次使用的时候都去重新引用会很繁琐,因此可以将这个组件配置成全局组件
在main.ts 引入我们的组件跟随在createApp(App) 后面 切记不能放到mount 后面这是一个链式调用用
import { createApp } from 'vue'
import './style.css'
import App from './App.vue'
import HelloWorld from './components/HelloWorld.vue'

createApp(App).component('Hello',HelloWorld).mount('#app')
然后就可以在使用的地方直接使用
<template>
  <Hello :title="title" ref="hello" @clickTap="getData"></Hello>
</template>

<script setup lang='ts'>
import {ref} from 'vue'
const getData = (data:any)=>{console.log(data)}
const title = ref<string>("标题");
</script>

<style scoped lang='less'></style>
如果需要批量注册,可以参考
3、递归组件
原理跟我们写js递归是一样的 自己调用自己 通过一个条件来结束递归 否则导致内存泄漏
常见的场景有树形组件
<template>
    <div v-for="item in data" class="tree">
        <input v-model="item.checked" type="checkbox"> <span>{{ item.name }}</span>
        <Tree v-if="item?.children?.length" :data="item.children"></Tree>
    </div>
</template>

<script setup lang="ts">
type TreeList = {
  name: string;
  checked: boolean;
  children?: TreeList[] | [];
};
type Props<T> = {
  data?: T[] | [];
};

const props = defineProps<Props<TreeList>>()
</script>

<style scoped lang="less">
.tree{
    margin-left: 10px;
}
</style>
这里使用了?可选链操作符,避免属性不存在而读取下面属性的时候报错,通常配合??使用,??表示如果左边表达式得到的结果为null或者undefined,则返回右边的值 null ?? 1 返回1
这里因为没有额外的给这个组件起别名,所以可以直接用文件名引用自己
然后在使用他的地方直接引用
<template>
  <Tree :data="data"></Tree>
</template>

<script setup lang='ts'>
import { reactive } from 'vue';
import Tree from './components/Tree.vue'

type TreeList = {
  name: string;
  icon?: string;
  children?: TreeList[] | [];
};
const data = reactive<TreeList[]>([
  {
    name: "no.1",
    children: [
      {
        name: "no.1-1",
        children: [
          {
            name: "no.1-1-1",
          },
        ],
      },
    ],
  },
  {
    name: "no.2",
    children: [
      {
        name: "no.2-1",
      },
    ],
  },
  {
    name: "no.3",
  },
]);

</script>

<style scoped lang='less'></style>
1、定义组件名称
如果不想用文件名作为组件名,可以有以下几种方法进行定义组件名
1、直接文件名当组件名
如果这个组件的文件名称为Tree.vue,可以直接引用自己
<template>
    <div v-for="item in data" class="tree">
        <input v-model="item.checked" type="checkbox"> <span>{{ item.name }}</span>
        <Tree v-if="item?.children?.length" :data="item.children"></Tree>
    </div>
</template>

<script setup lang="ts">
type TreeList = {
  name: string;
  checked: boolean;
  children?: TreeList[] | [];
};
type Props<T> = {
  data?: T[] | [];
};

const props = defineProps<Props<TreeList>>()
</script>

<style scoped lang="less">
.tree{
    margin-left: 10px;
}
</style>
2、在增加一个script 通过 export 添加name
这里会跟setup冲突,所以可以另写个script代码块
<script  lang="ts">
export default{
    name:"TreeItem"
}
</script>
3、使用属性defineOptions
<template>
    <div v-for="item in data" class="tree">
        <input v-model="item.checked" type="checkbox"> <span>{{ item.name }}</span>
        <TreeItem v-if="item?.children?.length" :data="item.children"></TreeItem>
    </div>
</template>

<script setup lang="ts">
type TreeList = {
  name: string;
  checked: boolean;
  children?: TreeList[] | [];
};
type Props<T> = {
  data?: T[] | [];
};

defineOptions({
    name:"TreeItem"
})
const props = defineProps<Props<TreeList>>()
</script>
<style scoped lang="less">
.tree{
    margin-left: 10px;
}
</style>
某些vue3的版本不能直接使用这个函数,需要引用插件 unplugin-vue-define-options,最新的已经能直接使用了
import DefineOptions from 'unplugin-vue-define-options/vite'
import Vue from '@vitejs/plugin-vue'

export default defineConfig({
  plugins: [Vue(), DefineOptions()],
})
15、动态组件
动态组件是指多个组件可以在一个挂载点动态渲染。通常在tab切换的时候,避免使用v-if使用
1、内置组件传入对象
<template>
  <div>
    <div style="display: flex;">
        <div :class="[current==index?'active':'']" class="tabs" v-for="(item,index) in data" :key="index" @click="changeTabs(item,index)">
          <div>{{ item.name }}</div>
        </div>
    </div>
    <component :is="comId"></component>
  </div>
</template>

<script setup lang='ts'>
import { reactive,ref,markRaw } from 'vue';
import Avue from './components/A.vue'
import Bvue from './components/B.vue'
import Cvue from './components/C.vue'
const data=reactive([
  {
    name:"A组件",
    com:markRaw(Avue)
  },
  {
    name:"B组件",
    com:markRaw(Bvue)
  },
  {
    name:"C组件",
    com:markRaw(Cvue)
  },
])
const comId = ref(Avue)
const current = ref(0)
const changeTabs=(item:any,index:number)=>{
  current.value=index
  comId.value=item.com
}
</script>

<style scoped lang='less'>
.tabs{
  border: 1px solid #ccc;
  padding: 5px 10px;
  margin: 10px;
  cursor: pointer;
}
.active{
  background-color: aqua;
}
</style>
这里面要用到内置组件component 将动态组件的信息通过is属性传递到内置组件中
2、内置组件传入组件名
<template>
  <div>
    <div style="display: flex;">
        <div :class="[current==index?'active':'']" class="tabs" v-for="(item,index) in data" :key="index" @click="changeTabs(item,index)">
          <div>{{ item.name }}</div>
        </div>
    </div>
    <component :is="comId"></component>
  </div>
</template>
<script lang="ts">
  import Avue from './components/A.vue'
  import Bvue from './components/B.vue'
  import Cvue from './components/C.vue'
  export default{
    components:{
      Avue,
      Bvue,
      Cvue
    }
  }
</script>
<script setup lang='ts'>
import { reactive,ref } from 'vue';

const data=reactive([
  {
    name:"A组件",
    com:"Avue"
  },
  {
    name:"B组件",
    com:"Bvue"
  },
  {
    name:"C组件",
    com:"Cvue"
  },
])
const comId = ref("Cvue")
const current = ref(2)
const changeTabs=(item:any,index:number)=>{
  current.value=index
  comId.value=item.com
}
</script>

<style scoped lang='less'>
.tabs{
  border: 1px solid #ccc;
  padding: 5px 10px;
  margin: 10px;
  cursor: pointer;
}
.active{
  background-color: aqua;
}
</style>
要先将这个组件注册到vue中,然后就可以直接传入组件名
16、插槽
插槽就是子组件中的提供给父组件使用的一个占位符,用<slot></slot> 表示,父组件可以在这个占位符中填充任何模板代码,如 HTML、组件等,填充的内容会替换子组件的<slot></slot>标签。
1、匿名插槽
<template>
    <div>
        <div class="header">
            头部
            <slot name="header"></slot>
        </div>
        <div class="main">
            主体
            <!-- 匿名插槽,插槽没有定义名称 -->
            <slot></slot>
        </div>
        <div class="footer">
            尾部
            <slot name="footer"></slot>
        </div>
    </div>
</template>
<style lang="less" scoped>
.header{
    height: 200px;
    width: 100%;
    background-color: aqua;
}
.main{
    height: 200px;
    width: 100%;
    background-color: aquamarine;
}
.footer{
    height: 200px;
    width: 100%;
    background-color: red;
}

</style>
在引用组件的时候,只用v-slot进行插槽替换,但是没有标记替换哪个插槽的内容,会直接替换匿名插槽的内容
<template>
  <div>
    <SlotTemplate>
      <template v-slot>
        <div>
          这是匿名插槽
        </div>
      </template>
    </SlotTemplate>
  </div>
</template>

<script setup lang='ts'>
import SlotTemplate from './components/dialog/slottemplate.vue'

</script>

<style scoped lang='less'>
</style> 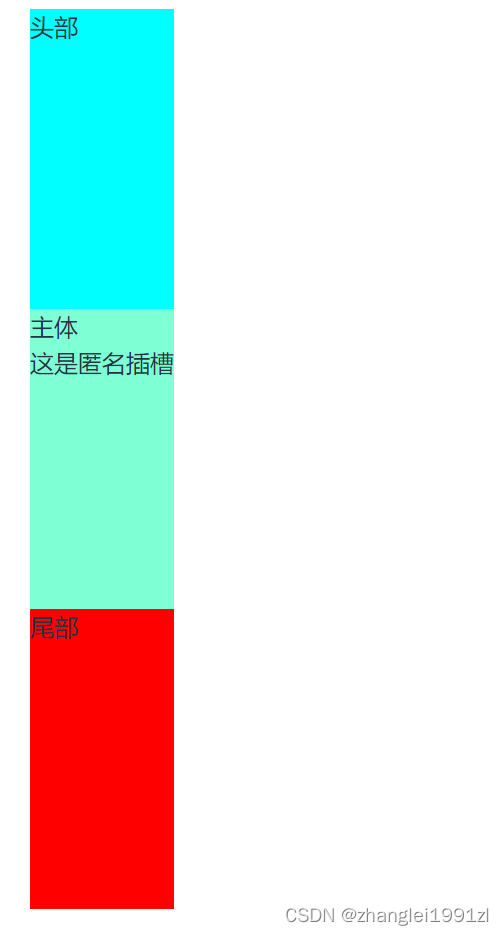
2、 具名插槽
就是插槽上定义了个名称,使用的时候也指定名称
<template>
  <div>
    <SlotTemplate>
      <template v-slot:header>
        <div>这是头部插槽</div>
      </template>
      <template v-slot>
        <div>
          这是匿名插槽
        </div>
      </template>
      <template v-slot:footer>
        <div>这是尾部插槽</div>
      </template>
    </SlotTemplate>
  </div>
</template>

<script setup lang='ts'>
import SlotTemplate from './components/dialog/slottemplate.vue'

</script>

<style scoped lang='less'>
</style>
插槽简写
<Dialog>
<template #header>
<div>1</div>
</template>
<template #default>
<div>2</div>
</template>
<template #footer>
<div>3</div>
</template>
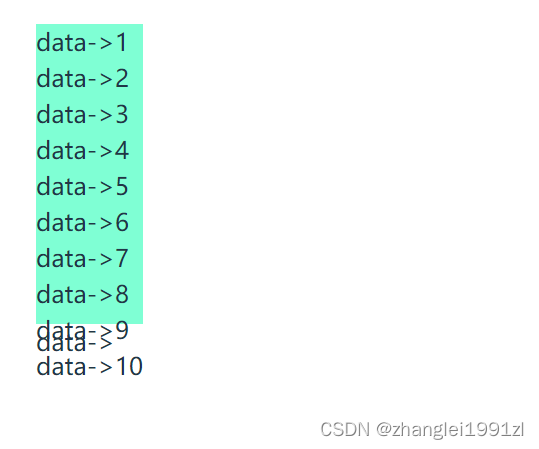
</Dialog>3、作用域插槽
在子组件动态绑定参数 派发给父组件的slot去使用
<template>
    <div>
        <div class="main">
            <div v-for="item in 100">
                <slot :data="item"></slot>
            </div>
        </div>
        <slot></slot>
    </div>
</template>
<style lang="less" scoped>
.header{
    height: 200px;
    width: 100%;
    background-color: aqua;
}
.main{
    height: 200px;
    width: 100%;
    background-color: aquamarine;
}
.footer{
    height: 200px;
    width: 100%;
    background-color: red;
}

</style>
父组件通过对象进行接收
<template>
  <div>
    <SlotTemplate>

      <template v-slot="{data}">
        <div>
          data->{{ data }}
        </div>
      </template>

    </SlotTemplate>
  </div>
</template>

<script setup lang='ts'>
import SlotTemplate from './components/dialog/slottemplate.vue'

</script>

<style scoped lang='less'>
</style>
也可以简写成#default="{data}"
4、动态插槽
引用的时候传入一个引用的名称
 <template #[name]>
     <div>
        23
     </div>
 </template>
const name = ref('header')17、 异步组件与分包
vue3中允许组件异步加载,只需要在组件定义的顶层,使用await关键字,那么这个组件的代码执行就是个异步的
先定义个异步组件,模拟请求为3秒
<template>
    <div>
           {{ result }}

    </div>
</template>

<script setup lang="ts">

  //一定要定义成Promise对象,否则下面的await不会阻塞
  const sleep = (delay:number) => new Promise((resolve) => setTimeout(resolve, delay))

  //模拟请求
  const repeatedGreetings = async () => {
    await sleep(1000)
    console.log(1)
    await sleep(1000)
    console.log(2)
    await sleep(1000)
    console.log(3)
    return "延迟组件"
  }


  //在setup中使用await,执行代码的顶层使用await
  const result = await repeatedGreetings()
</script>
再定义个默认组件
<template>
    <div>
        默认组件
    </div>
</template>
在父组件中使用关键字defineAsyncComponent引入异步组件,同时使用关键字suspense引用异步组件的
<template>
  <div>
    <Suspense>
      <!-- 异步组件执行完之后的插槽 -->
      <template #default>
        <SyncVue></SyncVue>
      </template>
      <!-- 异步组件未执行完之前的插槽 -->
      <template #fallback>
        <DefaultVue></DefaultVue>
      </template>
    </Suspense>
  </div>
</template>

<script setup lang='ts'>

import { defineAsyncComponent} from 'vue';
import DefaultVue from './components/sync/default.vue';
const SyncVue = defineAsyncComponent(()=>import('./components/sync/sync.vue'))
</script>

<style scoped lang='less'>
</style>
就可以看到效果,未加载前看到的是默认组件,加载完之后是异步组件
虽然有另一种传参方式,但其他的属性还没研究出效果,这里只做个记录
const SyncVue = defineAsyncComponent({
    loader: () => import("./components/sync/sync.vue"),
    //加载过程中显示的组件
    loadingComponent: Loading,
    //加载失败时显示的组件
    // errorComponent:Error,
    // 在显示loadingComponent组件之前, 等待多长时间
    delay: 1000,
    //定义组件是否可挂起|默认值:true
    suspensible:true,
    /**
     * err: 错误信息,
     * retry: 函数, 调用retry尝试重新加载
     * attempts: 记录尝试的次数
     */
    onError: function(err, retry, attempts) {
      console.log(err,retry,attempts)
    }
  })
分包的含义是:
如果组件的引用全部是用import DefaultVue from './components/sync/default.vue';这种语法引入,最终编译会编译成一个js脚本,这个脚本最终会很大,页面第一次加载的时候会很慢,但凡是用import(''./components/sync/sync.vue'') 这种语法引入的组件,会生成多个js脚本,达到分包的目的
18、Teleport 传送组件
<Teleport> 是一个内置组件,它可以将一个组件内部的一部分模板“传送”到该组件的 DOM 结构外层的位置去
<template>

    <div class="dialog">
        <header class="header">
            <div>我是弹框</div>

        </header>
        <main class="main">
            我是内容12321321321
        </main>

    </div>

</template>

<script setup lang='ts'>

</script>
<style lang="less" scoped>
.dialog {
    width: 400px;
    height: 400px;
    background: #141414;
    display: flex;
    flex-direction: column;
    position: absolute;
    left: 50%;
    top: 50%;
    margin-left: -200px;
    margin-top: -200px;

    .header {
        display: flex;
        color: #CFD3DC;
        border-bottom: 1px solid #636466;
        padding: 10px;
        justify-content: space-between;
    }

    .main {
        flex: 1;
        color: #CFD3DC;
        padding: 10px;
    }

    .footer {
        border-top: 1px solid #636466;
        padding: 10px;
        display: flex;
        justify-content: flex-end;
    }
}
</style>
引用代码
<template>
  <div id="parent" style="width: 100%;height: 50vh;background-color: yellow;position: relative;">
    <h1>我是父级</h1>

    <div style="width: 100%;height: 50vh;background-color: blue;position: relative;">
      <Teleport to="#parent" :disabled="a">
        <Loading></Loading>
      </Teleport>
    </div>

  </div>
  <div id="other" style="width: 100%;height: 50vh;background-color: red;position: relative;" >我是子级</div>
</template>

<script setup lang='ts'>
import Loading from './components/sync/loading.vue';
import { ref } from 'vue';

const a = ref<boolean>(false)

setInterval(()=>{
  a.value = !a.value
},1000)

</script>

<style scoped lang='less'>
</style>
19、keep-alive 缓存
有时候我们不希望组件被重新渲染影响使用体验;或者处于性能考虑,避免多次重复渲染降低性能。而是希望组件可以缓存下来,维持当前的状态。这时候就需要用到keep-alive组件。
开启keep-alive 生命周期的变化
初次进入时: onMounted> onActivated
退出后触发 deactivated
再次进入:
只会触发 onActivated
事件挂载的方法等,只执行一次的放在 onMounted中;组件每次进去执行的方法放在 onActivated中
<script setup lang="ts">
import { ref } from "vue";
import A from "./components/A.vue";
import B from "./components/B.vue";
const showFlag = ref(true);
const changeShow = () => {
  showFlag.value = !showFlag.value;
};
</script>

<template>
  <div>
    <button @click="changeShow">changeShow</button>
    <div>
      <keep-alive>
        <component :is="showFlag ? A : B" />
      </keep-alive>
    </div>
  </div>

</template>

<style scoped>
.logo {
  height: 6em;
  padding: 1.5em;
  will-change: filter;
  transition: filter 300ms;
}
.logo:hover {
  filter: drop-shadow(0 0 2em #646cffaa);
}
.logo.vue:hover {
  filter: drop-shadow(0 0 2em #42b883aa);
}
</style>
keep-alive 还能指定缓存哪些组件,哪些组件不用缓存,最多缓存多少个组件
include 和 exclude 允许组件有条件地缓存。二者都可以用逗号分隔字符串、正则表达式或一个数组来表示
<keep-alive :include="['A','B']" :exclude="['B']" :max="1">
   <component :is="showFlag ? A : B" />
</keep-alive>
注意,keep-alive组件内最多只能渲染一个组件,同时渲染多个组件会报错,下面这种用法就会报错
 <keep-alive >
    <A></A>
    <B></B>
 </keep-alive>
20、transition动画组件
Vue 提供了 transition 的封装组件,在下列情形中,可以给任何元素和组件添加进入/离开过渡:
条件渲染 (使用 v-if)
条件展示 (使用 v-show)
动态组件
组件根节点
自定义 transition 过度效果,你需要对transition组件的name属性自定义。并在css中写入对应的样式
1、内置过渡的类名
在进入/离开的过渡中,会有 6 个 class 切换。
v-enter-from:定义进入过渡的开始状态。在元素被插入之前生效,在元素被插入之后的下一帧移除。
v-enter-active:定义进入过渡生效时的状态。在整个进入过渡的阶段中应用,在元素被插入之前生效,在过渡/动画完成之后移除。这个类可以被用来定义进入过渡的过程时间,延迟和曲线函数。
v-enter-to:定义进入过渡的结束状态。在元素被插入之后下一帧生效 (与此同时 v-enter-from 被移除),在过渡/动画完成之后移除。
v-leave-from:定义离开过渡的开始状态。在离开过渡被触发时立刻生效,下一帧被移除。
v-leave-active:定义离开过渡生效时的状态。在整个离开过渡的阶段中应用,在离开过渡被触发时立刻生效,在过渡/动画完成之后移除。这个类可以被用来定义离开过渡的过程时间,延迟和曲线函数。
v-leave-to:离开过渡的结束状态。在离开过渡被触发之后下一帧生效 (与此同时 v-leave-from 被移除),在过渡/动画完成之后移除。
<script setup lang="ts">
import { ref } from "vue";
const flag = ref(false);
</script>

<template>
  <div>
    <button @click='flag = !flag'>切换</button>
    <transition name='fade'>
      <div v-if='flag' class="box"></div>
    </transition>
  </div>

</template>

<style scoped >

.fade-enter-from{
   background:red;
   width:0px;
   height:0px;
   transform:rotate(360deg)
}

.fade-enter-active{
  transition: all 2.5s linear;
}

.fade-enter-to{
   background:yellow;
   width:200px;
   height:200px;
}

.fade-leave-from{
  width:200px;
  height:200px;
  transform:rotate(360deg)
}

.fade-leave-active{
  transition: all 1s linear;
}

.fade-leave-to{
  width:0px;
   height:0px;
}
.box{
  width:200px;
  height:200px;
  background:yellow;
}
</style>
如代码所示, transition 指定name属性,就可以在组件渲染的时候触发动画效果
2、自定义类名
如果不想用组件内置的类名,可以给动画组件的指定类名属性中传入特定的名称,下面是可以指定属性名
enter-from-classenter-active-classenter-to-classleave-from-classleave-active-classleave-to-class
<script setup lang="ts">
import { ref } from "vue";
const flag = ref(false);
</script>

<template>
  <div>
    <button @click='flag = !flag'>切换</button>
    <transition
      leave-active-class="fade-leave-active"
      enter-active-class="fade-enter-active"
      leave-to-class="fade-leave-to"
    >
        <div v-if="flag" class="box"></div>
    </transition>
  </div>

</template>

<style scoped >

.fade-enter-from{
   background:red;
   width:200px;
   height:200px;
   transform:rotate(360deg)
}

.fade-enter-active{
  transition: all 2.5s linear;
}

.fade-enter-to{
   background:yellow;
   width:200px;
   height:200px;
}

.fade-leave-from{
  width:200px;
  height:200px;
  transform:rotate(360deg)
}

.fade-leave-active{
  transition: all 1s linear;
}

.fade-leave-to{
  width:0px;
   height:0px;
}
.box{
  width:200px;
  height:200px;
  background:yellow;
}
</style>
3、transition 生命周期8个
@before-enter="beforeEnter" //对应enter-from
@enter="enter"//对应enter-active
@after-enter="afterEnter"//对应enter-to
@enter-cancelled="enterCancelled"//显示过度打断
@before-leave="beforeLeave"//对应leave-from
@leave="leave"//对应enter-active
@after-leave="afterLeave"//对应leave-to
@leave-cancelled="leaveCancelled"//离开过度打断
当只用 JavaScript 过渡的时候,在 enter 和 leave 钩子中必须使用 done 进行回调
const beforeEnter = (el: Element) => {
    console.log('进入之前from', el);
}
const Enter = (el: Element,done:Function) => {
    console.log('过度曲线');
    setTimeout(()=>{
       done()
    },3000)
}
const AfterEnter = (el: Element) => {
    console.log('to');
}
4、appear
通过这个属性可以设置初始节点过度 就是页面加载完成就开始动画 对应三个状态
appear-active-class=""
appear-from-class=""
appear-to-class=""
appear
21、transition-group 组件
怎么同时渲染整个列表,比如使用 v-for?在这种场景下,我们会使用 <transition-group> 组件。
默认情况下,它不会渲染一个包裹元素,但是你可以通过 tag attribute 指定渲染一个元素。
过渡模式不可用,因为我们不再相互切换特有的元素。
内部元素总是需要提供唯一的 key attribute 值。
CSS 过渡的类将会应用在内部的元素中,而不是这个组/容器本身。
1、基本用法
<template>
  <div>
      <button @click="Push">Push</button>
      <button @click="Pop">Pop</button>
      <div class="wraps">
        <transition-group tag="section"  name="fade">
          <div style="margin: 10px;" :key="item" v-for="item in list">{{ item }}</div>
        </transition-group>
      </div>


  </div>
</template>

<script setup  lang='ts'>
import { reactive } from 'vue'

const list = reactive<number[]>([1, 2, 3, 4, 5, 6, 7, 8, 9])
const Push = () => {
    list.push(list.length+1)
}
const Pop = () => {
    list.pop()
}
</script>
<style scoped lang="less">
.warps{
  display: flex;
  flex-wrap: wrap;
  word-break: break-all;
  border: 1px solid #ccc;
}
.fade-enter-from{
   background:red;
   width:200px;
   height:200px;
   transform:rotate(360deg)
}

.fade-enter-active{
  transition: all 2.5s linear;
}

.fade-enter-to{
   background:yellow;
   width:200px;
   height:200px;
}

.fade-leave-from{
  width:200px;
  height:200px;
  transform:rotate(360deg)
}

.fade-leave-active{
  transition: all 1s linear;
}

.fade-leave-to{
  width:0px;
   height:0px;
}
</style>
2、移动过渡
<template>
  <div>
      <button @click="shuffle">Shuffle</button>
      <transition-group class="wraps" name="mmm" tag="ul">
        <li class="cell" v-for="item in items" :key="item.id">{{ item.number }}</li>
      </transition-group>

      <!-- <ul class="wraps">
        <li class="cell" v-for="item in items" :key="item.id">{{ item.number }}</li>
      </ul> -->

  </div>
</template>

<script setup  lang='ts'>
import _ from 'lodash'
import { ref } from 'vue'
let items = ref(Array.apply(null, { length: 81 } as number[]).map((_, index) => {
  return {
      id: index,
      number: (index % 9) + 1
  }
}))
const shuffle = () => {
  items.value = _.shuffle(items.value)
}
</script>

<style scoped lang="less">
.wraps {
  display: flex;
  flex-wrap: wrap;
  width: calc(25px * 10 + 9px);
  .cell {
      width: 25px;
      height: 25px;
      border: 1px solid #ccc;
      list-style-type: none;
      display: flex;
      justify-content: center;
      align-items: center;
  }
}

.mmm-move {
  transition: transform 0.8s ease;
}
</style>
3、状态过渡
这个功能的演示感觉不是vue3的功能,更像是gsap的功能,发生变化之后,赋值的过程
<template>
  <div>
      <input step="20" v-model="num.current" type="number" />
      <div>{{ num.tweenedNumber.toFixed(0) }}</div>
  </div>
</template>

<script setup lang='ts'>
import { reactive, watch } from 'vue'
import gsap from 'gsap'
const num = reactive({
  tweenedNumber: 0,
  current:0
})

watch(()=>num.current, (newVal) => {
  gsap.to(num, {
      duration: 1,
      tweenedNumber: newVal
  })
})

</script>

<style>
</style>
22、依赖注入Provide / Inject
通常,当我们需要从父组件向子组件传递数据时,我们使用 props。想象一下这样的结构:有一些深度嵌套的组件,而深层的子组件只需要父组件的部分内容。在这种情况下,如果仍然将 prop 沿着组件链逐级传递下去,可能会很麻烦。
provide 可以在祖先组件中指定我们想要提供给后代组件的数据或方法,而在任何后代组件中,我们都可以使用 inject 来接收 provide 提供的数据或方法。
<script setup lang="ts">
import A from './components/A.vue'
import { provide,ref } from "vue";
let flag = ref<number>(1)
provide('msg', flag)

const add = () => {
  flag.value++
}
</script>

<template>
  <div>
    这是爷爷组件
    <button @click="add">我是App</button>
    <div>
      引用父组件
      <A />
    </div>
  </div>

</template>

<style scoped ></style>
<template>
    <div style="background-color:red">
        这是父组件
        <div>
            引用子组件
            <B />
        </div>
    </div>
</template>
<script setup lang="ts">
import B from './B.vue'
import { ref } from "vue";

</script>
<template>
<div style="background-color:yellow">
这是孙子组件
<div>
接收参数:{{msg}}
</div>
</div>
</template>
<script setup lang="ts">
import { inject } from "vue";
const msg = inject('msg')
</script>23、兄弟组件传参和Bus
1.借助父组件传参
例如父组件为App 子组件为A 和 B他两个是同级的
<template>
    <div>
        <A @on-click="getFalg"></A>
        <B :flag="Flag"></B>
    </div>
</template>

<script setup lang='ts'>
import A from './components/A.vue'
import B from './components/B.vue'
import { ref } from 'vue'
let Flag = ref<boolean>(false)
const getFalg = (flag: boolean) => {
   Flag.value = flag;
}
</script>

<style>
</style>
2、Event Bus
我们在Vue2 可以使用$emit 传递 $on监听 emit传递过来的事件
这个原理其实是运用了JS设计模式之发布订阅模式
小满大神写了一个简易版,核心思想是这个对象有on跟emit2个方法,on监听的时候会将函数保存在map中,map的key是事件名,值是事件数组,emit方法会重新将事件数组全部执行一遍
type BusClass<T> = {
    emit: (name: T) => void
    on: (name: T, callback: Function) => void
}
type BusParams = string | number | symbol
type List = {
    [key: BusParams]: Array<Function>
}
class Bus<T extends BusParams> implements BusClass<T> {
    list: List
    constructor() {
        this.list = {}
    }
    emit(name: T, ...args: Array<any>) {
        let eventName: Array<Function> = this.list[name]
        eventName.forEach(ev => {
            ev.apply(this, args)
        })
    }
    on(name: T, callback: Function) {
        let fn: Array<Function> = this.list[name] || [];
        fn.push(callback)
        this.list[name] = fn
    }
}

export default new Bus<number>()
然后挂载到Vue config 全局就可以使用啦
3、mitt的使用
在vue3中$on,$off 和 $once 实例方法已被移除,组件实例不再实现事件触发接口,因此大家熟悉的EventBus便无法使用了。然而我们习惯了使用EventBus,对于这种情况我们可以使用Mitt库
1、安装
npm install mitt -S
2、main.ts 初始化
全局总线,vue 入口文件 main.js 中挂载全局属性
import { createApp } from 'vue'
import App from './App.vue'
import mitt from 'mitt'

const Mit = mitt()

//TypeScript注册
// 由于必须要拓展ComponentCustomProperties类型才能获得类型提示
declare module "vue" {
    export interface ComponentCustomProperties {
        $Bus: typeof Mit
    }
}

const app = createApp(App)

//Vue3挂载全局API
app.config.globalProperties.$Bus = Mit

app.mount('#app')
3、使用方法通过emit派发, on 方法添加事件,off 方法移除,clear 清空所有
<template>
    <div>
        <h1>我是A</h1>
        <button @click="emit1">emit1</button>
        <button @click="emit2">emit2</button>
    </div>
</template>

<script setup lang='ts'>
import { getCurrentInstance } from 'vue'
const instance = getCurrentInstance();
const emit1 = () => {
    instance?.proxy?.$Bus.emit('on-num', 100)
}
const emit2 = () => {
    instance?.proxy?.$Bus.emit('*****', 500)
}
</script>

<style>
</style>
<template>
<div>
<h1>我是B</h1>
</div>
</template>
<script setup lang='ts'>
import { getCurrentInstance } from 'vue'
const instance = getCurrentInstance()
instance?.proxy?.$Bus.on('on-num', (num) => {
console.log(num,'===========>B')
})
</script>
<style>
</style>监听所有事件( on("*") )
instance?.proxy?.$Bus.on('*',(type,num)=>{
    console.log(type,num,'===========>B')
})
移除监听事件(off)
const Fn = (num: any) => {
    console.log(num, '===========>B')
}
instance?.proxy?.$Bus.on('on-num',Fn)//listen
instance?.proxy?.$Bus.off('on-num',Fn)//unListen
清空所有监听(clear)
instance?.proxy?.$Bus.all.clear() 24、tsx语法
tsx是jsx的typeScript版,我们之前呢是使用Template去写我们模板。现在可以扩展另一种风格TSX风格,vue2 的时候就已经支持jsx写法,只不过不是很友好,随着vue3对typescript的支持度,tsx写法越来越被接受
1、安装及引用插件
npm install @vitejs/plugin-vue-jsx -D
在vite.config.ts 配置
import { defineConfig } from 'vite'
import vue from '@vitejs/plugin-vue'
import vueJsx from '@vitejs/plugin-vue-jsx'

// https://vitejs.dev/config/
export default defineConfig({
  plugins: [vue(),vueJsx()],
  css: {
    // 预处理器配置项
    preprocessorOptions: {
      less: {
        math: "always",
      },
    },
  },
})
修改tsconfig.json 配置文件
{
  "compilerOptions": {
    "target": "ES2020",
    "useDefineForClassFields": true,
    "module": "ESNext",
    "lib": ["ES2020", "DOM", "DOM.Iterable"],
    "skipLibCheck": true,

    /* Bundler mode */
    "moduleResolution": "bundler",
    "allowImportingTsExtensions": true,
    "resolveJsonModule": true,
    "isolatedModules": true,
    "noEmit": true,
    "jsx": "preserve",

    /* Linting */
    "strict": true,
    "jsx": "preserve", //新增
    "jsxFactory": "h",//新增
    "jsxFragmentFactory": "Fragment",//新增
    "noUnusedLocals": true,
    "noUnusedParameters": true,
    "noFallthroughCasesInSwitch": true
  },
  "include": ["src/**/*.ts", "src/**/*.d.ts", "src/**/*.tsx", "src/**/*.vue"],
  "references": [{ "path": "./tsconfig.node.json" }]
}
2、编写tsx文件
export default function(){
    return (<div>测试</div>)
}
3、引用tsx文件
引用的时候不需要带上.tsx
<template>
  <div>
    <A></A>
 </div>
</template>
<script setup lang='ts'>
import A from './tsx/A'
</script>
<style></style>
4、tsx语法
1、支持只返回渲染函数
export default function(){
    return (<div>测试</div>)
}
2、optionsApi
这里语法跟vue2有点类似,但取值需要用{},template中需要用{{}}
//使用vue3的内置对象
import { defineComponent } from "vue";

export default defineComponent({
    data(){
        return {name:'aa'}
    },
    render(){
        return(<div>{this.name}</div>)
    }
})
3、setup方式
这种方式要返回一个渲染函数,上面那种方式显示定义渲染函数
import { defineComponent,ref } from "vue";

export default defineComponent({
    setup(){
        const age = ref(15)
        return ()=>(<div>{age.value}</div>)
    }
})
4、支持vue的语法
1、v-show支持
import { ref } from 'vue'

let flag = ref(false)

const renderDom = () => {
    return (
        <>
           <div v-show={flag.value}>景天</div>
           <div v-show={!flag.value}>雪见</div>
        </>
    )
}

export default renderDom
2、v-if不支持,需要用其他方式实现
import { ref } from 'vue'

let flag = ref(false)

const renderDom = () => {
    return (
        <>
            {
                flag.value ? <div>景天</div> : <div>雪见</div>
            }
        </>
    )
}

export default renderDom
3、v-for不支持,需要用map进行循环渲染
import { ref } from 'vue'

let arr = [1,2,3,4,5]

const renderDom = () => {
    return (
        <>
            {
              arr.map(v=>{
                  return <div>${v}</div>
              })
            }
        </>
    )
}

export default renderDom
4、v-bind支持,但语法有点像值引用
这个地方有点疑问,因为演示的代码为
import { ref } from 'vue'

let arr = [1, 2, 3, 4, 5]

const renderDom = () => {
    return (
        <>
            <div data-arr={arr}>1</div>
        </>
    )
}

export default renderDom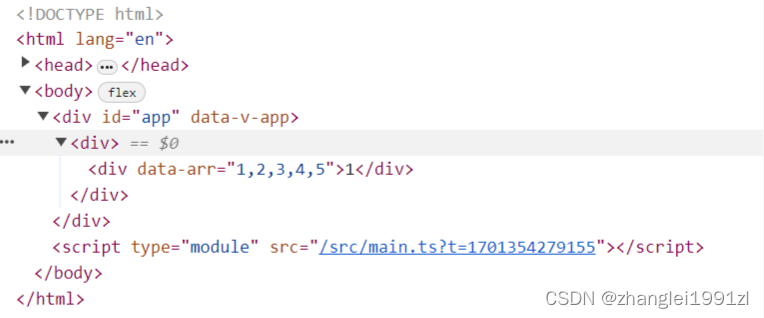
但是这个硬要说跟v-bind有关系,这个肯定有问题,只是说可以用这种语法实现v-bind的功能,单纯的赋值
5、v-on 绑定事件,所有的事件都按照react风格来
所有事件有on开头,所有事件名称首字母大写
const renderDom = () => {
    return (
        <>
            <button onClick={clickTap}>点击</button>
        </>
    )
}

const clickTap = () => {
    console.log('click');
}

export default renderDom
6、Props 接受值
渲染函数的第一个参数就是传入的props
import { ref } from 'vue'

type Props = {
    title:string
}

const renderDom = (props:Props) => {
    return (
        <>
            <div>{props.title}</div>
            <button onClick={clickTap}>点击</button>
        </>
    )
}

const clickTap = () => {
    console.log('click');
}

export default renderDom
引用的文件
<template>
  <div>
    <A :title="title"></A>
 </div>
</template>
<script setup lang='ts'>
import A from './tsx/A'
import { ref } from 'vue';
const title = ref('测试title')
</script>
<style></style> 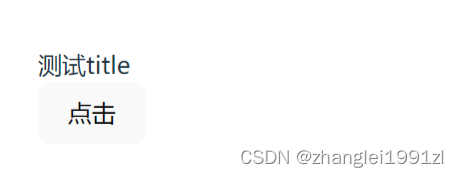
6、Emit派发
渲染函数的第二个参数就是emit,通过它可以实现事件的派发
type Props = {
    title: string
}
const fn = ()=>{
    console.log('触发了')
}
const renderDom = (props: Props,content:any) => {
    return (
        <>
            <div>{props.title}</div>
            <button onClick={()=>clickTap(content)} >点击</button>
        </>
    )
}

const clickTap = (ctx:any) => {

    ctx.emit('on-click',1)
}

export default renderDom
<template>
<div>
<A :title="title" @on-click="click"></A>
</div>
</template>
<script setup lang='ts'>
import A from './tsx/A'
import { ref } from 'vue';
const title = ref('测试title')
const click = (data:any)=>{
console.log(data)
}
</script>
<style></style>7、插槽的使用
const A = (props, { slots }) => (
    <>
        <h1>{slots.default ? slots.default() : 'foo'}</h1>
        <h2>{slots.bar?.()}</h2>
    </>
);

const App = {
    setup() {
        const slots = {
            bar: () => <span>B</span>,
        };
        return () => (
            <A v-slots={slots}>
                <div>A</div>
            </A>
        );
    },
};

// or

const App = {
  setup() {
    const slots = {
      default: () => <div>A</div>,
      bar: () => <span>B</span>,
    };
    return () => <A v-slots={slots} />;
  },
};

// or you can use object slots when `enableObjectSlots` is not false.
const App = {
  setup() {
    return () => (
      <>
        <A>
          {{
            default: () => <div>A</div>,
            bar: () => <span>B</span>,
          }}
        </A>
        <B>{() => "foo"}</B>
      </>
    );
  },
};


export default App
25、自动引入插件(unplugin-auto-import)的使用
vue的内置组件使用的时候都需要import,然后才能使用,这里介绍一款插件,免去繁琐的引用环节
安装及配置
npm install -D unplugin-auto-import
然后再配置文件中引入这个插件
import { defineConfig } from 'vite'
import vue from '@vitejs/plugin-vue'
import vueJsx from '@vitejs/plugin-vue-jsx'
import AutoImport from 'unplugin-auto-import/vite'


// https://vitejs.dev/config/
export default defineConfig({
  plugins: [vue(),vueJsx(),AutoImport({
    imports:['vue'],
    dts:"src/auto-import.d.ts"//生命文件生成地址
  })],
  css: {
    // 预处理器配置项
    preprocessorOptions: {
      less: {
        math: "always",
      },
    },
  },
})
重新运行程序之后,就会生成这个插件的生命文件
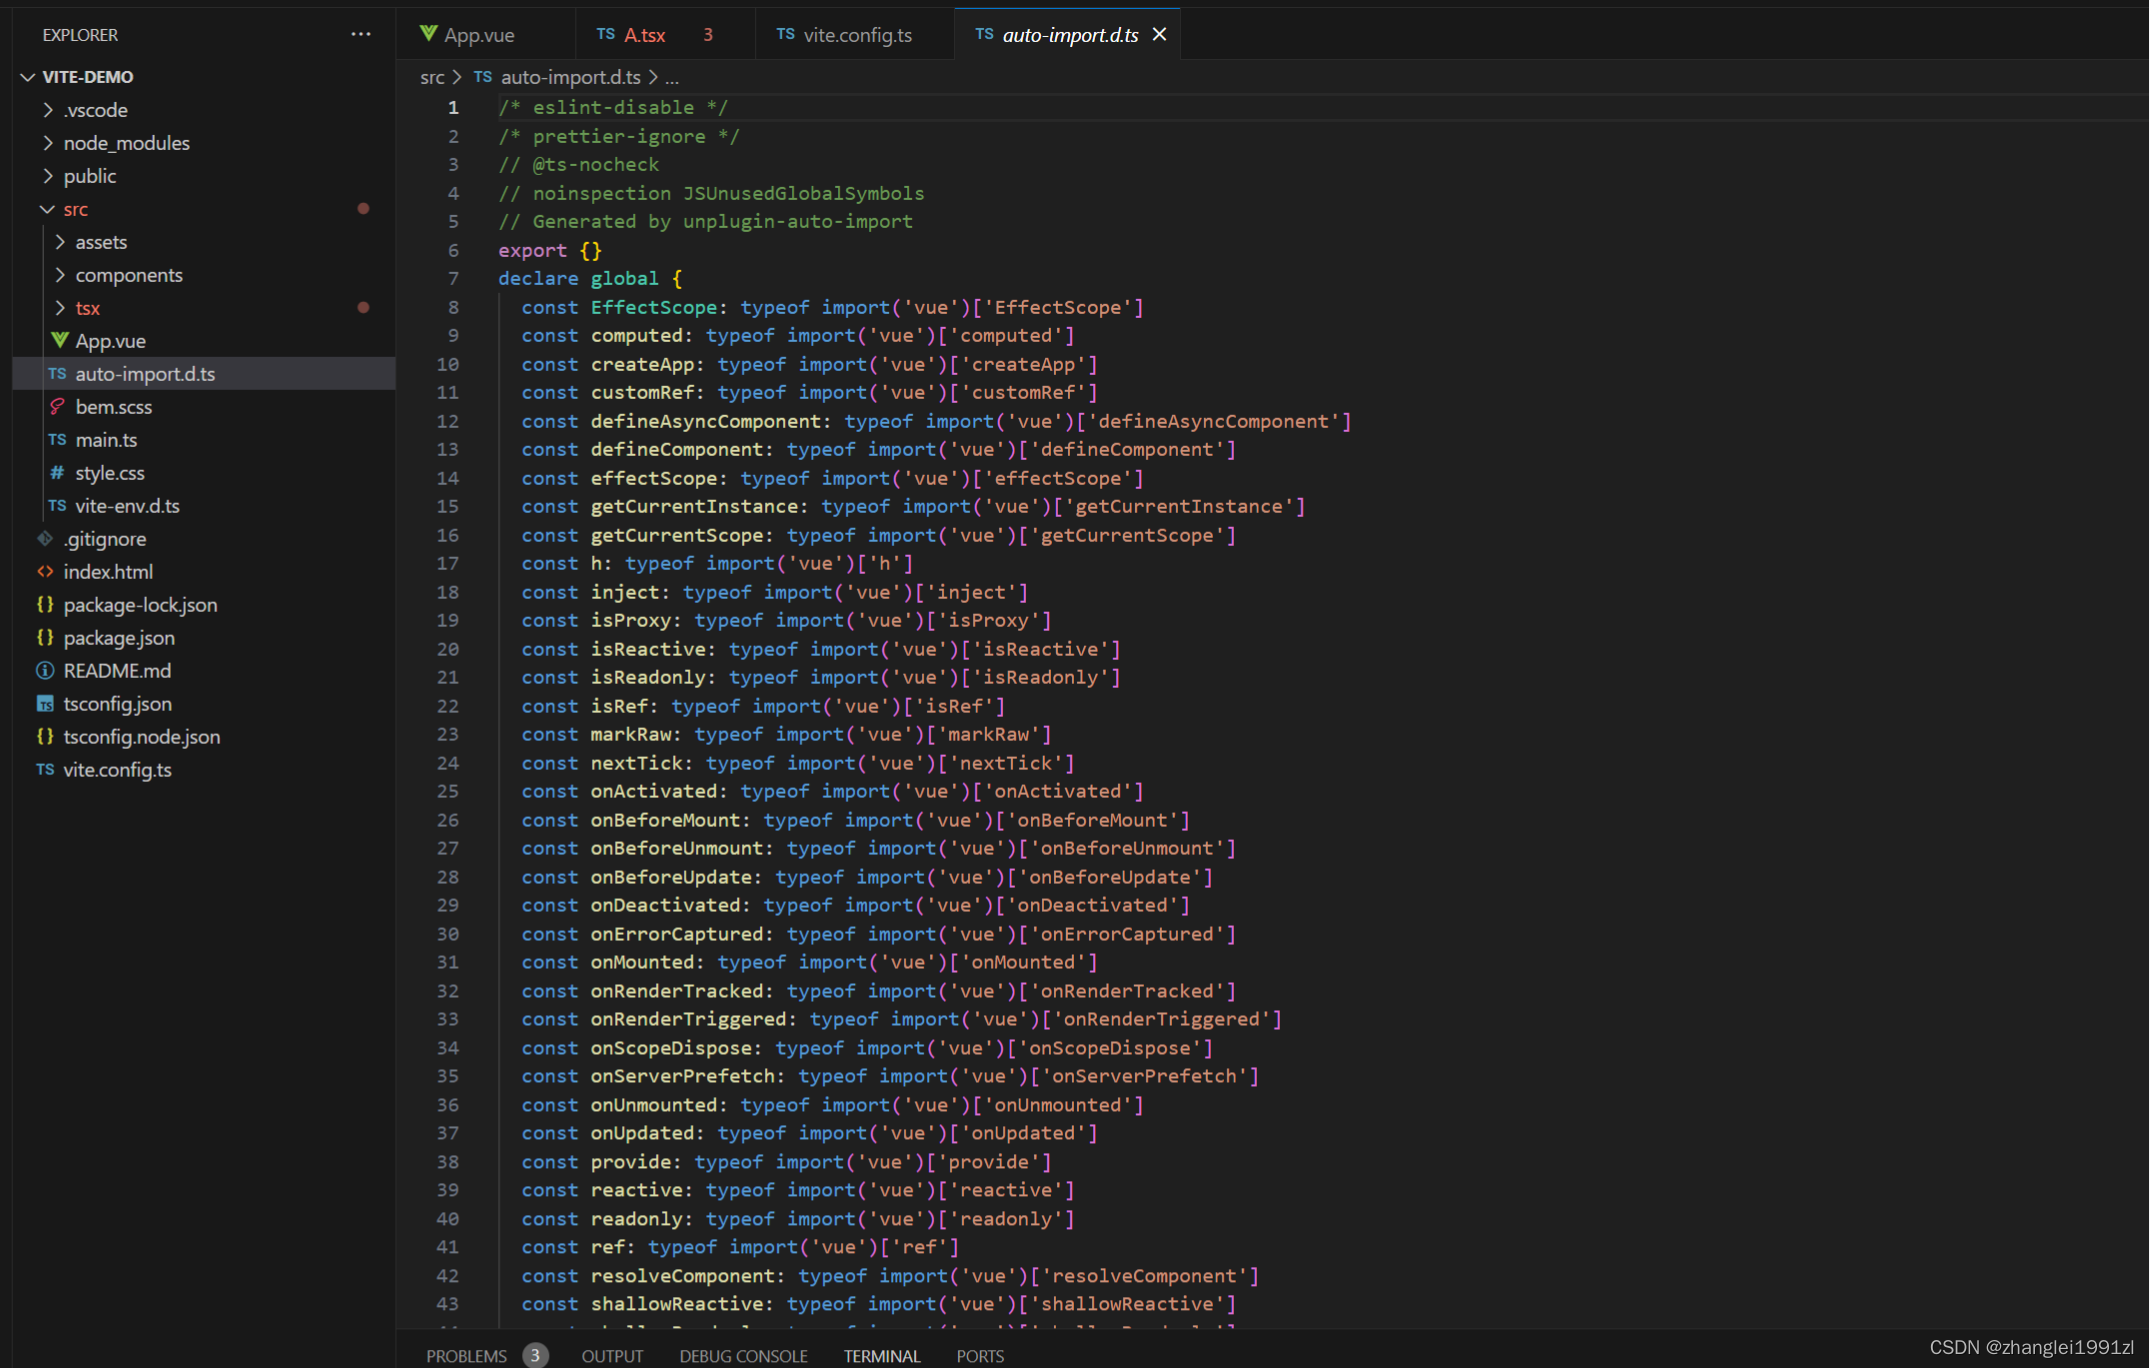
代码里就可以直接用
<template>
  <div>
    {{ title }}
 </div>
</template>
<script setup lang='ts'>
const title = ref('测试title')

</script>
<style></style>
26、v-model的使用
vue2中如果要在自定义组件中进行值的双向绑定,可以参考下面这个文章
vue3中语法有一点变化,子组件用props接收,接收的属性名为modelValue,更新时间为固定格式update:modelValue
<template>
    <div v-if='propData.modelValue ' class="dialog">
        <div class="dialog-header">
            <div>标题</div><div @click="close">x</div>
        </div>
        <div class="dialog-content">
           内容
        </div>

    </div>
</template>

<script setup lang='ts'>

type Props = {
  modelValue:boolean
}

const propData = defineProps<Props>()

const emit = defineEmits(['update:modelValue'])

const close = () => {
    emit('update:modelValue',false)
}

</script>

<style lang='less'>
.dialog{
   width: 300px;
   height: 300px;
   border: 1px solid #ccc;
   position: fixed;
   left:50%;
   top:50%;
   transform: translate(-50%,-50%);
   &-header{
       border-bottom: 1px solid #ccc;
       display: flex;
       justify-content: space-between;
       padding: 10px;
   }
   &-content{
       padding: 10px;
   }
}
</style>

<!--父界面-->
<template>
  <button @click="show = !show">开关{{show}}</button>
  <Dialog v-model="show"></Dialog>
</template>

<script setup lang='ts'>
import Dialog from "./components/A.vue";
import {ref} from 'vue'
const show = ref(false)
</script>

<style>
</style>
可以绑定多个v-model
<template>
<div v-if='modelValue ' class="dialog">
<div class="dialog-header">
<div>标题---<input :value="title" @change="changeData" /></div><div @click="close">x</div>
</div>
<div class="dialog-content">
内容
</div>
</div>
</template>
<script setup lang='ts'>
import {defineProps,defineEmits,onMounted,ref} from 'vue'
type Props = {
modelValue:boolean,
title:string
}
const propData = defineProps<Props>()
const emit = defineEmits(['update:modelValue','update:title'])
const close = () => {
emit('update:modelValue',false)
emit('update:title',titleValue)
}
const titleValue = ref('')
onMounted(()=>{
titleValue.value = propData.title
})
const changeData = (e:any) => {
titleValue.value = e.target.value
}
</script>
<style lang='less'>
.dialog{
width: 300px;
height: 300px;
border: 1px solid #ccc;
position: fixed;
left:50%;
top:50%;
transform: translate(-50%,-50%);
&-header{
border-bottom: 1px solid #ccc;
display: flex;
justify-content: space-between;
padding: 10px;
}
&-content{
padding: 10px;
}
}
</style>
<!--父界面-->
<template>
<button @click="show = !show">开关{{show}} ----- {{title}}</button>
<Dialog v-model:title='title' v-model="show"></Dialog>
</template>
<script setup lang='ts'>
import Dialog from "./components/A.vue";
import {ref} from 'vue'
const show = ref(false)
const title = ref('我是标题')
</script>
<style>
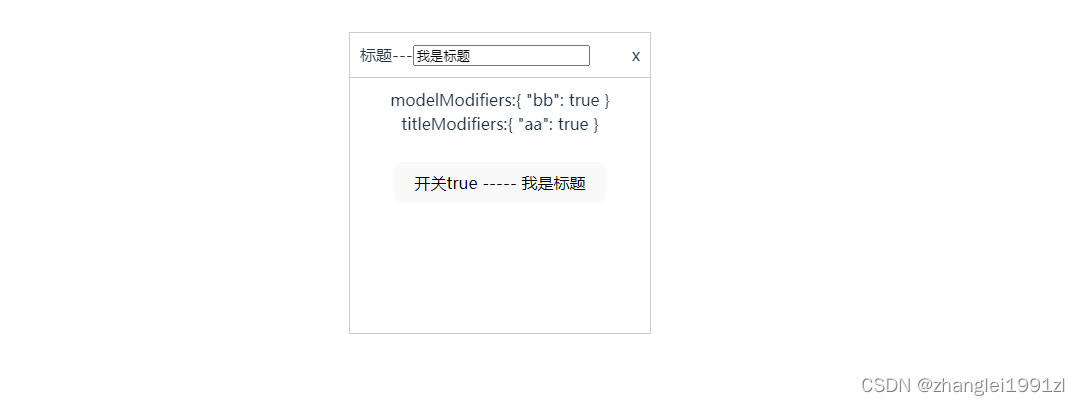
</style>自定义修饰符
<template>
    <div v-if='modelValue ' class="dialog">
        <div class="dialog-header">
            <div>标题---<input :value="title" @change="changeData" /></div><div @click="close">x</div>
        </div>
        <div class="dialog-content">
           modelModifiers:{{modelModifiers}}<br/>
           titleModifiers:{{titleModifiers}}
        </div>

    </div>
  </template>

  <script setup lang='ts'>
  import {defineProps,defineEmits,onMounted,ref} from 'vue'

  type Props = {
    modelValue:boolean,
    title:string,
    modelModifiers?: {
        default: () => {}
    },
    titleModifiers?: {
        default: () => {}
    }
  }

  const propData = defineProps<Props>()

  const emit = defineEmits(['update:modelValue','update:title'])

  const close = () => {
    emit('update:modelValue',false)
    emit('update:title',titleValue)
  }

  const titleValue = ref('')
  onMounted(()=>{
    titleValue.value = propData.title
  })

  const changeData = (e:any) => {
    titleValue.value = e.target.value
  }

  </script>

  <style lang='less'>
  .dialog{
   width: 300px;
   height: 300px;
   border: 1px solid #ccc;
   position: fixed;
   left:50%;
   top:50%;
   transform: translate(-50%,-50%);
   &-header{
       border-bottom: 1px solid #ccc;
       display: flex;
       justify-content: space-between;
       padding: 10px;
   }
   &-content{
       padding: 10px;
   }
  }
  </style>

<!--父组件-->
<!--父界面-->
<template>
<button @click="show = !show">开关{{show}} ----- {{title}}</button>
<Dialog v-model:title.aa='title' v-model.bb="show"></Dialog>
</template>

<script setup lang='ts'>
import Dialog from "./components/A.vue";
import {ref} from 'vue'
const show = ref(false)
const title = ref('我是标题')
</script>

<style>
</style>
效果:
27、指令
1、常规使用
Vue中有v-if,v-for,v-bind,v-show,v-model 等等一系列方便快捷的指令,同时也提供了自定义指令
自定义指令的生命周期函数为
created 元素初始化的时候
beforeMount 指令绑定到元素后调用 只调用一次
mounted 元素插入父级dom调用
beforeUpdate 元素被更新之前调用
update 这个周期方法被移除 改用updated
beforeUnmount 在元素被移除前调用
unmounted 指令被移除后调用 只调用一次
<template>
  <button @click="show = !show">切换</button>
  <A v-auth="'123'" :title="123"></A>
  <A v-auth="'456'" :title="456"></A>
  <A v-auth="'789'" :title="789"></A>
</template>

<script setup lang='ts'>
import A from "./components/A.vue";
import {ref,Directive } from 'vue'
const show = ref(false)
const vAuth:Directive={
  created(){
   console.log('created')
  },
  beforeMount(){
    console.log('beforeMount')
  },
  mounted(el:any,binding:any,vnode:any,prevVnode:any){
    console.log('mounted')
    console.log(el)
    console.log(binding)
    console.log(vnode)
    console.log(prevVnode)
    if (binding.value == '789') {
      el.style.display = 'none'
    }
  },
  beforeUpdate(){
    console.log('beforeUpdate')
  },
  updated(){
    console.log('updated')
  },
  beforeUnmount(){
    console.log('beforeUnmount')
  },
  unmounted(){
    console.log('unmounted')
  }
}
</script>

<style>
</style>
参数详解
第一个 el 当前绑定的DOM 元素
第二个 binding对象,内部个属性为
instance:使用指令的组件实例。
value:传递给指令的值。例如,在 v-my-directive="1 + 1" 中,该值为 2。
oldValue:先前的值,仅在 beforeUpdate 和 updated 中可用。无论值是否有更改都可用。
arg:传递给指令的参数(如果有的话)。例如在 v-my-directive:foo 中,arg 为 "foo"。
modifiers:包含修饰符(如果有的话) 的对象。例如在 v-my-directive.foo.bar 中,修饰符对象为 {foo: true,bar: true}。
dir:一个对象,在注册指令时作为参数传递。
第三个 当前元素的虚拟DOM 也就是Vnode第四个 prevNode 上一个虚拟节点,仅在 beforeUpdate 和 updated 钩子中可用
2、函数简写
你可能想在 mounted 和 updated 时触发相同行为,而不关心其他的钩子函数。那么你可以通过将这个函数模式实现
<template>
  <A v-auth="'123'" :title="'123'" ></A>
  <A v-auth="'456'" :title="'456'"></A>
  <A v-auth="'789'" :title="'789'"></A>
</template>

<script setup lang='ts'>
import A from "./components/A.vue";
import {Directive } from 'vue'
const vAuth:Directive=(el:any,binding:any)=>{
  if (binding.value == '456') {
      el.style.display = 'none'
  }
}
</script>

<style>
</style>
拖拽案例
<template>
  <div v-move class="box">
    <div class="header"></div>
    <div>
      内容
    </div>
  </div>
</template>

<script setup lang='ts'>
import { Directive } from "vue";
const vMove: Directive = {
  mounted(el: HTMLElement) {
    let moveEl = el.firstElementChild as HTMLElement;
    const mouseDown = (e: MouseEvent) => {
      //鼠标点击物体那一刻相对于物体左侧边框的距离=点击时的位置相对于浏览器最左边的距离-物体左边框相对于浏览器最左边的距离
      console.log(e.clientX, e.clientY, "-----起始", el.offsetLeft);
      let X = e.clientX - el.offsetLeft;
      let Y = e.clientY - el.offsetTop;
      const move = (e: MouseEvent) => {
        el.style.left = e.clientX - X + "px";
        el.style.top = e.clientY - Y + "px";
        console.log(e.clientX, e.clientY, "---改变");
      };
      document.addEventListener("mousemove", move);
      document.addEventListener("mouseup", () => {
        document.removeEventListener("mousemove", move);
      });
    };
    moveEl.addEventListener("mousedown", mouseDown);
  },
};
</script>

<style lang='less'>
.box {
  position: fixed;
  left: 50%;
  top: 50%;
  transform: translate(-50%, -50%);
  width: 200px;
  height: 200px;
  border: 1px solid #ccc;
  .header {
    height: 20px;
    background: black;
    cursor: move;
  }
}
</style>
图片懒加载案例
<template>
    <div>
        <div v-for="item in arr">
            <img height="500" :data-index="item" v-lazy="item" width="360" alt="">
        </div>
    </div>
</template>

<script setup lang='ts'>
import type { Directive } from 'vue'
const images: Record<string, { default: string }> = import.meta.glob('./assets/images/*.*',{eager:true})
let arr = Object.values(images).map(v => v.default)

let vLazy: Directive<HTMLImageElement, string> = async (el, binding) => {
    let url = await import('../assets/vue.svg')
    el.src = url.default;
    let observer = new IntersectionObserver((entries) => {
        console.log(entries[0], el)
        if (entries[0].intersectionRatio > 0 && entries[0].isIntersecting) {
            setTimeout(() => {
                el.src = binding.value;
                observer.unobserve(el)
            }, 2000)
        }
    })
    observer.observe(el)
}

</script>

<style scoped lang='less'></style>
28、自定义hook
- Vue3 的 hook函数 相当于 vue2 的 mixin, 不同在与 hooks 是函数
1、简单使用
定义一个ts文件
import { onMounted } from 'vue'


type Options = {
    el: string
}

type Return = {
    Baseurl: string | null
}
export default function (option: Options): Promise<Return> {

    return new Promise((resolve) => {
        onMounted(() => {
            const file: HTMLImageElement = document.querySelector(option.el) as HTMLImageElement;
            file.onload = ():void => {
                resolve({
                    Baseurl: toBase64(file)
                })
            }

        })


        const toBase64 = (el: HTMLImageElement): string => {
            const canvas: HTMLCanvasElement = document.createElement('canvas')
            const ctx = canvas.getContext('2d') as CanvasRenderingContext2D
            canvas.width = el.width
            canvas.height = el.height
            ctx.drawImage(el, 0, 0, canvas.width,canvas.height)
            console.log(el.width);

            return canvas.toDataURL('image/png')

        }
    })


}
引用这个ts文件
<template>
  <img src="/assets/images/1-200R1141258.jpg" id="image123">

</template>

<script setup lang='ts'>
import Base642 from './hook/base642'
Base642({el:"#image123"}).then(res=>{
  console.log(res.Baseurl)
})
</script>

<style>
</style>
这里需要注意的是,因为案例中自定义的hook方法中使用的是onMouted函数,这个函数是同步的,所以不能在异步的方法中调用这个hook函数
如果想在异步方法中调用,可以稍微修改一下
import { onMounted } from 'vue'


type Options = {
    el: string
}

type Return = {
    Baseurl: string | null
}
export default function (option: Options): Promise<Return> {

    return new Promise((resolve) => {
        // onMounted(() => {
        //     const file: HTMLImageElement = document.querySelector(option.el) as HTMLImageElement;
        //     file.onload = ():void => {
        //         resolve({
        //             Baseurl: toBase64(file)
        //         })
        //     }

        // })

        nextTick(() => {
            const file: HTMLImageElement = document.querySelector(option.el) as HTMLImageElement;
            file.onload = ():void => {
                resolve({
                    Baseurl: toBase64(file)
                })
            }

        })


        const toBase64 = (el: HTMLImageElement): string => {
            const canvas: HTMLCanvasElement = document.createElement('canvas')
            const ctx = canvas.getContext('2d') as CanvasRenderingContext2D
            canvas.width = el.width
            canvas.height = el.height
            ctx.drawImage(el, 0, 0, canvas.width,canvas.height)
            console.log(el.width);

            return canvas.toDataURL('image/png')

        }
    })


}


<!--组件中引用-->
<template>
    <div>
        <div v-for="(item,index) in arr">
            <img height="500" :data-index="item" v-lazy="item" width="360" alt="" :id="'image'+index">
        </div>
    </div>
</template>

<script setup lang='ts'>
import type { Directive } from 'vue'
import Base642 from '../hook/base642'
const images: Record<string, { default: string }> = import.meta.glob('../../public/assets/images/*.*',{eager:true})
let arr = Object.values(images).map(v => v.default)

let vLazy: Directive<HTMLImageElement, string> = async (el:HTMLImageElement, binding) => {
    let url = await import('../assets/vue.svg')
    el.src = url.default;
    let observer = new IntersectionObserver((entries) => {
        console.log(entries[0], el)
        if (entries[0].intersectionRatio > 0 && entries[0].isIntersecting) {
            setTimeout(() => {
                el.src = binding.value;

                Base642({'el':"#"+el.id}).then(res=>{
                    console.log(res.Baseurl)
                })
                observer.unobserve(el)
            }, 2000)
        }
    })
    observer.observe(el)
}

</script>

<style scoped lang='less'></style>

<!--父组件中引用-->
<template>
  <!-- <img src="/assets/images/1-200R1141258.jpg" id="image123"> -->
  <A></A>
</template>

<script setup lang='ts'>
// import Base642 from './hook/base642'
// Base642({el:"#image123"}).then(res=>{
//   console.log(res.Baseurl)
// })

import A from './components/A.vue'
</script>

<style>
</style>
2、综合案例以及npm包上传
1、另起一个工程(文件名为了避免跟小满zs 大神视频中的工程一致,改了一下),
通过指令npm init 生成package.json
通过指令tsc --init生成 tsconfig.json
手动创建index.d.ts以及vite.config.ts
安装依赖vite以及vue
npm i vue -D
npm i vite -D
安装完成之后文件夹目录结构

2、编写代码index.ts
import {App} from 'vue'

// interSectionObserver 侦听元素是否在视口内
// MutationObserver 侦听自己的变化,还有属性的变化以及增啊涵盖查
// ResizeObserver 侦听元素宽高的变化
function useResize(el:HTMLElement,callback:Function){
    //因为可以监听多次,所以回调函数的参数是数组
    let resize = new ResizeObserver((entries)=>{
        callback(entries[0].contentRect)
    })
    resize.observe(el)
}

// vue插件的使用语法为
// let app = createApp()
// app.use(XX)  use函数的底层就是调用install方法
const install = (app:App)=>{
    app.directive('resize',{
        mouted(el:any,binding:any){
            useResize(el,binding)
        }
    })
}

useResize.install = install;

export default useResize;
3、修改vite.config.ts
import {defineConfig} from 'vite'

export default defineConfig({
    build:{
        lib:{
            entry:'src/index.ts',
            name:'useResize'
        },
        rollupOptions:{
            external:['vue'],
            output:{
                globals:{
                    useResize:"useResize"
                }
            }
        }
    }
})
4、修改 package.json
增加build指令
{
  "name": "v-resize-zl",
  "version": "1.0.0",
  "description": "",
  "main": "dist/v-resize-zl.umd",
  "module": "dist/v-resize-zl.mjs",
  "files": [
    "dist",
    "index.d.ts"
  ],
  "scripts": {
    "test": "echo \"Error: no test specified\" && exit 1",
    "build": "vite build"
  },
  "author": "",
  "license": "ISC",
  "devDependencies": {
    "vite": "^5.0.5",
    "vue": "^3.3.10"
  }
}
5、执行打包操作
npm run build打包完成之后会多生成2个文件
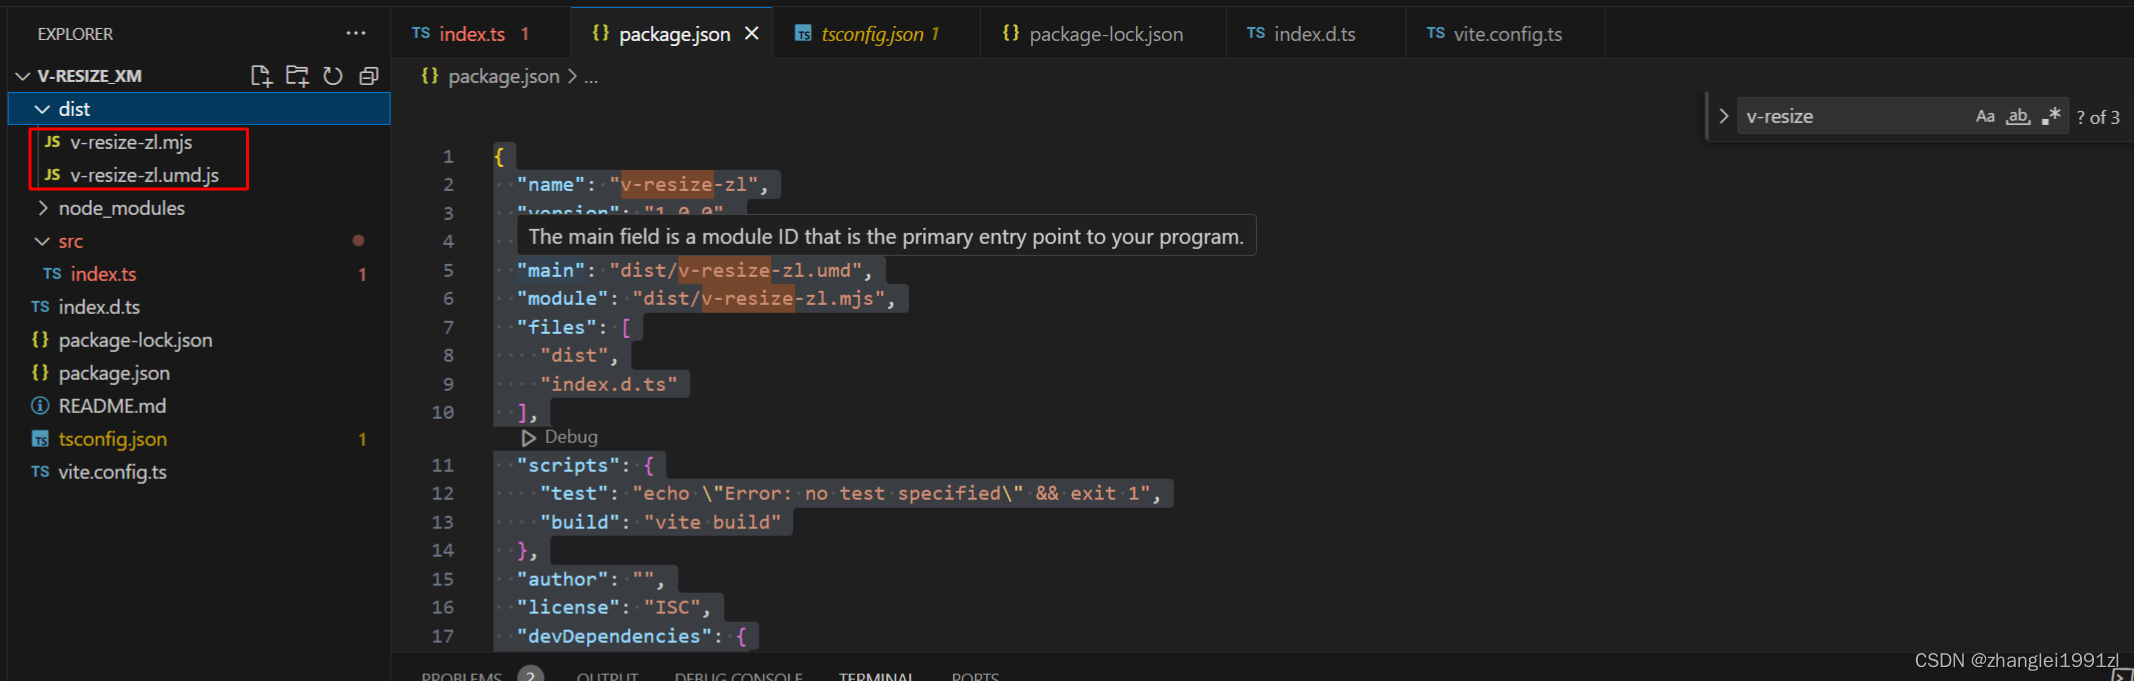
6、修改package.json准备上传
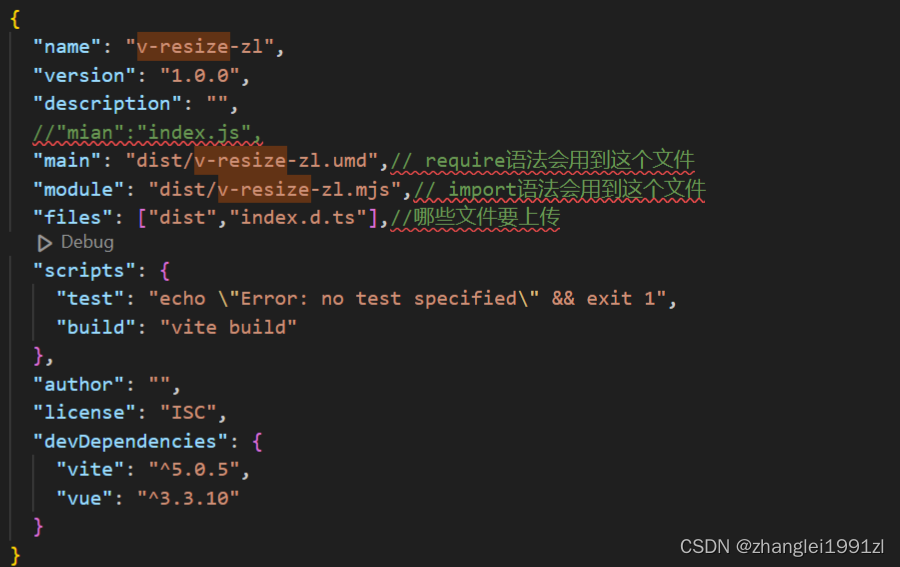
7、执行npm login登录到官网
8、执行npm publish
上传成功之后可以在npm官网查到自己的npm包
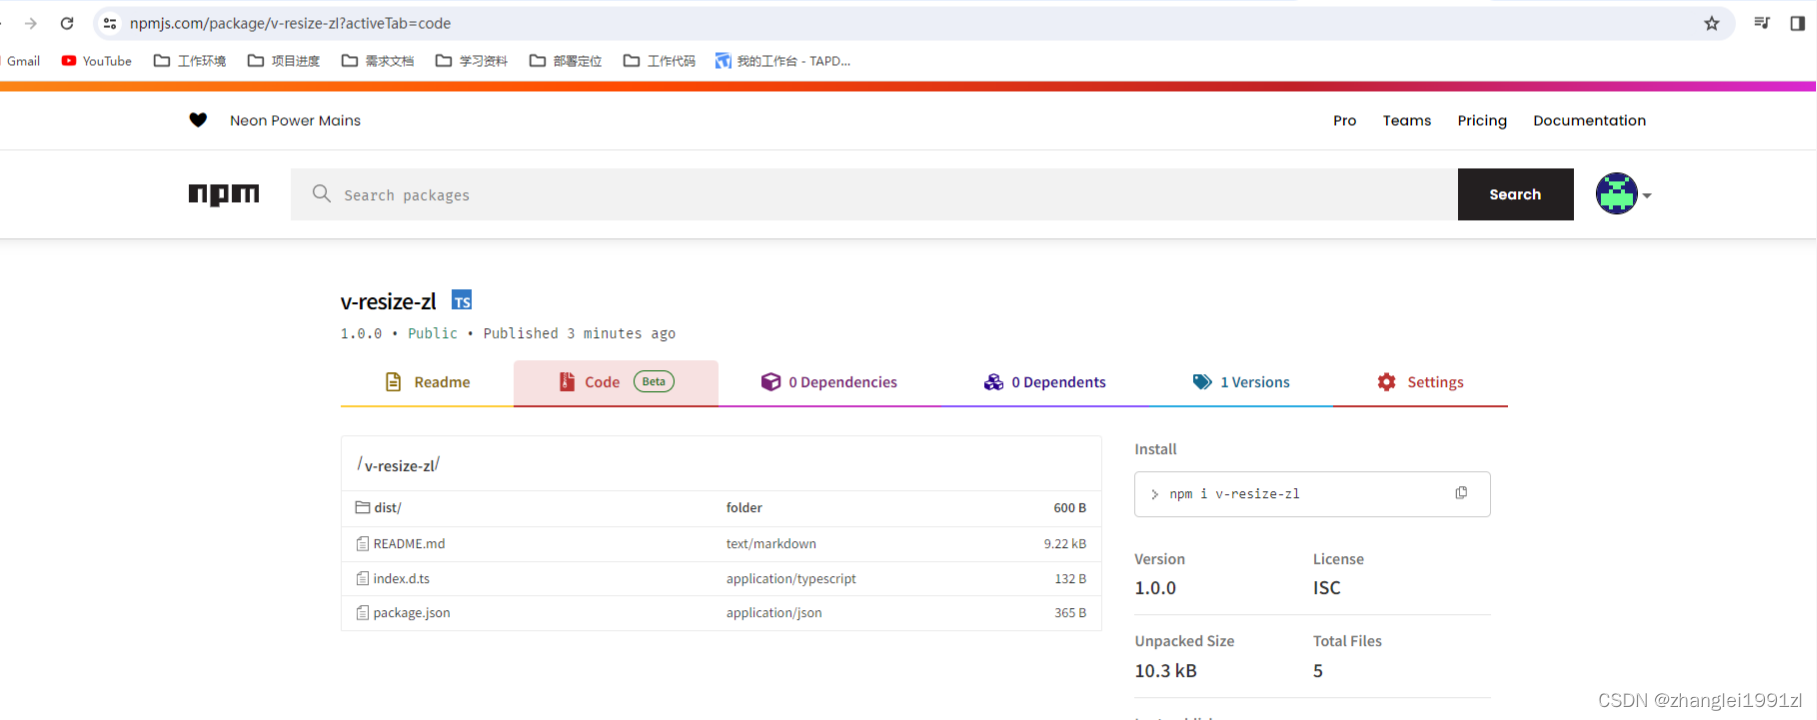
8、其他项目中引用
npm i v-resize-zl<template>
<div id="resize">
123
</div>
</template>
<script setup lang='ts'>
import useResize from 'v-resize-zl'
onMounted(()=>{
useResize(document.querySelector("#resize") as HTMLElement,(e:any)=>{
console.log(e)
})
})
</script>
<style>
#resize{
border: 1px solid #ccc;
resize: both;
overflow: hidden;
}
</style>29、定义全局变量
1、在app对象中的globalProperties对象进行挂载属性
import { createApp } from 'vue'
import './style.css'
import App from './App.vue'
import mitt from 'mitt'

const emitter = mitt()


const app = createApp(App)
app.config.globalProperties.$Bus=emitter

//全局属性
app.config.globalProperties.$name = '全局属性'

// 全局函数
app.config.globalProperties.$filters = {
    format(param:string){
        return param+'123'
    }
}


app.mount('#app')
2、在页面使用
<template>
<div>
    <div>全局属性{{$name}}</div>
    <div>全局过滤器{{$filters.format('789')}}</div>
</div>
</template>

<script setup lang='ts'>
import Dialog from "./components/A.vue";
import {ref,getCurrentInstance} from 'vue'
// 全局获取参数方法1
var name = getCurrentInstance()?.appContext?.config?.globalProperties.$name;
console.log("name1",name)
// 全局获取参数方法2
const { proxy } = getCurrentInstance() as ComponentInternalInstance
const name1 = proxy?.$name
console.log("name2",name1)
</script>

<style>
</style>
3、 声明文件
声明文件 不然TS无法正确类型 推导
type Filter = {
    format<T>(str: T): string
}

// 声明要扩充@vue/runtime-core包的声明.
// 这里扩充"ComponentCustomProperties"接口, 因为他是vue3中实例的属性的类型.
declare module 'vue' {
    export interface ComponentCustomProperties {
        $filters: Filter
    }
}
30、自定义插件
插件是自包含的代码,通常向 Vue 添加全局级功能。你如果是一个对象需要有install方法Vue会帮你自动注入到install 方法 你如果是function 就直接当install 方法去使用
在使用 createApp() 初始化 Vue 应用程序后,你可以通过调用 use() 方法将插件添加到你的应用程序中
这里用一个loading案例进行讲解插件
1、自定义一个组件
<template>
    <div v-if="isShow" class="loading">
        <div class="loading-content">Loading...</div>
    </div>
</template>

<script setup lang='ts'>
import { ref } from 'vue';
const isShow = ref(false)//定位loading 的开关

const show = () => {
    isShow.value = true
}
const hide = () => {
    isShow.value = false
}
//对外暴露 当前组件的属性和方法
defineExpose({
    isShow,
    show,
    hide
})
</script>


<style scoped lang="less">
.loading {
    position: fixed;
    inset: 0;
    background: rgba(0, 0, 0, 0.8);
    display: flex;
    justify-content: center;
    align-items: center;
    &-content {
        font-size: 30px;
        color: #fff;
    }
}
</style>
2、 引用组件并应用于自定义插件
import {  createVNode, render, VNode, App } from 'vue';
import Loading from './index.vue'

// 通过vue提供的全局API  创建一个Loading组件的实例对象
// export可以是个函数,也可以是个带install方法的对象
export default {
    // app.use()调用时会执行install方法
    install(app: App) {
        //createVNode vue提供的底层方法 可以给我们组件创建一个虚拟DOM 也就是Vnode
        const vnode: VNode = createVNode(Loading)
        //render 把我们的Vnode 生成真实DOM 并且挂载到指定节点
        render(vnode, document.body)
        // Vue 提供的全局配置 可以自定义
        app.config.globalProperties.$loading = {
            //exposed 通过这个属性可以访问到组件实例内部暴露的方法或属性
            show: () => vnode.component?.exposed?.show(),
            hide: () => vnode.component?.exposed?.hide()
        }

    }
}
3、在main.ts中引入插件并使用
import { createApp } from 'vue'
import './style.css'
import App from './App.vue'
import mitt from 'mitt'
import loading from './components/loading/loading'

const emitter = mitt()


const app = createApp(App)
app.use(loading)
app.config.globalProperties.$Bus=emitter

//全局属性
app.config.globalProperties.$name = '全局属性'

// 全局函数
app.config.globalProperties.$filters = {
    format(param:string){
        return param+'123'
    }
}


app.mount('#app')
4、页面中直接使用
<template>
<div>
    <div>全局属性{{$name}}</div>
    <div>全局过滤器{{$filters.format('789')}}</div>
</div>
</template>

<script setup lang='ts'>
import Dialog from "./components/A.vue";
import {ref,getCurrentInstance} from 'vue'
// 全局获取参数方法1
var name = getCurrentInstance()?.appContext?.config?.globalProperties.$name;
console.log("name1",name)
// 全局获取参数方法2
const { proxy } = getCurrentInstance() as ComponentInternalInstance
const name1 = proxy?.$name
console.log("name2",name1)

//使用组件
proxy?.$loading?.show()
setTimeout(()=>{
    proxy?.$loading?.hide()
},5000)
</script>

<style>
</style>
31、 了解UI库ElementUI,AntDesigin等
小满zs大神这个文章https://xiaoman.blog.csdn.net/article/details/123306603描述的很详细
1、Element UI Plus
安装方法
# NPM
npm install element-plus --save
# Yarn
yarn add element-plus
# pnpm
pnpm install element-plus
main ts引入
import { createApp } from 'vue'
import ElementPlus from 'element-plus'
import 'element-plus/dist/index.css'
import App from './App.vue'

const app = createApp(App)

app.use(ElementPlus)
app.mount('#app')
 volar插件支持

{
  "compilerOptions": {
    // ...
    "types": ["element-plus/global"]
  }
}
官网:一个 Vue 3 UI 框架 | Element Plus
2、Ant Design Vue
安装方法
npm install ant-design-vue@next --save

yarn add ant-design-vue@next
使用
import { createApp } from 'vue';
import Antd from 'ant-design-vue';
import App from './App';
import 'ant-design-vue/dist/antd.css';

const app = createApp(App);

app.use(Antd).mount('#app');
官网:https://next.antdv.com/docs/vue/introduce-cn
3、IView
安装
npm install view-ui-plus --save使用
import { createApp } from 'vue'
import ViewUIPlus from 'view-ui-plus'
import App from './App.vue'
import router from './router'
import store from './store'
import 'view-ui-plus/dist/styles/viewuiplus.css'

const app = createApp(App)

app.use(store)
  .use(router)
  .use(ViewUIPlus)
  .mount('#app')
官网: iView / View Design 一套企业级 UI 组件库和前端解决方案
4、Vant 移动端
安装
npm i vant -S使用
import Vant from 'vant'
import 'vant/lib/index.css';
createApp(App).use(vant).$mount('#app)
官网: Vant 3 - Lightweight Mobile UI Components built on Vue
32、Scope 及样式穿透
主要是用于修改很多vue常用的组件库(element, vant, AntDesigin),虽然配好了样式但是还是需要更改其他的样式
就需要用到样式穿透
scoped的原理
vue中的scoped 通过在DOM结构以及css样式上加唯一不重复的标记:data-v-hash的方式,以保证唯一(而这个工作是由过PostCSS转译实现的),达到样式私有化模块化的目的。
总结一下scoped三条渲染规则:
1、给HTML的DOM节点加一个不重复data属性(形如:data-v-123)来表示他的唯一性
2、在每句css选择器的末尾(编译后的生成的css语句)加一个当前组件的data属性选择器(如[data-v-123])来私有化样式
3、如果组件内部包含有其他组件,只会给其他组件的最外层标签加上当前组件的data属性
代码实战
<template>

    <el-input v-model="input" placeholder="请输入内容" class="aa"></el-input>
</template>

<script setup lang='ts'>
import { ref } from 'vue';
const input = ref("")
</script>

<style scoped lang="less">
.aa{
  border: 1px solid red;
  .el-input__inner{
    background: blue;
  }
}
</style>
效果为:
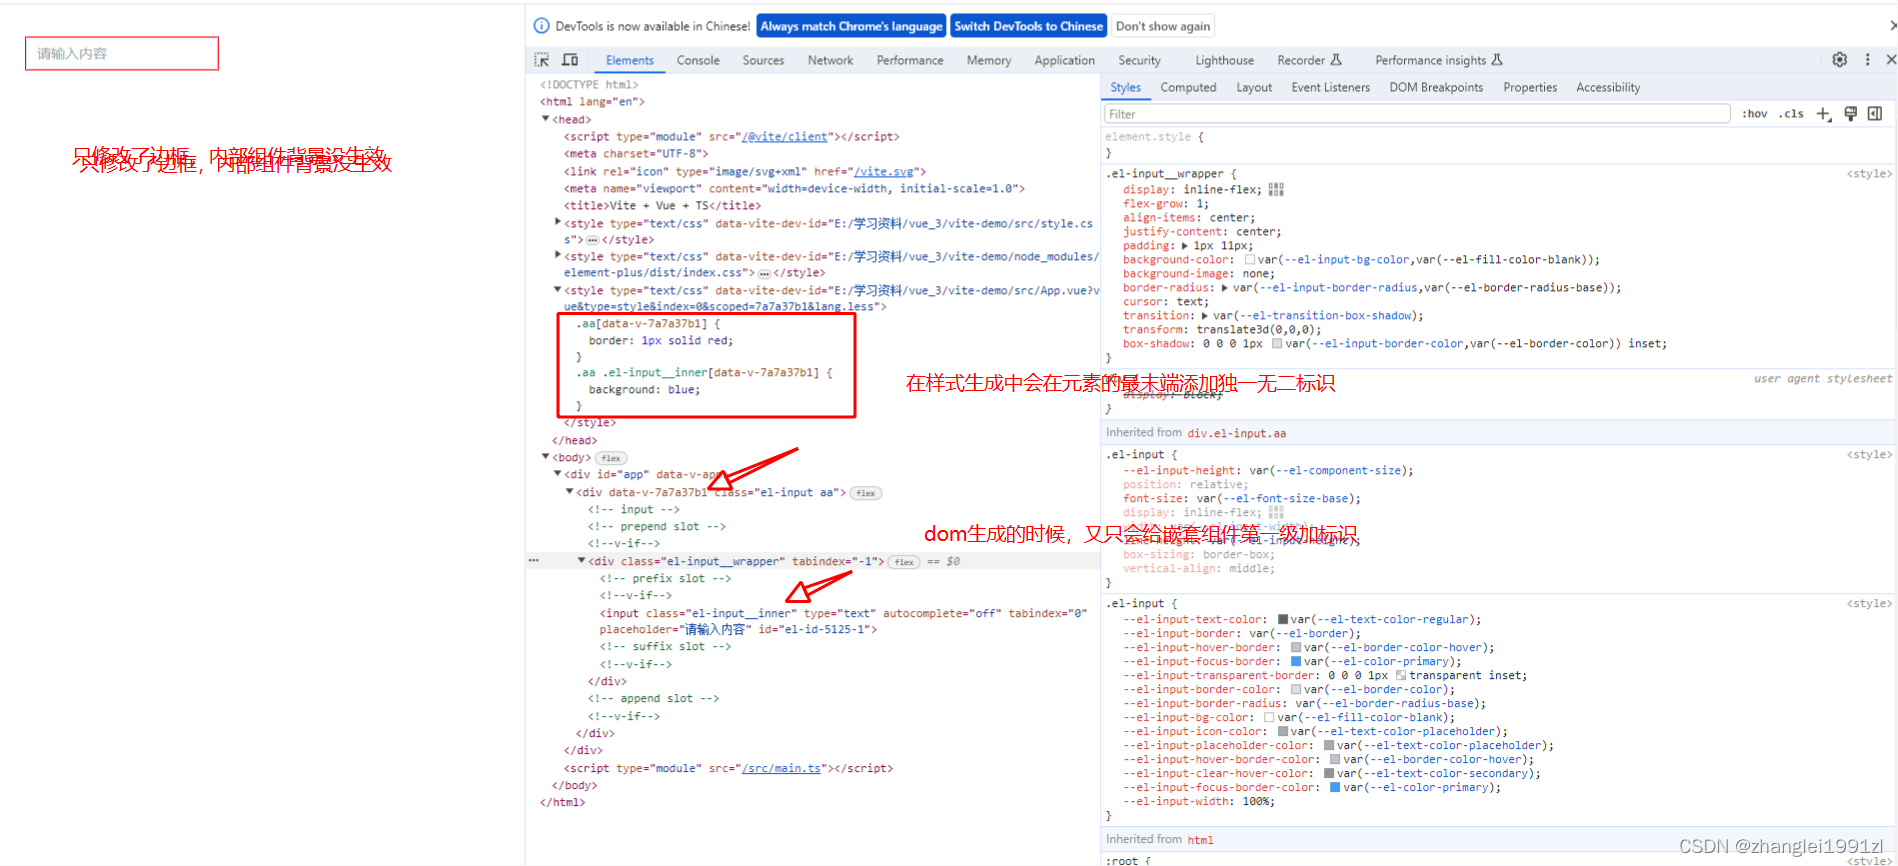
需要使用deep之后
vue3鼓励使用:deep(), vue2是/deep/
<template>

    <el-input v-model="input" placeholder="请输入内容" class="aa"></el-input>
</template>

<script setup lang='ts'>
import { ref } from 'vue';
const input = ref("")
</script>

<style scoped lang="less">
.aa{
  border: 1px solid red;
  :deep(.el-input__inner){
    background: blue;
  }
}
</style>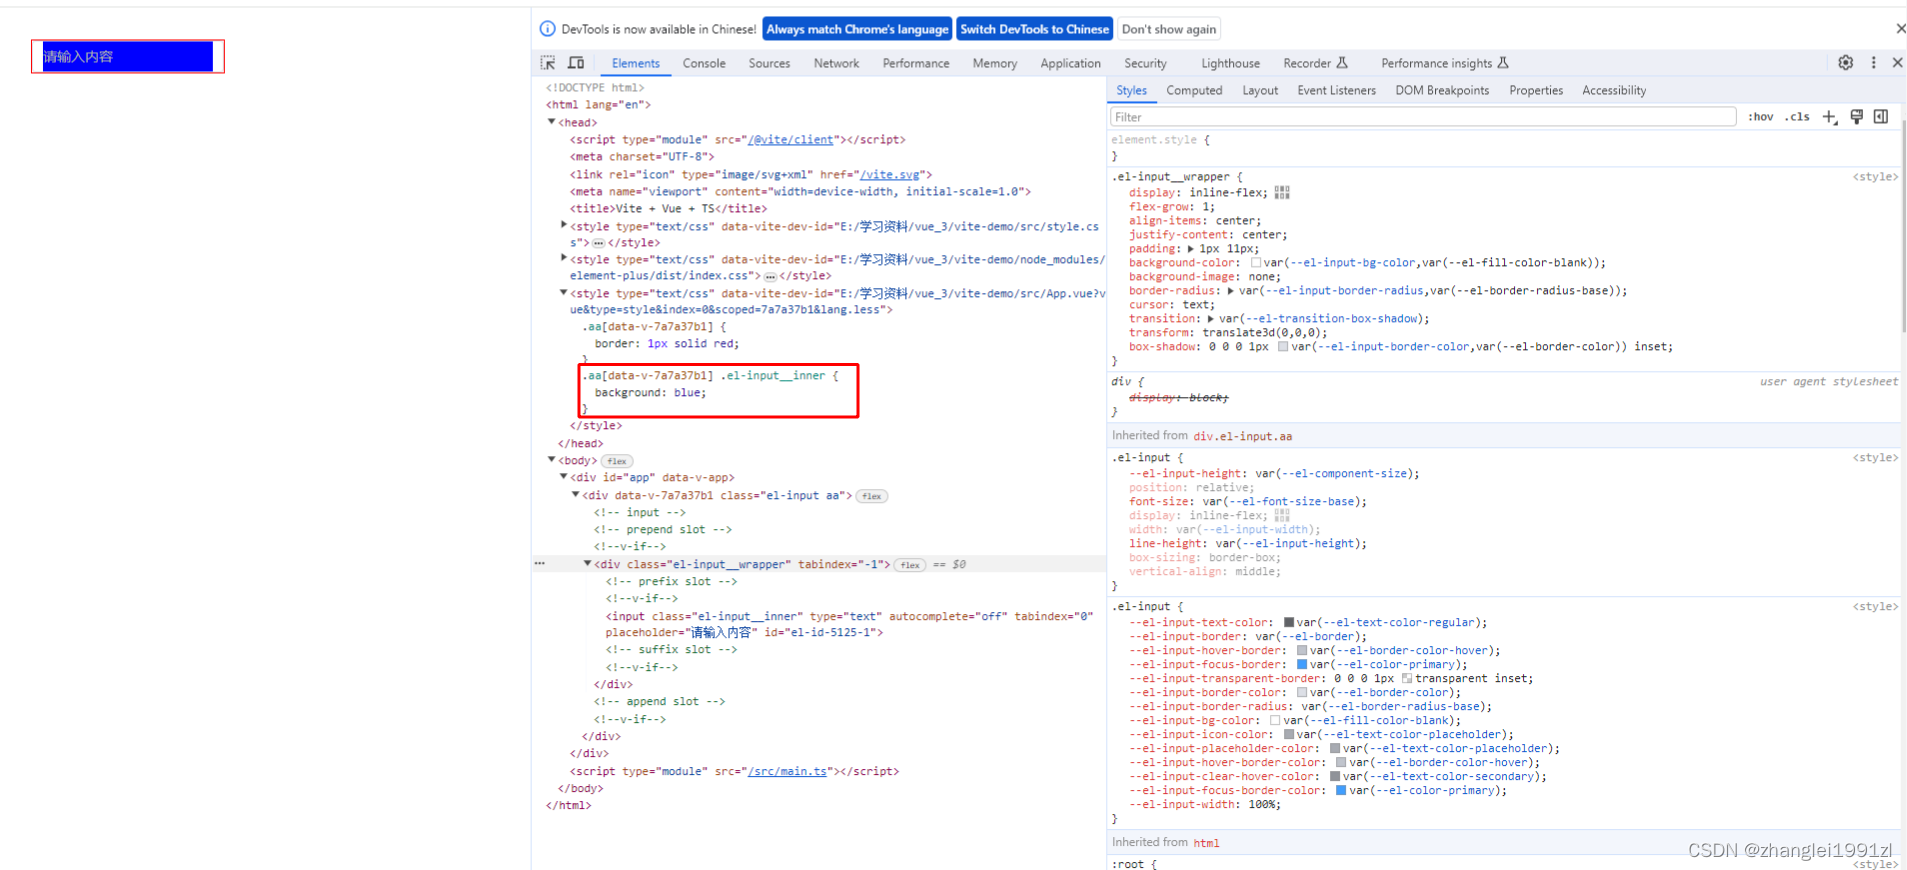
会将属性选择器的位置由最末级挪到第一级,达到元素定位
33、css Style完整新特性
1、插槽选择器
定义一个插槽组件
<template>
    <div>
        我是个插槽组件
        <slot ></slot>
    </div>
</template>
<style scoped>
.a {
    color: red;
}

</style>
引用这个插槽组件
<template>
<div>
    <SlotA>
        <div class="a">
            插件组件的内容
        </div>
    </SlotA>
</div>
</template>

<script setup lang='ts'>
import SlotA from './components/slotA.vue'
</script>

<style>

</style>
这时候样式是不生效的
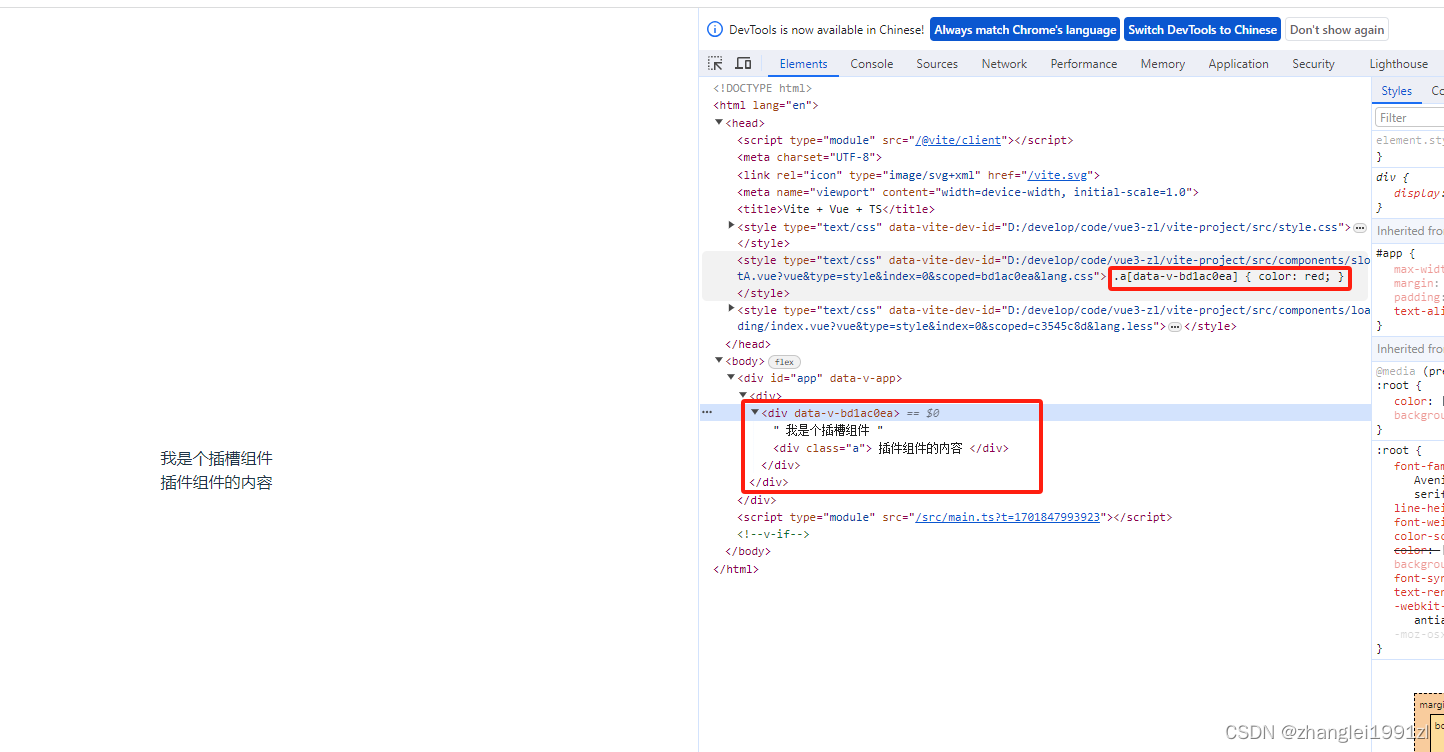
改成插槽选择器
<template>
    <div>
        我是个插槽组件
        <slot ></slot>
    </div>
</template>
<style scoped>
:slotted(.a) {
    color: red;
}

</style>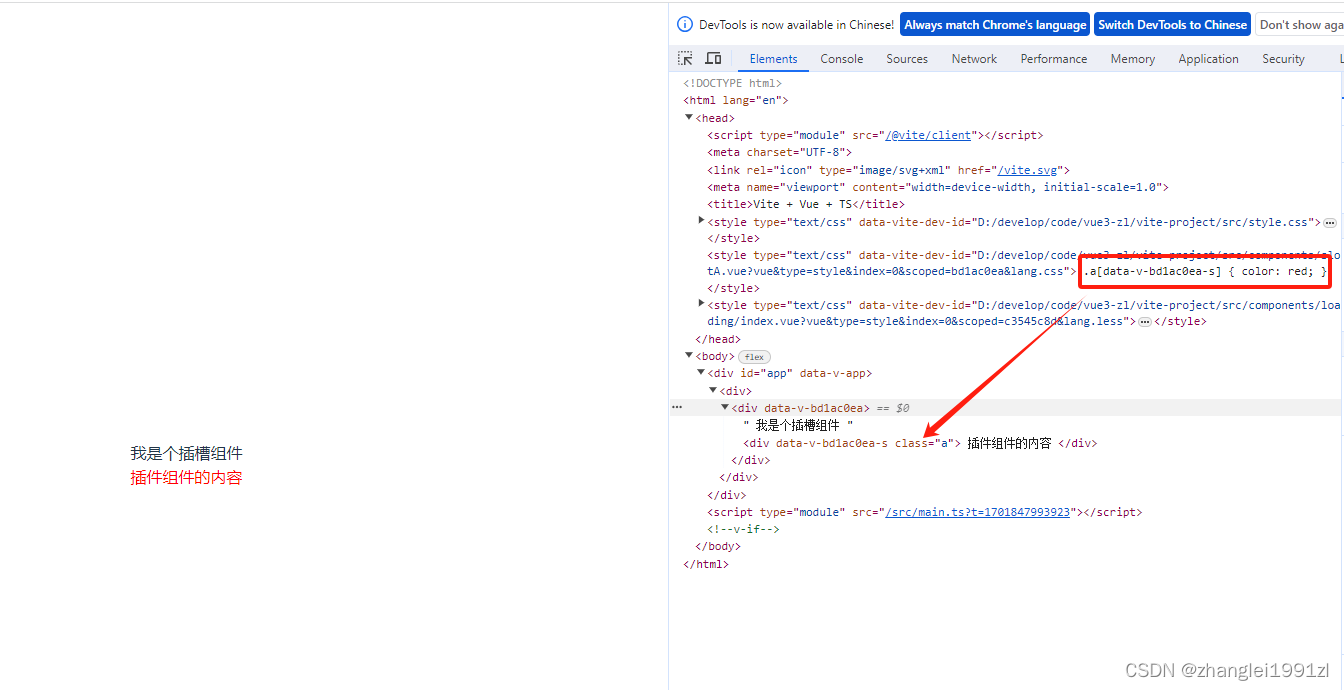
2、全局选择器
以前如果编写样式的时候,有局部的也有全局的样式,往往需要编写2个style代码块,一个带上scoped一个不带
现在有个更好的方式
<style lang="less" scoped>
:global(div){
    color:red
}
</style>
3、动态CSS
<template>
    <div class="div">
       123
    </div>
</template>

<script lang="ts" setup>
import { ref } from 'vue'
const red = ref<string>('red')
</script>

<style lang="less" scoped>
.div{
   color:v-bind(red)
}

</style>
如果是个对象
 <template>
    <div class="div">
        XXX
    </div>
</template>

<script lang="ts" setup>
import { ref } from "vue"
const red = ref({
    color:'pink'
})
</script>

    <style lang="less" scoped>
.div {
    color: v-bind('red.color');
}
</style>
4、css module
<style module> 标签会被编译为 CSS Modules 并且将生成的 CSS 类作为 $style 对象的键暴露给组件
<template>
    <div :class="$style.red">
        XXX
    </div>
</template>

<style module>
.red {
    color: red;
    font-size: 20px;
}
</style>
自定义注入名称(多个可以用数组)
你可以通过给 module attribute 一个值来自定义注入的类对象的 property 键
<template>
    <div :class="[zs.red,zs.border]">
        XXX
    </div>
</template>

<style module="zs">
.red {
    color: red;
    font-size: 20px;
}
.border{
    border: 1px solid #ccc;
}
</style>
与组合式 API 一同使用,注入的类可以通过 useCssModule API 在 setup() 和 <script setup> 中使用。对于使用了自定义注入名称的 <style module> 模块,useCssModule 接收一个对应的 module attribute 值作为第一个参数
<template>
    <div :class="[css.red,css.border]">
        小满是个弟弟
    </div>
</template>


<script setup lang="ts">
import { useCssModule } from 'vue'
const css = useCssModule('zs')
console.log(css)
</script>

<style module="zs">
.red {
    color: red;
    font-size: 20px;
}
.border{
    border: 1px solid #ccc;
}
</style>
34、event loop 和 nextTick
首选要明确一个概念,js实际上是单线程操作,单线程就意味着所有的任务都需要排队,后面的任务需要等前面的任务执行完才能执行,如果前面的任务耗时过长,后面的任务就需要一直等,一些从用户角度上不需要等待的任务就会一直等待,这个从体验角度上来讲是不可接受的,所以JS中就出现了异步的概念,但这个只是让程序看起来像异步的。
可以具体看下这篇介绍Event Loop到底是个啥? - 知乎
同步任务
代码从上到下按顺序执行
异步任务
1.宏任务
script(整体代码)、setTimeout、setInterval、UI交互事件、postMessage、Ajax
2.微任务
Promise.then catch finally、MutaionObserver、process.nextTick(Node.js 环境)
运行机制
所有的同步任务都是在主进程执行的形成一个执行栈,主线程之外,还存在一个"任务队列",异步任务执行队列中先执行宏任务,然后清空当次宏任务中的所有微任务,然后进行下一个tick如此形成循环。
下面是一段代码方便理解这个过程
<template>
    <div >
        测试
    </div>
</template>
<script setup lang='ts'>
async function Prom() {
    console.log('Y')
    await Promise.resolve()
    console.log('x')
}
setTimeout(() => {
    console.log(1)
    Promise.resolve().then(() => {
        console.log(2)
    })
}, 0)
setTimeout(() => {
    console.log(3)
    Promise.resolve().then(() => {
        console.log(4)
    })
}, 0)

Promise.resolve().then(() => {console.log(5)})
Promise.resolve().then(() => {console.log(6)})
Promise.resolve().then(() => {console.log(7)})
Promise.resolve().then(() => {console.log(8)})
Prom()
console.log(0)
//y 0 5 6 7 8 x 1 2 3 4
</script>
<style >
</style>
nextTick就是用的这个原理,会将传入的函数转成promise
const resolvedPromise: Promise<any> = Promise.resolve()
let currentFlushPromise: Promise<void> | null = null

export function nextTick<T = void>(
  this: T,
  fn?: (this: T) => void
): Promise<void> {
  const p = currentFlushPromise || resolvedPromise
  return fn ? p.then(this ? fn.bind(this) : fn) : p
}如果想研究更多,可以看下满神的文章https://xiaoman.blog.csdn.net/article/details/125237755
vue的dom更新以及watch函数都是异步的,而值的改变时同步的,这么设计的优势是避免值变化多次渲染界面跟触发函数,下面是个测试代码
<template>
    <div >
        测试
    </div>
</template>
<script setup lang='ts'>
import { ref, watch,nextTickt } from 'vue'
const a = ref(1)
watch(a, (newVal, oldVal) => {
    console.log(newVal, oldVal)
})
for (let index = 0; index < 999; index++) {
   a.value++
}
</script>
<style >
</style>
35、移动端开发
这块内容可以参考小满的神的文章https://xiaoman.blog.csdn.net/article/details/125490078
36、unocss原子化
css原子化有点像全局样式,通过统一命名,全局使用,但功能上更强大,可以看下下面的文章
CSS原子化的优缺点
1.减少了css体积,提高了css复用
2.减少起名的复杂度
3.增加了记忆成本 将css拆分为原子之后,你势必要记住一些class才能书写,哪怕tailwindcss提供了完善的工具链,你写background,也要记住开头是bg
1、接入unocss
tips:最好用于vite webpack属于阉割版功能很少
安装
npm i -D unocss修改vite.config.ts
import { defineConfig } from 'vite'
import vue from '@vitejs/plugin-vue'
import vueJsx from '@vitejs/plugin-vue-jsx'
import AutoImport from 'unplugin-auto-import/vite'
import unocss from 'unocss/vite'


// https://vitejs.dev/config/
export default defineConfig({
  plugins: [vue(),vueJsx(),
    AutoImport({
      imports:['vue'],
      dts:"src/auto-import.d.ts"//生命文件生成地址
    }),
    unocss({
      //定义全局样式
      rules: [
        ['flex', { display: "flex" }],
        ['red', {color:"red"}]
      ]
    })
  ],
  css: {
    // 预处理器配置项
    preprocessorOptions: {
      less: {
        math: "always",
      },
    },
  },
})
修改main.ts
import { createApp } from 'vue'
import './style.css'
import App from './App.vue'
import ElementPlus from 'element-plus'
import 'element-plus/dist/index.css'
// 引入unocss
import 'uno.css'
createApp(App).use(ElementPlus).mount('#app')
然后代码中就可以使用
<template>

   <div class="flex red">样例</div>
</template>

<script setup lang='ts'>
</script>

<style scoped lang="less">
</style>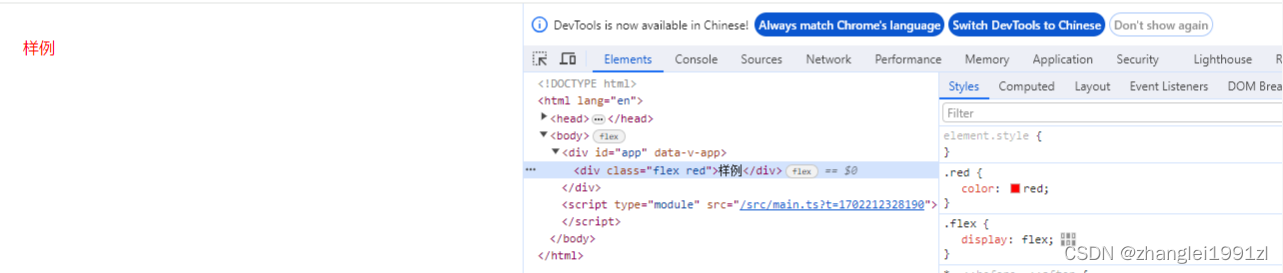
2、动态配置样式
rules: [
        ['flex', { display: "flex" }],
        ['red', {color:"red"}],
        //动态配置以m-数字开头的样式
        [/^m-(\d+)$/, ([, d]) => ({ margin: `${Number(d) * 10}px` })],
      ]
代码中使用
<template>
<div class="flex red m-100">样例</div>
</template>
<script setup lang='ts'>
</script>
<style scoped lang="less">
</style>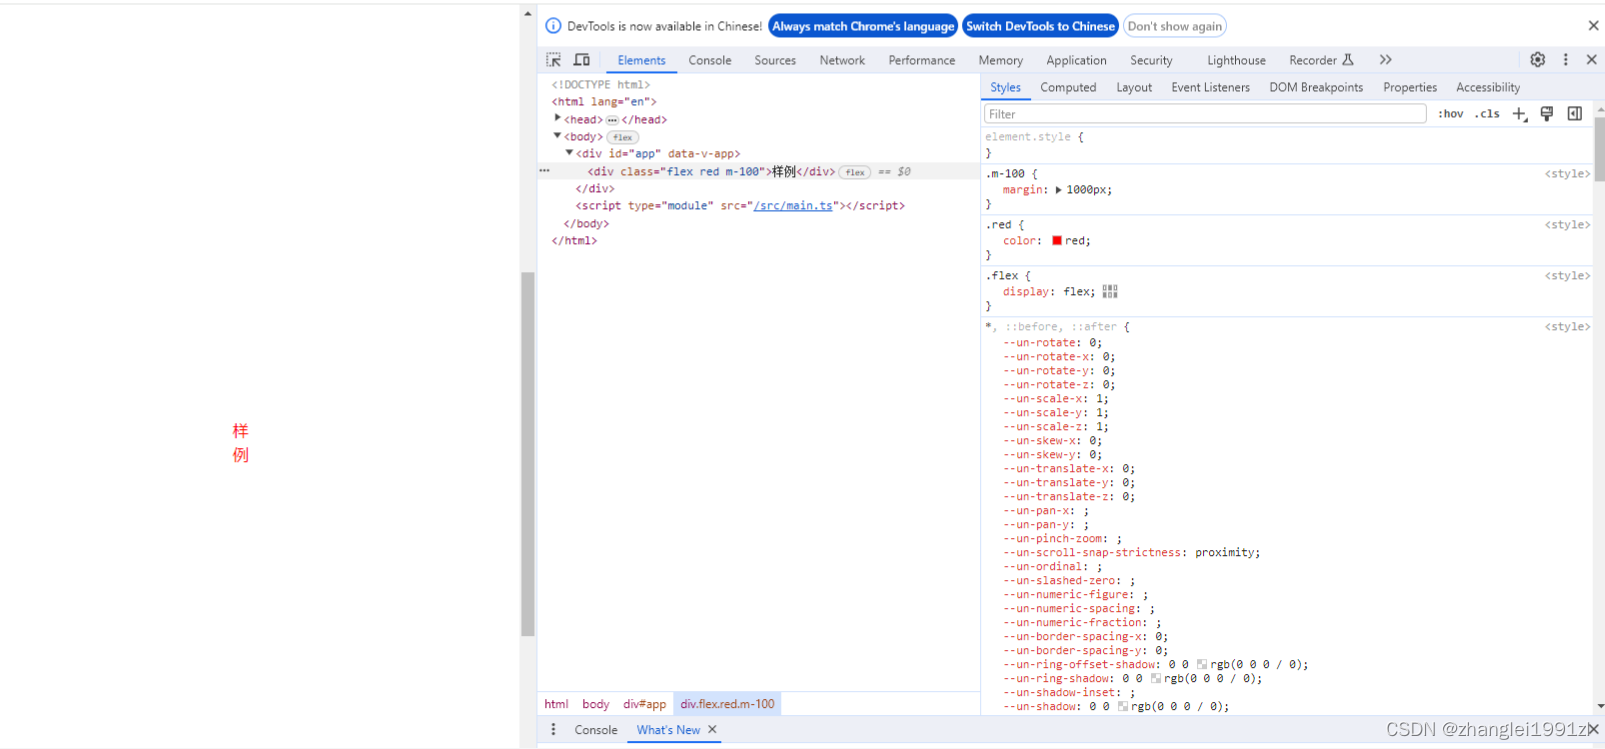 3、shortcuts组合样式
unocss({
      //定义全局样式
      rules: [
        ['flex', { display: "flex" }],
        ['red', {color:"red"}],
        //动态配置以m-数字开头的样式
        [/^m-(\d+)$/, ([, d]) => ({ margin: `${Number(d) * 10}px` })],
      ],
      shortcuts: {
        redFlex: "red flex"
      }
    })
<template>
<div class="redFlex">样例</div>
</template>
<script setup lang='ts'>
</script>
<style scoped lang="less">
</style>
4、unocss 预设
unocss提供了3种预设
在vite.config.ts中引入这三种预设,并进行配置
import { defineConfig } from 'vite'
import vue from '@vitejs/plugin-vue'
import vueJsx from '@vitejs/plugin-vue-jsx'
import AutoImport from 'unplugin-auto-import/vite'
import unocss from 'unocss/vite'
//presetIcons 内置icon库,需要安装对应的库
//presetAttributify 优化对象属性,简化类名写法
//presetUno 工具类预设
import {presetIcons,presetAttributify,presetUno} from 'unocss'


// https://vitejs.dev/config/
export default defineConfig({
  plugins: [vue(),vueJsx(),
    AutoImport({
      imports:['vue'],
      dts:"src/auto-import.d.ts"//生命文件生成地址
    }),
    unocss({
      //定义全局样式
      rules: [
        ['flex', { display: "flex" }],
        ['red', {color:"red"}],
        //动态配置以m-数字开头的样式
        [/^m-(\d+)$/, ([, d]) => ({ margin: `${Number(d) * 10}px` })],
      ],
      shortcuts: {
        redFlex: "red flex"
      },
      presets:[presetIcons(),presetAttributify(),presetUno()]
    })
  ],
  css: {
    // 预处理器配置项
    preprocessorOptions: {
      less: {
        math: "always",
      },
    },
  },
})
1、presetIcons
首先我们去icones官网(方便浏览和使用iconify)浏览我们需要的icon,比如这里我用到了Google Material Icons图标集里面的baseline-add-circle图标
npm i -D @iconify-json/ic<div class="i-ic-baseline-backspace" />2、presetAttributify 属性化模式支持
使用这个预设之后,使用样式的时候不需要class也能生效
<template>
   <div redFlex>样例</div>
</template>

<script setup lang='ts'>
</script>

<style scoped lang="less">
</style>
3、presetUno 工具类预设
默认的 @unocss/preset-uno 预设(实验阶段)是一系列流行的原子化框架的 通用超集,包括了 Tailwind CSS,Windi CSS,Bootstrap,Tachyons 等。
例如,ml-3(Tailwind),ms-2(Bootstrap),ma4(Tachyons),mt-10px(Windi CSS)均会生效。
37、函数式编程,h函数
Vue单文件组件编译是需要过程,他会经过parser -> transform -> generate 而h函数直接跳过这三个阶段,所以性能上有很大的帮助
h 接收三个参数
- type 元素的类型
- propsOrChildren 数据对象, 这里主要表示(props, attrs, dom props, class 和 style)
- children 子节点
1、h函数拥有多种组合方式
// 除类型之外的所有参数都是可选的
h('div')
h('div', { id: 'foo' })

//属性和属性都可以在道具中使用
//Vue会自动选择正确的分配方式
h('div', { class: 'bar', innerHTML: 'hello' })

// props modifiers such as .prop and .attr can be added
// with '.' and `^' prefixes respectively
// 这一点验证的时候发现有些属性挂不上去,id可以挂,但name却不行
h('div', { '.name': 'some-name', '^width': '100' })

// class 和 style 可以是对象或者数组
h('div', { class: [foo, { bar }], style: { color: 'red' } })

// 定义事件需要加on 如 onXxx
h('div', { onClick: () => {} })

// 子集可以字符串
h('div', { id: 'foo' }, 'hello')

//如果没有props是可以省略props 的
h('div', 'hello')
h('div', [h('span', 'hello')])

// 子数组可以包含混合的VNode和字符串
h('div', ['hello', h('span', 'hello')])
2、使用props传递参数
<template>
    <Btn text="按钮"></Btn>
</template>

<script setup lang='ts'>
import { h, } from 'vue';
type Props = {
    text: string
}
const Btn = (props: Props, ctx: any) => {
    return h('div', {
        class: 'p-2.5 text-white bg-green-500 rounded shadow-lg w-20 text-center inline m-1',

    }, props.text)
}
</script>
如果是父组件通过h函数渲染子组件,传参要用props
子组件代码LinkBtn
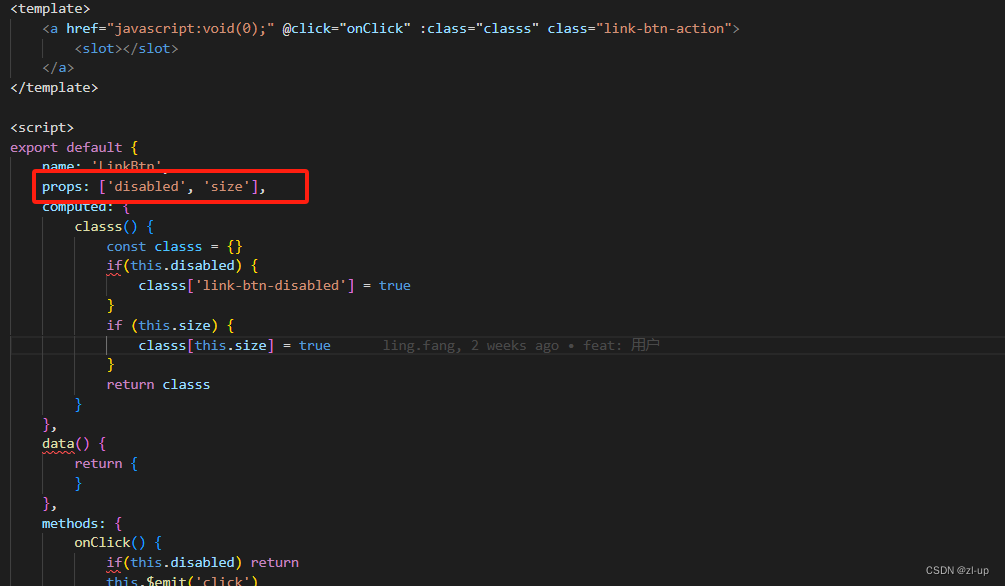
父组件传值
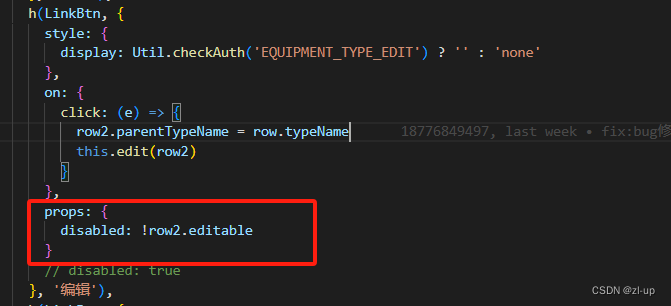
3、接受emit
<template>
  <Btn @on-click="getNum" text="按钮"></Btn>
</template>

<script setup lang='ts'>
import { h, } from 'vue';
type Props = {
  text: string
}
const Btn = (props: Props, ctx: any) => {
  return h('div', {
      class: 'p-2.5 text-white bg-green-500 rounded shadow-lg w-20 text-center inline m-1',
      onClick: () => {
          ctx.emit('on-click', 123)
      }
  }, props.text)
}

const getNum = (num: number) => {
  console.log(num);
}
</script>
4、 定义插槽
<template>
    <Btn @on-click="getNum">
        <template #default>
            按钮slots
        </template>
    </Btn>
</template>

<script setup lang='ts'>
import { h, } from 'vue';
type Props = {
    text?: string
}
const Btn = (props: Props, ctx: any) => {
    return h('div', {
        class: 'p-2.5 text-white bg-green-500 rounded shadow-lg w-20 text-center inline m-1',
        onClick: () => {
            ctx.emit('on-click', 123)
        }
    }, ctx.slots.default())
}

const getNum = (num: number) => {
    console.log(num);
}
</script>
38、electron桌面程序开发
这一节可以看满神的文章https://xiaoman.blog.csdn.net/article/details/131713875
对应满身的B站视频为: 小满Vue3(第三十九章 electron桌面程序)_哔哩哔哩_bilibili
39、Vue3.3 编译宏
这一节可以看满神的文章https://xiaoman.blog.csdn.net/article/details/131618820
40、环境变量
环境变量:他的主要作用就是让开发者区分不同的运行环境,来实现 兼容开发和生产
例如 npm run dev 就是开发环境 npm run build 就是生产环境等等
Vite 在一个特殊的 import.meta.env 对象上暴露环境变量。这里有一些在所有情况下都可以使用的内建变量
有一些默认的内置环境变量,npm run dev默认情况下Mode就是development
<template>

<div>测试</div>
</template>
<script setup lang='ts'>
// import {ref,reactive} from 'vue'
console.log(import.meta.env)
</script>
<style scoped>

</style>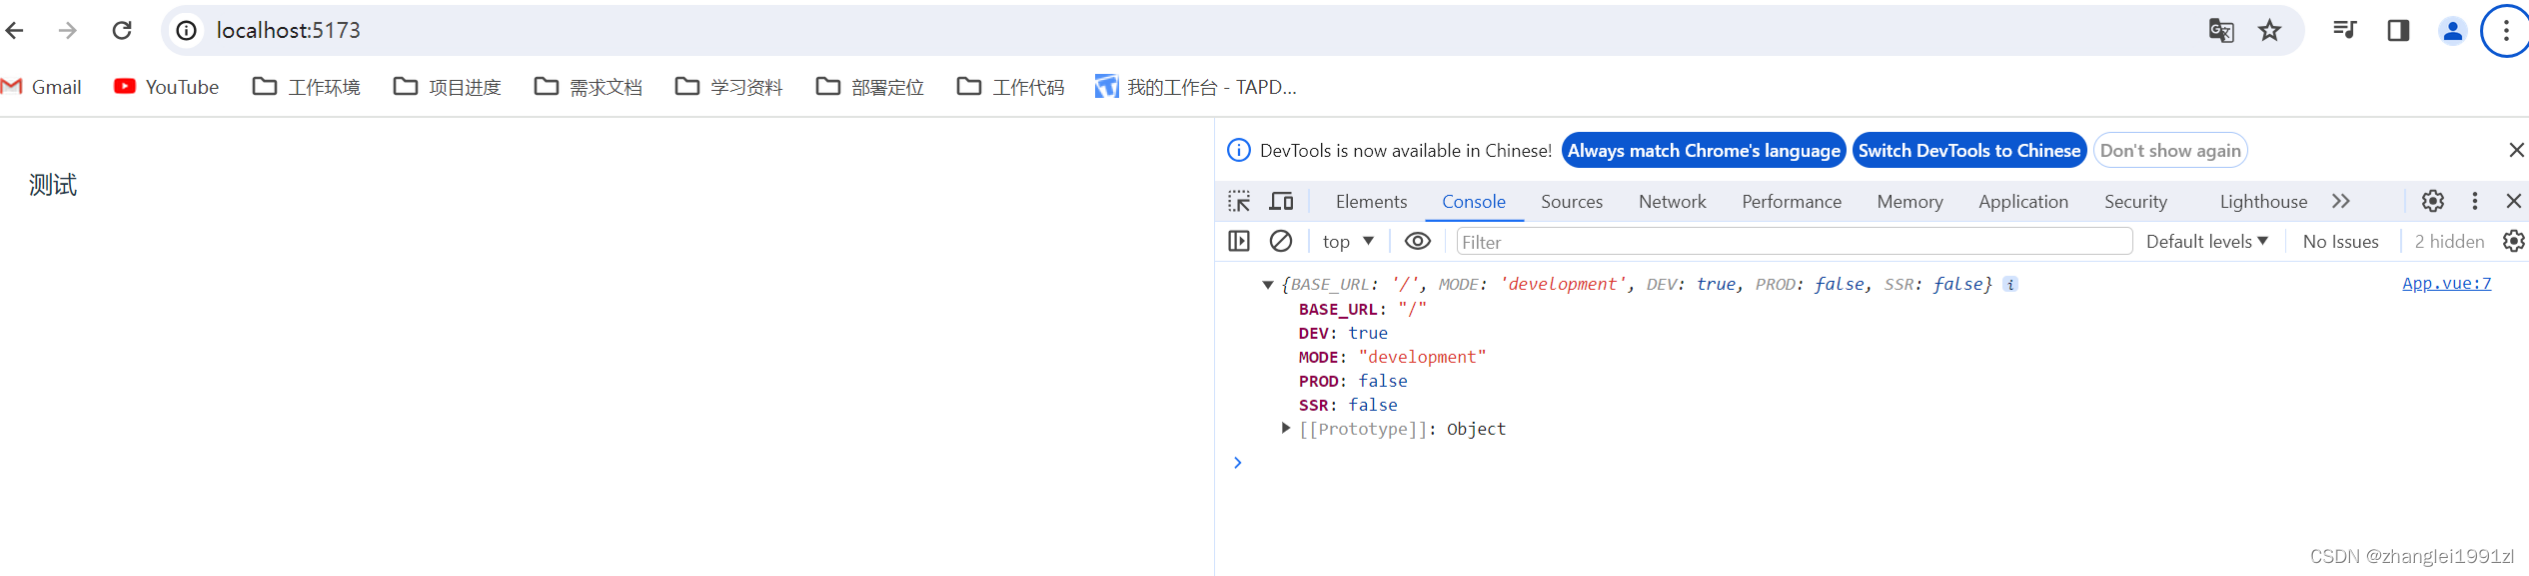
如果想要添加额外的变量,需要在src同级添加一个以环境变量相同的文件.env.development
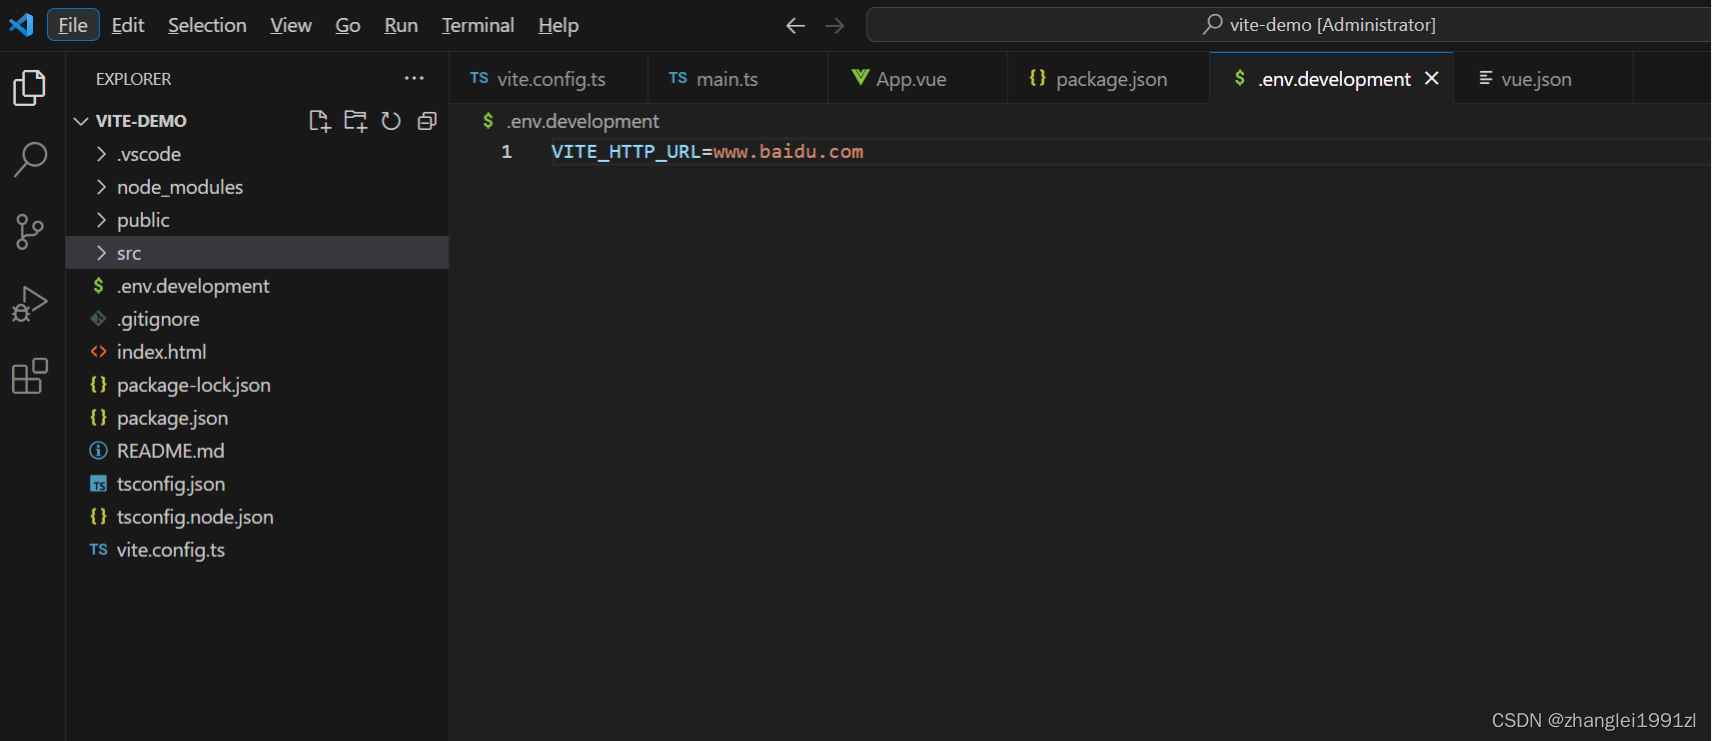
启动后会自动添加到环境变量中
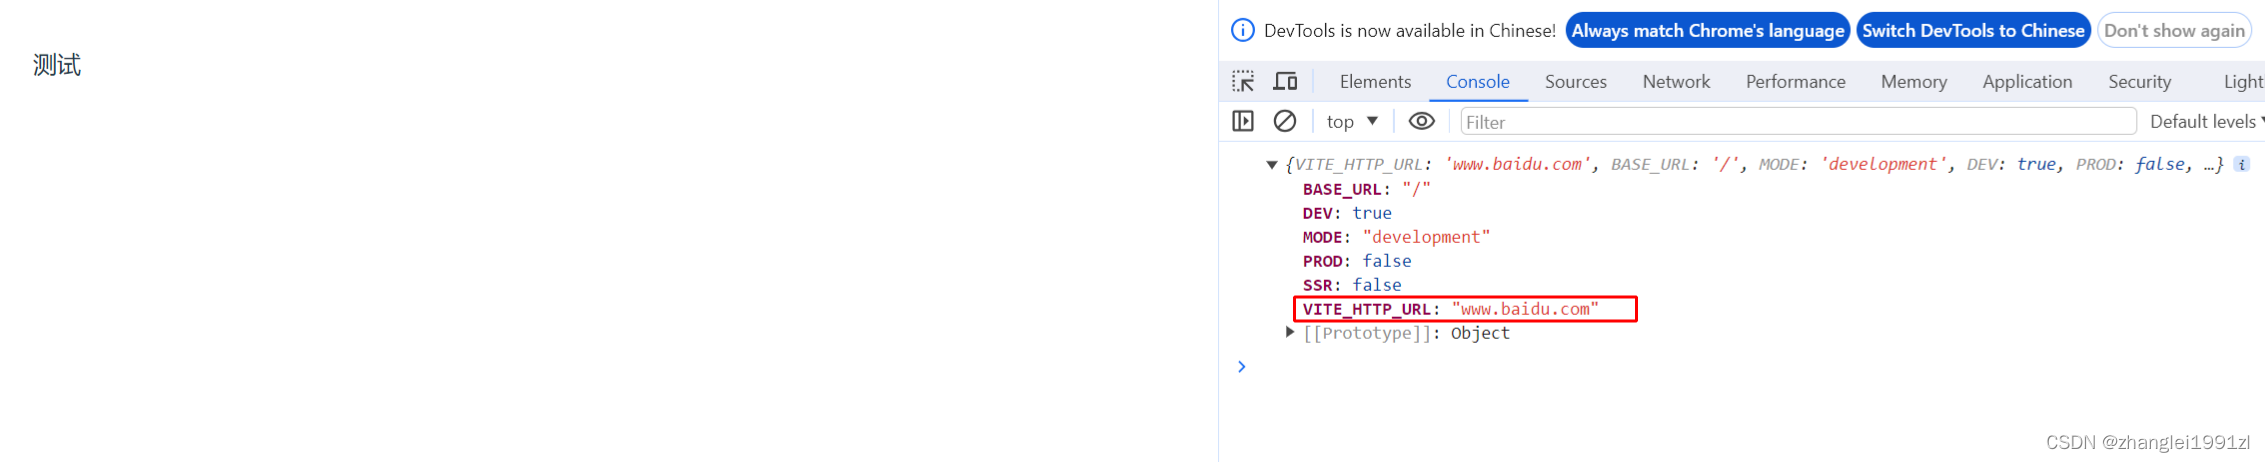 如果要配置多套环境,只需要在package.json中传入对应的mode
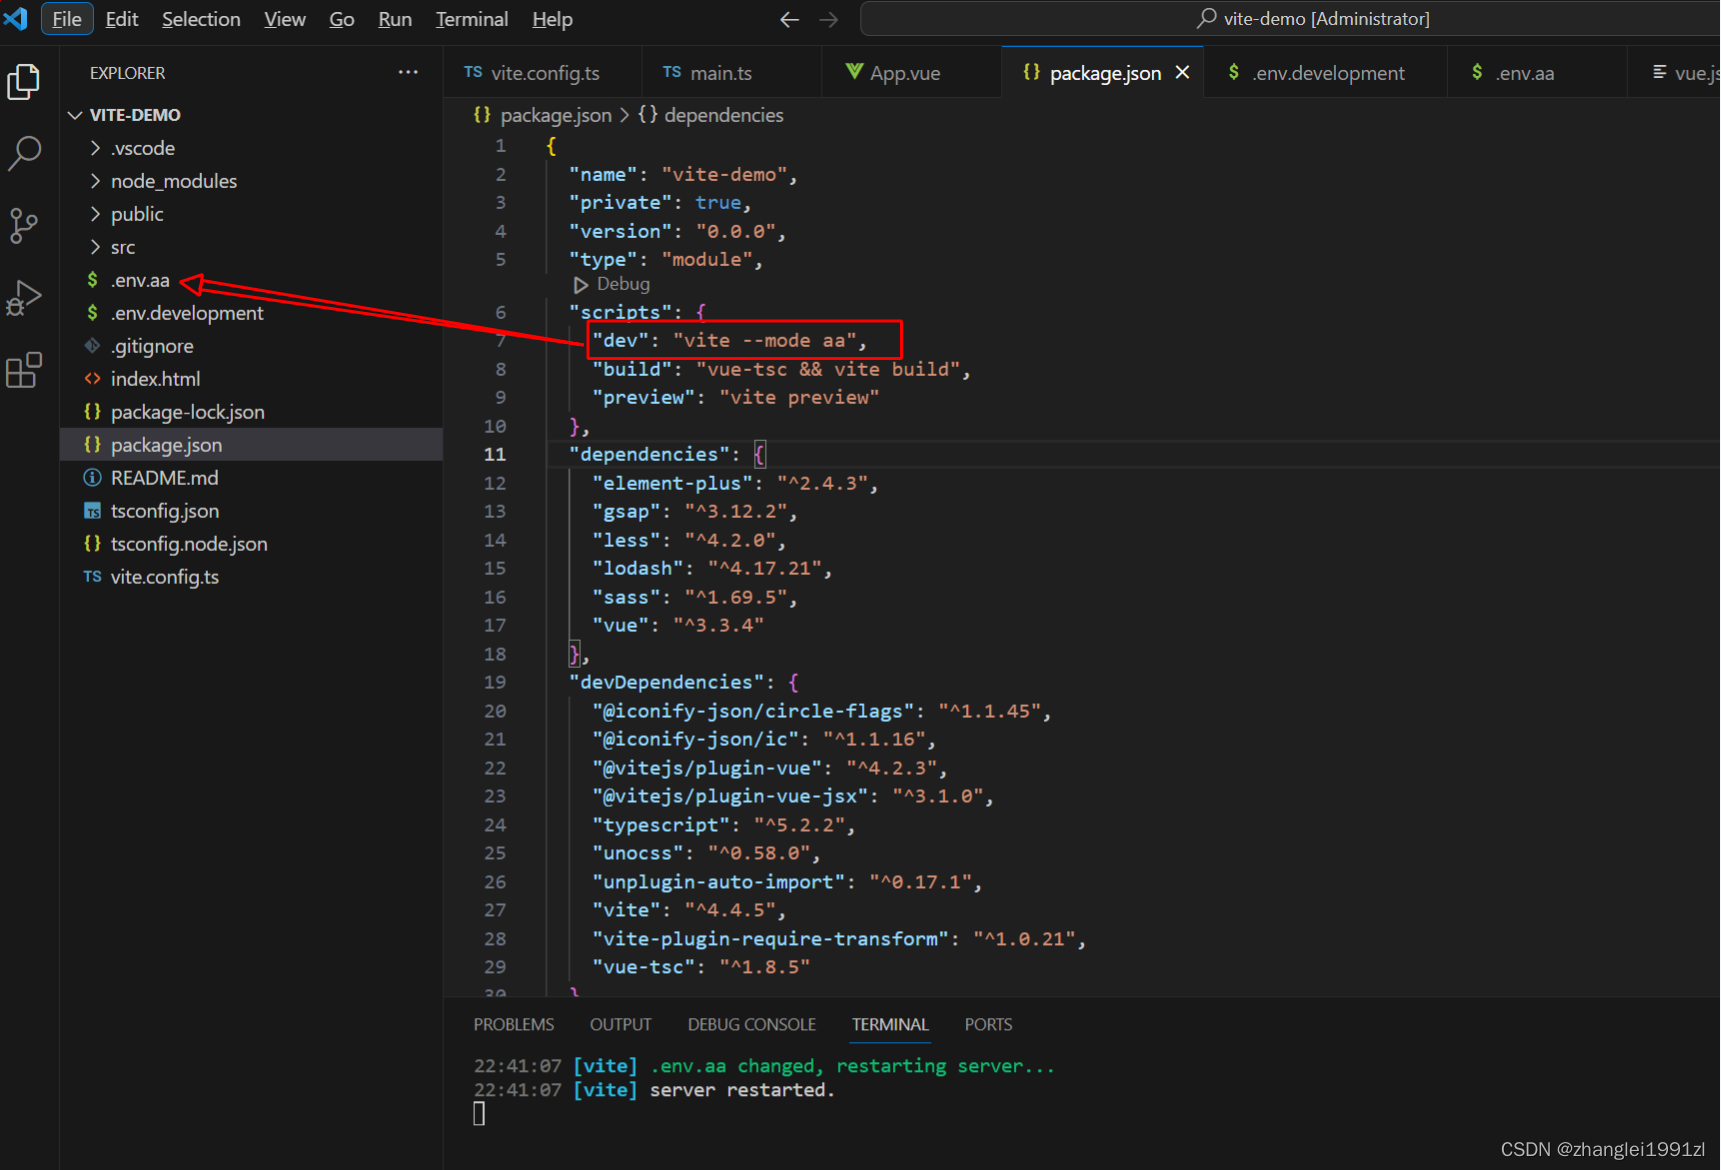
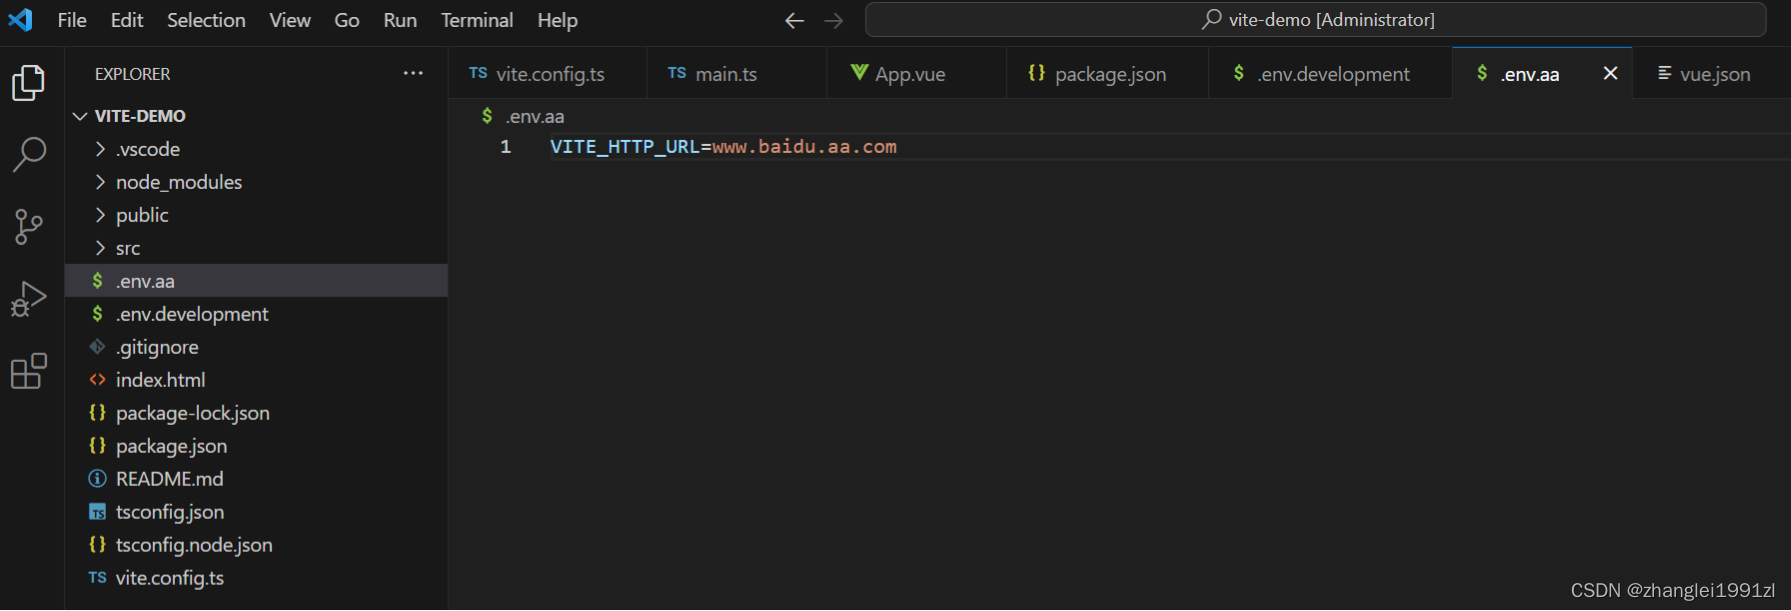
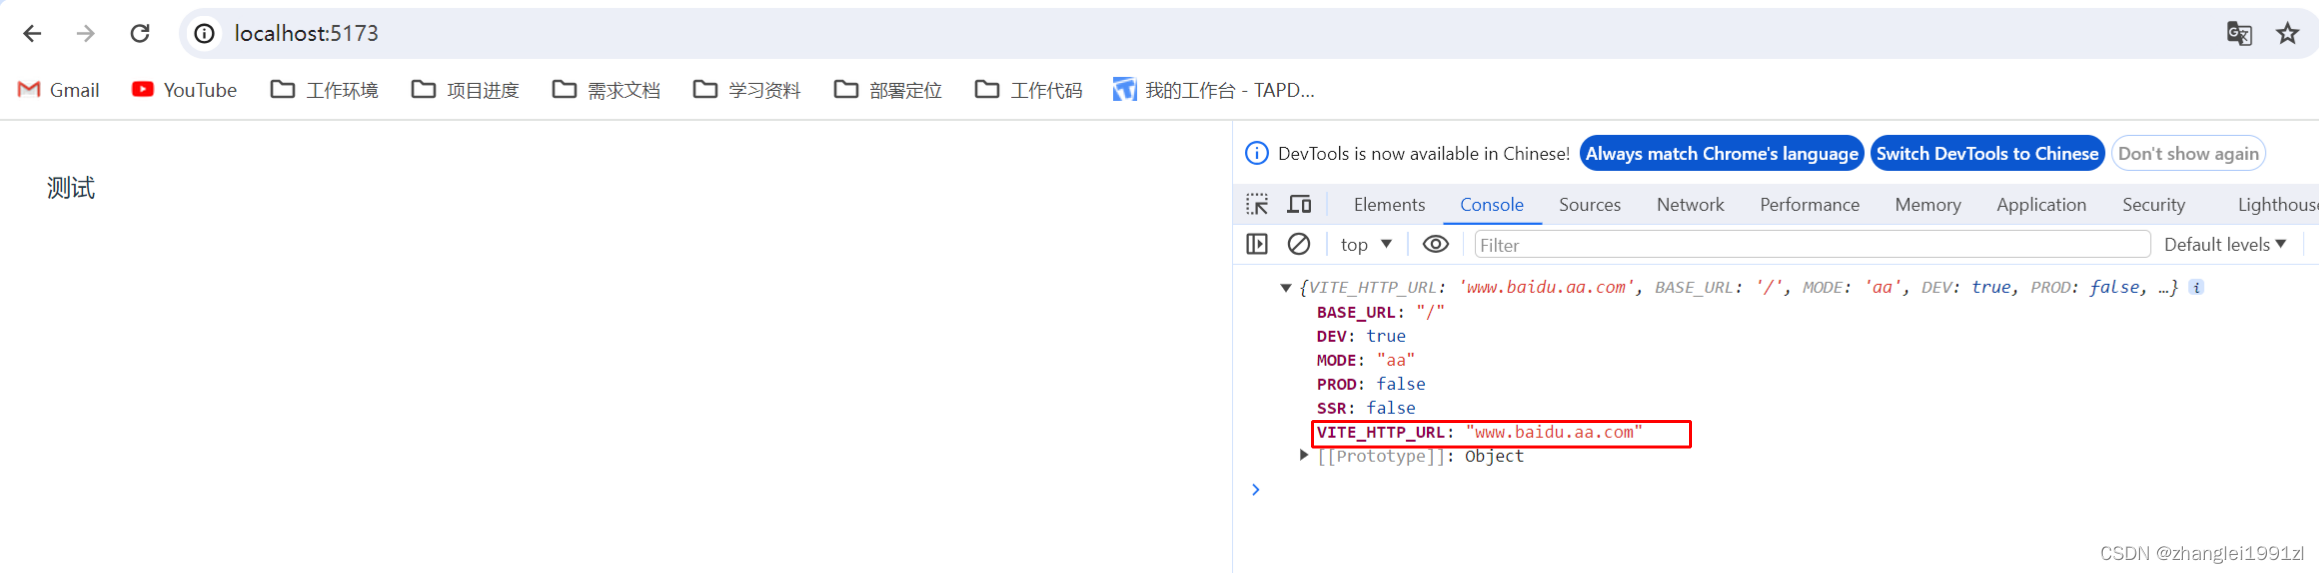
值得注意的是,自定义环境变量在vite构建的项目中必须以VITE_开头
生产环境要想有自定义变量,创建 .env.production 在执行npm run build 的时候他会自己加载这个文件
如果想在vite.config.ts 使用环境变量
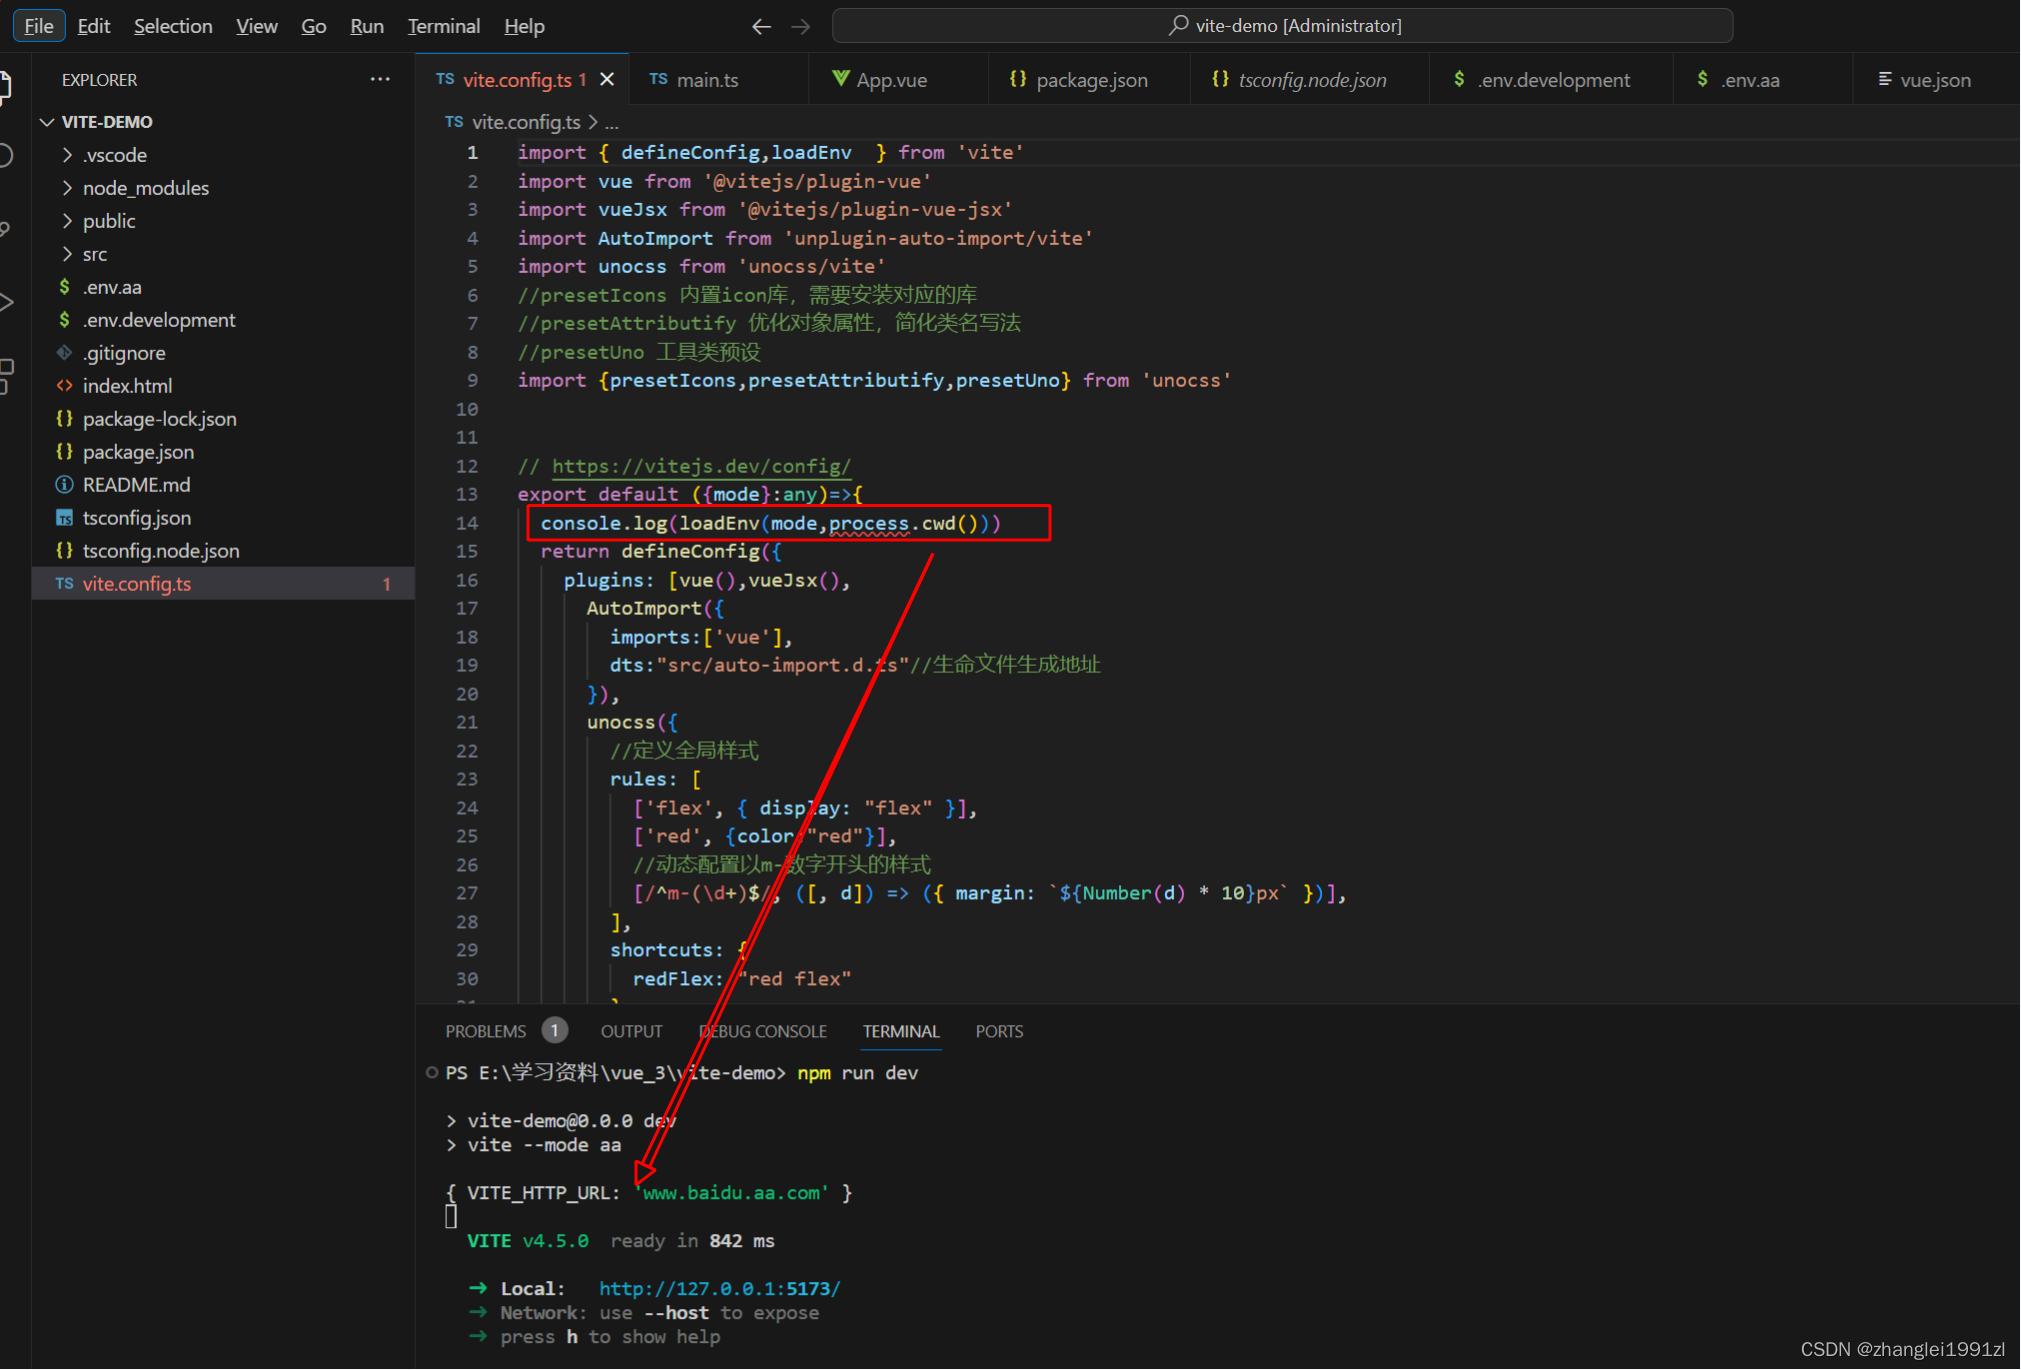
import { defineConfig,loadEnv  } from 'vite'
import vue from '@vitejs/plugin-vue'
import vueJsx from '@vitejs/plugin-vue-jsx'
import AutoImport from 'unplugin-auto-import/vite'
import unocss from 'unocss/vite'
//presetIcons 内置icon库,需要安装对应的库
//presetAttributify 优化对象属性,简化类名写法
//presetUno 工具类预设
import {presetIcons,presetAttributify,presetUno} from 'unocss'


// https://vitejs.dev/config/
export default ({mode}:any)=>{
  console.log(loadEnv(mode,process.cwd()))
  return defineConfig({
    plugins: [vue(),vueJsx(),
      AutoImport({
        imports:['vue'],
        dts:"src/auto-import.d.ts"//生命文件生成地址
      }),
      unocss({
        //定义全局样式
        rules: [
          ['flex', { display: "flex" }],
          ['red', {color:"red"}],
          //动态配置以m-数字开头的样式
          [/^m-(\d+)$/, ([, d]) => ({ margin: `${Number(d) * 10}px` })],
        ],
        shortcuts: {
          redFlex: "red flex"
        },
        presets:[presetIcons(),presetAttributify(),presetUno()]
      })
    ],
    css: {
      // 预处理器配置项
      preprocessorOptions: {
        less: {
          math: "always",
        },
      },
    },
  })


}
41、webpack详解 (从0到1编写)
1、准备工程
准备一个工程,工程目录结构如下

index.html文件为
<!DOCTYPE html>
<html lang="en">
<head>
    <meta charset="utf-8">
    <meta http-equiv="X-UA-Compatible" content="IE=edge">
    <meta name="viewport" content="width=device-width,initial-scale=1.0">
    <title>webpack demo</title>
</head>
<body>

</body>
</html>
通过指令
npm init
tsc --init
分别生成package.json与tsconfig.json,手动创建webpack.config.js
2、安装webpack
npm install webpack
npm install webpack-cli
npm install webpack-dev-server
npm install html-webpack-plugin
编写webpack.config.js
//引入提示
const { Configuration } = require('webpack')
const path = require('path')
const htmlWebpackPlugin = require('html-webpack-plugin')

/**
 * @type {Configuration} //配置智能提示
 */
const config={
    mode: "development",
    entry: './src/main.ts', //入口文件
    output: {
        filename: "[hash].js",
        path: path.resolve(__dirname, 'dist') //出口文件
    },
    plugins: [
        new htmlWebpackPlugin({
            template: "./public/index.html" //html模板
        })
    ]

}

module.exports = config
这个文件比较简单,定义了文件入口是哪个,编译之后文件的出口是哪个
webpack打包中path.resolve(__dirname,“dist“)的含义_path.resolve(__dirname, 'dist')-CSDN博客
编写完成之后,增加打包指令
{
  "name": "web-package-demo",
  "version": "1.0.0",
  "description": "webpackage构建工程样例",
  "main": "index.js",
  "scripts": {
    "test": "echo \"Error: no test specified\" && exit 1",
    "build": "webpack",
    "dev":"webpack-dev-server"
  },
  "author": "",
  "license": "ISC",
  "dependencies": {
    "clean-webpack-plugin": "^4.0.0",
    "html-webpack-plugin": "^5.5.4",
    "vue": "^3.3.11",
    "vue-loader": "^17.3.1",
    "webpack": "^5.89.0",
    "webpack-cli": "^5.1.4",
    "webpack-dev-server": "^4.15.1"
  }
}
执行指令
npm run build会生成文件夹以及编译后的文件,证明简单工程搭建完成
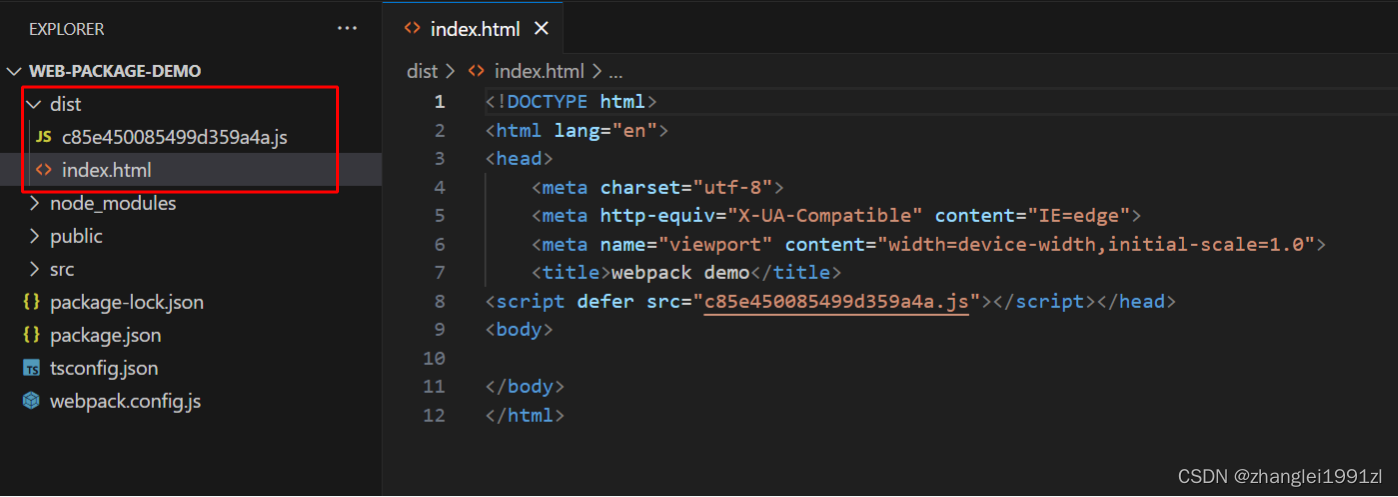
验证main.ts被执行,在main.ts文件中输入一行指令,查看编译后的结果中是否有这个指令
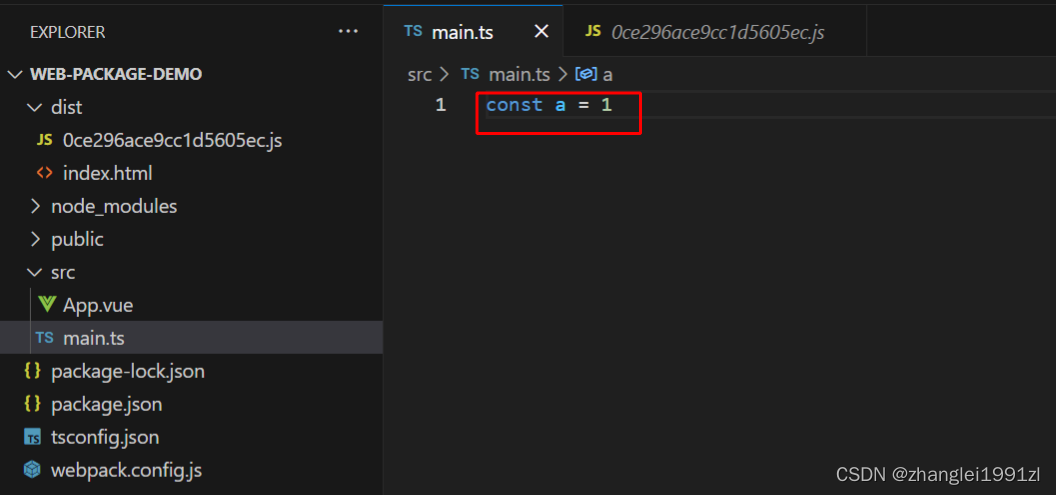
 3、引入vue
npm install vue
npm install vue-loader@next
改写main.ts
import { createApp } from 'vue'
import App from './App.vue'

createApp(App).mount('#app')
由于已经指定了挂载节点为id为app的元素,所以在public/index.html中创建id为app的div
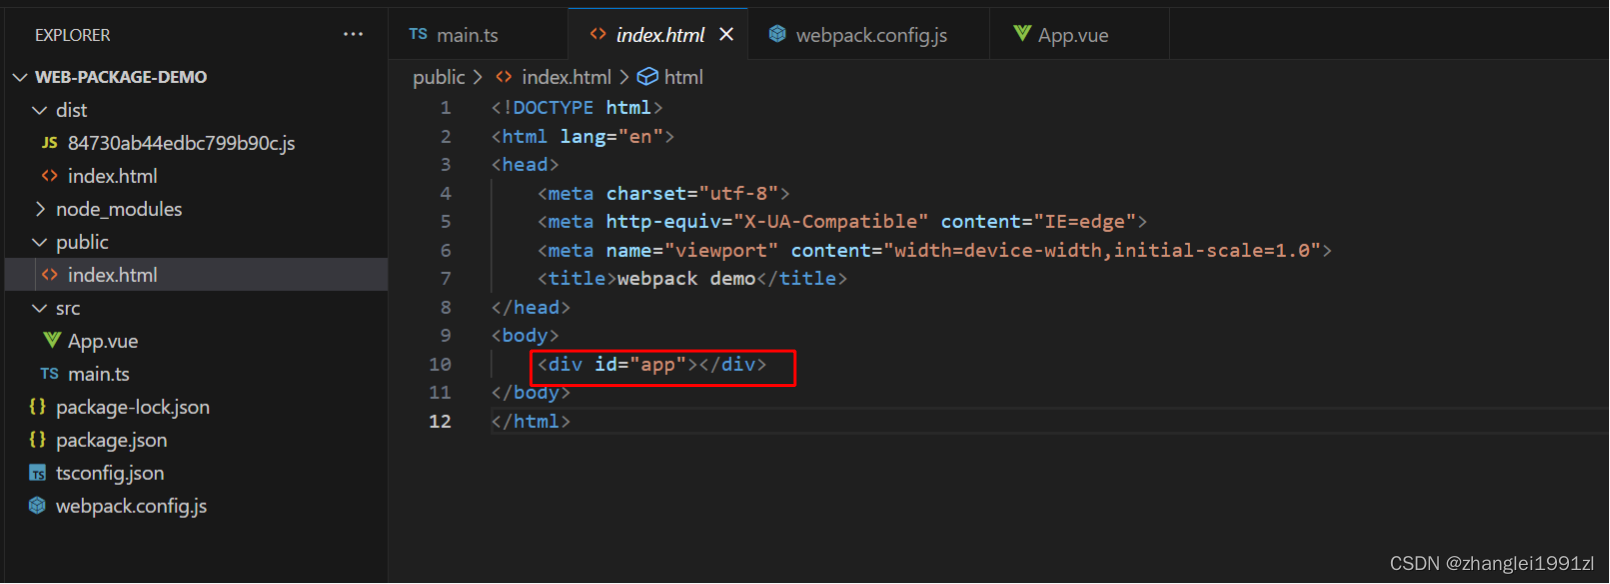
此时如果打包会报错,因为webpack不能解析文件名为vue结尾的文件,这个时候要改写webpack.config.js指定vue文件的解析器
//引入提示
const { Configuration } = require('webpack')
const path = require('path')
const htmlWebpackPlugin = require('html-webpack-plugin')
//引入vue解析器
const { VueLoaderPlugin } = require('vue-loader/dist/index')

/**
 * @type {Configuration} //配置智能提示
 */
const config={
    mode: "development", //develop不会压缩解析之后的文件,production会进行压缩
    entry: './src/main.ts', //入口文件
    output: {
        filename: "[hash].js",
        path: path.resolve(__dirname, 'dist') //出口文件
    },
    module: {
        rules: [
            {
                test: /\.vue$/, //解析vue 模板
                use: "vue-loader"
            }
        ]
    },
    plugins: [
        new htmlWebpackPlugin({
            template: "./public/index.html" //html模板
        }),
        new VueLoaderPlugin() //解析vue
    ]

}

module.exports = config
然后在App.vue改写点东西,进行测试打包
<template>

<div>
    测试
</div>
</template>
<script setup>
import {ref,reactive} from 'vue'

</script>
<style scoped>

</style>
执行打包指令
npm run build用浏览器打开dist文件夹下index.html

证明能正常编译打包
4、引入CleanWebpackPlugin
每次执行npm run build打包指令的时候,dist文件夹不会进行文件清理,会导致垃圾文件越来越多,这个插件就是帮助每次构建打包的时候进行清理dist文件夹
npm install clean-webpack-plugin修改webpack.config.js
//引入提示
const { Configuration } = require('webpack')
const path = require('path')
const htmlWebpackPlugin = require('html-webpack-plugin')
//引入vue解析器
const { VueLoaderPlugin } = require('vue-loader/dist/index')
//引入清理插件
const { CleanWebpackPlugin } = require('clean-webpack-plugin')

/**
 * @type {Configuration} //配置智能提示
 */
const config={
    mode: "development", //develop不会压缩解析之后的文件,production会进行压缩
    entry: './src/main.ts', //入口文件
    output: {
        filename: "[hash].js",
        path: path.resolve(__dirname, 'dist') //出口文件
    },
    module: {
        rules: [
            {
                test: /\.vue$/, //解析vue 模板
                use: "vue-loader"
            }
        ]
    },
    plugins: [
        new htmlWebpackPlugin({
            template: "./public/index.html" //html模板
        }),
        new VueLoaderPlugin(), //解析vue
        new CleanWebpackPlugin(), //打包清空dist
    ]

}

module.exports = config
5、引入css解析器
当涉及到样式文件时,webpack并不知道用什么解析器进行解析,因此要引入css解析器解析css后缀文件
这里先增加一个别名配置,方便引入文件的时候能用别名替换一部分路径
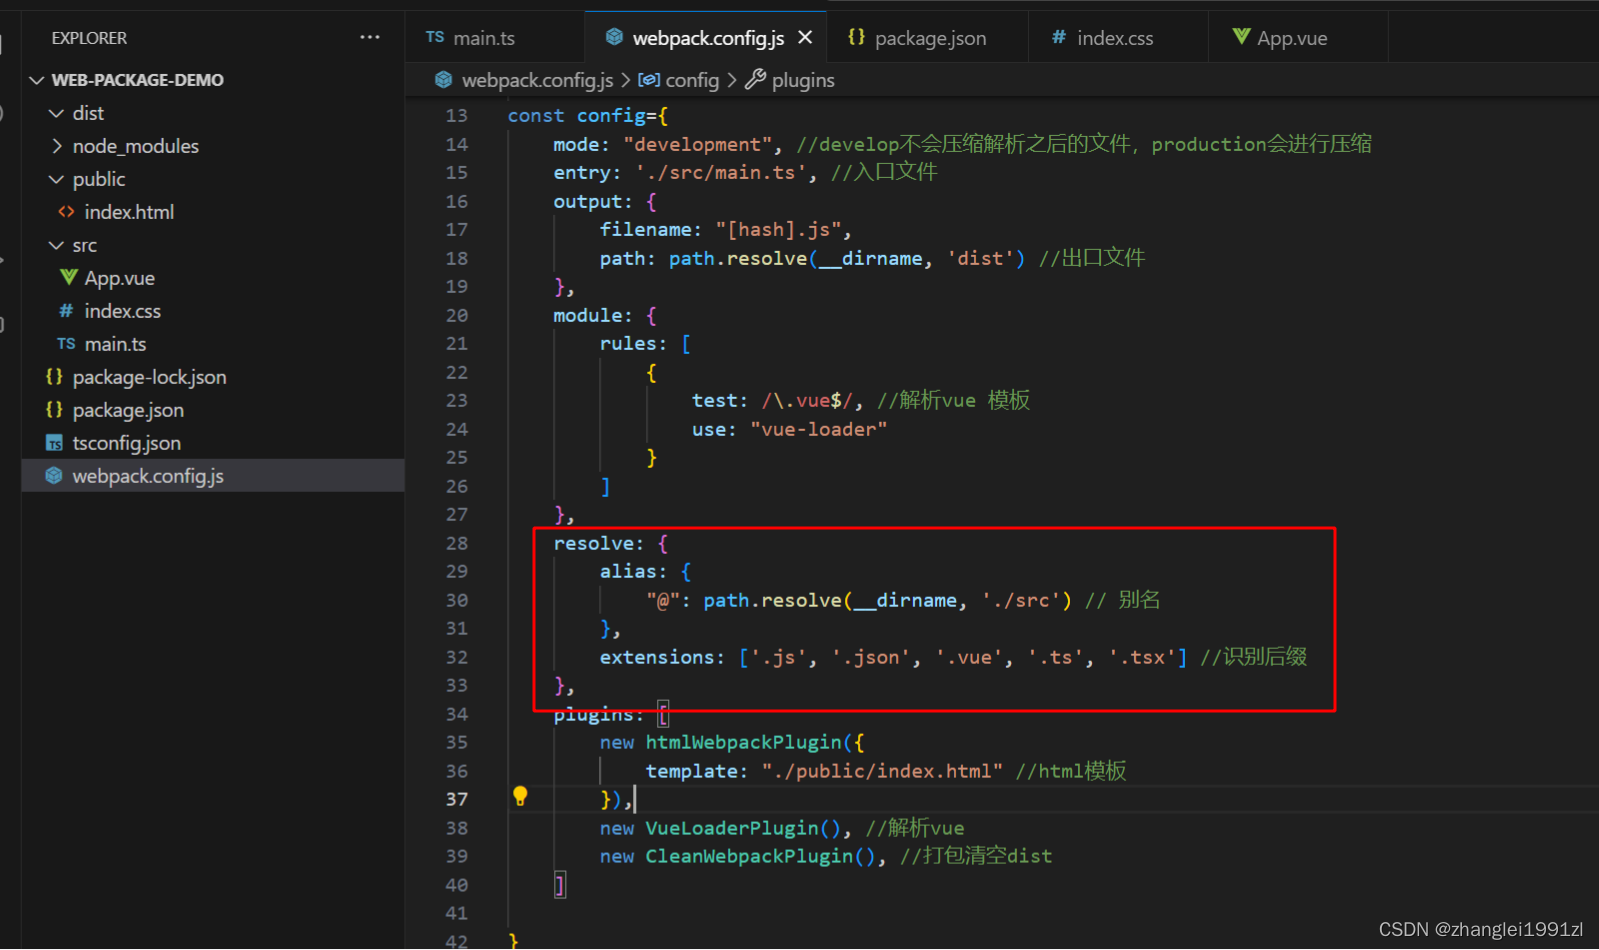
//引入提示
const { Configuration } = require('webpack')
const path = require('path')
const htmlWebpackPlugin = require('html-webpack-plugin')
//引入vue解析器
const { VueLoaderPlugin } = require('vue-loader/dist/index')
//引入清理插件
const { CleanWebpackPlugin } = require('clean-webpack-plugin')

/**
 * @type {Configuration} //配置智能提示
 */
const config={
    mode: "development", //develop不会压缩解析之后的文件,production会进行压缩
    entry: './src/main.ts', //入口文件
    output: {
        filename: "[hash].js",
        path: path.resolve(__dirname, 'dist') //出口文件
    },
    module: {
        rules: [
            {
                test: /\.vue$/, //解析vue 模板
                use: "vue-loader"
            }
        ]
    },
    resolve: {
        alias: {
            "@": path.resolve(__dirname, './src') // 别名
        },
        extensions: ['.js', '.json', '.vue', '.ts', '.tsx'] //识别后缀
    },
    plugins: [
        new htmlWebpackPlugin({
            template: "./public/index.html" //html模板
        }),
        new VueLoaderPlugin(), //解析vue
        new CleanWebpackPlugin(), //打包清空dist
    ]

}

module.exports = config
安装插件
npm install css-loader
npm install style-loader
增加webpack.config.js配置
module: {
        rules: [
            {
                test: /\.vue$/, //解析vue 模板
                use: "vue-loader"
            },
            {
                test: /\.css$/, //解析css
                use: ["style-loader", "css-loader"],
            },
        ]
    },
引入样式文件
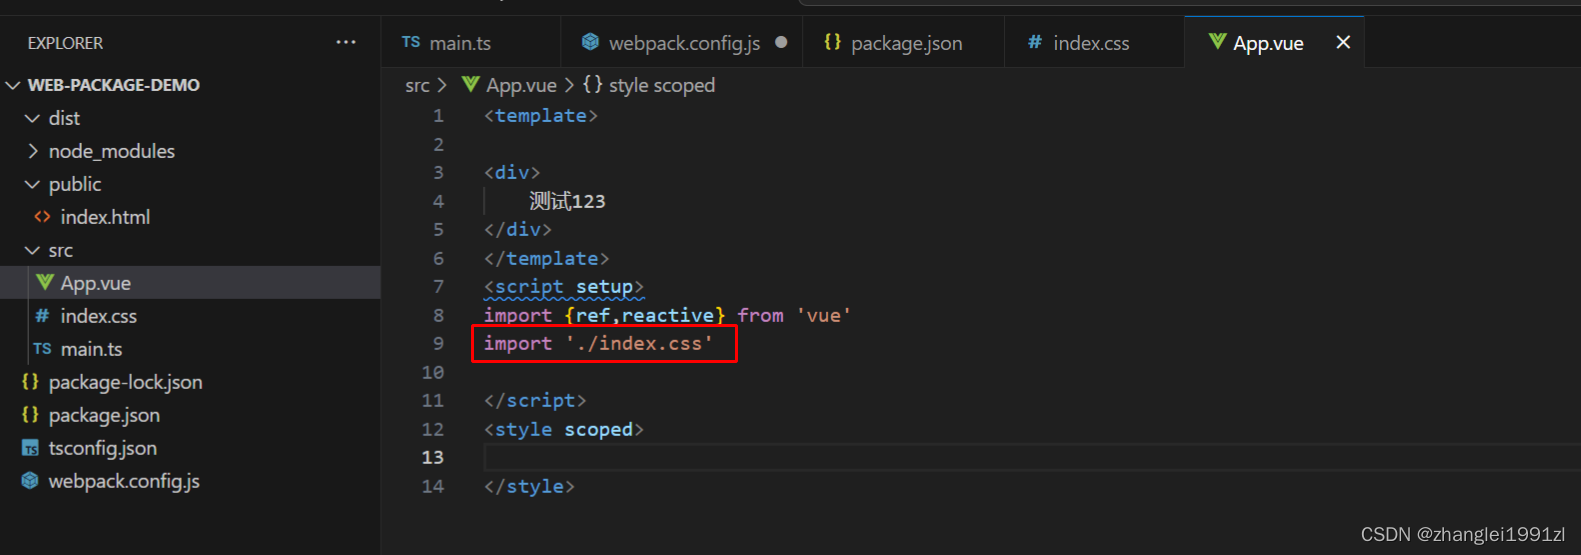
测试效果
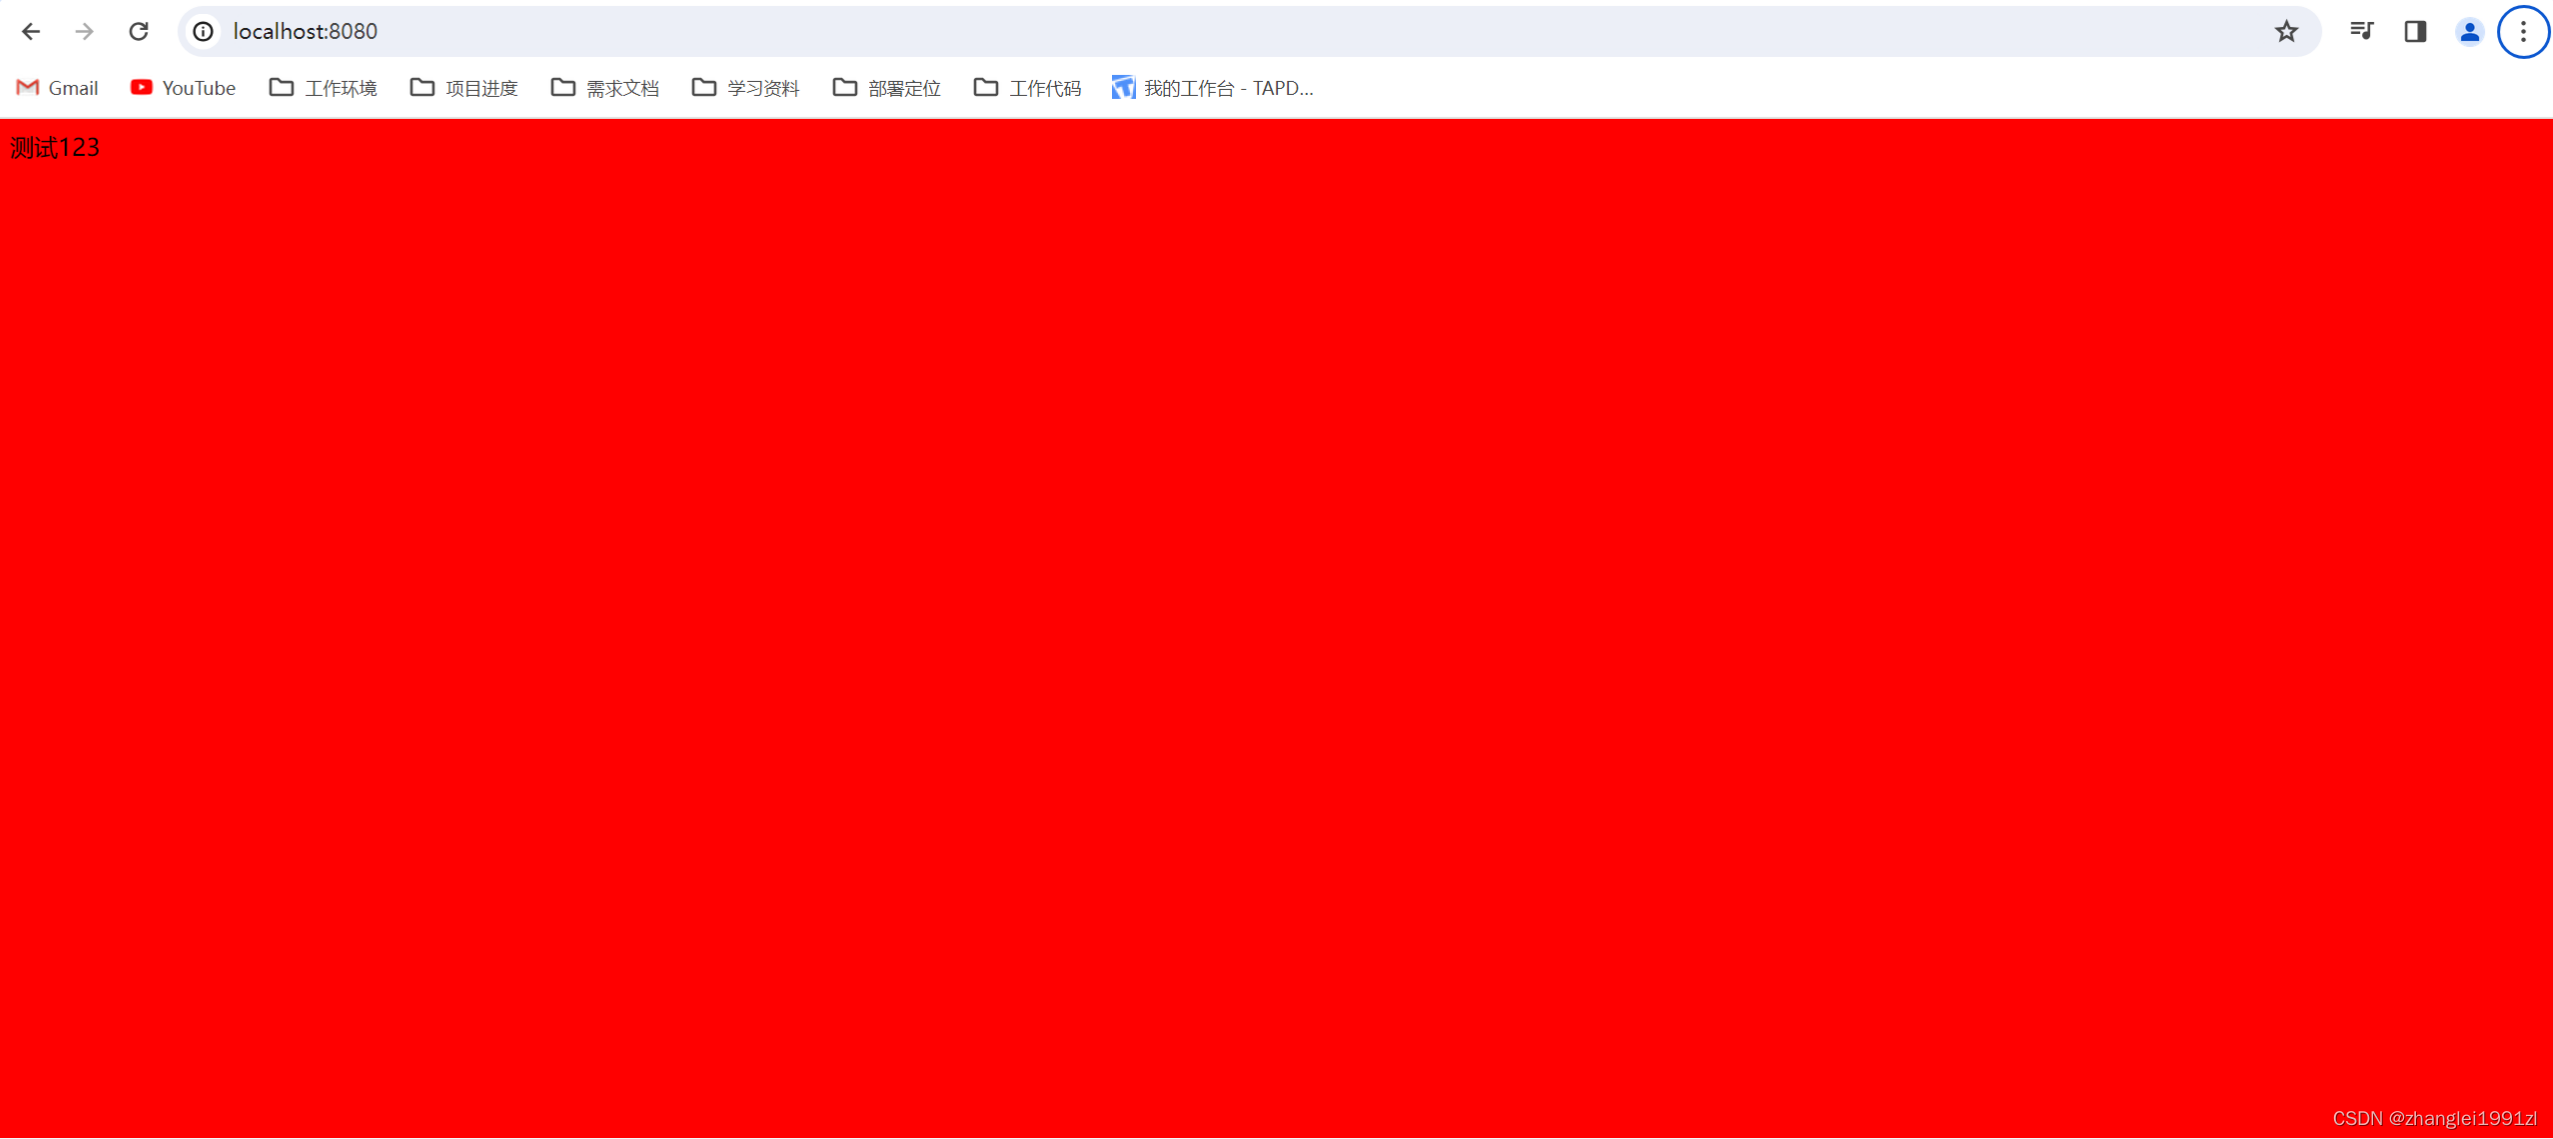
如果想用less语法,可以安装less解析器
npm install less-loadermodule: {
rules: [
{
test: /\.vue$/, //解析vue 模板
use: "vue-loader"
},
{
test: /\.css$/, //解析css
use: ["style-loader", "css-loader"],
},
{
test: /\.less$/, //解析 less
use: ["style-loader", "css-loader", "less-loader"],
},
]
},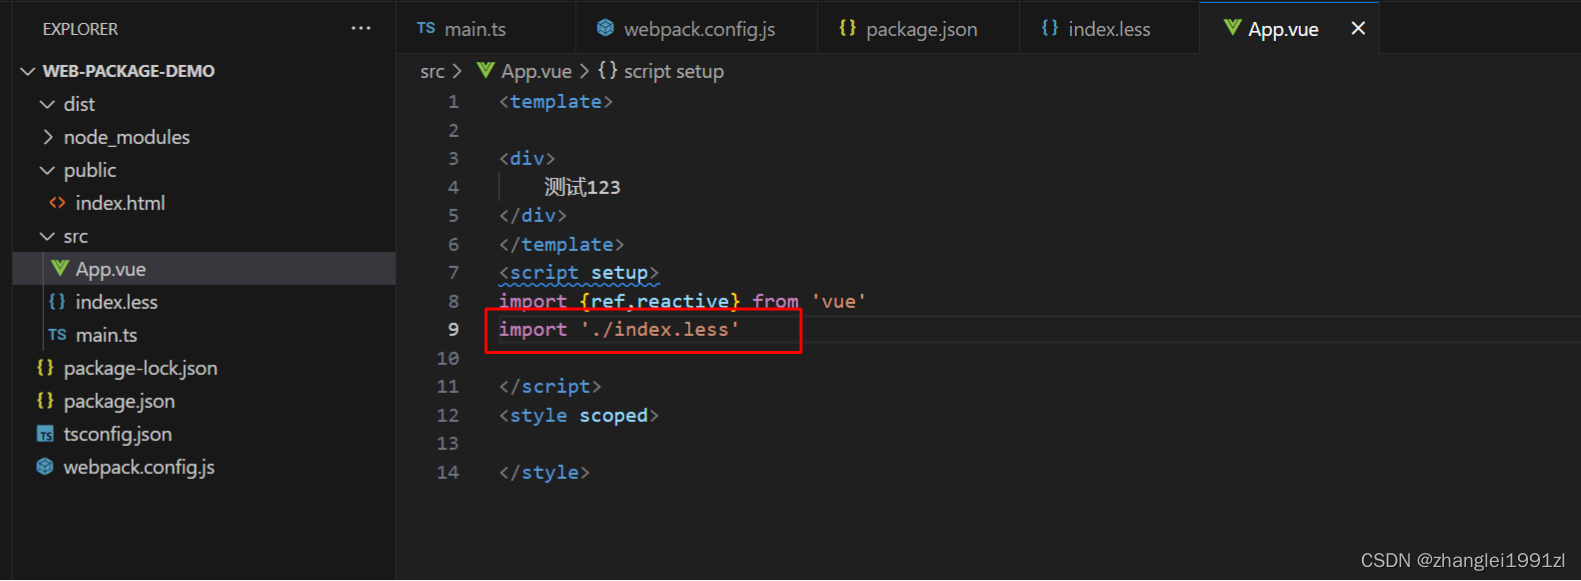 6、引入ts解析器
npm install typescript
npm install ts-loader
module: {
rules: [
{
test: /\.vue$/, //解析vue 模板
use: "vue-loader"
},
{
test: /\.css$/, //解析css
use: ["style-loader", "css-loader"],
},
{
test: /\.less$/, //解析 less
use: ["style-loader", "css-loader", "less-loader"],
},
{
test: /\.ts$/, //解析ts
loader: "ts-loader",
options: {
configFile: path.resolve(process.cwd(), 'tsconfig.json'),
appendTsSuffixTo: [/\.vue$/]
},
}
]
},代码中写一段ts代码
<template>
<div>
测试123
{{ name }}
</div>
</template>
<script setup lang="ts">
import {ref,reactive} from 'vue'
import './index.less'
const name = ref<string>("aa")
</script>
<style scoped>
</style>这时候会报一个错误

是说ts-loader解析的时候不知道vue,需要添加vue的声明文件
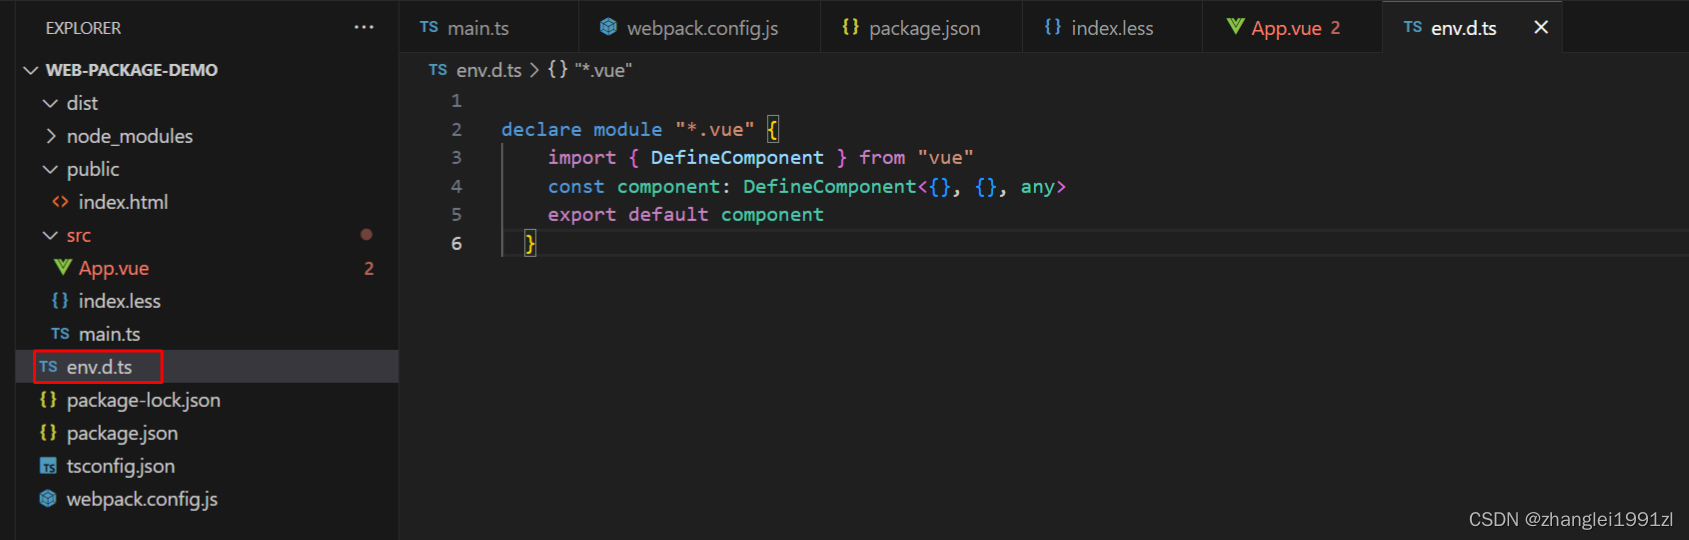
再执行就能成功输出
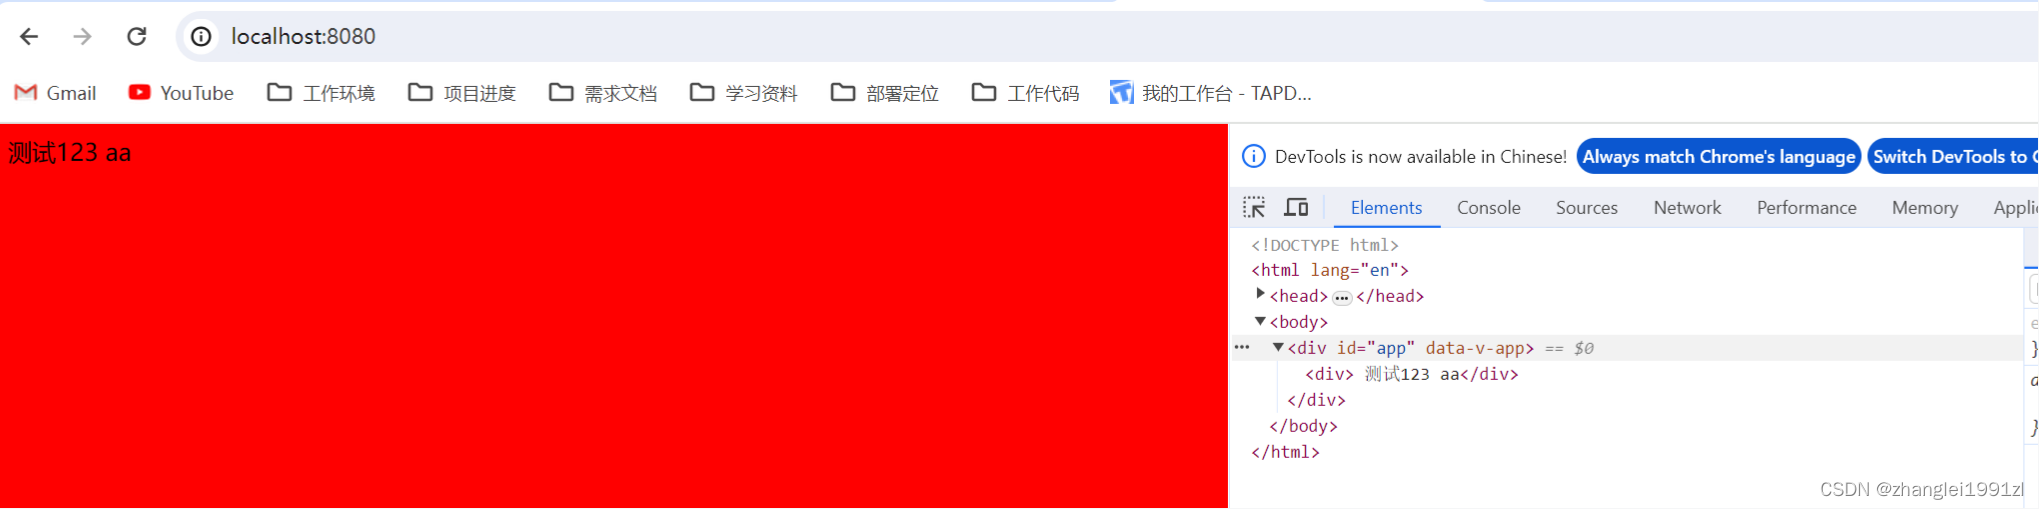
7、引入输出友好组件FriendlyErrorsWebpackPlugin
因为控制台输出的内容比较多且杂乱,引入这个插件可以控制输出的内容
这个组件只在低于webpack5的版本下支持,webpack5安装会报错
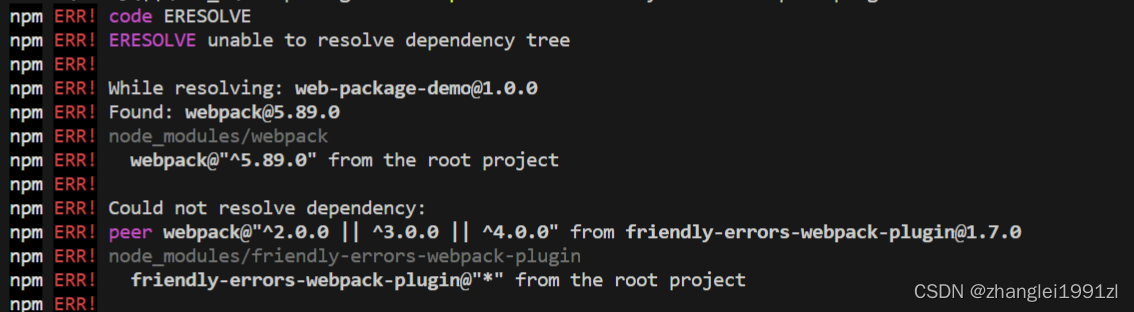
使用方法
//内容提示友好组件
const FriendlyErrorsWebpackPlugin = require("friendly-errors-webpack-plugin");
stats:"errors-only", //取消提示
plugins: [
new htmlWebpackPlugin({
template: "./public/index.html" //html模板
}),
new VueLoaderPlugin(), //解析vue
new CleanWebpackPlugin(), //打包清空dist
new FriendlyErrorsWebpackPlugin({
compilationSuccessInfo:{ //美化样式
messages:['You application is running here http://localhost:9001']
}
})
]8、devServer
修改devserver启动的一些配置,如端口,是否启动完成打开窗口等
//引入提示
const { Configuration } = require('webpack')
const path = require('path')
const htmlWebpackPlugin = require('html-webpack-plugin')
//引入vue解析器
const { VueLoaderPlugin } = require('vue-loader/dist/index')
//引入清理插件
const { CleanWebpackPlugin } = require('clean-webpack-plugin')
//内容提示友好组件
// const FriendlyErrorsWebpackPlugin = require("friendly-errors-webpack-plugin");
/**
* @type {Configuration} //配置智能提示
*/
const config={
mode: "development", //develop不会压缩解析之后的文件,production会进行压缩
entry: './src/main.ts', //入口文件
output: {
filename: "[hash].js",
path: path.resolve(__dirname, 'dist') //出口文件
},
module: {
        rules: [
            {
                test: /\.vue$/, //解析vue 模板
                use: "vue-loader"
            },
            {
                test: /\.css$/, //解析css
                use: ["style-loader", "css-loader"],
            },
            {
                test: /\.less$/, //解析 less
                use: ["style-loader", "css-loader", "less-loader"],
            },
            {
                test: /\.ts$/,  //解析ts
                loader: "ts-loader",
                options: {
                    configFile: path.resolve(process.cwd(), 'tsconfig.json'),
                    appendTsSuffixTo: [/\.vue$/]
                },
            }
        ]
    },
resolve: {
alias: {
"@": path.resolve(__dirname, './src') // 别名
},
extensions: ['.js', '.json', '.vue', '.ts', '.tsx'] //识别后缀
},
stats:"errors-only", //取消提示
plugins: [
new htmlWebpackPlugin({
template: "./public/index.html" //html模板
}),
new VueLoaderPlugin(), //解析vue
new CleanWebpackPlugin(), //打包清空dist
// new FriendlyErrorsWebpackPlugin({
// compilationSuccessInfo:{ //美化样式
// messages:['You application is running here http://localhost:9001']
// }
// })
],
devServer: {
proxy: {},
port: 9001,
hot: true,
open: true,
},
}
module.exports = config9、externals
打包的时候如果引入的组件比较多,会导致打包的包体积很大,这时候如果引用这个属性,可以将某些组件不打包进去,但一定要在模板中用CDN的方式引用这个相关的组件,否则会报错
先不添加这个配置进行打包操作,打包的大小为618K
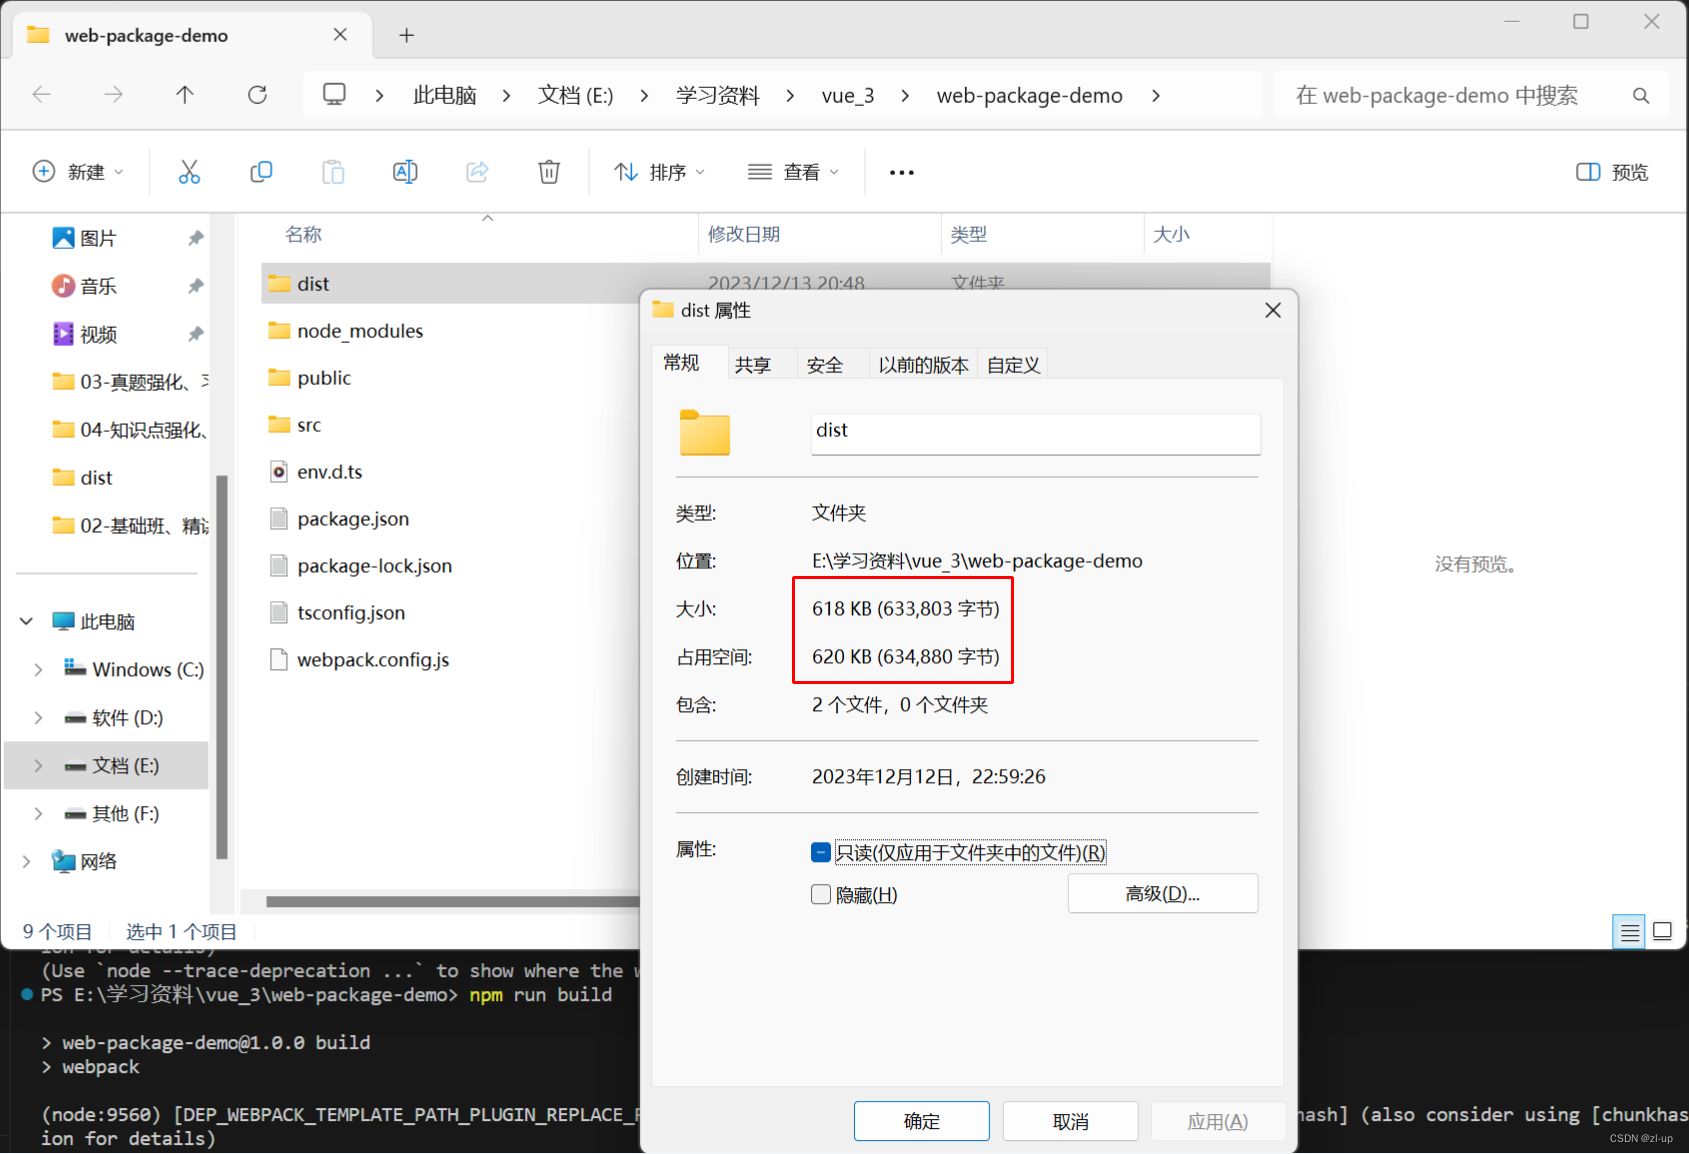
增加配置之后
//引入提示
const { Configuration } = require('webpack')
const path = require('path')
const htmlWebpackPlugin = require('html-webpack-plugin')
//引入vue解析器
const { VueLoaderPlugin } = require('vue-loader/dist/index')
//引入清理插件
const { CleanWebpackPlugin } = require('clean-webpack-plugin')
//内容提示友好组件
// const FriendlyErrorsWebpackPlugin = require("friendly-errors-webpack-plugin");
/**
 * @type {Configuration} //配置智能提示
 */
const config={
    mode: "development", //develop不会压缩解析之后的文件,production会进行压缩
    entry: './src/main.ts', //入口文件
    output: {
        filename: "[hash].js",
        path: path.resolve(__dirname, 'dist') //出口文件
    },
    module: {
        rules: [
            {
                test: /\.vue$/, //解析vue 模板
                use: "vue-loader"
            },
            {
                test: /\.css$/, //解析css
                use: ["style-loader", "css-loader"],
            },
            {
                test: /\.less$/, //解析 less
                use: ["style-loader", "css-loader", "less-loader"],
            },
            {
                test: /\.ts$/,  //解析ts
                loader: "ts-loader",
                options: {
                    configFile: path.resolve(process.cwd(), 'tsconfig.json'),
                    appendTsSuffixTo: [/\.vue$/]
                },
            }
        ]
    },
    resolve: {
        alias: {
            "@": path.resolve(__dirname, './src') // 别名
        },
        extensions: ['.js', '.json', '.vue', '.ts', '.tsx'] //识别后缀
    },
    stats:"errors-only", //取消提示
    plugins: [
        new htmlWebpackPlugin({
            template: "./public/index.html" //html模板
        }),
        new VueLoaderPlugin(), //解析vue
        new CleanWebpackPlugin(), //打包清空dist
        // new FriendlyErrorsWebpackPlugin({
        //     compilationSuccessInfo:{ //美化样式
        //         messages:['You application is running here http://localhost:9001']
        //     }

        // })
    ],
    devServer: {
        proxy: {},
        port: 9001,
        hot: true,
        open: true,
    },
    externals: {
        vue: "Vue" //CDN 引入
    },
}

module.exports = config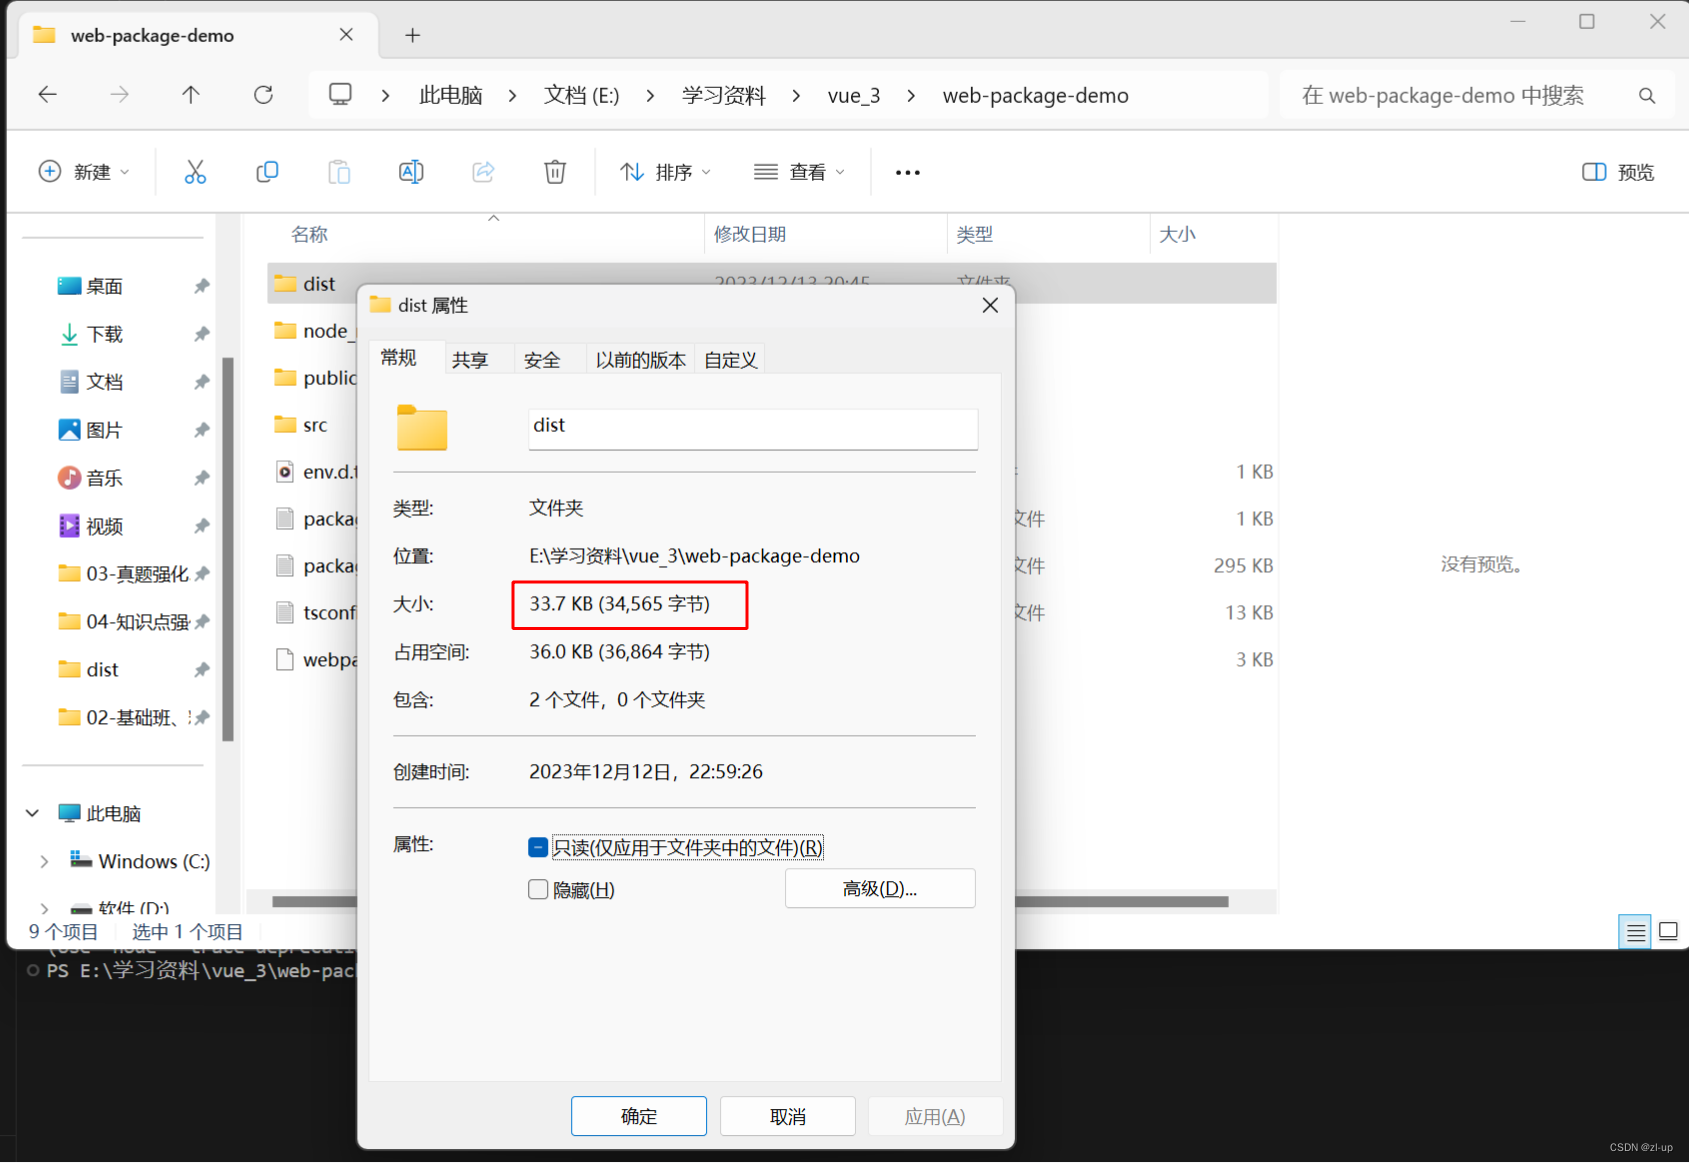
但因为打包的文件中不包含vue,所以要在模板中用CDN的方式引入VUE否则页面会报错找不到vue
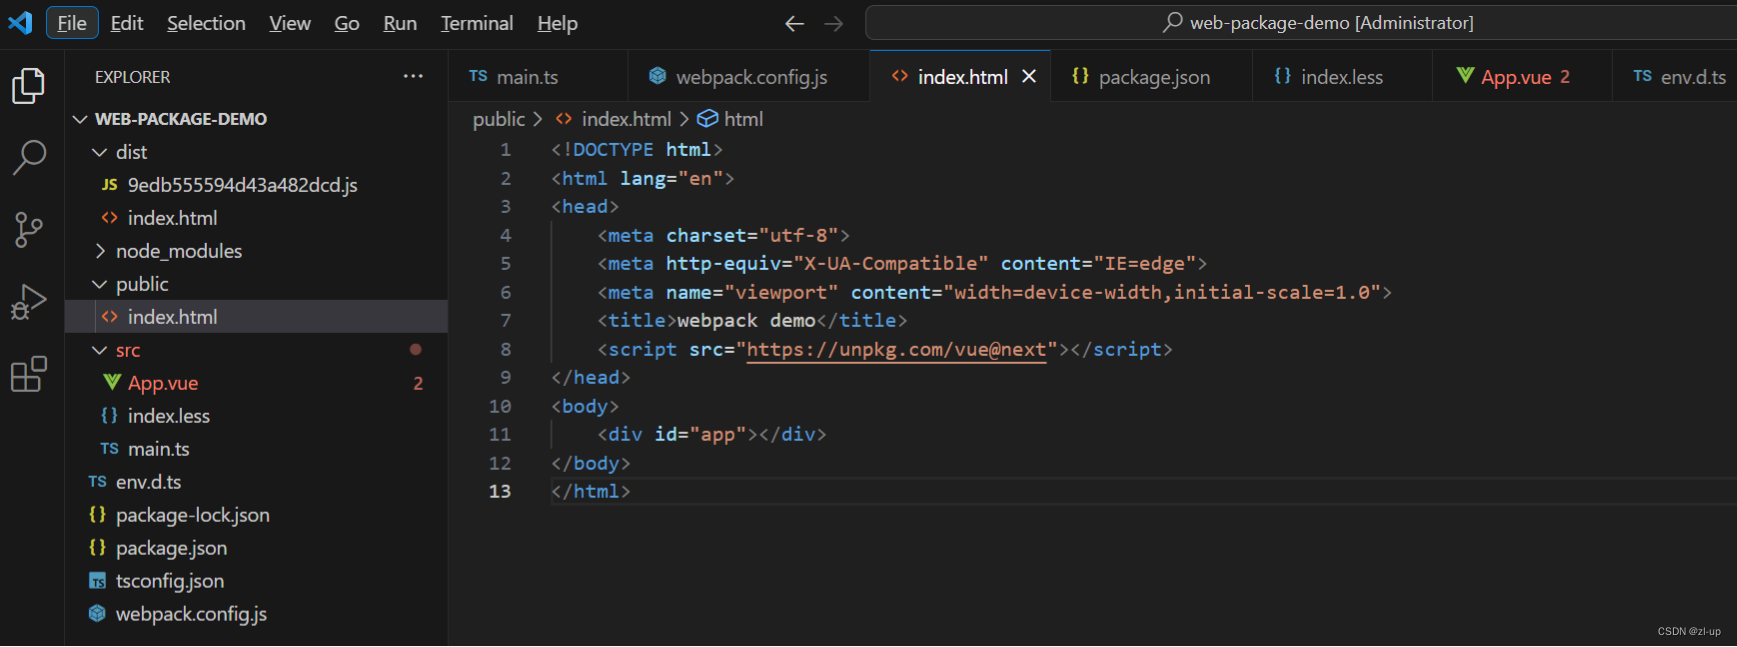
42、性能优化
这一节可以参考满神的文章https://xiaoman.blog.csdn.net/article/details/126811832
43、Web Components
web components提供了我们自定义标签的能力,并且提供了标签内完整的生命周期 。
1、简单使用
编写一个btn.js文件定义一个标签Btn,并在windows中注册这个标签
class Btn extends HTMLElement {
    constructor () {
        //调用super 来建立正确的原型链继承关系
        super()
        const p = this.h('p')
        p.innerText = '测试'
        p.setAttribute('style','height:200px;width:200px;border:1px solid #ccc;background:yellow')
        //表示 shadow DOM 子树的根节点。
        const shaDow = this.attachShadow({mode:"open"})

        shaDow.appendChild(p)
    }

    h (el) {
       return  document.createElement(el)
    }

    /**
     * 生命周期
     */
    //当自定义元素第一次被连接到文档 DOM 时被调用。
    connectedCallback () {
        console.log('我已经插入了!!!嗷呜')
    }

    //当自定义元素与文档 DOM 断开连接时被调用。
    disconnectedCallback () {
        console.log('我已经断开了!!!嗷呜')
    }

    //当自定义元素被移动到新文档时被调用
    adoptedCallback () {
        console.log('我被移动了!!!嗷呜')
    }
    //当自定义元素的一个属性被增加、移除或更改时被调用
    attributeChangedCallback () {
        console.log('我被改变了!!!嗷呜')
    }

}

window.customElements.define('xiao-man',Btn)
引入这个js并使用这个标签
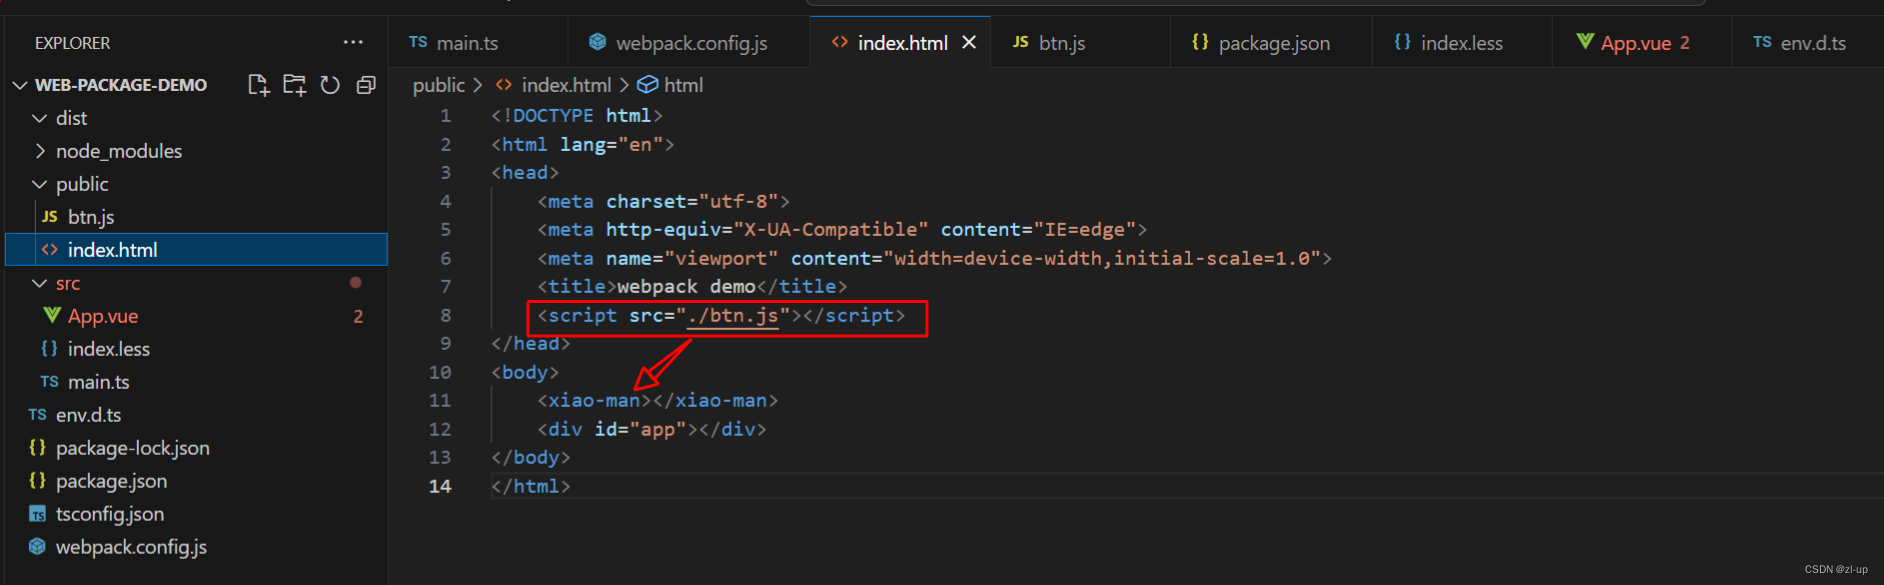
结果为
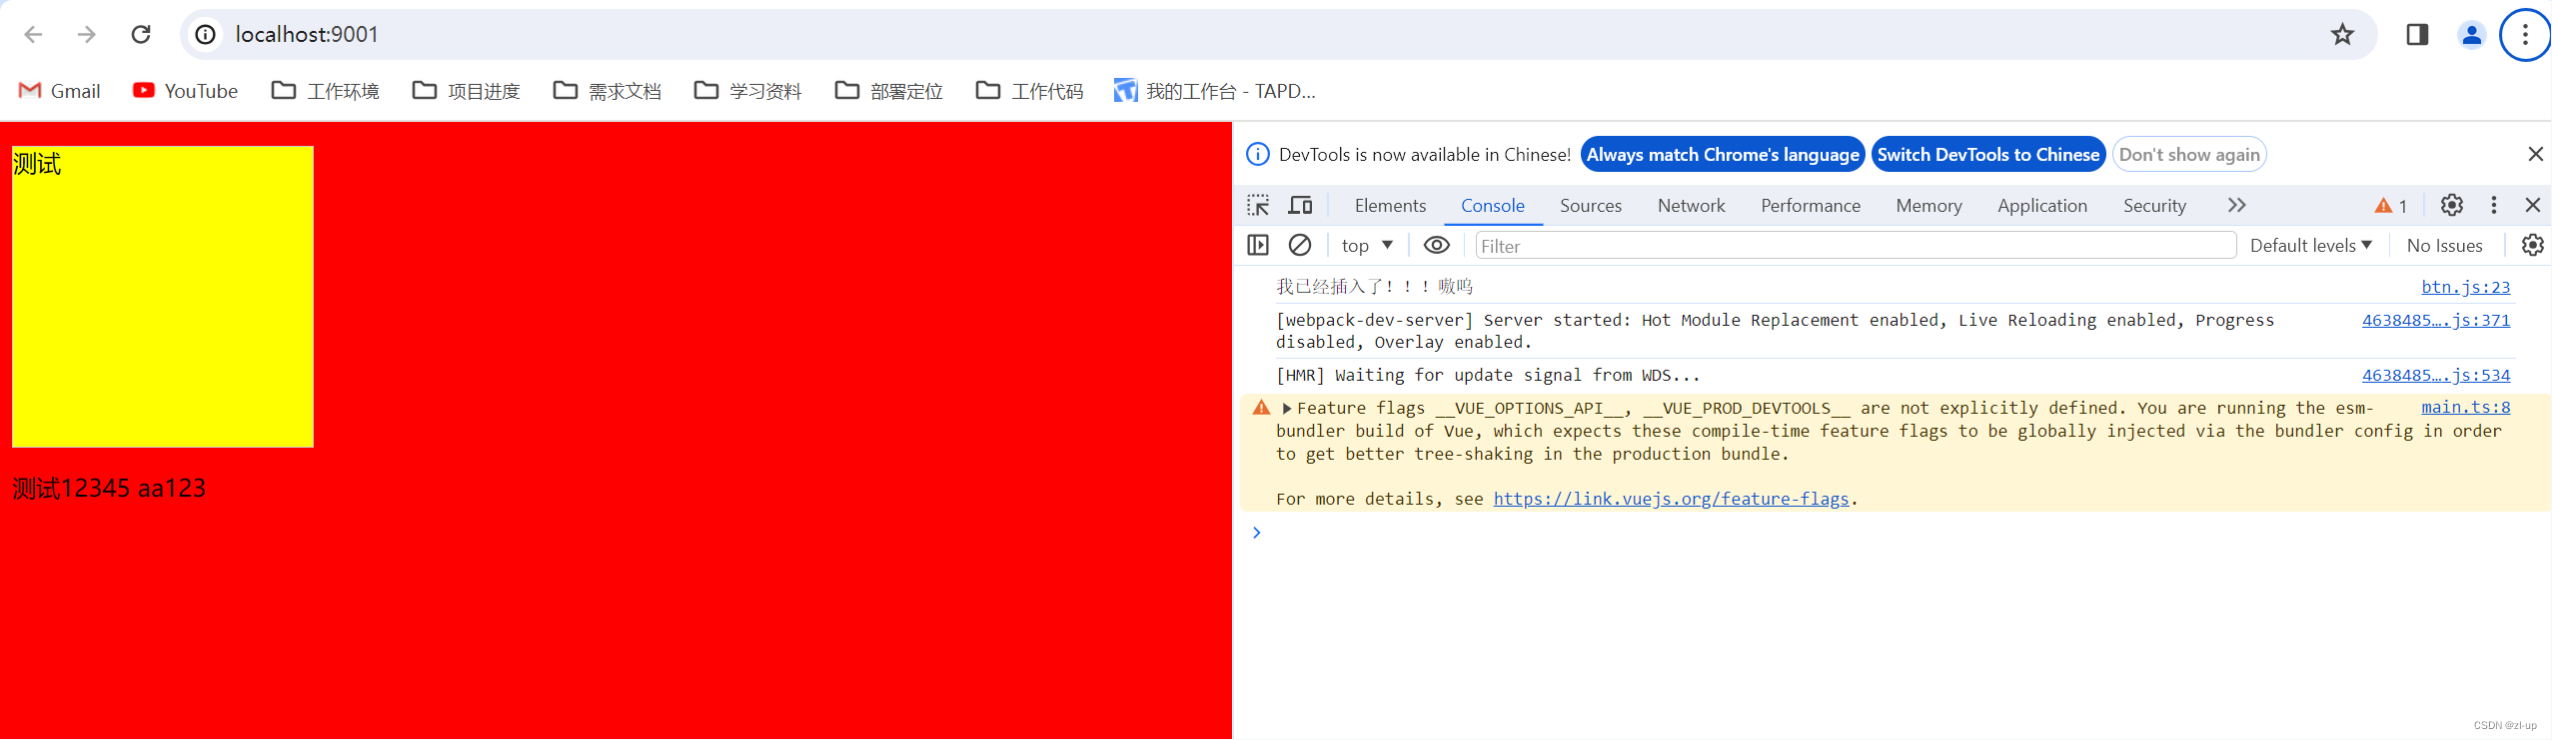
也有另一种定义的方式
class Btn extends HTMLElement {
    constructor() {
        //调用super 来建立正确的原型链继承关系
        super()
        const template = this.h('template')
        template.innerHTML = `
        <div>小满</div>
        <style>
            div{
                height:200px;
                width:200px;
                background:blue;
            }
        </style>
        `
        //表示 shadow DOM 子树的根节点。
        const shaDow = this.attachShadow({ mode: "open" })

        shaDow.appendChild(template.content.cloneNode(true))
    }

    h(el) {
        return document.createElement(el)
    }

    /**
     * 生命周期
     */
    //当自定义元素第一次被连接到文档 DOM 时被调用。
    connectedCallback() {
        console.log('我已经插入了!!!嗷呜')
    }

    //当自定义元素与文档 DOM 断开连接时被调用。
    disconnectedCallback() {
        console.log('我已经断开了!!!嗷呜')
    }

    //当自定义元素被移动到新文档时被调用
    adoptedCallback() {
        console.log('我被移动了!!!嗷呜')
    }
    //当自定义元素的一个属性被增加、移除或更改时被调用
    attributeChangedCallback() {
        console.log('我被改变了!!!嗷呜')
    }

}

window.customElements.define('xiao-man', Btn)
2、vue中使用
由于满神的文章只介绍了vite引用一种 https://xiaoman.blog.csdn.net/article/details/127328300![]() https://xiaoman.blog.csdn.net/article/details/127328300
https://xiaoman.blog.csdn.net/article/details/127328300
这里提供了另一篇文章参考使用
先让vue跳过解析自己定义的标签
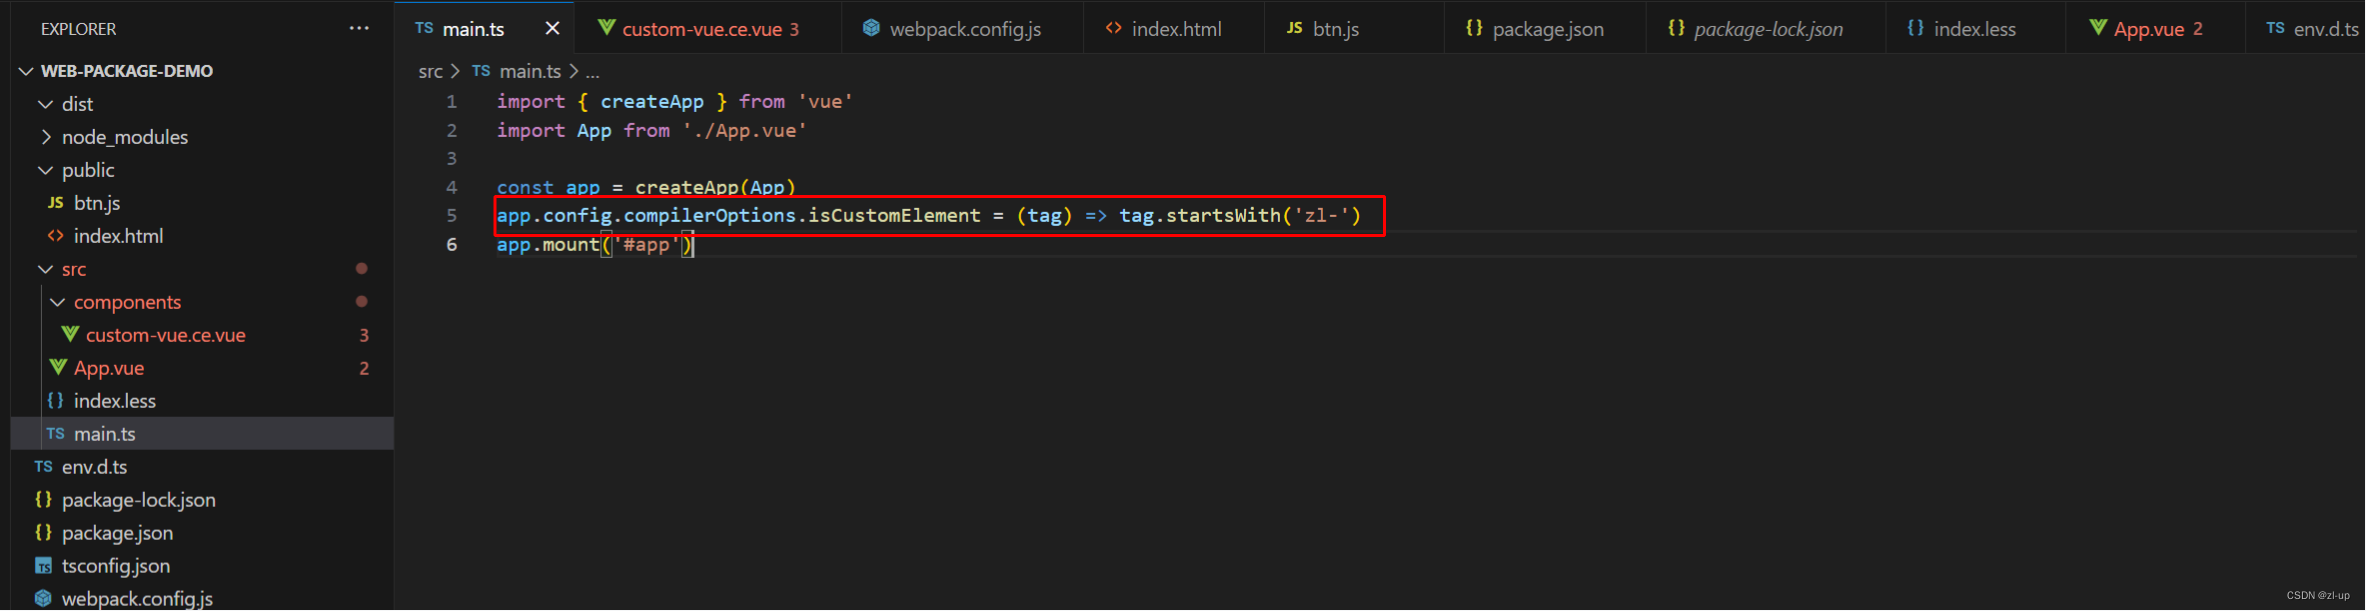
这里是定义以zl-开头的为自己定义的标签(这一行属实有点多余,至少在vue3.3.11中没这一行,我也能成功)
编写标签页代码
<template>
    <div>

        test {{title}}
    </div>
</template>

<script setup lang='ts'>

import { ref, reactive } from 'vue'

defineProps<{
    title:string
}>()

</script>

<style scoped lang='less'>

</style>
引用并注册这个标签
<template>
    <div>
        <zl-btn :title=" JSON.stringify(name) "></zl-btn>
    </div>
</template>

<script setup lang='ts'>
import { ref, reactive, defineCustomElement } from 'vue'
//自定义元素模式  要开启这个模式,只需要将你的组件文件以 .ce.vue 结尾即可(不用这个结尾好像也可以,我修改了这个文件的后缀,去掉了.ce,也成功了)
import customVueVue from './components/custom-vue.vue'
const Btn = defineCustomElement(customVueVue)
customElements.define('zl-btn', Btn)

const name = ref({a:1})

</script>

<style scoped lang='less'>

</style>
效果如下

跟原生的不同的是,外面样式会影响到这个标签,背景颜色是在外面定义的,原生的不会受影响
44、跨域及代理
满神文章中对vite构建配置做了详细描述
https://xiaoman.blog.csdn.net/article/details/128081558![]() https://xiaoman.blog.csdn.net/article/details/128081558我这里只是粘贴一下webpack的配置方式
https://xiaoman.blog.csdn.net/article/details/128081558我这里只是粘贴一下webpack的配置方式
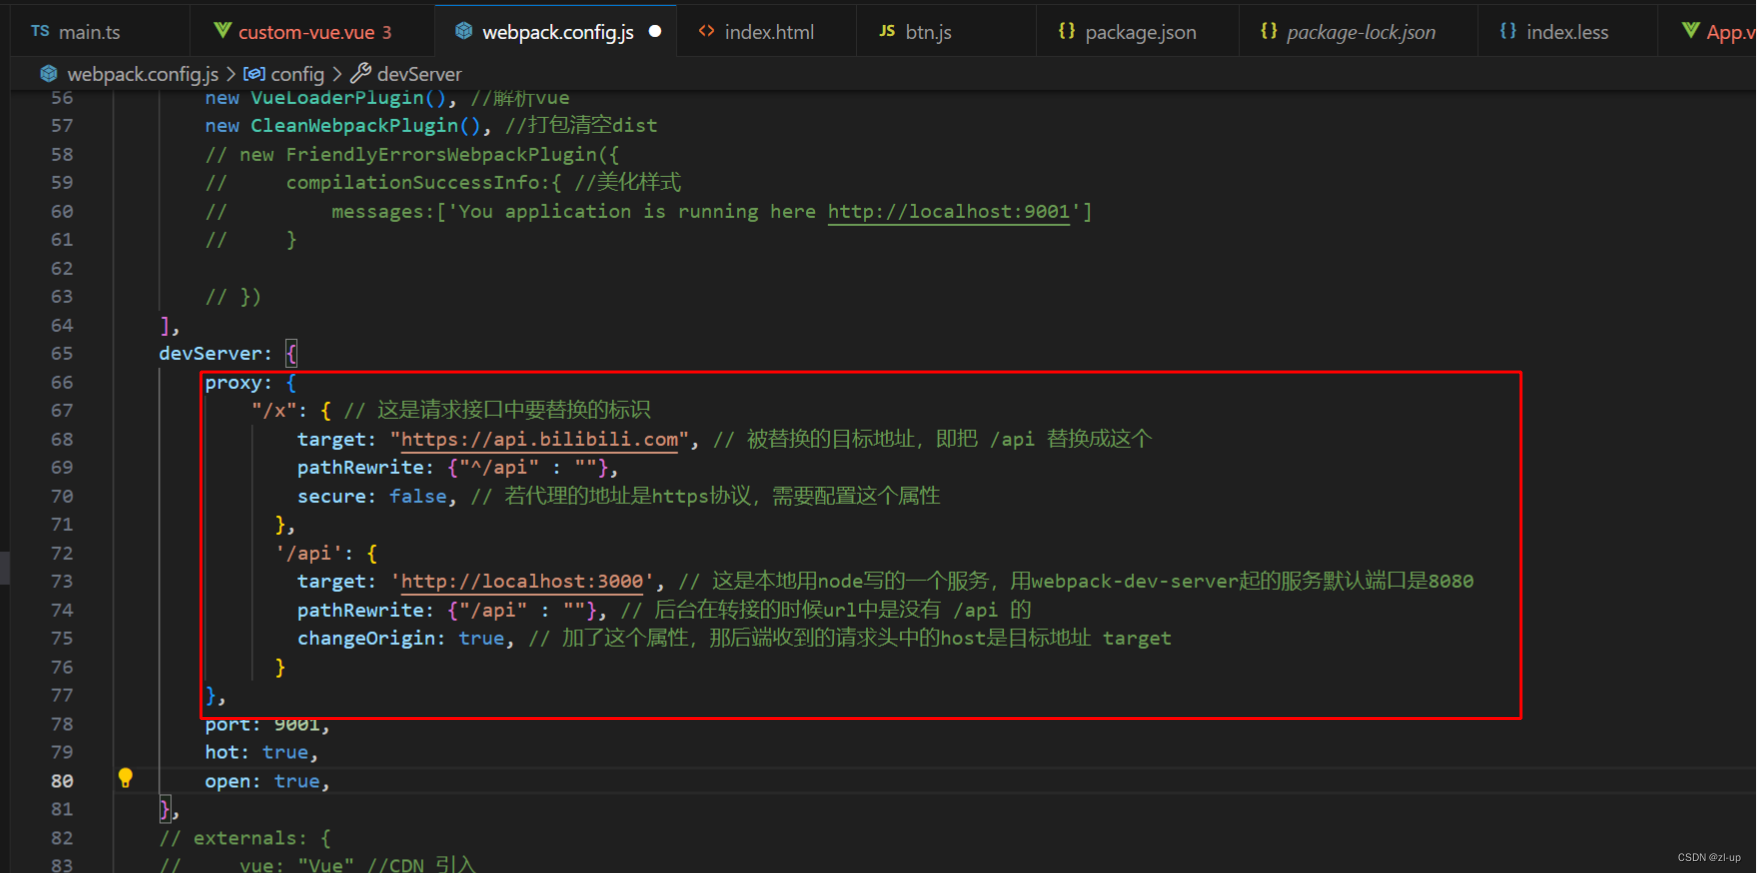


 2058
2058


 被折叠的 条评论
为什么被折叠?
被折叠的 条评论
为什么被折叠?
 到【灌水乐园】发言


