


根据网上的经验,有以下几种方式来进行屏幕的适配。
一、图片的适配
不同像素密度的手机加载工程资源文件(res)中不同资源图片,相信大家都很了解图片的适配了吧.
二、dimens.xml文件适配
dimens.xml存在于工程资源(res)文件夹中不同values(如:value-1280x720、value-800x480)文件夹下,可用于指定控件大小,不同像素密度手机加载不同values文件夹下的dimens.xml文件,使用方式如下:
hdpi:加载dimens.xml资源文件,位于res/value-800x480文件夹下
三、布局文件适配
五、权重适配
通过android提供的(权重)剩余空间分配,达到适配效果,只是在linearLayout里。布局文件如下所示:
  <!-- 不同的手机加载不同的dp -->
            <TextView
                android:background="#987654"
                android:layout_width="@dimen/width"
                android:layout_height="wrap_content"
                android:text="@string/hello_world" />
hdpi:加载dimens.xml资源文件,位于res/value-800x480文件夹下
        <resources>
            <dimen name="width">160dp</dimen>
        </resources>
根据上述hdpi dp和px的转换关系1dp = 1.5px,则160dp = 240px,当前控件宽度应该位于屏幕中间位置。
xhdpi:加载dimens.xml资源文件,位于res/value-1280x720文件夹下
        <resources>
            <dimen name="width">180dp</dimen>
        </resources>
三、布局文件适配
不同分辨率的手机,加载不同的布局文件已达到适配效果。创建多个layout(如:layout-1280x720、layout-800x480)文件夹用于存放不同像素密度手机所需布局文件。系统会自动的去加载适配的layout文件布局。
四、java代码适配
通过android相应api获取当前手机的宽高像素值,按比例分配屏幕中控件的宽高以达到适配效果,下面是布局和实现功能的核心代码:
一个textview:
TextView tv  = (TextView) findViewById(R.id.tv);
                //获取封装当前手机屏幕信息对象,用于存放宽高值
                DisplayMetrics metrics  = new DisplayMetrics();
                //给当前屏幕设置宽高
                getWindowManager().getDefaultDisplay().getMetrics(metrics);
                //获取高度
                Constant.srceenHeight = metrics.heightPixels;
                //获取宽度
                Constant.srceenWidth = metrics.widthPixels;
                Log.i(tag, "Constant.srceenHeight = "+Constant.srceenHeight);
                Log.i(tag, "Constant.srceenWidth = "+Constant.srceenWidth);
                //宽高各占50%
                RelativeLayout.LayoutParams layoutParams = new
                RelativeLayout.LayoutParams(
                                (int)(Constant.srceenWidth*0.5+0.5),
                                (int)(Constant.srceenHeight*0.5+0.5));
                tv.setLayoutParams(layoutParams);
五、权重适配
通过android提供的(权重)剩余空间分配,达到适配效果,只是在linearLayout里。布局文件如下所示:
        <LinearLayout xmlns:android="http://schemas.android.com/apk/res/android"
            xmlns:tools="http://schemas.android.com/tools"
            android:layout_width="match_parent"
            android:layout_height="match_parent"
            android:orientation="horizontal"
            tools:context=".MainActivity" >
                <TextView
                    android:background="#000000"
                    android:layout_width="0dp"
                    android:layout_weight="1"
                 android:layout_height="match_parent"/>
                <TextView
                    android:background="#123456"
                    android:layout_width="0dp"
                    android:layout_weight="1"
                    android:layout_height="match_parent"/>
        </LinearLayout>
六、百分比适配
下面的百分比布局是根据鸿神的博客概括出来的,感兴趣的可以去他的博客看下。
Android 屏幕适配方案 :http://blog.csdn.net/lmj623565791/article/details/45460089
Android 百分比布局库(percent-support-lib) 解析与扩展: http://blog.csdn.net/lmj623565791/article/details/46695347
dp能够让同一数值在不同的分辨率展示出大致相同的尺寸大小,但是当设备的尺寸差异较大的时候,就无能为力了。
1、多用match_parent和wrap_content
2、多用weight
3、自定义view解决
2、多用weight
3、自定义view解决
其实上述3点,归根结底还是利用百分比,match_parent相当于100%参考父控件;weight即按比例分配;自定义view无非是因为里面多数尺寸是按照百分比计算的;
google新出的百分比布局就极大的解决了屏幕适配的问题。
需要在as的grald里面添加:
compile 'com.android.support:percent:22.2.0'-
两种布局供大家使用:
PercentRelativeLayout、PercentFrameLayout,通过名字就可以看出,这是继承自FrameLayout和RelativeLayout两个容器类; -
支持的属性有:
layout_widthPercent、layout_heightPercent、
layout_marginPercent、layout_marginLeftPercent、
layout_marginTopPercent、layout_marginRightPercent、
layout_marginBottomPercent、layout_marginStartPercent、layout_marginEndPercent。
可以看到支持宽高,以及margin。
也就是说,大家只要在开发过程中使用PercentRelativeLayout、PercentFrameLayout替换FrameLayout、RelativeLayout即可。
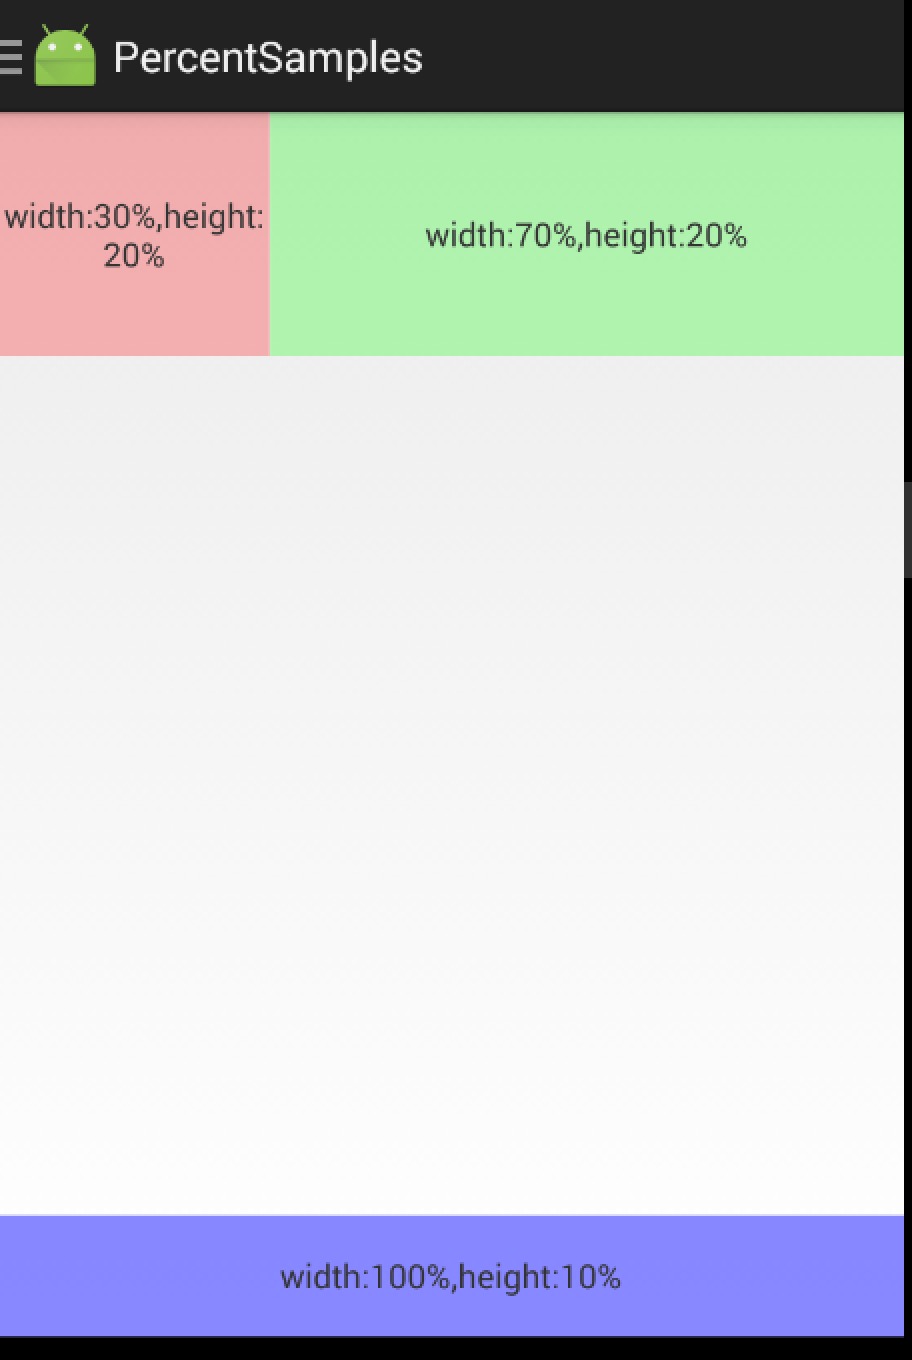
首先看下PercentFrameLayout的使用:
<?xml version="1.0" encoding="utf-8"?>
<android.support.percent.PercentFrameLayout
    xmlns:android="http://schemas.android.com/apk/res/android"
    xmlns:app="http://schemas.android.com/apk/res-auto"
    android:layout_width="match_parent"
    android:layout_height="match_parent">

    <TextView
        android:layout_width="0dp"
        android:layout_height="0dp"
        android:layout_gravity="left|top"
        android:background="#44ff0000"
        android:text="width:30%,height:20%"
        app:layout_heightPercent="20%"
        android:gravity="center"
        app:layout_widthPercent="30%"/>

    <TextView
        android:layout_width="0dp"
        android:layout_height="0dp"
        android:layout_gravity="right|top"
        android:gravity="center"
        android:background="#4400ff00"
        android:text="width:70%,height:20%"
        app:layout_heightPercent="20%"
        app:layout_widthPercent="70%"/>


    <TextView
        android:layout_width="0dp"
        android:layout_height="0dp"
        android:layout_gravity="bottom"
        android:background="#770000ff"
        android:text="width:100%,height:10%"
        android:gravity="center"
        app:layout_heightPercent="10%"
        app:layout_widthPercent="100%"/>


</android.support.percent.PercentFrameLayout>
3个TextView,很简单,直接看效果图:
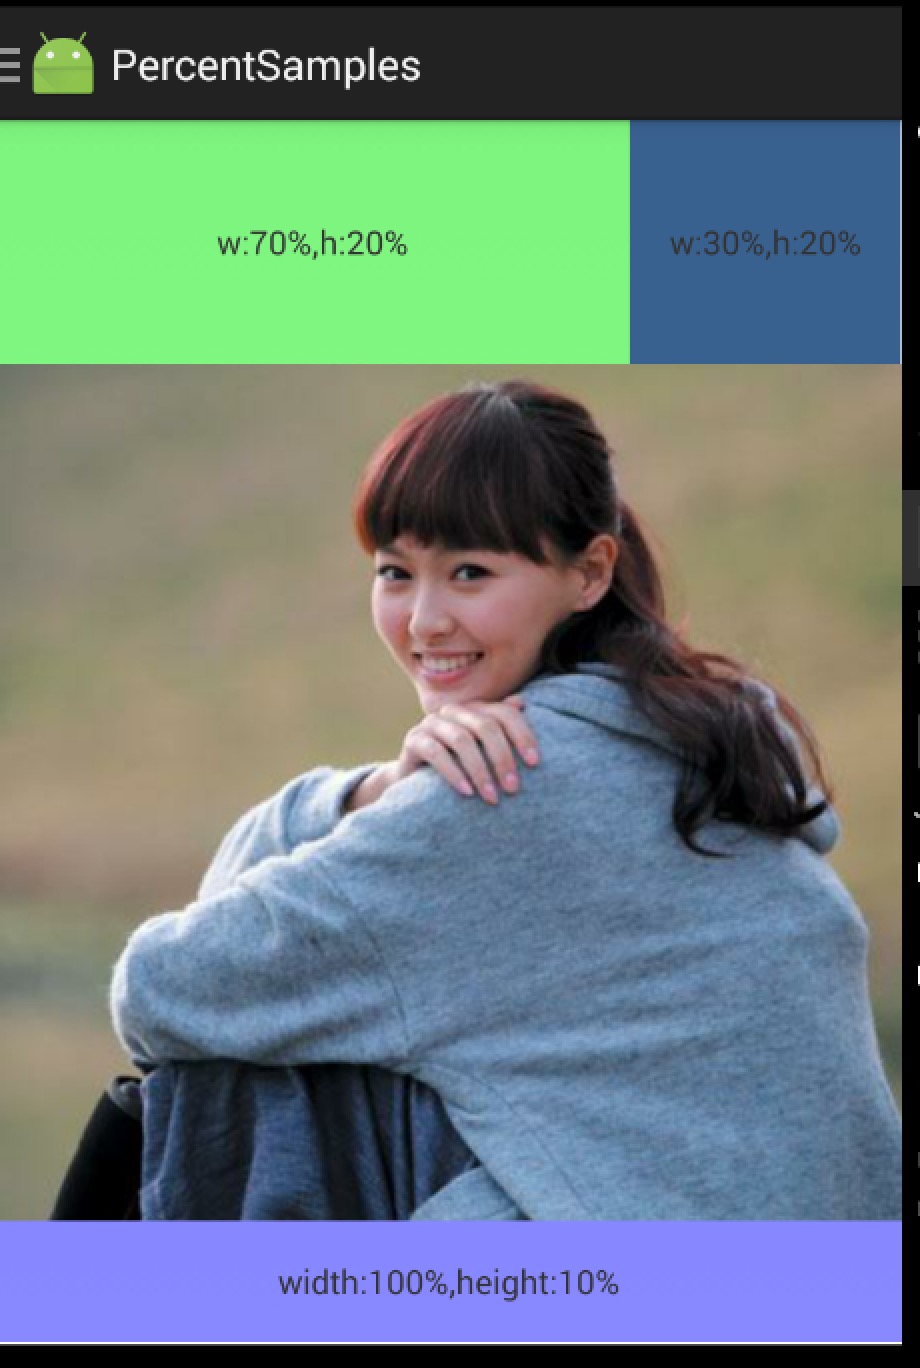
PercentRelativeLayout
<?xml version="1.0" encoding="utf-8"?>
<android.support.percent.PercentRelativeLayout
    xmlns:android="http://schemas.android.com/apk/res/android"
    xmlns:app="http://schemas.android.com/apk/res-auto"
    android:layout_width="match_parent"
    android:layout_height="match_parent"
    android:clickable="true">

    <TextView
        android:id="@+id/row_one_item_one"
        android:layout_width="0dp"
        android:layout_height="0dp"
        android:layout_alignParentTop="true"
        android:background="#7700ff00"
        android:text="w:70%,h:20%"
        android:gravity="center"
        app:layout_heightPercent="20%"
        app:layout_widthPercent="70%"/>

    <TextView
        android:id="@+id/row_one_item_two"
        android:layout_width="0dp"
        android:layout_height="0dp"
        android:layout_toRightOf="@+id/row_one_item_one"
        android:background="#396190"
        android:text="w:30%,h:20%"
        app:layout_heightPercent="20%"
        android:gravity="center"
        app:layout_widthPercent="30%"/>


    <ImageView
        android:id="@+id/row_two_item_one"
        android:layout_width="match_parent"
        android:layout_height="0dp"
        android:src="@drawable/tangyan"
        android:scaleType="centerCrop"
        android:layout_below="@+id/row_one_item_one"
        android:background="#d89695"
        app:layout_heightPercent="70%"/>

    <TextView
        android:layout_width="0dp"
        android:layout_height="0dp"
        android:layout_below="@id/row_two_item_one"
        android:background="#770000ff"
        android:gravity="center"
        android:text="width:100%,height:10%"
        app:layout_heightPercent="10%"
        app:layout_widthPercent="100%"/>


</android.support.percent.PercentRelativeLayout>
ok,依然是直接看效果图:
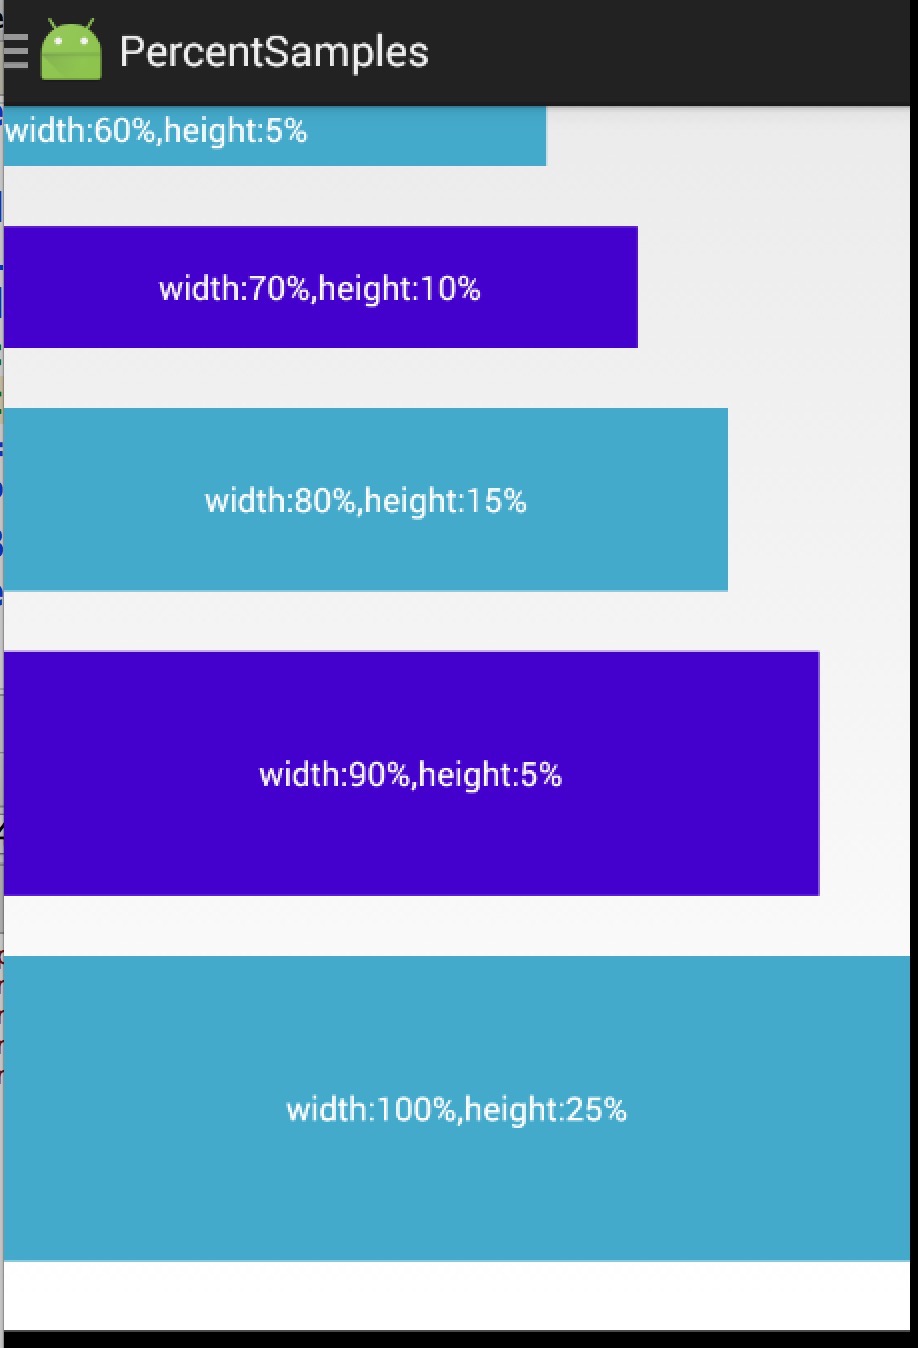
鸿神将PercentLinearLayout封装了之后就可以直接使用了,原理和解析在他的博客有详细介绍,这里就不重复了。
<?xml version="1.0" encoding="utf-8"?>


<com.juliengenoud.percentsamples.PercentLinearLayout
    xmlns:android="http://schemas.android.com/apk/res/android"
    xmlns:app="http://schemas.android.com/apk/res-auto"
    android:layout_width="match_parent"
    android:layout_height="match_parent"
    android:orientation="vertical">

    <TextView
        android:layout_width="0dp"
        android:layout_height="0dp"
        android:background="#ff44aacc"
        android:text="width:60%,height:5%"
        android:textColor="#ffffff"
        app:layout_heightPercent="5%"
        app:layout_marginBottomPercent="5%"
        app:layout_widthPercent="60%"/>

    <TextView
        android:layout_width="0dp"
        android:layout_height="0dp"
        android:background="#ff4400cc"
        android:gravity="center"
        android:textColor="#ffffff"
        android:text="width:70%,height:10%"
        app:layout_heightPercent="10%"
        app:layout_marginBottomPercent="5%"
        app:layout_widthPercent="70%"/>
    <TextView
        android:layout_width="0dp"
        android:layout_height="0dp"
        android:background="#ff44aacc"
        android:gravity="center"
        android:text="width:80%,height:15%"
        android:textColor="#ffffff"
        app:layout_heightPercent="15%"
        app:layout_marginBottomPercent="5%"
        app:layout_widthPercent="80%"/>
    <TextView
        android:layout_width="0dp"
        android:layout_height="0dp"
        android:background="#ff4400cc"
        android:gravity="center"
        android:text="width:90%,height:5%"
        android:textColor="#ffffff"
        app:layout_heightPercent="20%"
        app:layout_marginBottomPercent="10%"
        app:layout_widthPercent="90%"/>

    <TextView
        android:layout_width="match_parent"
        android:layout_height="0dp"
        android:background="#ff44aacc"
        android:gravity="center"
        android:text="width:100%,height:25%"
        android:textColor="#ffffff"
        app:layout_heightPercent="25%"
        app:layout_marginBottomPercent="5%"
        />


</com.juliengenoud.percentsamples.PercentLinearLayout>
我们纵向排列的几个TextView,分别设置宽/高都为百分比,且之间的间隔为5%p。
效果图
要使用PercentLinearLayout的话,就需要添加这个库,而不是上面的官方的了。
dependencies {
    //...
    compile 'com.zhy:percent-support-extends:1.0.7'
}
对应的三个类分别为:
com.zhy.android.percent.support.PercentLinearLayout
com.zhy.android.percent.support.PercentRelativeLayout
com.zhy.android.percent.support.PercentFrameLayout


 1590
1590

 被折叠的 条评论
为什么被折叠?
被折叠的 条评论
为什么被折叠?
 到【灌水乐园】发言


