


目录
1. 在ruoyi-module模块下new一个modeule工程模块ruoyi-test
5 在nacos里新增 ruoyi-test-dev.yml
6. 在nacos网关模块的配置文件ruoyi-gateway-dev.yml中,新增加一个转发规则:
7. 启动RuoYiTestApplicaiton微服务,nacos出现ruoyi-test
(2)字段里有create_by,需要在controller里手动添加代码才能存入到数据库
1. 在ruoyi-module模块下new一个modeule工程模块ruoyi-test

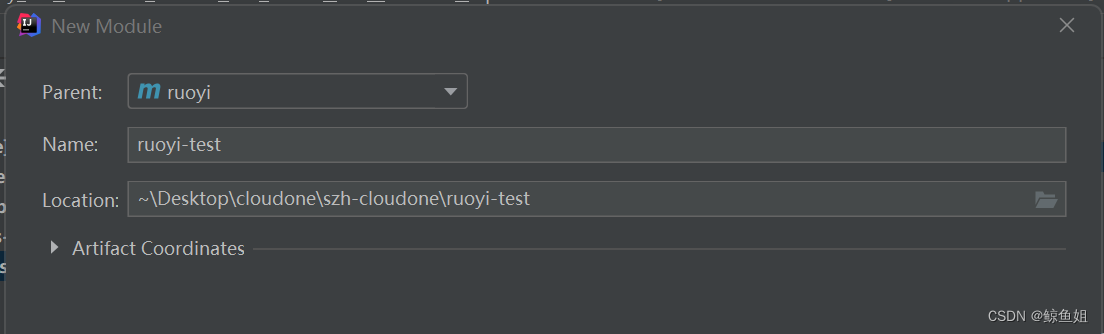
在ruoyi-module模块的pom.xml文件中,添加子模块 <module>ruoyi-test</module>
<modules>
    <module>ruoyi-system</module>
    <module>ruoyi-gen</module>
    <module>ruoyi-job</module>
    <module>ruoyi-file</module>
    <module>ruoyi-test</module>
</modules>
2. 配置ruoyi-test的pom.xml
直接将ruoyi-system模块的内容复制过来,改一下<artifactId>和<description>就行了:
<?xml version="1.0" encoding="UTF-8"?>
<project xmlns="http://maven.apache.org/POM/4.0.0"
         xmlns:xsi="http://www.w3.org/2001/XMLSchema-instance"
         xsi:schemaLocation="http://maven.apache.org/POM/4.0.0 http://maven.apache.org/xsd/maven-4.0.0.xsd">
    <parent>
        <groupId>com.ruoyi</groupId>
        <artifactId>ruoyi-modules</artifactId>
        <version>3.6.3</version>
    </parent>
    <modelVersion>4.0.0</modelVersion>

    <artifactId>ruoyi-modules-test</artifactId>

    <description>
        ruoyi-modules-test系统模块
    </description>

    <dependencies>

        <!-- SpringCloud Alibaba Nacos -->
        <dependency>
            <groupId>com.alibaba.cloud</groupId>
            <artifactId>spring-cloud-starter-alibaba-nacos-discovery</artifactId>
        </dependency>

        <!-- SpringCloud Alibaba Nacos Config -->
        <dependency>
            <groupId>com.alibaba.cloud</groupId>
            <artifactId>spring-cloud-starter-alibaba-nacos-config</artifactId>
        </dependency>

        <!-- SpringCloud Alibaba Sentinel -->
        <dependency>
            <groupId>com.alibaba.cloud</groupId>
            <artifactId>spring-cloud-starter-alibaba-sentinel</artifactId>
        </dependency>

        <!-- SpringBoot Actuator -->
        <dependency>
            <groupId>org.springframework.boot</groupId>
            <artifactId>spring-boot-starter-actuator</artifactId>
        </dependency>

        <!-- Swagger UI -->
        <dependency>
            <groupId>io.springfox</groupId>
            <artifactId>springfox-swagger-ui</artifactId>
            <version>${swagger.fox.version}</version>
        </dependency>

        <!-- Mysql Connector -->
        <dependency>
            <groupId>com.mysql</groupId>
            <artifactId>mysql-connector-j</artifactId>
        </dependency>

        <!-- RuoYi Common DataSource -->
        <dependency>
            <groupId>com.ruoyi</groupId>
            <artifactId>ruoyi-common-datasource</artifactId>
        </dependency>

        <!-- RuoYi Common DataScope -->
        <dependency>
            <groupId>com.ruoyi</groupId>
            <artifactId>ruoyi-common-datascope</artifactId>
        </dependency>

        <!-- RuoYi Common Log -->
        <dependency>
            <groupId>com.ruoyi</groupId>
            <artifactId>ruoyi-common-log</artifactId>
        </dependency>

        <!-- RuoYi Common Swagger -->
        <dependency>
            <groupId>com.ruoyi</groupId>
            <artifactId>ruoyi-common-swagger</artifactId>
        </dependency>

    </dependencies>

    <build>
        <finalName>${project.artifactId}</finalName>
        <plugins>
            <plugin>
                <groupId>org.springframework.boot</groupId>
                <artifactId>spring-boot-maven-plugin</artifactId>
                <executions>
                    <execution>
                        <goals>
                            <goal>repackage</goal>
                        </goals>
                    </execution>
                </executions>
            </plugin>
        </plugins>
    </build>

</project>
3. 配置bootstrap.yml
将ruoyi-system模块的resource目录下的图中三个文件复制到business模块的resource目录下:
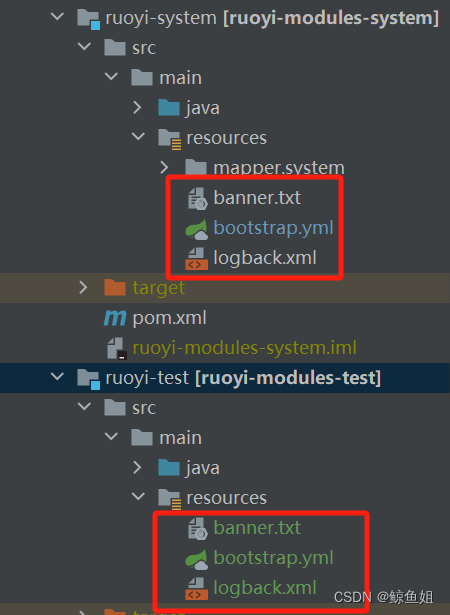
(1)修改bootstrap.yml, 注意端口号port不要和其他模块重复,应用名称写ruoyi-test, 修改nacos注册中心地址 和配置中心地址 server-addr为nacos的地址
| 微服务 | 端口 |
| ruoyi-gateway | 8080 |
| ruoyi-auth | 9200 |
| ruoyi-system | 9201 |
| ruoyi-gen | 9202 |
| ruoyi-job | 9203 |
| ruoyi-file | 9300 |
# Tomcat
server:
  port: 9301

# Spring
spring:
  application:
    # 应用名称
    name: ruoyi-test
  profiles:
    # 环境配置
    active: dev
  cloud:
    nacos:
      discovery:
        # 服务注册地址
        server-addr: 127.0.0.1:8848
      config:
        # 配置中心地址
        server-addr: 127.0.0.1:8848
        # 配置文件格式
        file-extension: yml
        # 共享配置
        shared-configs:
          - application-${spring.profiles.active}.${spring.cloud.nacos.config.file-extension}
(2)修改logback.yml的日志存放路径为logs/ruoyi-test
   <!-- 日志存放路径 -->
<property name="log.path" value="logs/ruoyi-test" />
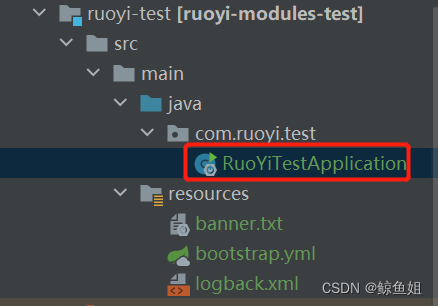
4. 创建启动类
在java文件夹下创建com.ruoyi.test包,然后新建RuoyiTestApplication类
RuoyiTestApplication类代码如下
package com.ruoyi.test;

import org.springframework.boot.SpringApplication;
import org.springframework.boot.autoconfigure.SpringBootApplication;
import com.ruoyi.common.security.annotation.EnableCustomConfig;
import com.ruoyi.common.security.annotation.EnableRyFeignClients;
import com.ruoyi.common.swagger.annotation.EnableCustomSwagger2;

/**
 * 测试模块
 *
 * @author ruoyi
 */
@EnableCustomConfig
@EnableCustomSwagger2
@EnableRyFeignClients
@SpringBootApplication
public class RuoYiTestApplication
{
    public static void main(String[] args)
    {
        SpringApplication.run(RuoYiTestApplication.class, args);
        System.out.println("(♥◠‿◠)ノ゙  测试模块启动成功   ლ(´ڡ`ლ)゙  \n" +
                " .-------.       ____     __        \n" +
                " |  _ _   \\      \\   \\   /  /    \n" +
                " | ( ' )  |       \\  _. /  '       \n" +
                " |(_ o _) /        _( )_ .'         \n" +
                " | (_,_).' __  ___(_ o _)'          \n" +
                " |  |\\ \\  |  ||   |(_,_)'         \n" +
                " |  | \\ `'   /|   `-'  /           \n" +
                " |  |  \\    /  \\      /           \n" +
                " ''-'   `'-'    `-..-'              ");
    }
}
5 在nacos里新增 ruoyi-test-dev.yml
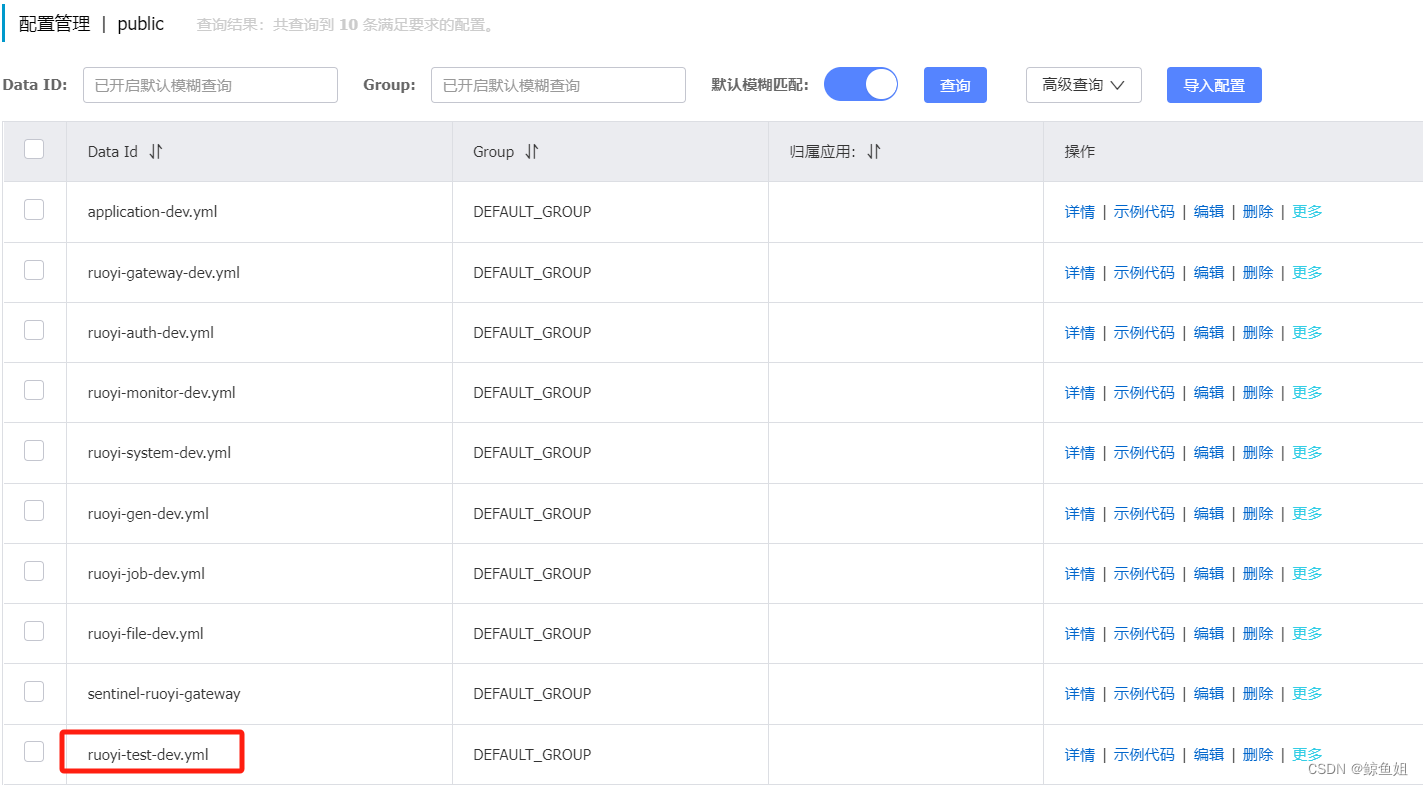
ruoyi-test-dev.yml配置内容可以复制ruoyi-system.yml
(1)注意修改IP和密码
(2)修改mybatis的包所在位置 typeAliasesPackage: com.ruoyi.test
mybatis:
    # 搜索指定包别名
    typeAliasesPackage: com.ruoyi.test
    # 配置mapper的扫描,找到所有的mapper.xml映射文件
    mapperLocations: classpath:mapper/**/*.xml
6. 在nacos网关模块的配置文件ruoyi-gateway-dev.yml中,新增加一个转发规则:
        # 测试模块
        - id: ruoyi-test
          uri: lb://ruoyi-test
          predicates:
            - Path=/test/**
          filters:
            - StripPrefix=1
7. 启动RuoYiTestApplicaiton微服务,nacos出现ruoyi-test


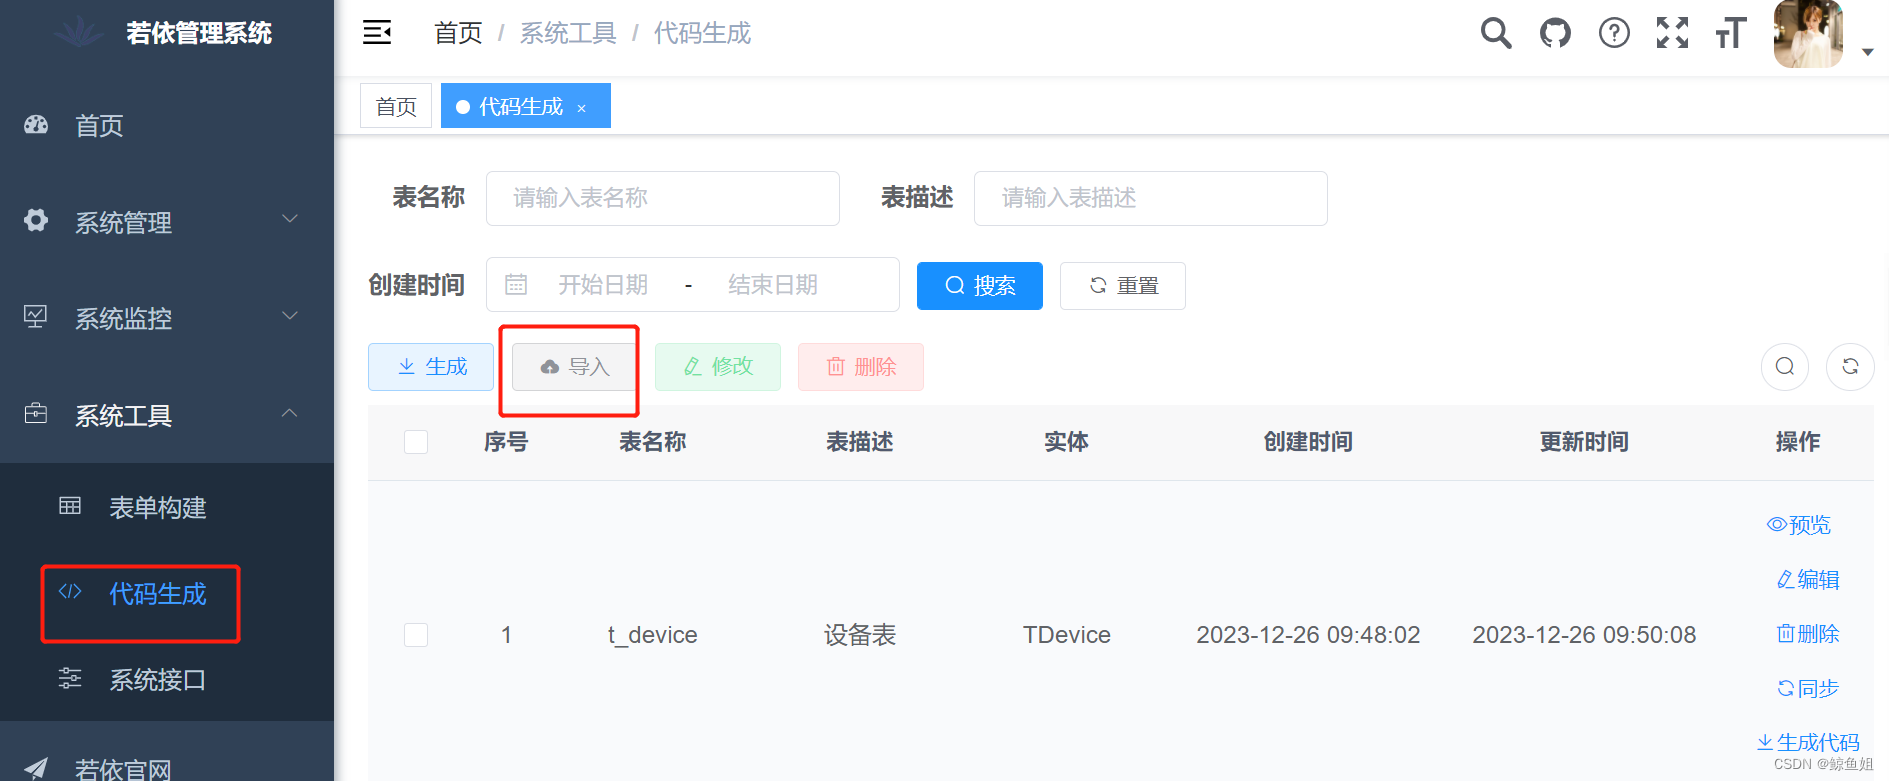
8. 使用代码生成器生成前后端代码
(1)设计数据库表t_device,创建人和创建时间使用create_by和create_time字段

(2) 给t_device表加描述
alter table t_device comment '设备表'(3) 启动程序
》启动RuoyiGenApplication应用( RuoyiAuth,RuoyiSystem,RuoyiGateway也必须启动)
》启动前端
(4)在系统工具——》代码生成——》导入t_device表
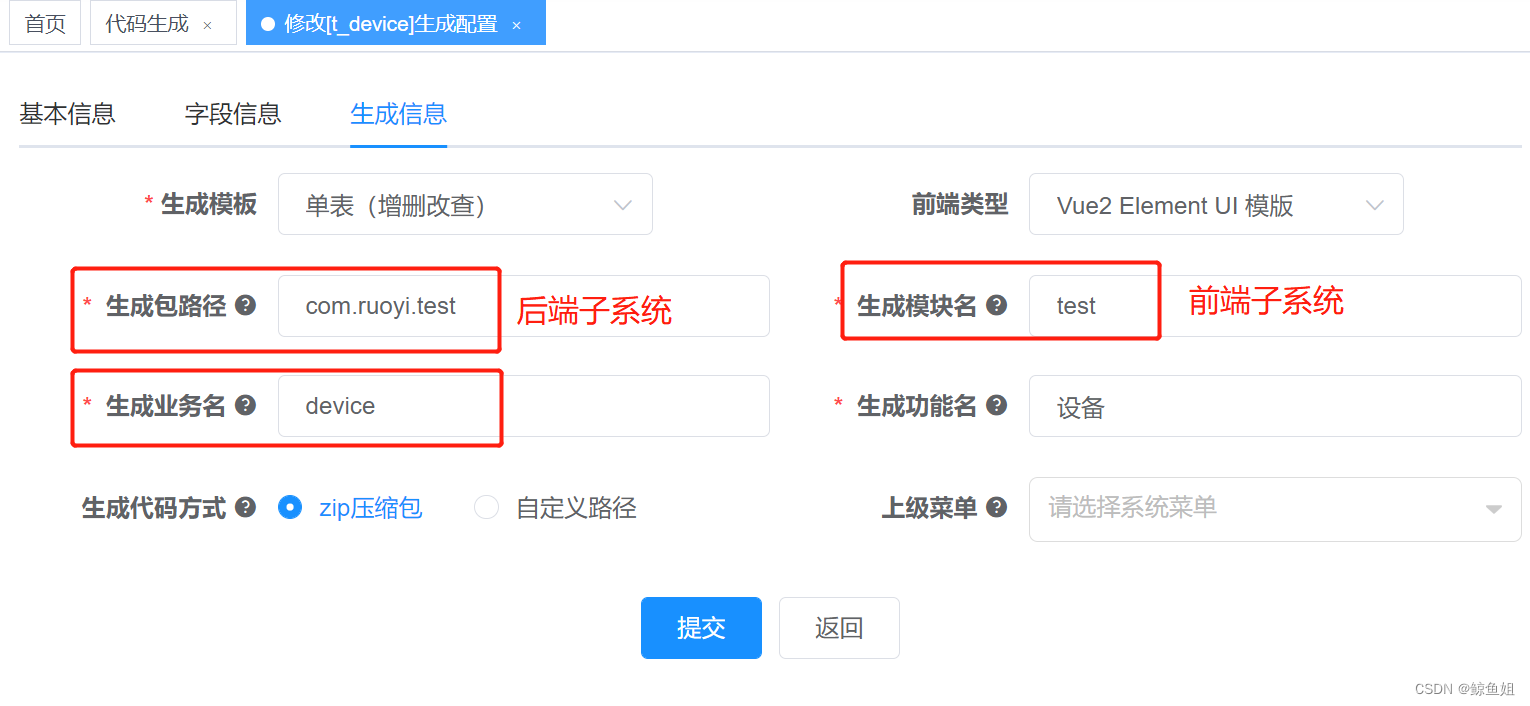
(5)修改生成信息
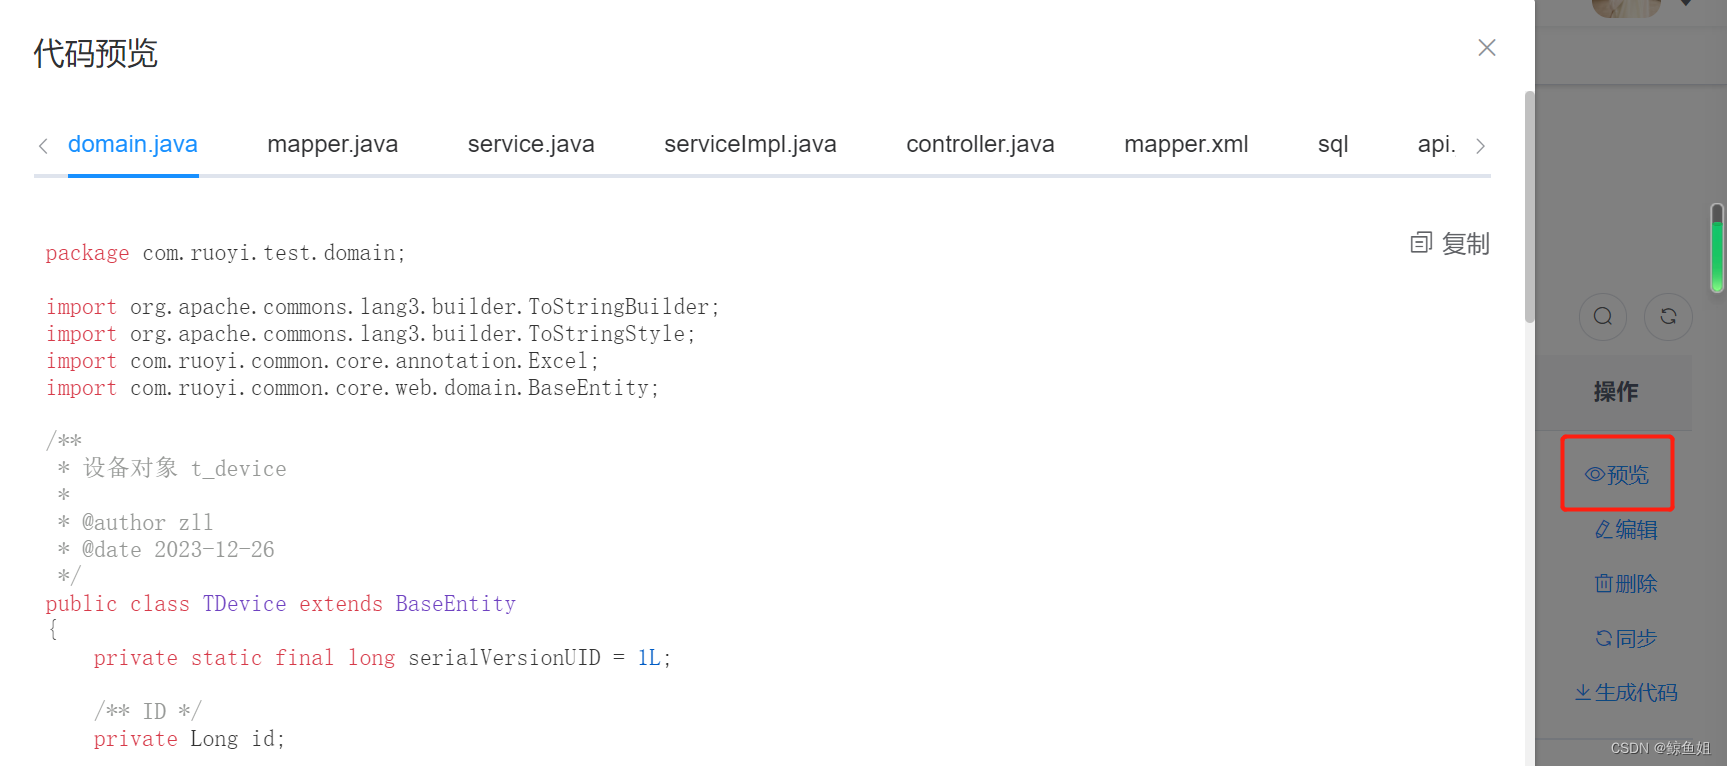
(6)预览代码,查看代码
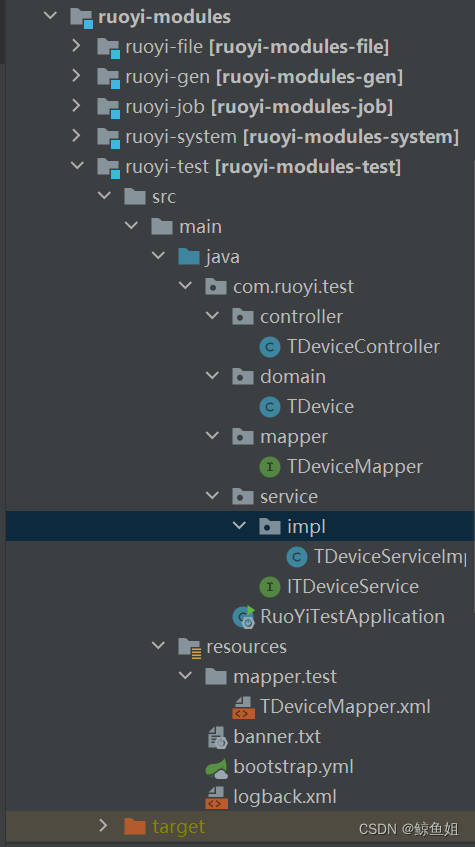
(7)放置代码到对应位置
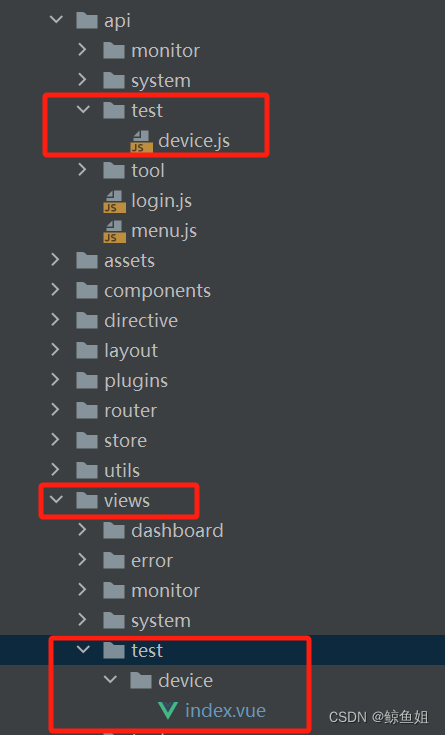
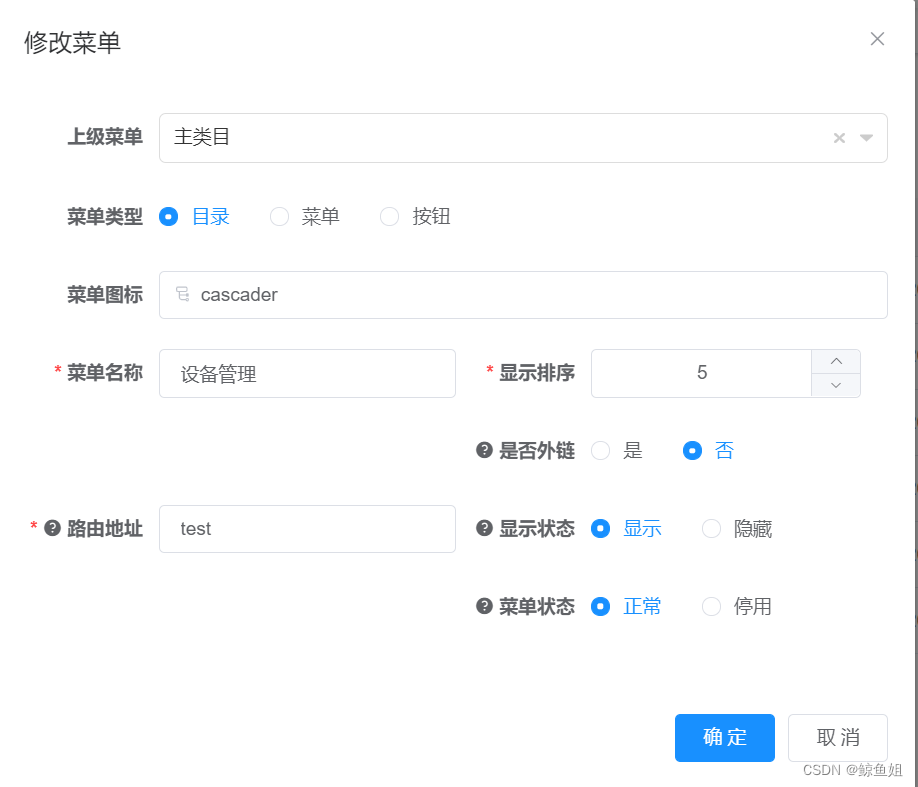
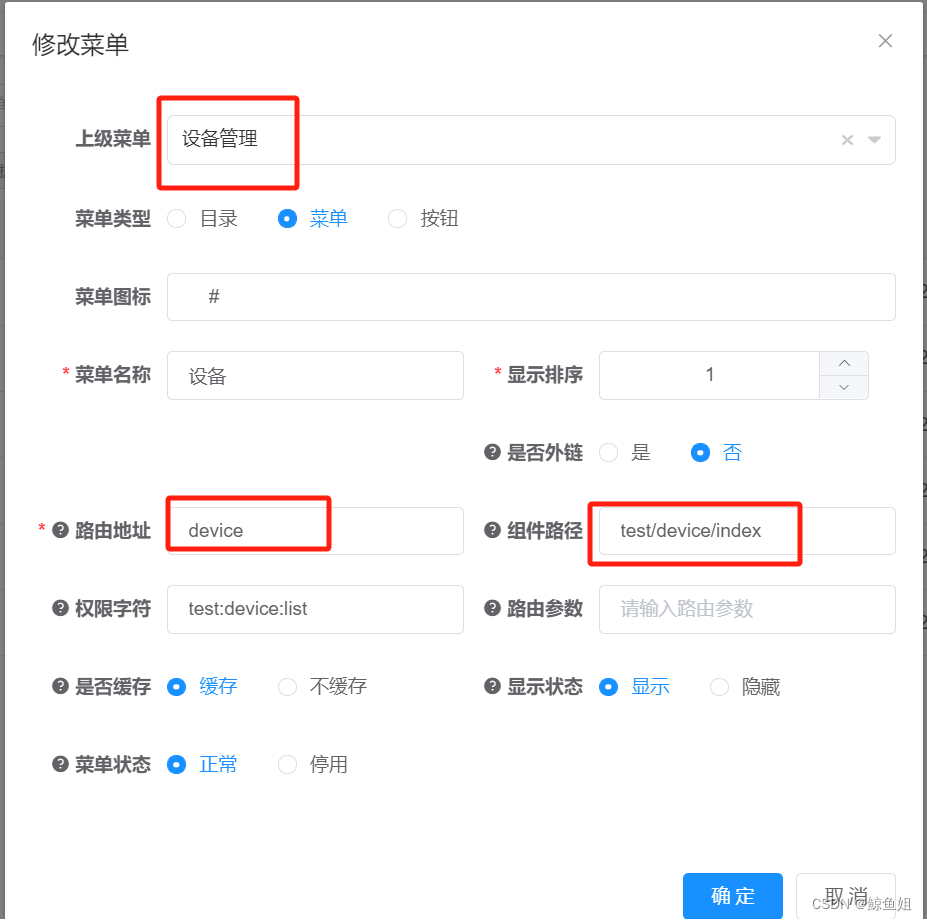
9. 创建目录和菜单
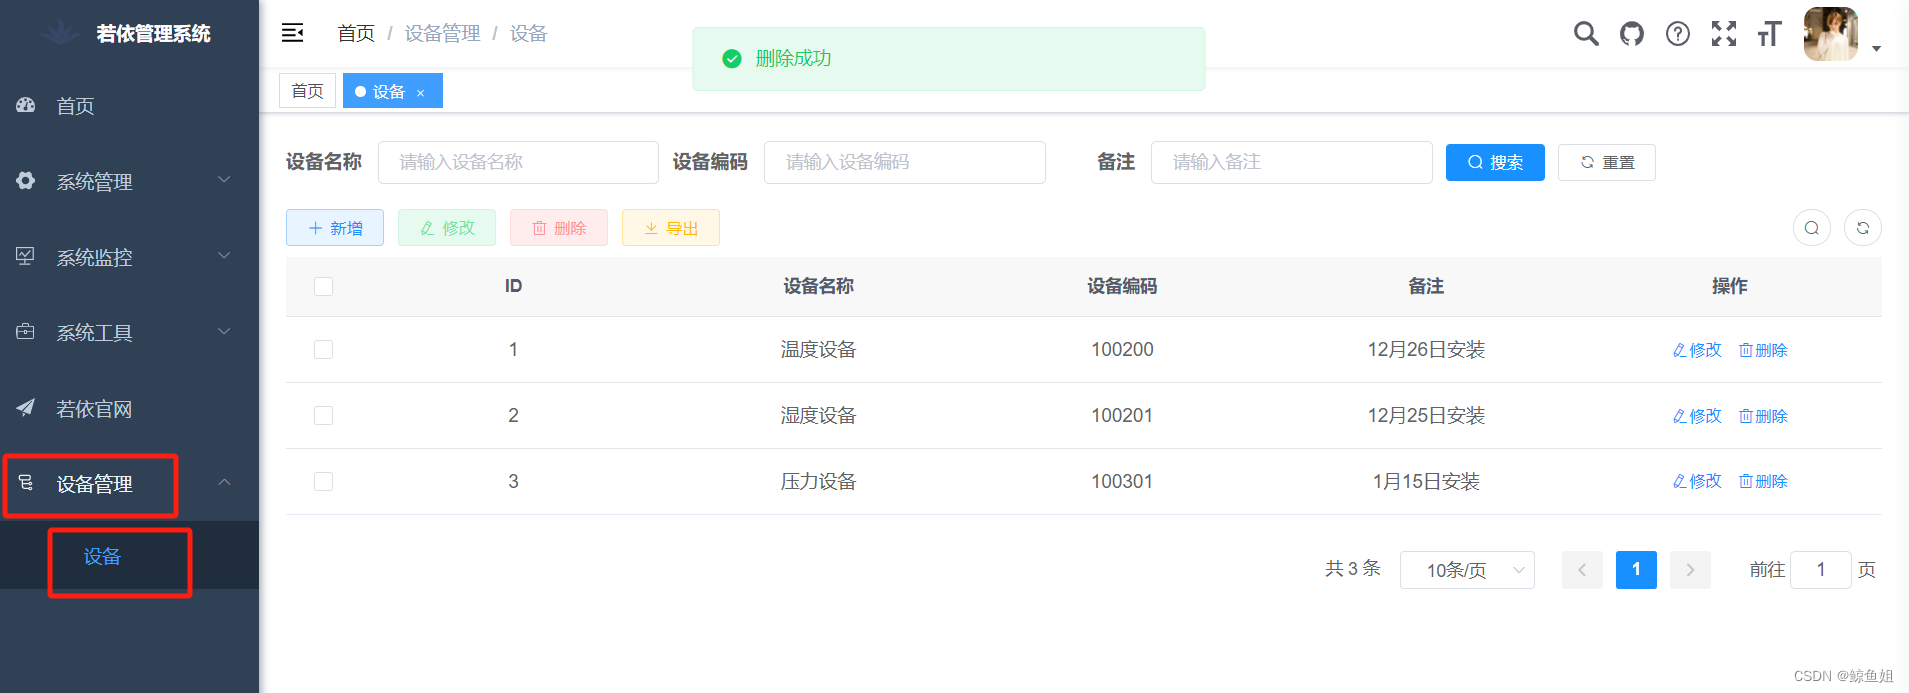
10. 重新运行前后端系统
注意:如果点击菜单无反应:建议提交git后,重新新建文件夹,拉取最新代码,重新运行前后端。
11. 其他
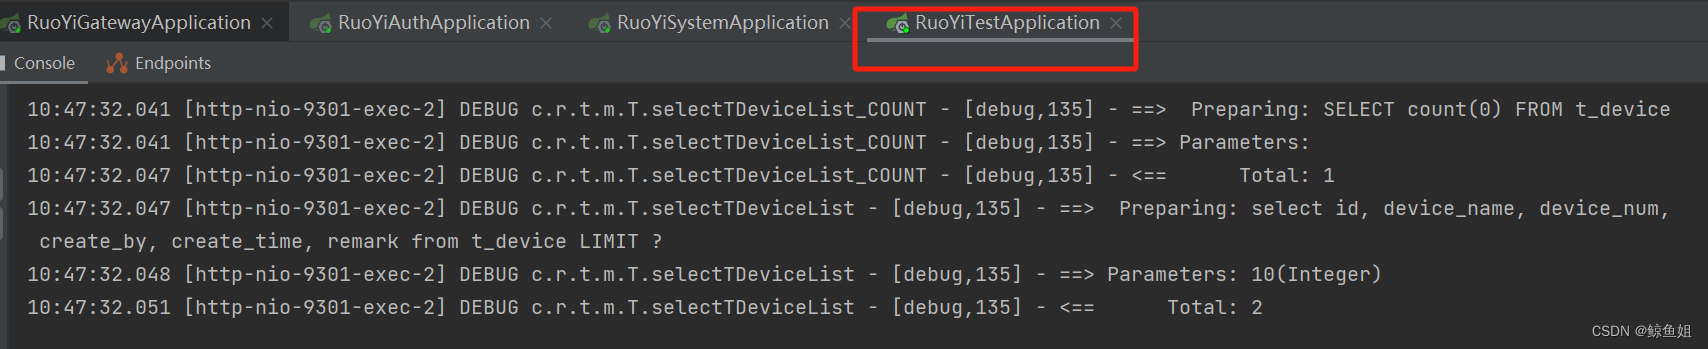
(1)打印执行SQL语句
微服务启动后,没有打印sql。
可以找到对应服务下的resouece下的logback.xml,调整日志级别为debug,实现打印
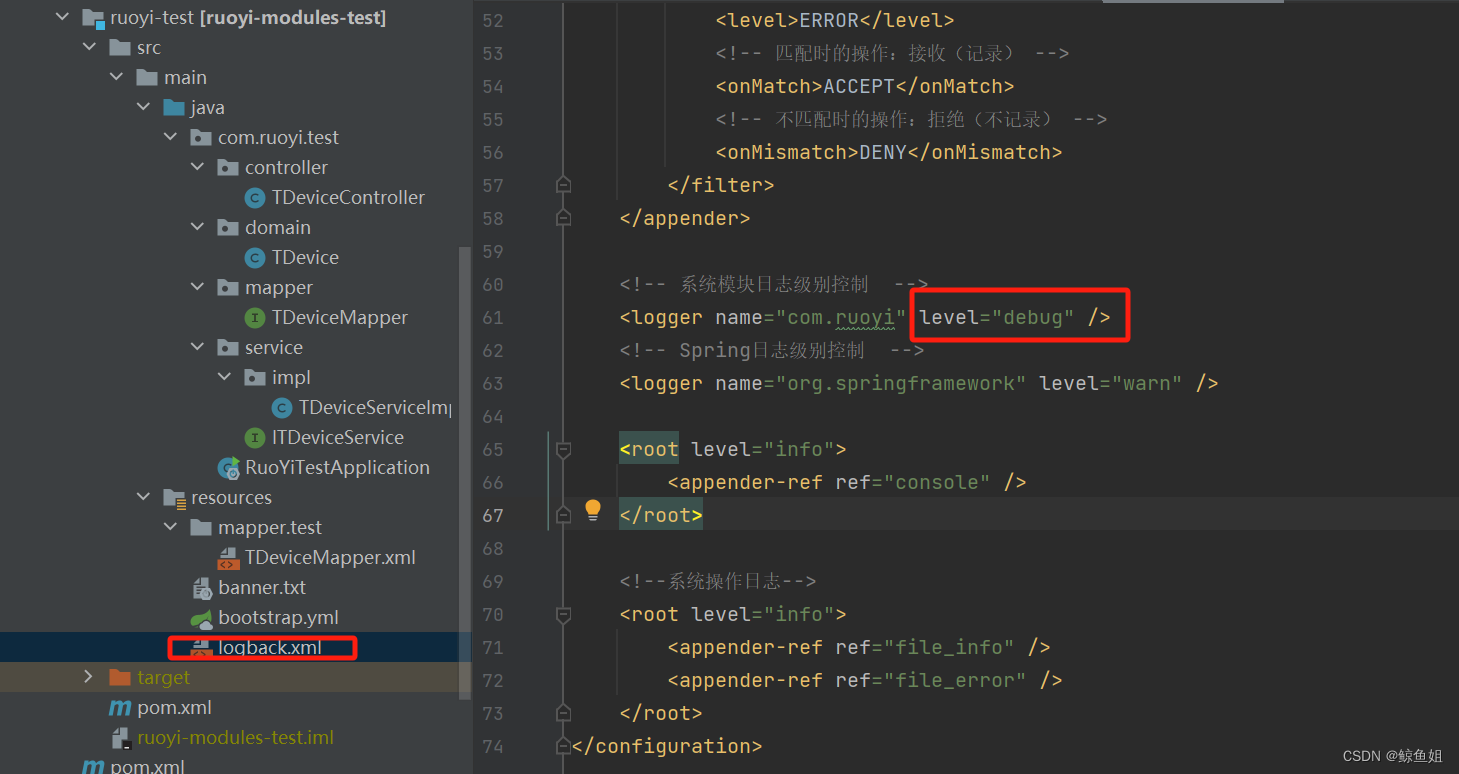 然后就会输出sql了
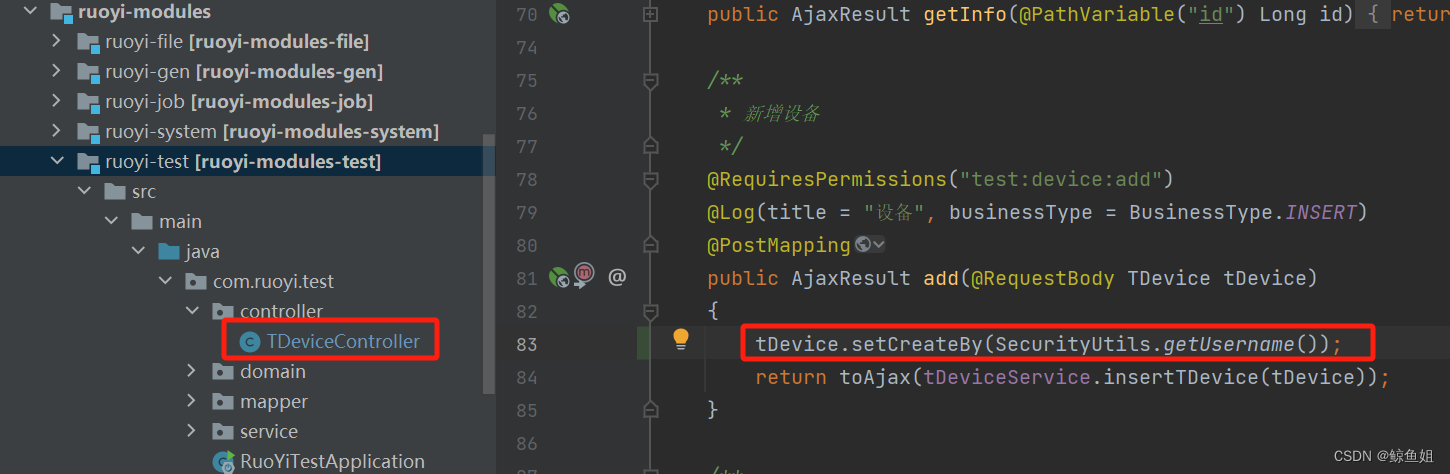
(2)字段里有create_by,需要在controller里手动添加代码才能存入到数据库
tDevice.setCreateBy(SecurityUtils.getUsername());


 7096
7096


 被折叠的 条评论
为什么被折叠?
被折叠的 条评论
为什么被折叠?
 到【灌水乐园】发言


