


首先说我是个渣渣,写这个供自己以后回顾及一些比我还新的新手借鉴一下,共同学习、共同进步。
百度了好几天,调了3个星期,每天晚上下班回来打开电脑就是调,头都大了,最后还是不负我努力啊,终于正常了点,不过还有点不完美,凑合着用吧!
先说下我的上传头像是个什么形式的:
1、这里有个默认头像

点击默认头像弹出一个框
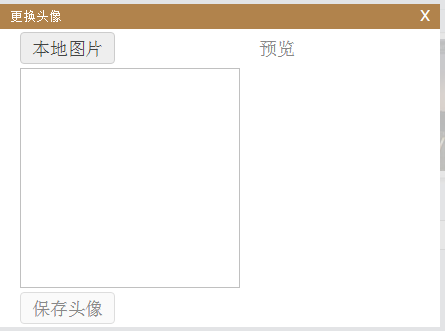
点击本地图片选择要上传的图片

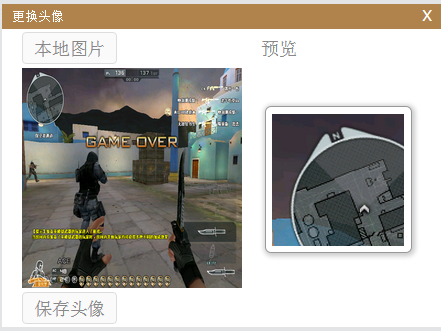
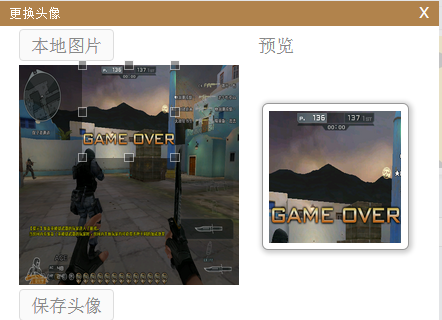
选择完图片后会立即上传服务器,随即回显,然后你可以在左侧选择剪切区域,右侧预览
选择好要截取的区域后点击保存头像
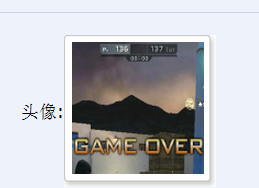
好了,选择,上传,截取,预览,保存。
进入正题,准备工作:
一、Jcrop插件,没有的话点击这里点击打开链接,![]() 右下角有下载。
右下角有下载。
下载完解压,文件夹里有四个js文件


选择这俩个js和一个css,我们会用到。好,准备工作结束。
二、开始写头像上传前预览剪切页面功能,后台会跟着给出。
1、首先说明下,我是在jsp页面开发这个功能的,这个jsp整体结构是一个大form表单里嵌了一个table,然后在table里的一个td里嵌套了一个div,这个头像预览功能就是在这个div里实现。这个div开始是隐藏的,点击默认的头像时弹出及显示,不是一个新页面所以会碰到好多问题。不过如果你单单只是要做个剪切预览功能,你可以把这个div抽离,只把这个div复制出来就好了,只不过我是项目需要。贴代码:
jsp页面:
<form action="" method="post" enctype="multipart/form-data" name="form" id="fom"><td width="40%">
								<div class="bgPhoto">
									<a href="javascript:void(0)" class="cal_decoration"><img id="defauPhoto" title="default" style="width: 120px;height: 120px;" src="${templatedir }/img/defaultPhoto.jpg"/></a>
								</div>
								<div id="light" class="white_content">
									<div style="width: 97.8%;height: 20px;background-color: #B1834C;font-size: 12px;color: white;
									padding-left: 9px;padding-top:2px;float: left;">更换头像
									<a href="javascript:void(0)" id="close" class="cal_decoration">X</a></div>
									<table style="margin-left: 4%">
										<tr>
											<td><a href="javascript:;" class="a-upload">
											    	<input type="file" name="file" id="file" οnchange="checkImgType(this)">本地图片
												</a>
											</td>
											<td style="color: #888888;width: 100%;padding-left: 4%;">预览</td>
										</tr>
										<tr>
											<td id="USERIMAGE"><img id="userimg" style="width: 200px; height: 200px;"/></td>
											<td>
												<div id="preview-pane" style="width: 120px; height: 120px; overflow: hidden; margin-left: 5px;">
													<div class="preview-container">
														<img id="preview"/>
													</div>
												</div>
											</td>
										</tr>
										<tr>
											<td><input type="hidden" id="x" title="截取区相对于图片左上角原点的横坐标"/>
												<input type="hidden" id="y" title="截取区相对于图片左上角的原点纵坐标"/>
												<input type="hidden" id="w" title="截取区的宽度"/>
												<input type="hidden" id="h" title="截取区的高"/>
												<a href="javascript:;" class="a-upload">
													<input type="button" id="photo" οnclick="saveHeadPhoto()"/>保存头像
												</a>
											</td>
										</tr>
									</table>
								</div>
								<div id="fade" class="black_overlay"></div>
</td>对应的css样式
<style type="text/css">
/*弹框样式*/
.white_content {
	display: none;
	position: absolute;
	top: 14%;
	left: 30%;
	width: 400px;
	/*height: 52%; */
	/*padding: 4px 16px;*/
	background-color: white;
	z-index: 1002;
}
/*弹框样式,背景*/
.black_overlay {
	display: none;
	position: absolute;
	top: 0%;
	left: 0%;
	width: 100%;
	height: 100%;
	background-color: #E2E2E2;
	z-index: 1001;
	-moz-opacity: 0.8;
	opacity: .80;
	filter: alpha(opacity = 80);
}
/*返回的X样式*/
#close {
	color: white;
	margin-left: 82%;
	font-size: 14px;
}


/*没点击之前*/
.cal_decoration:LINK{
	text-decoration: none;/*去除下划线*/
}
/*鼠标点击时*/
.cal_decoration:ACTIVE{

}
/*鼠标点击之后*/
.cal_decoration:VISITED{


}
/*鼠标悬停之上*/
.cal_decoration:HOVER {

}
/*选择图片按钮*/
.a-upload {
	padding: 4px 10px;
	height: 20px;
	line-height: 20px;
	position: relative;
	cursor: pointer;
	color: #888;
	background: #fafafa;
	border: 1px solid #ddd;
	border-radius: 4px;
	overflow: hidden;
	display: inline-block;
	*display: inline;
	*zoom: 1
}


.a-upload  input {
	position: absolute;
	width: 100px;
	font-size: 100px;
	right: 0;
	top: 0;
	opacity: 0;
	filter: alpha(opacity = 0);
	cursor: pointer
}


.a-upload:hover {
	color: #444;
	background: #eee;
	border-color: #ccc;
	text-decoration: none
}


.a-upload:link {
	text-decoration: none;
}


.bgPhoto {
	background: url("${templatedir }/img/bg.gif") no-repeat left top;
	padding: 7px 12px 12px 7px;
}
/*剪切头像,Jcrop插件里自带的css样式*/
.jcrop-holder #preview-pane {
  display: block;
  position: absolute;
  z-index: 2000;
  top: 35px;
  right: -77%;
  padding: 6px;
  border: 1px rgba(0,0,0,.4) solid;
  background-color: white;


  -webkit-border-radius: 6px;
  -moz-border-radius: 6px;
  border-radius: 6px;


  -webkit-box-shadow: 1px 1px 5px 2px rgba(0, 0, 0, 0.2);
  -moz-box-shadow: 1px 1px 5px 2px rgba(0, 0, 0, 0.2);
  box-shadow: 1px 1px 5px 2px rgba(0, 0, 0, 0.2);
}


#preview-pane .preview-container {
  width: 120px;
  height: 120px;
  overflow: hidden;
}
</style>

2、点击默认头像触发
/*点击默认头像触发*/
$("#defauPhoto").click(function(){
	$("#light").css("display","block");
	$("#fade").css("display","block");
});
3、点击本地图片触发
/*本地相片按钮触发*/
/*检查图片上传类型*/
function checkImgType(obj){//选中图片后预览
	if(""==obj.value){//如果没有选择图片则不提示
		return;
	}
	var imgFile = '';
	var imgFilePath = getImgFullPath(obj);//获取图像路径
	/*图片类型是否正确标识*/
	var tag = true;
	/*通过判断endIndex是否为-1来判断是否选择了文件*/
	var endIndex = imgFilePath.lastIndexOf(".");
	if(endIndex==-1){
		tag = false;
	}
	/*截取图片类型*/
	var imgType = imgFilePath.substring(endIndex+1);
	/*全部转为大写*/
	imgType = imgType.toUpperCase();
	if("GIF"!=imgType && "PNG"!=imgType && "JPG"!=imgType && "BMP"!=imgType){
		tag = false;
	}
	if(!tag){
		alert("上传图片的文件类型必须为: *.gif,*.jpg,*.png,*.bmp,请重新选择!");
		return;
	}
 	var options = {
		url : '${ctx}/admin/uploadHeadPhoto.do?tempid='+new Date()+Math.random(),
	    type: 'post',
        dataType: 'text',
		success: cutImgCallback,
    };
 	//$.fn.jqLoading();//打开等待层
	$("#fom").ajaxSubmit(options);
}/*上传头像回调*/
function cutImgCallback(data){
	//$.fn.jqLoading("destroy");//关闭等待层
	if("1"==data){
		var imgUrl = document.getElementById("file").files[0];
		var src = window.URL.createObjectURL(imgUrl);
		$("#userimg").attr("src",src);
		$(".jcrop-holder img").attr("src",src);
		//头像剪切函数
		cutImg(src);
	}else{
		alert("网络连接出现问题,稍后请重试!");
	}
}
/*剪切头像,Jcrop插件,官网有教程*/
function cutImg(src){
$("#userimg").Jcrop({
onChange : showPreview,
onSelect : showPreview,
aspectRatio : xsize / ysize
}, function() {
var bounds = this.getBounds();
boundx = bounds[0];
boundy = bounds[1];
jcrop_api = this;
$preview.appendTo(jcrop_api.ui.holder);
$("#preview").attr("src",src);//在插件加载完成后,重新给预览区赋值解决二次进入预览区因缓存问题图片还是上次的。之前预览区第二次选择图片就是上次的图片,找了好久好久,最后把它重新赋值就好了,我觉得是缓存问题
});
}/*选择框改变是执行此函数*/
function showPreview(c) {
if (parseInt(c.w) > 0) {
var rx = xsize / c.w;
var ry = ysize / c.h;
$("#x").val(Math.round(rx * c.x));
$("#y").val(Math.round(ry * c.y));
$("#w").val(Math.round(rx * boundx));
$("#h").val(Math.round(ry * boundy));
$pimg.css({
width : Math.round(rx * boundx) + 'px',
height : Math.round(ry * boundy) + 'px',
marginLeft : '-' + Math.round(rx * c.x) + 'px',
marginTop : '-' + Math.round(ry * c.y) + 'px'
});
}
}/*获取图片全路径*/
function getImgFullPath(obj){
if(obj){
//ie
if(window.navigator.userAgent.indexOf("MSIE")>=1){
obj.select();
return document.selection.createRange().text();
}else if(window.navigator.userAgent.indexOf("Firefox")>=1){
//firefox
if(obj.files){
return obj.files.item(0).getAsDataURL();
}
return obj.value;
}
return obj.value;
}
}4、选择好截取区域后点击保存头像触发
/*保存头像按钮触发*/
function saveHeadPhoto(){
	var fileImage = $("#file").val();
	if(""==fileImage){
		alert("请选择上传图片!");
		return;
	}
	var w = $("#w").val();
	var h = $("#h").val();
	if(w==0||h==0){
		alert("请选择所要裁剪的头像区域!");
		return;
	}
	var url = "${ctx}/admin/uploadImageCut.do";
	var type = "text";
	var data = {
		"x": $("#x").val(),
		"y": $("#y").val(),
		"w1": xsize,//预览区宽度
		"h1": ysize,//预览区高度
		"w": $("#w").val(),
		"h": $("#h").val(),
	};
	//$.fn.jqLoading({text:'正在保存,请稍后...'});//打开等待层
	$.post(url,data,ctuImageCallback,type);
}
/*保存头像回调函数*/
function ctuImageCallback(data){
	//var jsonData = eval("("+data+")");//最简单一种字符串json转为json对象
	var jsonData = JSON.parse(data);//第二种字符串json转为json对象
	//$.fn.jqLoading("destroy");//关闭等待层
	if("1"==jsonData.flag){
		destroyImageCut();//请求成功即销毁头像截取及预览以便下次选择头像初始化为未选择
		//$("#defauPhoto").attr("title","userImage");//头像上传成功改变title标识确定用户是否上传过头像
		var src = "${ctx}/"+jsonData.url;//保存后立即回显图片的路径
		$("#defauPhoto").attr("src",src);
	}else{
		alert("保存失败!");
	}
}
需要说明的是
 这两个参数。这俩个参数是预览区

的宽度和高度,不然截取的图片大小不对啊,按照Jcrop官网和网上的博客都是后台截图用左侧截取框的宽度和高度,但是跟我的情况不一样,找了好久才找到原因。
5、点击X或者保存头像后要销毁Jcrop
/*点击X触发*/
$("#close").click(function(){
	destroyImageCut();//销毁头像截取及预览以便下次选择头像初始化为未选择
});
function destroyImageCut(){
	$("#file").val("");//清除选择的图片文件
	if(jcrop_api){
		jcrop_api.destroy();//销毁
	}
	//重新写入img标签,防止第二次进入选择图片时,Jcrop插件把选择的图片宽度赋给img宽度
	$("#USERIMAGE").html("<img id='userimg' style='width: 200px; height: 200px;'/>");
	$("#light").css("display","none");
	$("#fade").css("display","none");
}
这样前台的代码就没了。下面是后台的代码。
二、JAVA后台代码:
1、uploadHeadPhoto.do的方法,我用的是springMVC。首先定义几个全局变量
public static final String IMGROOT = "/uploads/admin/";//图片要保存的文件位置
	//重写servletConfig方法,得到servletConfig,因为smartUpload要用到这个参数
	private ServletConfig servletConfig;
	@Override
	public void setServletConfig(ServletConfig arg0) {
		this.servletConfig = arg0;
	}
//原显示图片路径 /**
* 头像上传
*/
@RequestMapping("/uploadHeadPhoto")
public void uploadHeadPhoto(HttpServletRequest request,HttpServletResponse response) throws IOException{
String uploadPath = request.getSession().getServletContext().getRealPath("/")+IMGROOT;
/*检查是否有存放上传的图片文件夹*/
CommonUtil.checkDirs(uploadPath);
/*图片后缀名*/
String imgFileExt = "";
/*图片上传的相对路径*/
String imgUploadPath = "";
String imgWebAppPath = "";
/*图片名称:当前日期*/
String imgFileId = DateUtil.DateToStr(new Date(), "yyyyMMddhhmmss");
//图片初始化高度与宽度
//String width = null;
//String height = null;
int imgWidth = 0;
int imgHeight = 0;
try {
com.jspsmart.upload.SmartUpload smartUpload = new com.jspsmart.upload.SmartUpload();
smartUpload.initialize(servletConfig, request, response);
smartUpload.upload();
//文件个数
int fileCounts = smartUpload.getFiles().getCount();
for (int i = 0; i <fileCounts; i++) {
com.jspsmart.upload.File myFile = smartUpload.getFiles().getFile(i);
if (!myFile.isMissing()) {
imgFileExt = myFile.getFileExt();
//组装图片名称
imgFileId += "_" + i + "_" + System.currentTimeMillis() + "." + imgFileExt;
//图片生成路径
imgWebAppPath = uploadPath + imgFileId;
//生成图片文件
myFile.saveAs(imgWebAppPath);
//图片的相对路径
imgUploadPath = IMGROOT + imgFileId;
//检查图片大小
BufferedImage src = ImageIO.read(new File(imgWebAppPath)); // 读入文件
//int imgSrcWidth = src.getWidth(); // 得到源图宽
imgHeight = src.getHeight();
//按照图片的设置大小生成
ImageCutUtil.scale(imgWebAppPath, imgWebAppPath,imgWidth,imgHeight);
File f = new File(imgWebAppPath);
if(f.exists()){
logger.info("创建"+imgWidth+"*"+imgHeight+"图片成功");
}
oldImgPath=imgUploadPath;
imgFileExt1=imgFileExt;
imgRoot=IMGROOT;
width1=imgWidth;
height1=imgHeight;
request.setCharacterEncoding("UTF-8");
response.setContentType("text/html;charset=UTF-8");
response.getWriter().print("1");
}
}
}catch(Exception e){
e.printStackTrace();
}
} <span style="white-space:pre"> </span>/**
* 用户剪切后点击保存头像调用方法
* @param x 截取x坐标
* @param y 截取y坐标
* @param w1 截取宽度(这里是预览区宽度)
* @param h1 截取高度(这里是预览区高度)
* @param w 缩放宽度
* @param h 缩放高度
* @throws IOException
*/
@SuppressWarnings({ "unchecked", "rawtypes" })
@RequestMapping("/uploadImageCut")
@ResponseBody
public void ImageCut(HttpServletRequest request,HttpServletResponse response) throws IOException{
try {
logger.info("x:"+request.getParameter("x")+",y:"+request.getParameter("y")+
",w1:"+request.getParameter("w1")+",h1:"+request.getParameter("h1")+
",w:"+request.getParameter("w")+",h:"+request.getParameter("h"));
// 用户经过剪辑后的图片的大小
Integer x = Integer.parseInt(request.getParameter("x"));
Integer y = Integer.parseInt(request.getParameter("y"));
Integer w1 = Integer.parseInt(request.getParameter("w1"));
Integer h1 = Integer.parseInt(request.getParameter("h1"));
Integer w = Integer.parseInt(request.getParameter("w"));
Integer h = Integer.parseInt(request.getParameter("h"));
//WEB应用程序根路径
String rootPath = request.getSession().getServletContext().getRealPath("/");
/*图片名称:以当前日期*/
String imgFileId = DateUtil.DateToStr(new Date(), "yyyyMMddhhmmss");
String imgName = imgRoot + imgFileId + System.currentTimeMillis() + "." + imgFileExt1;
/*组装图片真实名称*/
String createImgPath = rootPath + imgName;
/*之前上传的图片路径*/
rootPath += oldImgPath;
logger.info("原图片路径: " + rootPath + ",新图片路径: " + createImgPath);
/*进行剪切图片操作*/
ImageCutUtil.abscut(rootPath, createImgPath, x, y, w1, h1, w, h);
File file = new File(createImgPath);
if(file.exists()){
logger.info("剪切图片大小: "+w1+"*"+h1+"图片成功!");
}
Map jsonMap = new HashMap();
jsonMap.put("url", imgName);
jsonMap.put("flag", "1");
//photoImg = createImgPath;//头像全路径保存到数据库
JSONObject jsonObject = JSONObject.fromObject(jsonMap);
request.setCharacterEncoding("UTF-8");
response.setContentType("text/html;charset=UTF-8");
response.getWriter().print(jsonObject.toString());//上传成功!
} catch (UnsupportedEncodingException e) {
e.printStackTrace();
}
} /**
* 缩放后裁剪图片方法
*
* @param srcImageFile 源图像地址
* @param dirImageFile 新图像地址
* @param x 目标切片起点x坐标
* @param y 目标切片起点y坐标
* @param destWidth 目标切片宽度
* @param destHeight 目标切片高度
* @param finalWidth 缩放宽度
* @param finalHeight 缩放高度
*/
public static void abscut(String srcImageFile, String dirImageFile, int x,
int y, int destWidth, int destHeight,int finalWidth,int finalHeight) {
try {
Image img;
ImageFilter cropFilter;
//FileInputStream is = null;
//ImageInputStream iis = null;
// 读取源图像
BufferedImage bi = ImageIO.read(new File(srcImageFile));
int srcWidth = bi.getWidth(); // 源图宽度
int srcHeight = bi.getHeight(); // 源图高度
System.out.println("srcWidth:"+srcWidth+",srcHeight:"+srcHeight);
if (srcWidth >= destWidth && srcHeight >= destHeight) {//保证源图高度大于截取高度
Image image = bi.getScaledInstance(finalWidth, finalHeight, bi.SCALE_SMOOTH);//获取缩放后的图片大小
// 四个参数分别为图像起点坐标和宽高
// 即: CropImageFilter(int x,int y,int width,int height)
cropFilter = new CropImageFilter(x, y, destWidth, destHeight);
img = Toolkit.getDefaultToolkit().createImage(new FilteredImageSource(image.getSource(), cropFilter));
BufferedImage tag = new BufferedImage(destWidth, destHeight, BufferedImage.TYPE_INT_RGB);
Graphics g = tag.getGraphics();
g.drawImage(img, 0, 0, null); // 绘制缩放后的图
g.dispose();
// 输出为文件
ImageIO.write(tag, "PNG", new File(dirImageFile));
}
} catch (Exception e) {
e.printStackTrace();
}
}<span style="white-space:pre"> </span> /**
* 判断目录是否存在,不存在就新建,多级父目录
* @param path
*/
public static void checkDirs(String path) {
File file = new File(path);
if(!file.exists()){
file.mkdirs();
}
}
类太多了,不好贴,网上搜,很多的,引用的时候三五行代码,在头像上传那个类里(uploadHeadPhoto)


 771
771

 被折叠的 条评论
为什么被折叠?
被折叠的 条评论
为什么被折叠?
 到【灌水乐园】发言


