


Android自定义View和自定义属性
虽然Android给我们提供了很多现成的视图控件,但是有时候我们也需要使用到比较复杂的视图组件。这时候基本的控件是无法满足我们的需求的,所以需要进行自定义。例如,我们的app中经常需要header,header中可能有返回按钮,可能有设置按钮。如何方便的、灵活的配置我们的header,这便是本文要讲解的内容啦~
其他视图组件的编写原理都一样,所以这里只举一个最简单的例子,便于理解。
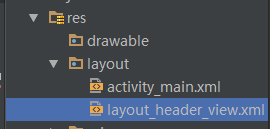
1. 为你的header创建一个xml文件
首先在layout里为header新建一个xml文件,我将其命名为layout_header_view
代码为:
<?xml version="1.0" encoding="utf-8"?>

<RelativeLayout xmlns:android="http://schemas.android.com/apk/res/android"
    android:layout_width="match_parent"
    android:layout_height="wrap_content">


    <LinearLayout
        android:orientation="horizontal"
        android:layout_width="match_parent"
        android:layout_height="wrap_content"
        android:layout_alignParentTop="true"
        android:layout_alignParentLeft="true"
        android:layout_alignParentStart="true">

        <TextView
            android:layout_width="wrap_content"
            android:layout_height="wrap_content"
            android:textAppearance="?android:attr/textAppearanceMedium"
            android:text="Medium Text"
            android:id="@+id/textView"
            android:padding="10dp"
            android:visibility="gone"/>
    </LinearLayout>
</RelativeLayout>
其实就是一个拥有一个TextView的header。TextView默认为gone。
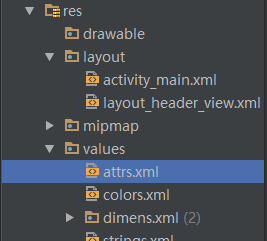
2. 列表内容自定义属性
接下来就是为自定义的header定义属性。在values中新建一个名为attrs的xml文件,如下图所示:
我给header定义了两个属性,如下所示:
<?xml version="1.0" encoding="utf-8"?>
<resources>
    <declare-styleable name="HeaderView">
        <attr name="headerBackgroundColor" format="color"/>
        <attr name="headerLeftText" format="string"/>
    </declare-styleable>
</resources>首先,通过<declare-styleable name="HeaderView">定义一个总的,取名为HeaderView。
接着在这个总的下,定义两个属性:
一个是<attr name="headerBackgroundColor" format="color"/>用于设置header的背景颜色,
一个是<attr name="headerLeftText" format="string"/>用于编辑TextView的文本信息
其中format是这些属性的值得类型。
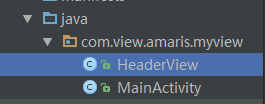
3.为自定义header添加一个class
新建一个类,我将其命名为HeaderView:
里面的代码如下:
package com.view.amaris.myview;

import android.content.Context;
import android.content.res.TypedArray;
import android.util.AttributeSet;
import android.view.LayoutInflater;
import android.view.View;
import android.view.ViewGroup;
import android.widget.LinearLayout;
import android.widget.TextView;

/**
 * Created by Amaris on 2015/10/12.
 */
public class HeaderView extends LinearLayout{

    private TextView leftTextView;

    private ViewGroup root;
    private Context context;

    public HeaderView(Context context, AttributeSet attrs) {
        super(context,attrs);
        this.context = context;
        setupView(context,attrs);
    }

    private void setupView(Context context, AttributeSet attrs) {
        root = (ViewGroup) LayoutInflater.from(context).inflate(R.layout.layout_header_view, null);
        leftTextView = (TextView) root.findViewById(R.id.textView);

        TypedArray typedArray = context.obtainStyledAttributes(attrs, R.styleable.HeaderView);
        setBackgroundColor(getResources().getColor(typedArray.getResourceId(R.styleable.HeaderView_headerBackgroundColor, R.color.theme_blue)));

        if (typedArray.hasValue(R.styleable.HeaderView_headerLeftText)) {
            leftTextView.setText(typedArray.getString(R.styleable.HeaderView_headerLeftText));
            leftTextView.setVisibility(View.VISIBLE);
        }

        if (typedArray != null) {
            typedArray.recycle();
        }

        addView(root, new ViewGroup.LayoutParams(ViewGroup.LayoutParams.MATCH_PARENT, ViewGroup.LayoutParams.WRAP_CONTENT));
    }
}
其中,
root = (ViewGroup) LayoutInflater.from(context).inflate(R.layout.layout_header_view, null);是将layout_header_view.xml和此类相关联。
TypedArray typedArray = context.obtainStyledAttributes(attrs, R.styleable.HeaderView);是获取我们自定义的属性。
R.styleable.HeaderView就是我们在attrs.xml中定义的<declare-styleable name="HeaderView">的name。
setBackgroundColor(getResources().getColor(typedArray.getResourceId(R.styleable.HeaderView_headerBackgroundColor, R.color.theme_blue)));为header设置颜色背景,将我们自定义属性中headerBackgroundColor的值设置为背景色。
typedArray.getResourceId(R.styleable.HeaderView_headerBackgroundColor就是获取设置的自定义属性值。
HeaderView_headerBackgroundColor下划线左边是<declare-styleable name="HeaderView">的name,右边是<attr name="headerLeftText" format="string"/>的name
R.color.theme_blue是如果没有设置自定义背景的颜色的值那么就默认为R.color.theme_blue这个颜色。
由于我们最先是把TextView设置为gone了,所以
if (typedArray.hasValue(R.styleable.HeaderView_headerLeftText)) {
            leftTextView.setText(typedArray.getString(R.styleable.HeaderView_headerLeftText));
            leftTextView.setVisibility(View.VISIBLE);
        }
表示如果我们使用的headerLeftText这个自定义属性,那么TextView便显示出来,并且文本也设置为指定的值。
if (typedArray != null) {
            typedArray.recycle();
        }
作用是Give back a previously retrieved StyledAttributes, for later re-use.
最后,记得addView
addView(root, new ViewGroup.LayoutParams(ViewGroup.LayoutParams.MATCH_PARENT, ViewGroup.LayoutParams.WRAP_CONTENT));4.使用自定义的header
接下来就可以使用我们自定义的header啦~
首先在主界面中添加HeaderView视图组件:
<?xml version="1.0" encoding="utf-8"?>
<RelativeLayout xmlns:android="http://schemas.android.com/apk/res/android"
    xmlns:view="http://schemas.android.com/apk/res-auto"
    xmlns:tools="http://schemas.android.com/tools" android:layout_width="match_parent"
    android:layout_height="match_parent" tools:context=".MainActivity">

    <com.view.amaris.myview.HeaderView
        android:id="@+id/hv_fragment_mine"
        android:layout_width="match_parent"
        android:layout_height="wrap_content"
        view:headerBackgroundColor="@color/theme_green"
        view:headerLeftText="aaa"
        />

</RelativeLayout>
xmlns:view="http://schemas.android.com/apk/res-auto"是获取自定义属性,我取名为view。
<com.view.amaris.myview.HeaderView
        android:id="@+id/hv_fragment_mine"
        android:layout_width="match_parent"
        android:layout_height="wrap_content"
        view:headerBackgroundColor="@color/theme_green"
        view:headerLeftText="aaa"
        />
这一段便是我们自定义的HeaderView了,
        view:headerBackgroundColor="@color/theme_green"
        view:headerLeftText="aaa"
这两句就是自定义的两个属性。
界面如下:
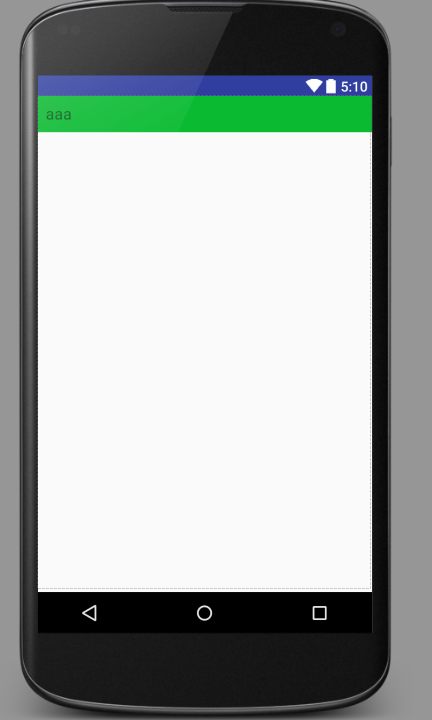
如果不添加view:headerLeftText="aaa"属性,那么TextView便会消失,变为gone了。
如果不添加view:headerBackgroundColor="@color/theme_green"属性,那么背景色为变为蓝色默认色。


 2347
2347

 被折叠的 条评论
为什么被折叠?
被折叠的 条评论
为什么被折叠?
 到【灌水乐园】发言


