


一.CSS+JS实现打字机效果
1.1实现效果

1.2HTML部分
<span class="bottom-text"></span>1.3CSS部分
.bottom-text {
    font-fanmily: "fangsong";
    display:inline-block;
    position:relative;
    font-size:20px;
    height:20px;
    inline-height:20px;
    color:white;
}

.bottom-text::after {
    content:"";
    position:absolute;
    right:-10px;
    top:5px;
    height:20px;
    width:2px;
    background-color:#fff;
    //指针动画效果
    animation: san 0.5s steps(1) infinite;
}
@keyframes san{
    0%,100% {
        background-color:#fff;
       }
       50% {
            background-color:transparent;
       }
}
1.4JS部分
    <script>
        //页面底部打字机效果
        const text = document.querySelector(".bottom-text");
        //需要轮替的文本内容列表
        const txt = ["你不比任何人差。","答案在风中飘荡。"];
        //当前文本内容的字符下标
        var crIndex = 0;
        //文本内容列表的下标
        var txtIndex = 0;
        //用来确定是打字还是删字,true是打字,false是删字
        var switchMode = true;
        setInterval(function(){
            if(switchMode) {
                text.innerHTML = txt[txtIndex].slice(0,++crIndex);
            }
            else {
                text.innerHTML = txt[txtIndex].slice(0,crIndex);
                crIndex--;
            }

            //+3是为了打完全部字后停留一段时间,更好的交互效果
            if(crIndex == txt[txtIndex].length+3) {
                switchMode = false;
            }
            //当前文本内容被删光后,进行下一个文本内容的打字
            else if (crIndex < 0) {
                crIndex = 0;
                switchMode = true;
                txtIndex++;
                if(txtIndex >= txt.length){
                    txtIndex = 0;
                }
            }
        //200ms表示打字的快慢,越低打字越快
        },200);
    </script>
二.Layui+JS实现多图片上传预览图+删除
2.1实现效果(悬浮效果):
2.2实现效果(删除效果)
2.3实现效果(预览效果)
2.4实现思路
- 首先在form表单中,创建一个隐藏的<input>用来临时存放上传图片的路径,图片与图片之间,使用“;”隔开,例如:“xxx.png;xxx.png;xxx.png”
- 每添加一张图片,动态给图片添加悬浮事件,当悬浮时,悬浮窗盒子显示(即黑色背景有删除、预览按钮的盒子),可以使用“Layui库中的类属性layui-hide”实现,当悬浮时删除该属性,鼠标移出后再次添加这个类属性
- 添加的图片临时存储在服务器的“tempImg”文件夹中,当点击删除按钮后,首先删除图片DOM节点,其次在服务器中删除该图片,可以创建一个下标索引(indexImg)和图片映射(mapImg)来反应图片下表与图片路径的关系。
2.5HTML部分
<div class="layui-form-item">
    <button type="button" class="layui-btn" id="uploadImg" style="margin-left:2.0rem;">
        <i class="layui-icon layui-icon-upload"></i> 多图片上传
    </button>
    <blockquote class="layui-elem-quote layui-quote-nm" style="margin-top:11px;">
        预览图:
    <div class="layui-upload-list" id="upload-img-preview"></div>
    <input name="imglist" type="text" id="imgInput" style="display:none;">
    </blockquote>
</div>
2.6CSS部分
<style>
    .imgBlock {
        width:180px;
        height:180px;
        margin:0 0.5rem 0.5rem 0;
        display:inline-block;
    }
    img {
        width:100%;
        height:100%;
    }
    .imgHoverBlock {
        display: flex;
        justify-content: center;
        align-items: center;
        background: rgba(59, 60, 61, 0.6);
        opacity:0.7;
        width:100%;
    }
    .iSize {
        cursor:pointer;
        font-size:20px;
        color:black;
    }
    .iSize:hover {
        transform:scale(1.5);
    }
</style>
2.7JavaScript部分
        layui.use(function(){
            const upload = layui.upload;
            upload.render({
                elem:"#uploadImg",
                url:"/main/blog/moreimgUpload",
                multiple:true,
                done:function(res){
                    //拼接预览图片
                    $("#upload-img-preview").append(
                        "<div id=" + "img" + imgIndex + " class='imgBlock'>" +
                        "<img src=" + "/" + res["url"] + ">" +
                        "<div class='imgHoverBlock layui-hide' style='height:100%;'>" +
                        "<div class='iSize'><i class='layui-icon layui-icon-close i-clickDelete'></i><i class='layui-icon layui-icon-eye i-clickView'></i></div>" +
                        "</div>" + "</div>"
                    );
                    //#imgInput是一个隐藏输入框,用来临时存储图片路径
                    targetUrl = res["url"].split("/").pop();
                    $("#imgInput").val($("#imgInput").val()+targetUrl+";");
                    //为预览图添加悬浮界面
                    $("#img"+imgIndex).hover(function(){
                        $(this).find("div:first").removeClass("layui-hide");
                        $(this).find("img:first").addClass("layui-hide");
                    },function(){
                        $(this).find("div:first").addClass("layui-hide");
                        $(this).find("img:first").removeClass("layui-hide");
                    });
                    //将图片下标以及路径添加到映射中
                    imgMap["img"+imgIndex] = res["url"];
                    //为悬浮界面图标添加点击事件
                    $(".i-clickDelete").click(function(){
                        const targetDom = $(this).parent().parent().parent();
                        const targetDomId = targetDom.prop("id");
                        //imgInput临时图片路径数组
                        let tempImgInputList = $("#imgInput").val().split(";");
                        //console.log("原先的值是:",$("#imgInput").val());
                        //在服务器中删除对应的图片
                        $.post("/main/blog/moreimgUpload/temp/Delete",{"path":imgMap[targetDomId]});
                        //修改imgInput的值(用来临时存储所有图片路径的标签)
                        for(let i = 0;i<tempImgInputList.length;i++){
                            if(tempImgInputList[i] == imgMap[targetDomId].split("/").pop()){
                                tempImgInputList.splice(i,1);
                                break;
                            }
                        }
                        //拼接imgInput字符串
                        $("#imgInput").val(tempImgInputList.join(""));
                        //console.log("之后的值是:",$("#imgInput").val());
                        //删除映射对象中对应的值
                        delete imgMap[targetDomId];
                        //删除轮播图DOM节点
                        targetDom.remove();
                    });
                    $(".i-clickView").click(function(){
                        const targetDom = $(this).parent().parent().parent();
                        const targetDomId = targetDom.prop("id");
                        console.log(imgMap[targetDomId]);
                        layui.use(function(){
                            var layer = layui.layer;
                            layer.photos({
                                photos: {
                                "title": "Photos Demo",
                                "start": 0,
                                "data": [
                                    {
                                        "alt": "",
                                        "pid": 5,
                                        "src": "/" + imgMap[targetDomId],
                                    }
                                  ]
                                },
                                footer: false // 是否显示底部栏 --- 2.8.16+
                            });
                        });
                    });
                    //预览图下标更新
                    imgIndex++;
                }
            });
        });
2.8后端接口(Python版本,供参考)
#删除临时轮播图图片函数
@blog.route("/moreimgUpload/temp/Delete",methods=['POST'])
def imgTempDelete():
imgPath = request.form.get("path")
os.remove(imgPath)
return {
"status":1
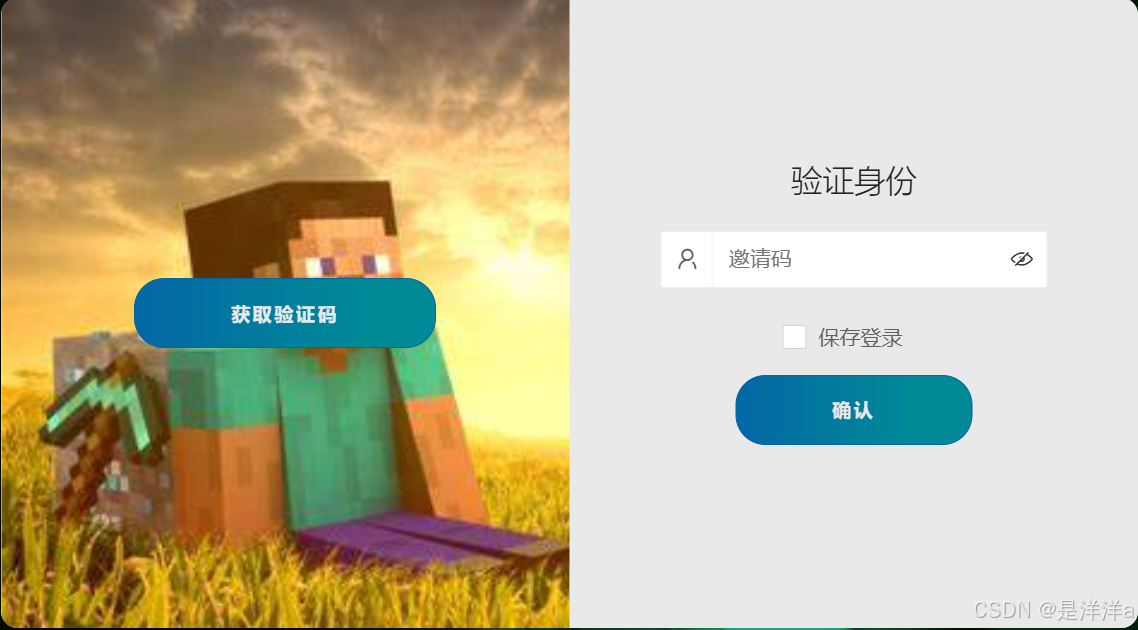
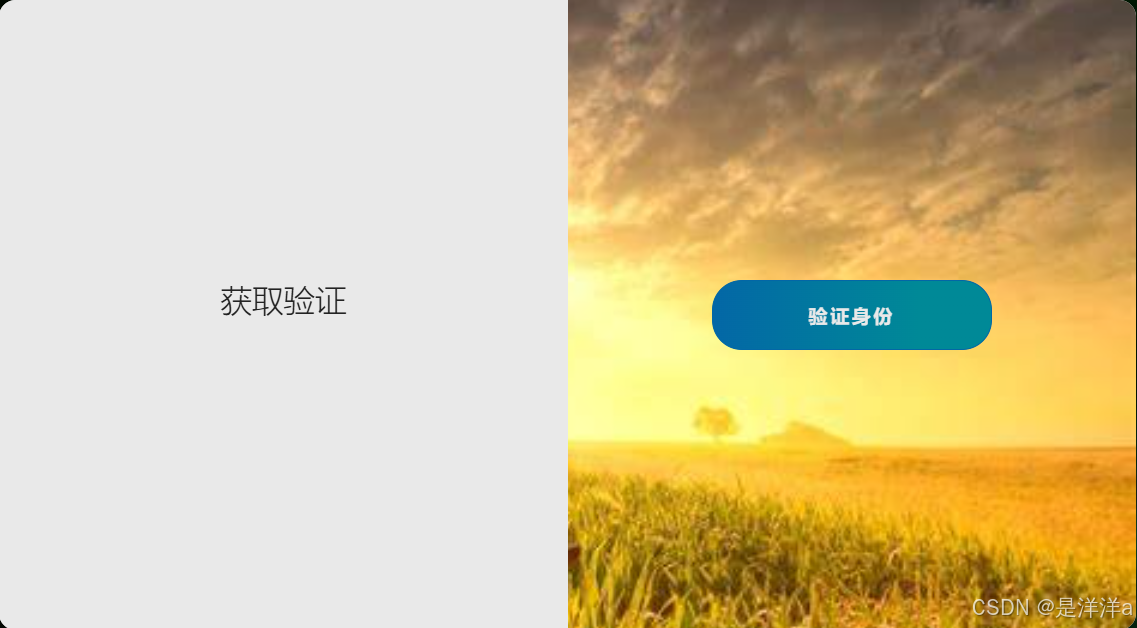
}三.基于原生HTML+CSS实现的登录界面
3.1前言
该登录界面中使用了“layui”组件制作<input>标签以及前缀等,在使用时可以根据自己的需要,酌情删减,带有“layui-xx”类的地方使用了layui组件,不使用layui组件库并不会对登录界面造成影响
3.2HTML部分
    <div class="container signal-active">
        <!-- 登录页面 -->
        <div class="container-form container--signup">
            <form class="form layui-form" id="form1" method="post">
                <h2 class="form-title">验证身份</h2>
                <div class="layui-form-item">
                    <div class="layui-input-wrap">
                        <div class="layui-input-prefix layui-input-split">
                            <i class="layui-icon layui-icon-username"></i>
                        </div>
                        <input type="password" name="username" lay-affix="eye" lay-verify="required" placeholder="邀请码" lay-reqtext="请填写邀请码" class="layui-input">
                    </div>
                </div>
                <div class="layui-form-item">
                    <input type="checkbox" name="remember" lay-skin="primary" title="保存登录">
                </div>
                <div class="layui-form-item">
                    <button class="btn" lay-submit lay-filtyer="login">确认</button>
                </div>
            </form>
        </div>
        <!-- 注册页面 -->
        <div class="container-form container--signin">
            <form class="form" id="form2">
                <h2 class="form-title">获取验证</h2>
            </form>
        </div>
        <!-- 移动覆盖层 -->
            <div class="container-overlay">
                <div class="overlay">
                    <div class="overlay-panel overlay--left">
                        <button class="btn" id="signIn">获取验证码</button>
                    </div>
                    <div class="overlay-panel overlay--right">
                        <button class="btn" id="signUp">验证身份</button>
                    </div>
                </div>
            </div>
    </div>
3.3JS部分
    <script>
        //获取按钮DOM节点
        const signInBtn = document.getElementById("signIn");
        const signUpBtn = document.getElementById("signUp");
        const container = document.querySelector(".container");
        //动态删减container容器的"signal-active"类属性,实现登录/注册两个窗口滑动
        signInBtn.addEventListener("click", () => {
            container.classList.remove("signal-active");
        });
        signUpBtn.addEventListener("click", () => {
            container.classList.add("signal-active");
        });
    </script>
3.4CSS部分
:root {
    /* 颜色 */
    --white: #e9e9e9;
    --gray: #333;
    --blue: #0367a6;
    --lightblue: #008997;
    /* 弧度 */
    --button-radius: 0.7rem;
    /* 大小 */
    --max-width: 758px;
    --max-height: 420px;
    font-size: 16px;
    font-family: -apple-system, BlinkMacSystemFont, "Segoe UI", Roboto, Oxygen,
    Ubuntu, Cantarell, "Open Sans", "Helvetica Neue", sans-serif;
}

body {
    align-items: center;
    background-color: var(--white);
    background: url("/static/img/login_background.jpg");
    /* 决定背景图像的位置是在视口内固定,或者随着包含它的区块滚动。 */
    background-attachment: fixed;
    background-position: center;
    background-repeat: no-repeat;
    background-size: cover;
    display: grid;
    height: 100vh;
    place-items: center;
}

.form-title {
    font-weight: 300;
    margin: 0;
    margin-bottom: 1.25rem;
}

.link {
    color: var(--gray);
    font-size: 0.9rem;
    margin: 1.5rem 0;
    text-decoration: none;
}

.container {
    background-color: var(--white);
    border-radius: var(--button-radius);
    box-shadow: 0 0.9rem 1.7rem rgba(0, 0, 0, 0.25),
      0 0.7rem 0.7rem rgba(0, 0, 0, 0.22);
    height: var(--max-height);
    max-width: var(--max-width);
    overflow: hidden;
    position: relative;
    width: 100%;
}

.container-form {
    height: 100%;
    position: absolute;
    top: 0;
    transition: all 0.6s ease-in-out;
}

.container--signin {
    left: 0;
    width: 50%;
    z-index: 2;
}

.container.signal-active .container--signin {
    opacity: 0;
    transform: translateX(100%);
}

.container--signup {
    left: 0;
    opacity: 0;
    width: 50%;
    z-index: 1;
}

.container.signal-active .container--signup {
    animation: show 0.6s;
    opacity: 1;
    transform: translateX(100%);
    z-index: 5;
}

.container-overlay {
    height: 100%;
    left: 50%;
    overflow: hidden;
    position: absolute;
    top: 0;
    transition: transform 0.6s ease-in-out;
    width: 50%;
    z-index: 100;
}

.container.signal-active .container-overlay {
    transform: translateX(-100%);
}

.overlay {
    background-color: var(--lightblue);
    background: url("/static/img/login_overlay.jpg");
    background-attachment: fixed;
    background-position: center;
    background-repeat: no-repeat;
    background-size: cover;
    height: 100%;
    left: -100%;
    position: relative;
    transform: translateX(0);
    transition: transform 0.6s ease-in-out;
    width: 200%;
}

.container.signal-active .overlay {
    transform: translateX(50%);
}

.overlay-panel {
    align-items: center;
    display: flex;
    flex-direction: column;
    height: 100%;
    justify-content: center;
    position: absolute;
    text-align: center;
    top: 0;
    transform: translateX(0);
    transition: transform 0.6s ease-in-out;
    width: 50%;
}

.overlay--left {
    transform: translateX(-20%);
}

.container.signal-active .overlay--left {
    transform: translateX(0);
}

.overlay--right {
    right: 0;
    transform: translateX(0);
}

.container.signal-active .overlay--right {
    transform: translateX(20%);
}

.btn {
    background-color: var(--blue);
    background-image: linear-gradient(90deg, var(--blue) 0%, var(--lightblue) 74%);
    border-radius: 20px;
    border: 1px solid var(--blue);
    color: var(--white);
    cursor: pointer;
    font-size: 0.8rem;
    font-weight: bold;
    letter-spacing: 0.1rem;
    padding: 0.9rem 4rem;
    text-transform: uppercase;
    transition: transform 80ms ease-in;
}

.form>.btn {
    margin-top: 1.5rem;
}

.btn:active {
    transform: scale(0.95);
}

.btn:focus {
    outline: none;
}

.form {
    background-color: var(--white);
    display: flex;
    align-items: center;
    justify-content: center;
    flex-direction: column;
    padding: 0 3rem;
    height: 100%;
    text-align: center;
}

@keyframes show {
    0%,
    49.99% {
        opacity: 0;
        z-index: 1;
    }
    50%,
    100% {
        opacity: 1;
        z-index: 5;
    }
}

@media screen and (max-width:768px) {
    .form {
        padding:0.15rem;
    }
    .btn {
        padding:0.9rem 3rem;
    }
}在CSS中,我们对“form”类进行媒体查询以适配不同大小的屏幕
3.5实现效果
3.5.1登录窗口
3.5.2注册窗口
四.前端常见问题
4.1怎么禁用<img>图片拖动
将<img>的标签属性“draggable”设置为“false”
<img src="xxx" draggable="false">4.2怎么均等的缩放<img>图片
在响应式布局中,有时我们可能需要修改<img>的大小。
第一种方法,我们可以手动指定width/height,但是这种方法可能会导致图片扭曲
为此,我们可以使用“scale”来进行均等的缩放
例如,当屏幕宽度小于768px时,我们可以将该<img>标签缩小75%
@media screen and (max-width:768px) {
    img {
        transform:scale(75%);
    }
}


 787
787

 被折叠的 条评论
为什么被折叠?
被折叠的 条评论
为什么被折叠?
 到【灌水乐园】发言


