CentOS 7 安装Libevent
1.下载安装包
新版本是libevent-2.1.12-stable.tar.gz。(如果你的系统已经安装了libevent,可以不用安装)
官网:http://www.monkey.org/~provos/libevent/
2.创建目录
# mkdir libevent-stable
3.解压
# tar zxvf libevent-2.1.12-stable.tar.gz
4.进入目录
# cd libevent-2.1.12-stable
5.设置安装路径
# ./configure –prefix=/usr/local/libevent
[root@localhost libevent-2.1.12-stable]# ./configure -prefix=/usr/local/libevent
checking for a BSD-compatible install... /usr/bin/install -c
checking whether build environment is sane... yes
checking for a thread-safe mkdir -p... /usr/bin/mkdir -p
checking for gawk... gawk
checking whether make sets $(MAKE)... yes
checking whether make supports nested variables... yes
checking whether make supports nested variables... (cached) yes
checking whether make supports the include directive... yes (GNU style)
checking for gcc... gcc
checking whether the C compiler works... yes
checking for C compiler default output file name... a.out
checking for suffix of executables...
checking whether we are cross compiling... no
checking for suffix of object files... o
checking whether we are using the GNU C compiler... yes
提示报错:
configure: error: openssl is a must but can not be found. You should add the directory containing ‘openssl.pc’ to the ‘PKG_CONFIG_PATH’ environment variable, or set ‘CFLAGS’ and ‘LDFLAGS’ directly for openssl, or use `–disable-openssl’ to disable support for openssl encryption
大致报错信息:编译libevent源码,openssl 依赖包在CentOS系统中没有发现openssl, 系统全局变量中缺少PKG_CONFIG_PATH 变量定义,注意PKG_CONFIG_PATH变量必须包含openssl.pc 连接文件。
解决办法:重新安装OpenSSL 替换CentOS 7 默认自带的OpenSSL。
一、查看主机openssl版本信息
1、查看路径
# which openssl
复制
2、查看版本
# openssl version
复制
3、查看CentOS版本
# cat /etc/redhat-release
温馨提示:CentOS 7.6 默认版本:openssl-1.0.2k
二、安装Openssl
方法一、下载源码编译安装
访问OpenSSL官网资源,查看是否有最新的版本发布。
官网资源地址:https://www.openssl.org/source
1、解压并切换目录
tar -zxvf openssl-1.0.2j.tar.gz
cd openssl-1.0.2j
复制
2、设定Openssl 安装,( –prefix )参数为欲安装之目录,也就是安装后的档案会出现在该目录下
./config --prefix=/usr/local/openssl
复制
3、执行命令
./config -t
复制
4、执行make、make install,编译Openssl
make & make install
建议再安装一次,使用shared 生成动态连接库。否则无法找到库文件
./config shared --prefix=/usr/local/openssl
make clean
make&& make install
5、centos 切换openssl版本
mv /usr/bin/openssl /usr/bin/openssl.bak
mv /usr/include/openssl /usr/include/openssl.bak
ln -s /usr/local/openssl/bin/openssl /usr/bin/openssl
ln -s /usr/local/openssl/include/openssl /usr/include/openssl
echo "/usr/local/openssl/lib" >> /etc/ld.so.conf
ldconfig -v
ln -s /usr/local/openssl/lib/libssl.so.1.0.0 /usr/lib64/libssl.so.1.0.0
ln -s /usr/local/openssl/lib/libcrypto.so.1.0.0 /usr/lib64/libcrypto.so.1.0.0
注意:不能直接删除软链接
CentOS 7 OpenSSL 默认libssl.so.* 和libcrypto.so.* 软连接。
[root@localhost lib]# find / -name libssl.so.1.0.2k
/var/lib/docker/overlay2/30e17a77fc02fa56f32ede3a9d504681b9035fecbd69d5b283d9d2d635bd8b55/diff/usr/lib64/libssl.so.1.0.2k
/var/lib/docker/overlay2/99f62cd325cf4c1fd668b98f95919648b19b0638ff2626250be1c14908f91ee9/diff/usr/lib64/libssl.so.1.0.2k
/usr/lib64/libssl.so.1.0.2k
[root@localhost lib]# find / -name libcrypto.so.1.0.2k
/var/lib/docker/overlay2/30e17a77fc02fa56f32ede3a9d504681b9035fecbd69d5b283d9d2d635bd8b55/diff/usr/lib64/libcrypto.so.1.0.2k
/var/lib/docker/overlay2/99f62cd325cf4c1fd668b98f95919648b19b0638ff2626250be1c14908f91ee9/diff/usr/lib64/libcrypto.so.1.0.2k
/usr/lib64/libcrypto.so.1.0.2k

如需使用新版本开发,则需替换原来的软链接指向,即替换原动态库,进行版本升级。

替换/lib(lib64)和/usr/lib(lib64)和/usr/local/lib(lib64)存在的相应动态库:
[root@localhost lib]# ln -s /usr/local/openssl/lib/libssl.so.1.0.0 /usr/lib64/libssl.so.1.0.0
[root@localhost lib]# ln -s /usr/local/openssl/lib/libcrypto.so.1.0.0 /usr/lib64/libcrypto.so.1.0.0
设置PKG_CONFIG_PATH 全局环境变量
vi /etc/procfile

-- 最后一行添加如下指令:
export PKG_CONFIG_PATH=/usr/local/openssl/lib/pkgconfig

-- 修改后的配置文件生效
source /etc/profilee
再次编译Libevent 源码
5.设置安装路径
# ./configure –prefix=/usr/local/libevent
[root@localhost libevent-2.1.12-stable]# ./configure -prefix=/usr/local/libevent
checking for a BSD-compatible install... /usr/bin/install -c
checking whether build environment is sane... yes
checking for a thread-safe mkdir -p... /usr/bin/mkdir -p
checking for gawk... gawk
checking whether make sets $(MAKE)... yes
checking whether make supports nested variables... yes
checking whether make supports nested variables... (cached) yes
checking whether make supports the include directive... yes (GNU style)
checking for gcc... gcc
checking whether the C compiler works... yes
checking for C compiler default output file name... a.out
checking for suffix of executables...
*****
6. 编译并且安装至指定路径地址(/usr/local/libevent)
# make & make install
root@localhost libevent-2.1.12-stable]# make &  make install
[1] 8554
make  install-am
make  all-am
make[1]: 进入目录“/usr/local/libevent-stable/libevent-2.1.12-stable”
make[1]: 进入目录“/usr/local/libevent-stable/libevent-2.1.12-stable”
  CC       sample/le_proxy-le-proxy.o
  CC       sample/le_proxy-le-proxy.o
  CC       libevent_openssl_la-bufferevent_openssl.lo
mv: 无法获取"sample/.deps/le_proxy-le-proxy.Tpo" 的文件状态(stat): 没有那个文件或目录
make[1]: *** [sample/le_proxy-le-proxy.o] 错误 1
make[1]: 离开目录“/usr/local/libevent-stable/libevent-2.1.12-stable”
make: *** [all] 错误 2
In file included from /usr/local/openssl/include/openssl/ssl.h:152:0,
                 from bufferevent_openssl.c:66:
bufferevent_openssl.c: 在函数‘bufferevent_openssl_socket_new’中:
/usr/local/openssl/include/openssl/bio.h:589:34: 警告:计算出的值未被使用 [-Wunused-value]
 # define BIO_set_close(b,c)      (int)BIO_ctrl(b,BIO_CTRL_SET_CLOSE,(c),NULL)
                                  ^
bufferevent_openssl.c:1466:3: 附注:in expansion of macro ‘BIO_set_close’
   BIO_set_close(bio, 0);
   ^
  CCLD     libevent_openssl.la
  CCLD     sample/le-proxy
  CC       sample/https_client-https-client.o
  CC       sample/https_client-hostcheck.o
******
至此CentOS 7 安装Libevent 网络库结束。
CentOS 7 验证Libevent 框架
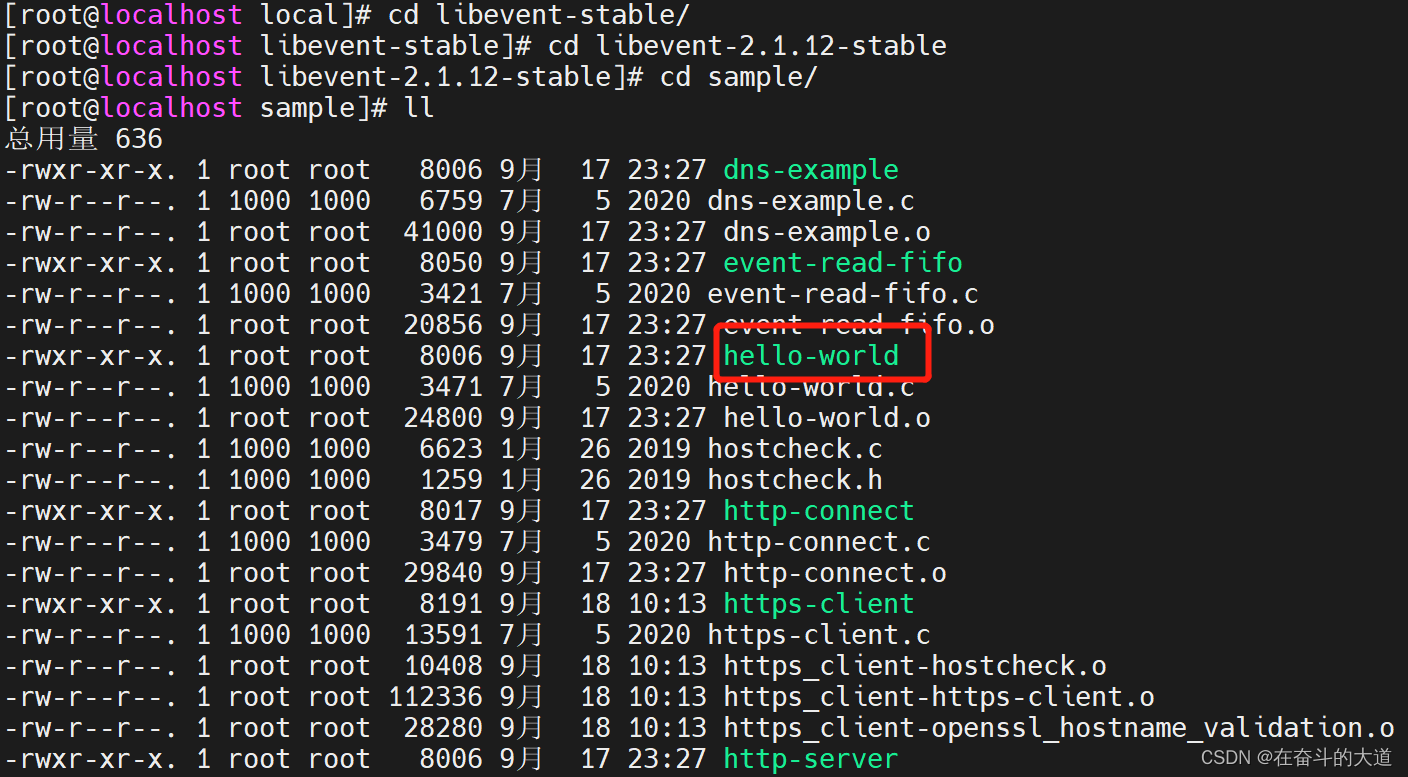
前提:使用libevent 源码中的sample 文件夹中的hello-word

NetCat 工具:各种TCP和UDP监听和连接测试用途。
判断CentOS 7 中是否安装netcat/nc, 执行如下指令:
# nc --help
如果没有netcat 版本信息输出和使用手册输出,你则需要安装netcat/nc 工具,请执行如下指令:
# yum install -y nc
[root@localhost ~]# yum install -y nc
已加载插件:fastestmirror
Determining fastest mirrors
 * base: mirrors.bupt.edu.cn
 * extras: mirrors.ustc.edu.cn
 * updates: mirrors.bupt.edu.cn
base                                                                                                                     | 3.6 kB  00:00:00
docker-ce-stable                                                                                                         | 3.5 kB  00:00:00
extras                                                                                                                   | 2.9 kB  00:00:00
updates                                                                                                                  | 2.9 kB  00:00:00
docker-ce-stable/7/x86_64/primary_db                                                                                     | 117 kB  00:00:26
正在解决依赖关系
--> 正在检查事务
---> 软件包 nmap-ncat.x86_64.2.6.40-19.el7 将被 安装
*****
启动Libevent服务端
[root@localhost sample]# ./hello-world
*** 等待客户端连接 ***
使用NetCat/NC 模拟TCP请求
[root@localhost ~]# nc 192.168.43.10 9995
Hello, World!
LibEvent 服务端输出
[root@localhost sample]# ./hello-world
*** 等待客户端连接 ***
flushed answer


 1198
1198


 被折叠的 条评论
为什么被折叠?


