


概述
去年公司的项目需要用到蓝牙开发的相关内容,因此查阅了Google官方文档的内容并进行二次整理。本文只涉及经典蓝牙(Classic Bluetooth)的开发,并不涉及低功耗蓝牙(BLE)的开发,本文应用场景为蓝牙单聊。
官方项目:GoogleSamples-android-BluetoothChat
Bluetooth Low Energy:学习笔记之低功耗蓝牙开发
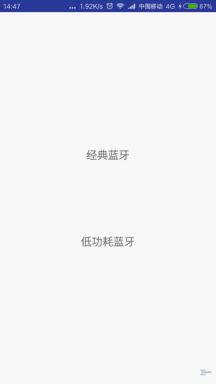
效果图A-小米4手机
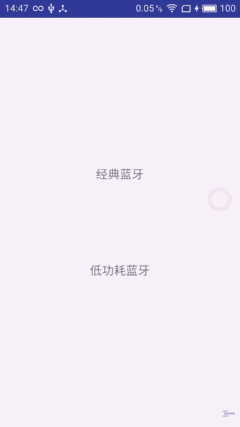
效果图B-魅蓝2手机
权限
经典蓝牙需要用到2个权限
允许程序连接到已配对的蓝牙设备<uses-permission android:name="android.permission.BLUETOOTH"/>
允许程序发现和配对蓝牙设备<uses-permission android:name="android.permission.BLUETOOTH_ADMIN"/>
在AndroidManifest加上这个2个权限
打开蓝牙
(1)判断该设备是否支持蓝牙、蓝牙功能是否被打开
public boolean openBluetooth() {
        if (adapter == null) {
            Toast.makeText(this, "该设备不支持蓝牙", Toast.LENGTH_LONG).show();
            return false;
        } else {
            if (!adapter.isEnabled()) { // 打开蓝牙
                // 设置蓝牙可见性,最多300秒
                Intent intent = new Intent(BluetoothAdapter.ACTION_REQUEST_ENABLE);
                intent.putExtra(BluetoothAdapter.EXTRA_DISCOVERABLE_DURATION, 300);
                startActivityForResult(intent, 0);
                return false;
            }
        }
        return true;
    }
(2)在onActivityResult方法处理回调结果
@Override
    protected void onActivityResult(int requestCode, int resultCode, Intent data) {
        switch (resultCode) {
            case RESULT_OK:
                Toast.makeText(this, "开启蓝牙成功", Toast.LENGTH_SHORT).show();
                break;
            case RESULT_CANCELED:
                Toast.makeText(this, "开启蓝牙失败", Toast.LENGTH_SHORT).show();
                break;
        }
    }
发现/搜索设备
(1)通过getBondedDevice()方法的获得已经匹配的设备。然后调用startDiscovery()方法来开始设备的搜索
public void addBluetooth(ArrayList<BluetoothDevice> mainList) {
        Set<BluetoothDevice> pairedDevices = adapter.getBondedDevices();
        if (pairedDevices.size() > 0) {
            for (BluetoothDevice device : pairedDevices) {
                if (!mainList.contains(device)) {
                    mainList.add(device);
                }
            }
        }
        // 寻找蓝牙设备,android会将查找到的设备以广播形式发出去
        adapter.startDiscovery();
}private BroadcastReceiver receiver = new BroadcastReceiver() {
@Override
public void onReceive(Context context, Intent intent) {
String action = intent.getAction();
if (BluetoothDevice.ACTION_FOUND.equals(action)) { // 发现设备的广播
BluetoothDevice device = intent.getParcelableExtra(BluetoothDevice.EXTRA_DEVICE);
/*if (device.getBondState() == BluetoothDevice.BOND_BONDED) {//已匹配的设备
if (device != null) {
if (!mainList.contains(device)) {
mainList.add(device);
lvAdapter.notifyDataSetChanged();
}
}
}*/
if(device!=null){
if (!mainList.contains(device)) {//未包含则添加
mainList.add(device);
lvAdapter.notifyDataSetChanged();
}
}
} else if (BluetoothAdapter.ACTION_DISCOVERY_FINISHED.equals(action)) {//搜索结束
stopAnimation(fab);
}
Log.e("BLUE", "size = " + mainList.size());
lvAdapter.notifyDataSetChanged();
}
};private void initReceiver() {
IntentFilter intentFilter = new IntentFilter();// 设置广播信息过滤
intentFilter.addAction(BluetoothDevice.ACTION_FOUND);//扫描发现设备广播
intentFilter.addAction(BluetoothDevice.ACTION_BOND_STATE_CHANGED);//设备连接状态改变的广播
intentFilter.addAction(BluetoothAdapter.ACTION_SCAN_MODE_CHANGED);//扫描模式变化广播
intentFilter.addAction(BluetoothAdapter.ACTION_STATE_CHANGED);//开关模式变化广播
intentFilter.addAction(BluetoothAdapter.ACTION_DISCOVERY_FINISHED);//扫描结束
// 注册广播接收器,接收并处理搜索结果
registerReceiver(receiver, intentFilter);
}设备配对与解除
注意事项
①蓝牙设备之间自动配对,需要两个设备都安装进行配对的apk
②由于BluetoothDevice配对的方法都是hide的,所以我们需要通过反射调用被隐藏的方法(现在基本都是通用的工具,网上模板基本一样,参考这里)
(1)配对事件
protected void connectDevice(BluetoothDevice mBluetoothDevice) {
        try {
            if (mBluetoothDevice.getBondState() == BluetoothDevice.BOND_NONE) {//未配对
                ClsUtils.createBond(mBluetoothDevice.getClass(), mBluetoothDevice);
            }else if(mBluetoothDevice.getBondState() == BluetoothDevice.BOND_BONDING){//配对中
                ClsUtils.cancelBondProcess(BluetoothDevice.class, mBluetoothDevice);
            } else {
                ClsUtils.removeBond(BluetoothDevice.class, mBluetoothDevice);
                Toast.makeText(this, "蓝牙配对解除", Toast.LENGTH_SHORT).show();
            }
        } catch (Exception e) {
            e.printStackTrace();
        }
    }
(2)蓝牙配对广播接收
public class BuletoothPairingReceiver extends BroadcastReceiver {
    String strPsw = "0000";
    final String ACTION_PAIRING_REQUEST = "android.bluetooth.device.action.PAIRING_REQUEST";

    @Override
    public void onReceive(Context context, Intent intent) {
        if (intent.getAction().equals(ACTION_PAIRING_REQUEST)) {
            BluetoothDevice device = intent.getParcelableExtra(BluetoothDevice.EXTRA_DEVICE);
            if (device.getBondState() != BluetoothDevice.BOND_BONDED) {
                try {
                    abortBroadcast();//如果没有将广播终止,则会出现一个一闪而过的配对框。
                    //确认配对
                    ClsUtils.setPairingConfirmation(device.getClass(), device, true);
                    //调用setPin方法进行配对...
                    boolean ret = ClsUtils.setPin(device.getClass(), device, strPsw);
//                  Toast.makeText(context, "配对信息" + device.getName()+"=="+ret, Toast.LENGTH_LONG).show();

                } catch (Exception e) {
                    Toast.makeText(context, "请求连接错误...", Toast.LENGTH_LONG).show();
                }
            }
        }
    }
}
(3)AndroidM
 最低0.47元/天 解锁文章


 3017
3017


 被折叠的 条评论
为什么被折叠?
被折叠的 条评论
为什么被折叠?
 到【灌水乐园】发言


