


SpringBoot2.0笔记
(一)SpringBoot基本操作——环境搭建及项目创建(有demo)
(二)SpringBoot基本操作——使用IDEA打war包发布及测试
(三)SpringBoot基本操作——SpringBoot整合SpringDataJpa(有demo)
(四)SpringBoot基本操作——SpringBoot使用RedisTemplate整合Redis(有demo)
(五)SpringBoot基本操作——SpringBoot使用Jedis整合Redis(有demo)
(六)SpringBoot基本操作——SpringBoot使用Junit4单元测试(有demo)
(七)SpringBoot基本操作——SpringBoot整合Shiro权限管理(完整demo+界面)
本篇介绍Springboot单元测试的一些基本操作,有人说一个合格的程序员必须熟练使用单元测试,接下来我们一起在Springboot项目中整合Junit4单元测试。
本文使用idea工具构建Springboot2.0+SpringMvc+Thymeleaf+SpringDataJPA+MySql项目
GitHub地址:https://github.com/jwam/springbootJunit4.git
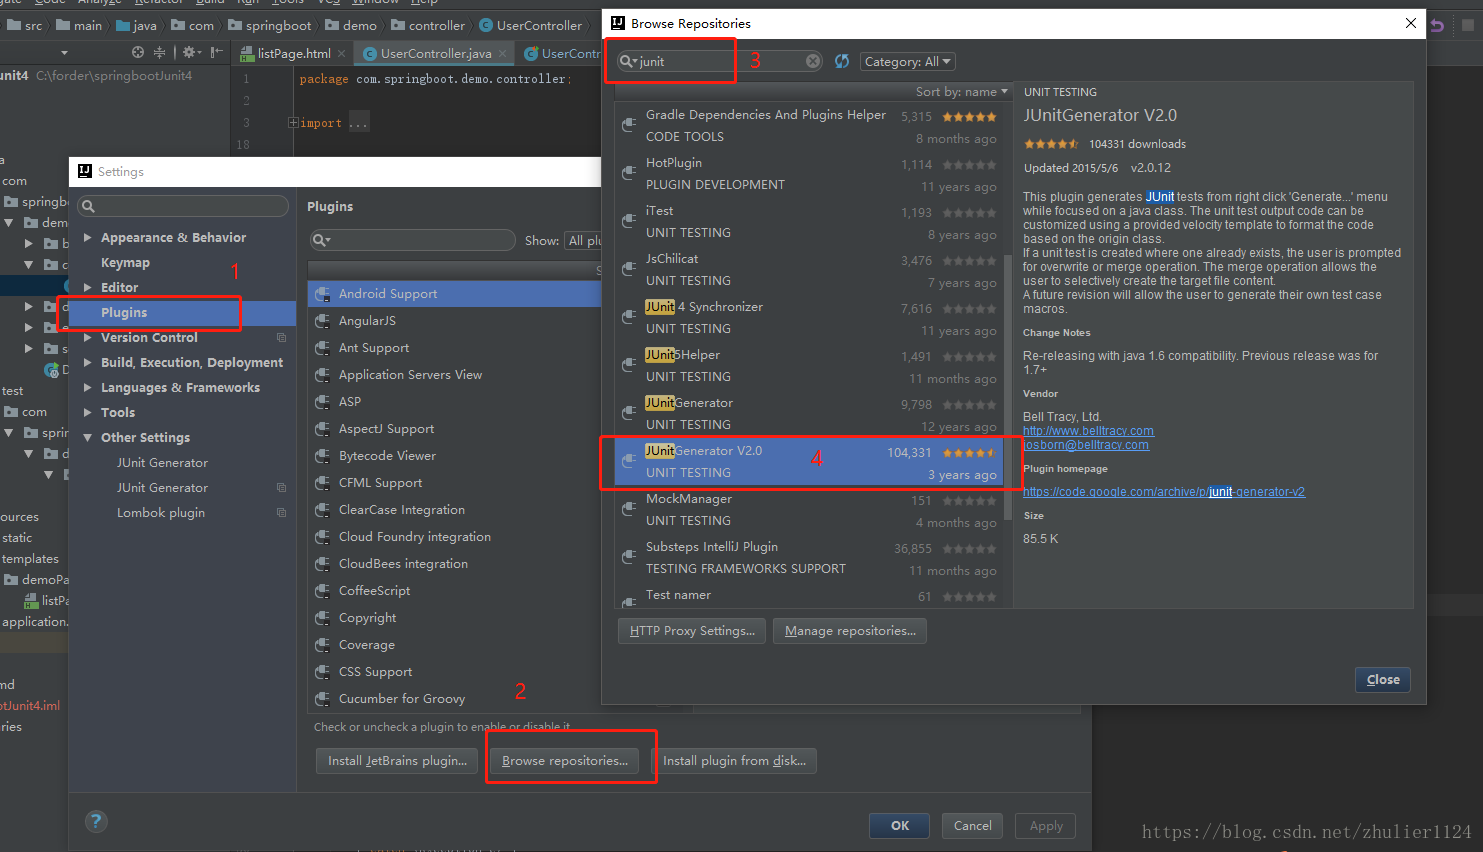
一、IDEA下载并安装Junit插件
点击file-settings,如图按照顺序操作即可,我这里已经安装过了所以最后一步不会显示install按钮。
二、引入关键依赖,完整pom文末给出
		<dependency>
			<groupId>org.springframework.boot</groupId>
			<artifactId>spring-boot-starter-test</artifactId>
			<scope>test</scope>
		</dependency>
		<dependency>
			<groupId>junit</groupId>
			<artifactId>junit</artifactId>
			<version>4.12</version>
			<!--<scope>test</scope>-->
		</dependency>
		<dependency>
			<groupId>org.springframework</groupId>
			<artifactId>spring-test</artifactId>
			<version>5.0.4.RELEASE</version>
		</dependency>
		<dependency>
			<groupId>org.springframework.boot</groupId>
			<artifactId>spring-boot-test</artifactId>
			<version>2.0.0.RELEASE</version>
		</dependency>
三、新建UserController.java作为被测试类
package com.springboot.demo.controller;

import com.springboot.demo.base.controller.BaseController;
import com.springboot.demo.base.utils.StateParameter;
import com.springboot.demo.entity.User;
import com.springboot.demo.service.UserService;
import org.springframework.beans.factory.annotation.Autowired;
import org.springframework.stereotype.Controller;
import org.springframework.ui.ModelMap;
import org.springframework.util.StringUtils;
import org.springframework.web.bind.annotation.RequestMapping;
import org.springframework.web.bind.annotation.RequestMethod;
import org.springframework.web.bind.annotation.ResponseBody;

import javax.servlet.http.HttpServletRequest;
import java.util.Date
最低0.47元/天 解锁文章


 1091
1091


 被折叠的 条评论
为什么被折叠?
被折叠的 条评论
为什么被折叠?
 到【灌水乐园】发言


