


最近买了个台机放客厅里接电视玩游戏,另外还有跑程序计算的需求所以通过笔记本电脑使用RDP或Parsec来远程控制,当然瘾犯了也能云游戏。路由器在另一个房间所以是无线网卡链接,用的最好的AX210+10db天线。
后来折腾来折腾去发现个痛点:每次都得跑到客厅去开机,麻烦不说人在外面这一套就行不通了。
基于以上需求和痛点,考虑了如下方案:
- 常开电脑
- 费电,最近电费飞涨不考虑
- WOL(Wake On LAN),
- 主板带的功能,关机后网卡在工作,给他一个magic packet就能唤醒开机 。不过有很多弊病
- 兼容性:纯看运气,有人设置好啥事也没有的,有人死活调不出来。涉及到主板和OS,能不能行真不好说,大家可以搜索下有很多坑
- 基本是对应有线的,无线网卡兼容性更烂
- 网卡常亮也有点功耗的,2w呢呵呵
- 主板带的功能,关机后网卡在工作,给他一个magic packet就能唤醒开机 。不过有很多弊病
- 物理式智能开关
- 有那种给吊灯开关用的,黏在开关上,原理就是个wifi+MCU+马达,信号来了就帮你按下开关
- 有点贵
- 不一定能契合机箱的结构固定住
- DIY一个wifi开关!!! 就是它了哈哈哈哈哈
原理
废话不多说,上概念图
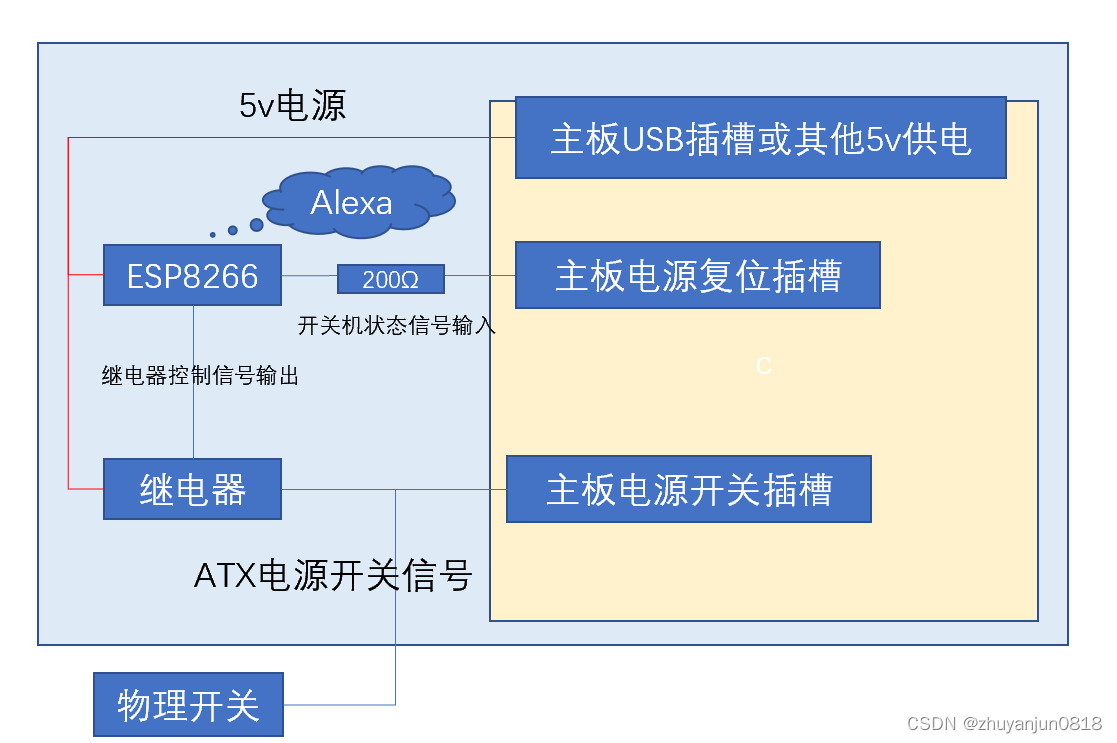
解释一下,ESP8266和 继电器都是5v的,通过主板usb直接供电(一般主板都能关机供电的,可在bios里设置)。ESP8266通过一个开源库模拟成智能iot设备,炼乳内网接收智能语音服务的控制信号,控制继电器开关,进而控制主板电源开关,同时此信号和原物理开关并联。因为继电器也是物理关断所以隔离没问题。关于智能语音服务,我在国外用的是alexa,国内的小爱小度,如果能ESP也能模拟出他们的智能信号理论上也能实现哈,折腾出来的同学请留个言。
追加一个ATX电源的开关电路的工作方式请参考,简单来说开关机只需要将对应的两个针脚接通以下再断开就行。电脑主板开机电路工作原理分析 - 四海骄阳 - 博客园
另外,为了不让电脑误开机或关机,其实应该是不让人误给电脑开机或关机指令,(明明已经是开机状态了你给个指令再开机的话,电脑就会关机了),我还加了个监控reset针脚的线路和逻辑。reset就是重启键连的针脚哈,high的时候表示开机状态,low表示关机状态 ,电压是3v的所以直接连接ESP的GPIO控制,对了记得加个几百欧的电阻限流
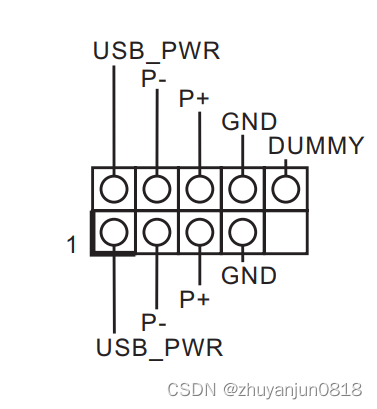
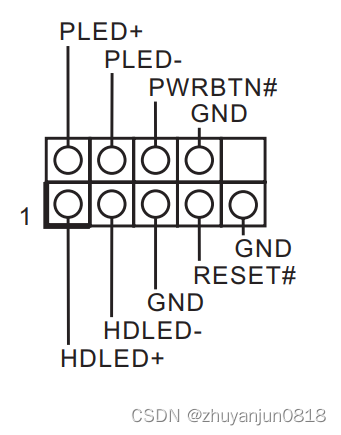
贴下usb插槽针脚和主板电源针脚配置,主板电源针脚不同主板不一定相同要查阅主板说明书
材料:
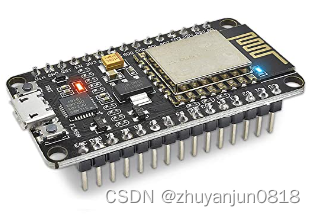
- ESP8266用的是很久以前买的,带micro usb方便烧录,缺点就是比较大占位置
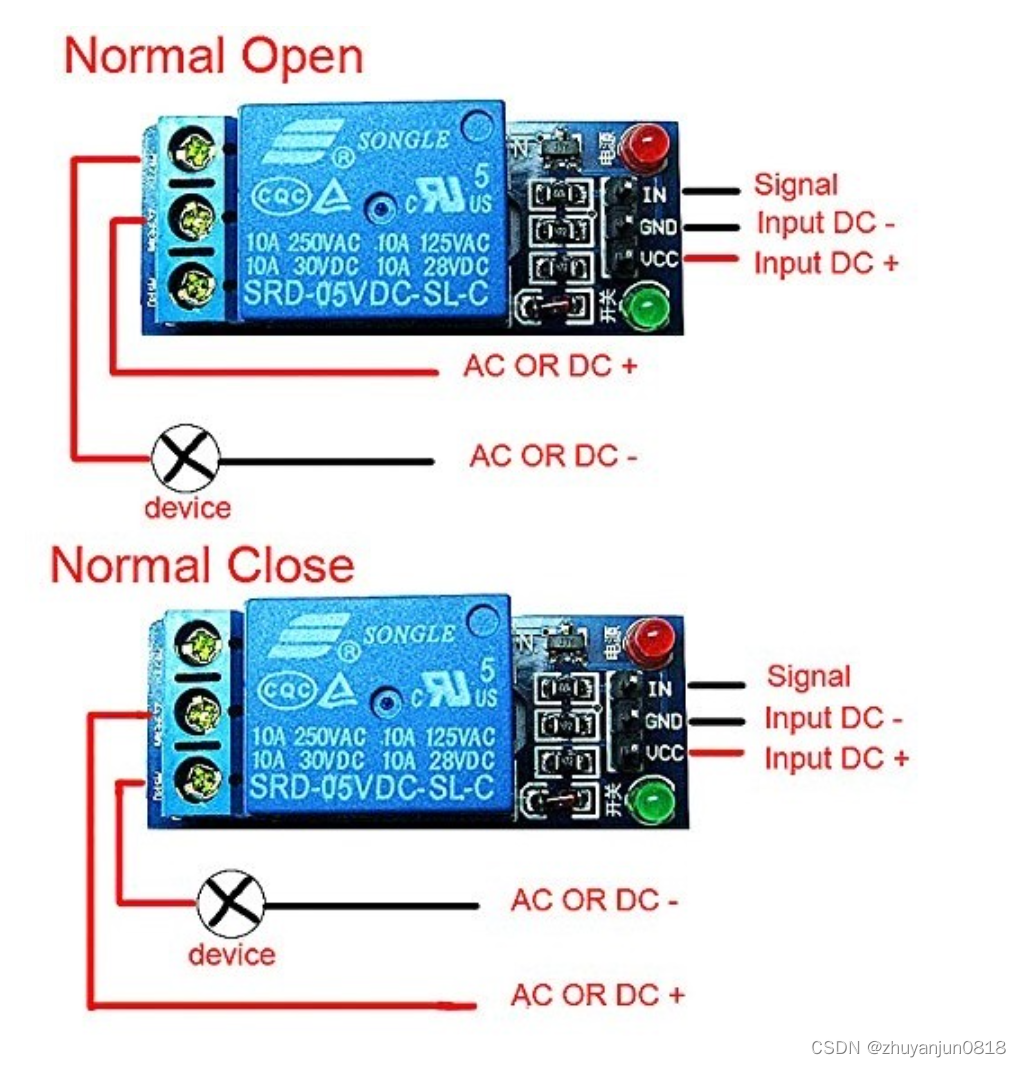
- 继电器是 SRD-05VDC-SL-C 应该是很常见的吧,5v电源,可用3.3v信号控制开关,控制端可用是DC也可以是AC,缺点也是比较大,我觉得我这个应用用个三极管就行了奈何正好家里没有
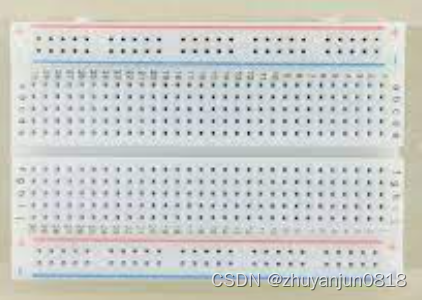
- 另外为了图方便和以后好修改,我就直接放在面包板上了,反正机箱也够大放得下
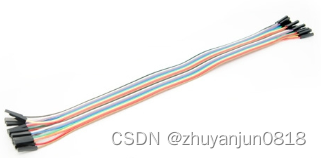
- 然后就是各种线材了,为了不修改原主板上的线材我都是用的能直插的杜邦线
这是装好ESP和继电器后做测试时的样子,还没接主板 :

ESP的设置和代码
我使用的是arduino平台,再加上一个支持模拟esp为飞利浦智能灯泡的开源库,就能被alexa支持了
arduino的配置看这里,先做个led电灯实验确定没有问题
【教程】一分钟学会ESP8266+Arduino开发环境搭建(含IDE安装,8266开发版配置,第三方库安装)_哔哩哔哩_bilibili
开源库在这里,里面也有安装方法就不多说了
然后使用示例程序修改代码
以下是我的代码,几个point
- 记得修改wifi名和密码
- 设备名可以后来在app上改,这里只能写拉丁字母否则会乱码
- 因为模拟的是灯,灯的控制是0和1-255亮度控制,代码里的bright就是这里的数值。我这里做开关当然不需要亮度控制,只需要检测是不是0就行
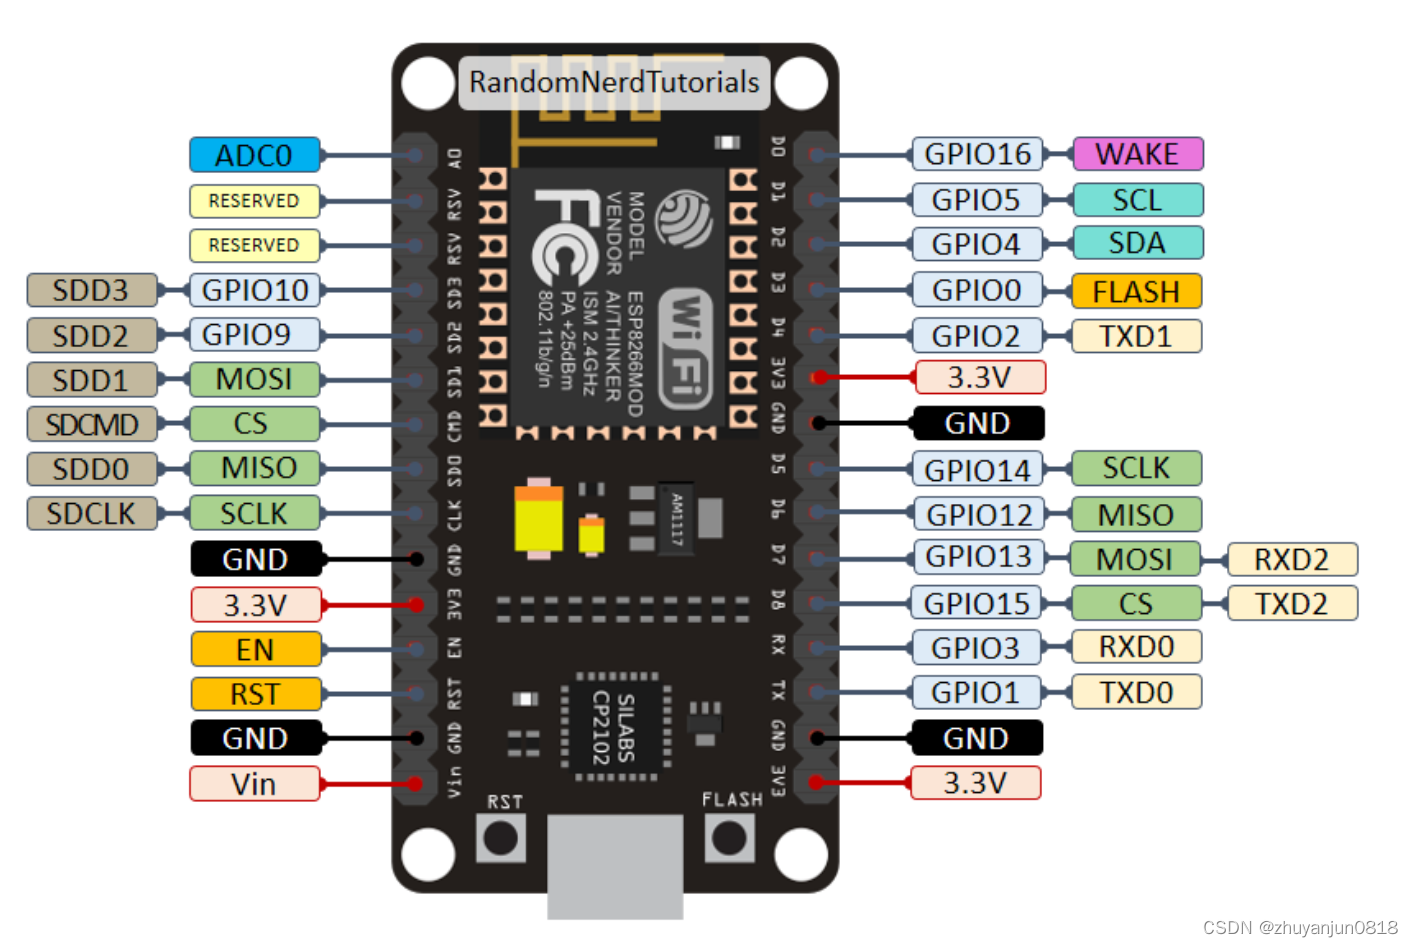
- 我使用GPIO16控制继电器,使用GPIO5监控reset的状态
- 贴一个针脚图
/*
 * This is a basic example on how to use Espalexa and its device declaration methods.
 */
#ifdef ARDUINO_ARCH_ESP32
#include <WiFi.h>
#else
#include <ESP8266WiFi.h>
#endif
#include <Espalexa.h>

// prototypes
boolean connectWifi();

//callback functions
void firstLightChanged(uint8_t brightness);
void secondLightChanged(uint8_t brightness);
void thirdLightChanged(uint8_t brightness);

// Change this!!
const char* ssid = "xxxx";
const char* password = "xxxx";

boolean wifiConnected = false;

Espalexa espalexa;

EspalexaDevice* device3; //this is optional

void setup()
{
  pinMode(LED_BUILTIN, OUTPUT);     // Initialize the LED_BUILTIN pin as an output
  pinMode(16,OUTPUT);//control the relay
  pinMode(5,INPUT);//read the power status
  Serial.begin(115200);
  // Initialise wifi connection
  wifiConnected = connectWifi();

  if(wifiConnected){

    // Define your devices here.
    espalexa.addDevice("computer", firstLightChanged); //simplest definition, default state off
    //espalexa.addDevice("Light 2", secondLightChanged, 255); //third parameter is beginning state (here fully on)

    //device3 = new EspalexaDevice("Light 3", thirdLightChanged); //you can also create the Device objects yourself like here
    //espalexa.addDevice(device3); //and then add them
    //device3->setValue(128); //this allows you to e.g. update their state value at any time!

    espalexa.begin();

  } else
  {
    while (1) {
      Serial.println("Cannot connect to WiFi. Please check data and reset the ESP.");
      delay(2500);
    }
  }
}

void loop()
{
   espalexa.loop();
   delay(1);
}

//our callback functions
void firstLightChanged(uint8_t brightness) {


    //do what you need to do here

    //EXAMPLE
    if (brightness) //if told the device to on
    {
        if (digitalRead(5)==LOW)//POWER off statue
        {
        Serial.println("Computer is changed to ON");
        digitalWrite(16, HIGH);// close relay
        delay(100);
        digitalWrite(16, LOW);// open relay
        delay(10);

        //LED on 3s
        digitalWrite(LED_BUILTIN, LOW);   //LED on
        delay(3000);                      // Wait for a second
        digitalWrite(LED_BUILTIN, HIGH);  // Turn the LED off by making the voltage HIGH


        //Serial.println(brightness);
        }
       else
       {
        Serial.println("Computer is already ON");
        }
    }
    else
    { //if told the device to off
       if (digitalRead(5)==HIGH) //POWER on statue
       {
        Serial.println("Computer is changed to OFF");
        digitalWrite(16, HIGH);// close relay
        delay(100);
        digitalWrite(16, LOW);// open relay
        delay(10);

        //LED on 0.5s
        digitalWrite(LED_BUILTIN, LOW);   //LED on
        delay(500);                      // Wait for a second
        digitalWrite(LED_BUILTIN, HIGH);  // Turn the LED off by making the voltage HIGH
       }
       else
       {
        Serial.println("Computer is already OFF");
        }
    }
}

void secondLightChanged(uint8_t brightness) {
  //do what you need to do here
}

void thirdLightChanged(uint8_t brightness) {
  //do what you need to do here
}

// connect to wifi – returns true if successful or false if not
boolean connectWifi(){
  boolean state = true;
  int i = 0;

  WiFi.mode(WIFI_STA);
  WiFi.begin(ssid, password);
  Serial.println("");
  Serial.println("Connecting to WiFi");

  // Wait for connection
  Serial.print("Connecting...");
  while (WiFi.status() != WL_CONNECTED) {
    delay(500);
    Serial.print(".");
    if (i > 20){
      state = false; break;
    }
    i++;
  }
  Serial.println("");
  if (state){
    Serial.print("Connected to ");
    Serial.println(ssid);
    Serial.print("IP address: ");
    Serial.println(WiFi.localIP());
  }
  else {
    Serial.println("Connection failed.");
  }
  return state;
}
上机, 线很乱无视无视

ESP6288控制电脑开关机
反应稍微有点慢,原因是放机箱里wifi信号不好!但不影响使用,收工!
后记:
后来我发现有时唤不醒电脑,测试了一下reset的电压并不稳定在GND,说不定并不是开机high关机low(而且有时候我不是关机而是睡眠),也有可能是open的
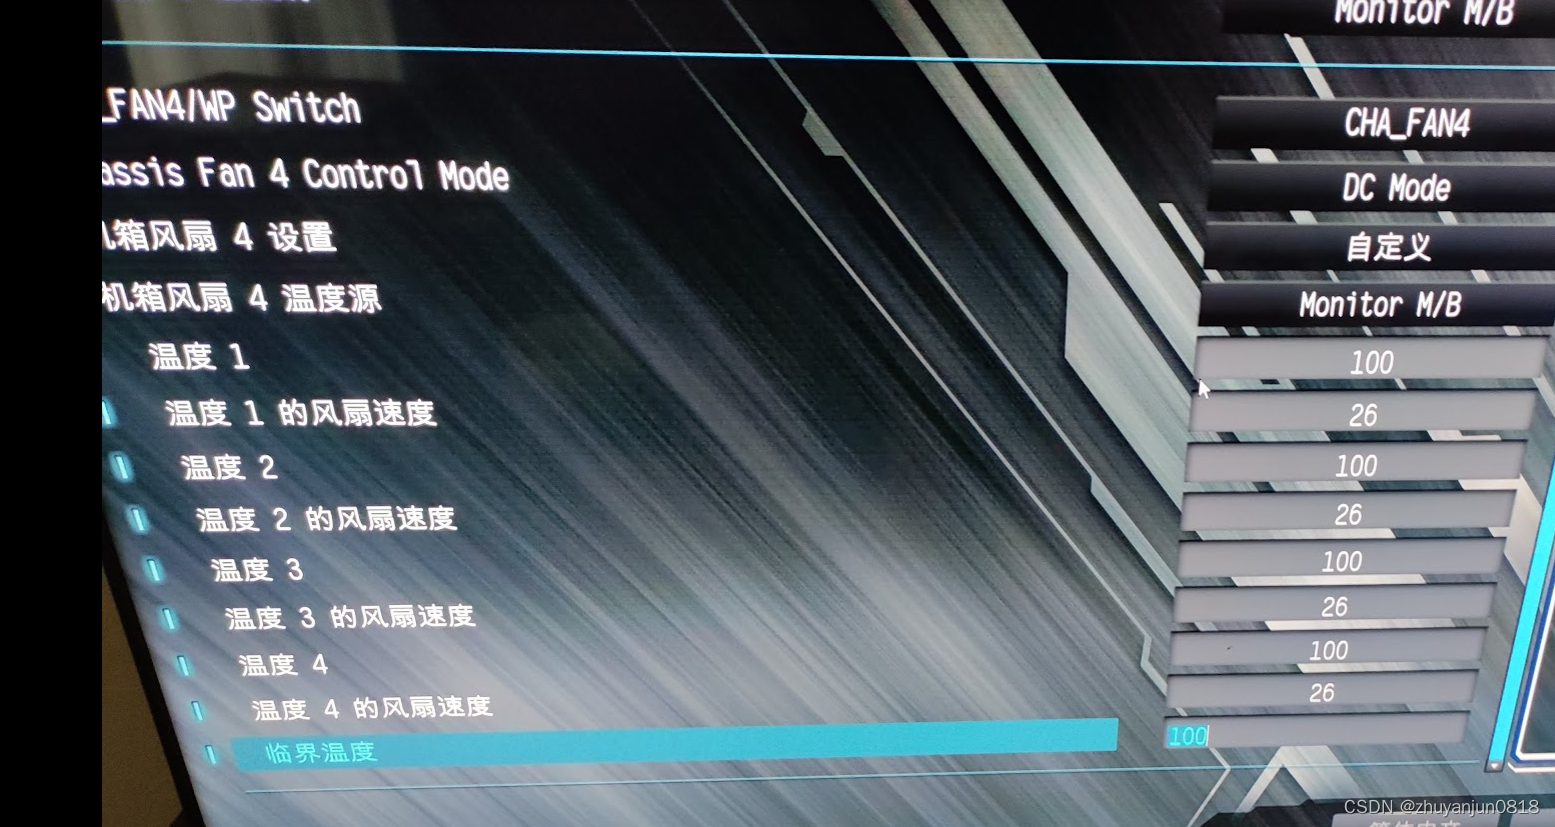
想了想用风扇的电源接口来代替判断了,不管是睡眠还是关机风扇肯定会停摆所以肯定是0v,不过要注意风扇接口默认是pwm,电压也不是3.3v,需要在bios里调试为DC和风扇转速,边调边测试电压是不3.3V


 8767
8767


 被折叠的 条评论
为什么被折叠?
被折叠的 条评论
为什么被折叠?
 到【灌水乐园】发言


