


1. 前言
参考文章: http://www.ituring.com.cn/article/60271
参考天气api 接口: http://openweathermap.org/forecast5
http://openweathermap.org/appid
项目发布地址: https://code.csdn.net/zhyh1435589631/chrome_addons/tree/master
这里主要记录一下 自己编写这个插件过程中遇到的一些问题
2. 基本步骤
2.1 manifest.json
这个实际上是一个配置文件, 写一些版本号, 图标, 浏览器动作, 跨站请求许可等东西
{
    "manifest_version": 2,
    "name": "天气预报",
    "version": "1.0",
    "description": "查看未来5天的天气情况",
    "icons": {
        "16" : "images/icon16.png",
        "48" : "images/icon48.png",
        "128" : "images/icon128.png"
    },
    "browser_action":{
        "default_icon":{
            "19": "images/icon19.png",
            "38": "images/icon38.png"
        },
        "default_title": "天气预报",
        "default_popup": "popup.html"
    },
    "options_page": "options.html",
    "permissions": [
        "http://api.openweathermap.org/data/2.5/forecast?q=*"
    ]
}
2.2 options.html
设置查询城市信息
<!DOCTYPE html>
<html lang="en">
    <head>
        <meta charset="utf-8">
        <title>设定城市</title>
    </head>
    <body>
        <input type="text" id = "city" />
        <input type="button" id = "save" value = "保存" />
        <script src = "js/options.js"></script>
    </body>
</html>
2.3 popup.html
设置界面显示UI 的 CSS 样式
<!DOCTYPE html>
<html lang="en">
    <head>
        <meta charset="utf-8">
        <style>
            *{
                margin: 0;
                padding: 0;
            }

            body{
                width: 520px;
                height: 270px;
            }

            table {
                font-family: "Times New Roman";
                font-size: 12px;
                width: 480px;
                text-align: left;
                border-collapse: collapse;
                border: 1px solid #69c;
                margin: 20px;
                cursor: default;
            }

            table th{
                font-weight: normal;
                font-size: 14px;
                color: #039;
                border-bottom: 1px dashed #69c;
                padding: 12px 17px;
                white-space: nowrap;
            }

            table td{
                color: #669;
                padding: 7px 17px;
                white-space: nowrap;
            }

            table tbody tr: hover td{
                color: #339;
                background: #d0dafd;
            }
        </style>
    </head>
    <body>
        <div id = "weather"></div>
        <script src = "js/weather.js"></script>
    </body>
</html>
2.4 options.js
设置 城市时候的 动作, 利用 localStorage 做长时间存储
var city = localStorage.city || "hefei";
document.getElementById("city").value = city;
document.getElementById("save").onclick = function(){
    localStorage.city = document.getElementById("city").value;
    alert("saved success");
}
2.5 weather.js
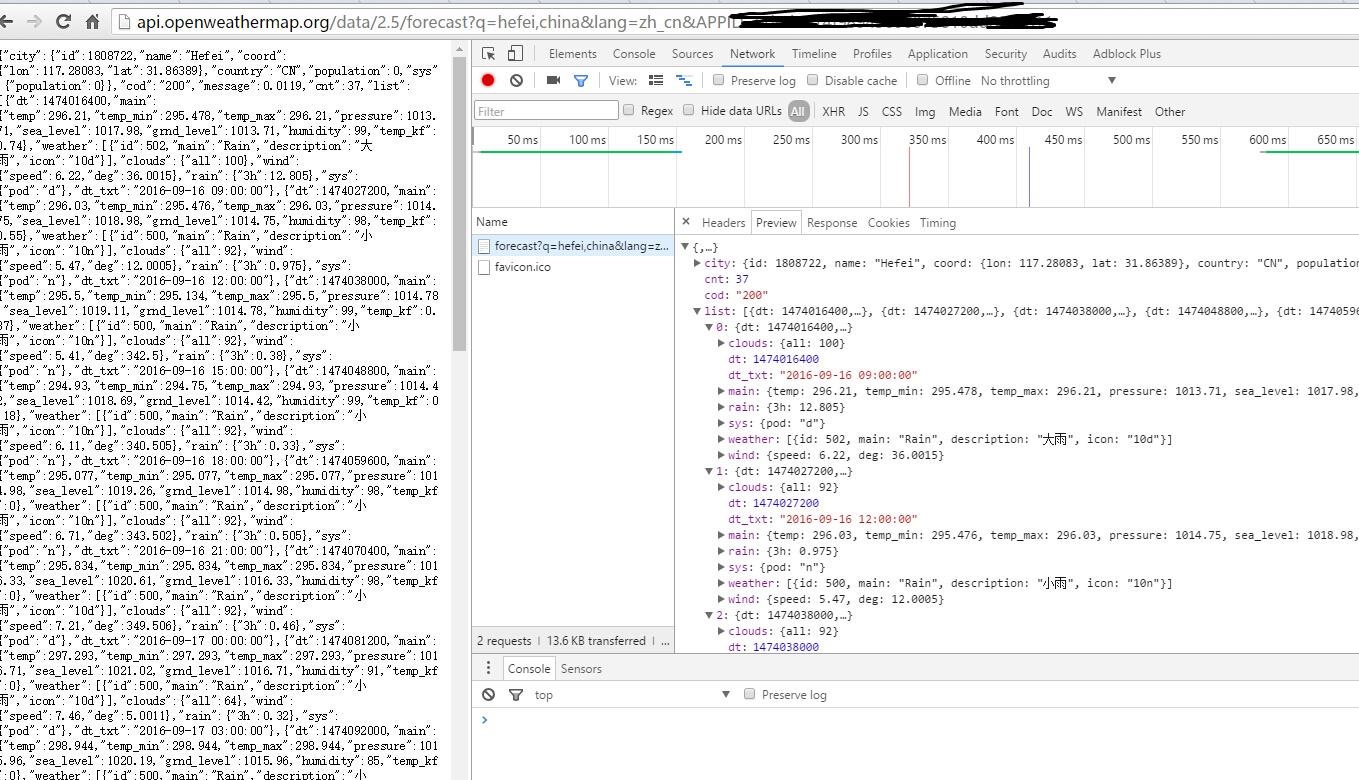
发起一个XMLHttpRequest 请求, 获取 openweathermap 上的天气数据, 需要注意使用 自己的 appid
function httpRequest(url, callback){
var xhr = new XMLHttpRequest();
xhr.open("GET", url, true);
xhr.onreadystatechange = function(){
if (xhr.readyState == 4){
callback(xhr.responseText);
}
}
xhr.send();
}
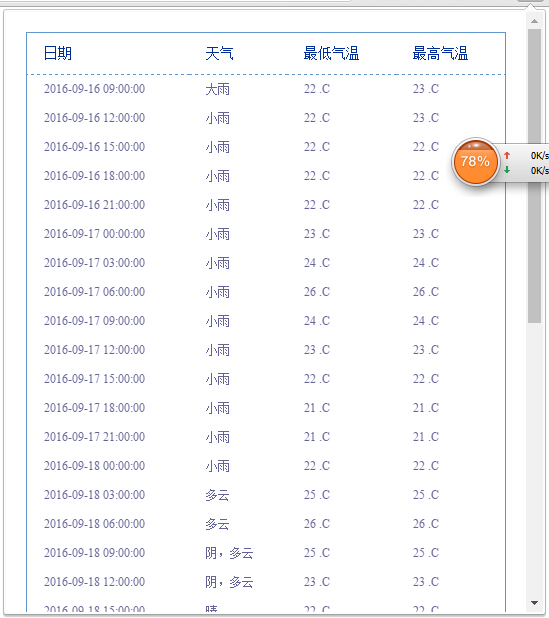
function showWeather(result){
result = JSON.parse(result);
var list = result.list;
var table = '<table><tr><th>日期</th><th>天气</th><th>最低气温</th><th>最高气温</th></tr>';
for (var i in list){
table += "<tr>";
table += "<td>" + list[i].dt_txt + "</td>";
table += "<td>" + list[i].weather[0].description + "</td>";
table += "<td>" + Math.round(list[i].main.temp_min - 273.15) + " .C</td>";
table += "<td>" + Math.round(list[i].main.temp_max - 273.15) + " .C</td>";
table += "</tr>";
}
table += "</table>";
document.getElementById("weather").innerHTML = table;
}
var city = localStorage.city;
city = city ? city : 'hefei';
var url = "http://api.openweathermap.org/data/2.5/forecast?q=" + city + ",china&lang=zh_cn&APPID=xxxxxxxxxxx";
httpRequest(url, showWeather);ps: 上面的 xxxxx 处填写自己的 appid。


 176
176

 被折叠的 条评论
为什么被折叠?
被折叠的 条评论
为什么被折叠?
 到【灌水乐园】发言


