


其实在iOS5.0以后就开始支持多选功能了, 只要设置self.tableView.allowsMultipleSelection = YES;就行.
这里只是对多选的数据的处理, 对以前知识的一个总结.
简单的一个事例:
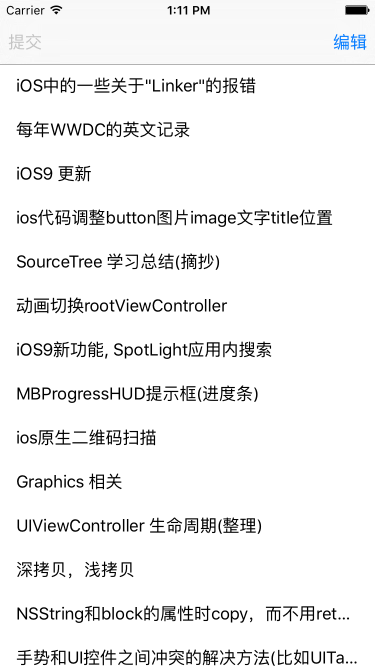
图一:
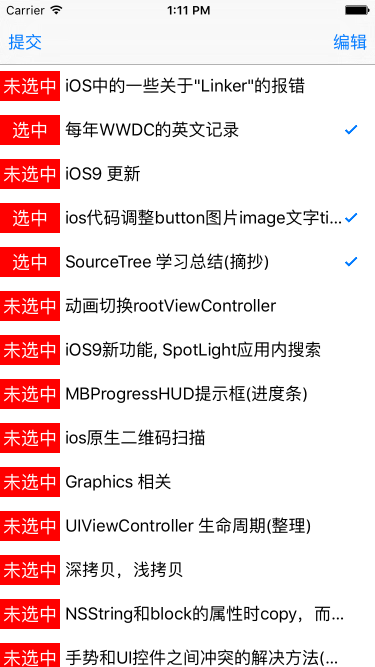
图二:
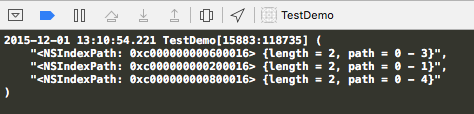
点击提交后:
cell的自适应高度这里没做处理, 这里不做重点, 数据也是只做了简单的处理
首先理清思路
1. cell处于不能点击状态, cell点击没反应, 提交按钮不能用
2. cell处于可多选状态, 提交按钮可用, 点击后的cell的index放到数组里面
3. 判断cell是否能点击, 设置标记flag
4. 切换cell可点击状态时, 清空index的数组
5. 设置cell的flag判断 选中按钮 显隐和 显示的label的frame
自定义cell
@interface ZHZTableViewCell : UITableViewCell
/**
 *  设置 选中,未选中 按钮
 */
@property (nonatomic, strong)UIButton *selctButton;

@property (nonatomic, strong)ZHZModel *model;
/**
 *  判断是否为 可多选状态
 */
@property (nonatomic, assign)BOOL isSelect;

@end
@implementation ZHZTableViewCell
- (instancetype)initWithStyle:(UITableViewCellStyle)style reuseIdentifier:(NSString *)reuseIdentifier {
if (self = [super initWithStyle:style reuseIdentifier:reuseIdentifier]) {
self.selctButton = [UIButton buttonWithType:UIButtonTypeCustom];
[self.selctButton setTitle:@"未选中" forState:UIControlStateNormal];
[self.selctButton setTitle:@"选中" forState:UIControlStateSelected];
self.selctButton.userInteractionEnabled = NO;
self.selctButton.backgroundColor = [UIColor redColor];
[self.selctButton setFrame:CGRectZero];
[self addSubview:self.selctButton];
}
return self;
}
- (void)layoutSubviews {
[super layoutSubviews];
for (UIView *view in self.contentView.subviews) {
if ([NSStringFromClass([view class]) isEqualToString:@"UITableViewLabel"]) {
//简单的demo, 数据都写死了
CGRect rect = view.frame;
if (self.isSelect) {
view.frame = CGRectMake(65, 0, 280, 43);
self.selctButton.frame = CGRectMake(0, 7, 60,30);
}else {
view.frame = rect;
self.selctButton.frame = CGRectZero;
}
}
}
}
///判断是否选中
- (void)setSelected:(BOOL)selected animated:(BOOL)animated {
[super setSelected:selected animated:animated];
if (selected && self.isSelect) {
self.accessoryType = UITableViewCellAccessoryCheckmark;
} else {
self.accessoryType = UITableViewCellAccessoryNone;
}
//关联button的选中 和 cell的选中
self.selctButton.selected = selected;
}
- (void)setModel:(ZHZModel *)model {
if (_model != model) {
_model = model;
self.textLabel.text = model.title;
}
}
配置tableViewController
@implementation ZHZTableViewController

- (void)viewDidLoad {
    [super viewDidLoad];

    self.selectArr = [[NSMutableArray alloc] initWithCapacity:0];

    [self.tableView registerClass:[ZHZTableViewCell class] forCellReuseIdentifier:@"reuseIdentifier"];

    self.tableView.allowsMultipleSelection = YES;
    [self requestData];

    self.navigationItem.leftBarButtonItem = [[UIBarButtonItem alloc] initWithTitle:@"提交" style:UIBarButtonItemStylePlain target:self action:@selector(senderData)];
    self.navigationItem.rightBarButtonItem = [[UIBarButtonItem alloc] initWithTitle:@"编辑" style:UIBarButtonItemStylePlain target:self action:@selector(changeState)];
    self.navigationItem.leftBarButtonItem.enabled = NO;

}

/**
 *  右侧
 */
- (void)changeState {
    self.flag = !self.flag;
    if (!self.flag) {
        self.navigationItem.leftBarButtonItem.enabled = NO;
        [self.selectArr removeAllObjects];
    } else {
        self.navigationItem.leftBarButtonItem.enabled = YES;
    }
    [self.tableView reloadData];
}

/**
 *  左侧
 */
- (void)senderData {
    NSLog(@"%@", self.selectArr);
}
#pragma mark - Table view data source
- (NSInteger)numberOfSectionsInTableView:(UITableView *)tableView {
    return 1;
}

- (NSInteger)tableView:(UITableView *)tableView numberOfRowsInSection:(NSInteger)section {
    return self.dataArr.count;
}

- (UITableViewCell *)tableView:(UITableView *)tableView cellForRowAtIndexPath:(NSIndexPath *)indexPath {

    ZHZTableViewCell *cell = [tableView dequeueReusableCellWithIdentifier:@"reuseIdentifier" forIndexPath:indexPath];
    cell.selectionStyle = UITableViewCellSelectionStyleNone;
    cell.isSelect = self.flag;
    cell.model = self.dataArr[indexPath.row];

    return cell;
}

- (void)tableView:(UITableView *)tableView didSelectRowAtIndexPath:(NSIndexPath *)indexPath {
//    ZHZModel *model = self.dataArr[indexPath.row];
//    model.isSelect = !model.isSelect;
    if (self.flag) {
        [self.selectArr addObject:indexPath];
    }

}

- (void)tableView:(UITableView *)tableView didDeselectRowAtIndexPath:(NSIndexPath *)indexPath {
    if (self.flag) {
        [self.selectArr removeObject:indexPath];
    }

}
使用NSURLSession进行网络请求
- (void)requestData {
    NSURL *url = [NSURL URLWithString:@"http://blog.csdn.net/zhz459880251/svc/GetCategoryArticleList?id=5848353&r=0.2699475851841271"];
    NSURLRequest *urlRequest = [NSURLRequest requestWithURL:url cachePolicy:NSURLRequestReturnCacheDataElseLoad timeoutInterval:20];
    NSURLSession *session = [NSURLSession sharedSession];
    //4.构造要执行的任务task
    /**
     * task
     *
     * @param data 返回的数据
     * @param response 响应头
     * @param error 错误信息
     *
     */
    NSURLSessionDataTask *task = [session dataTaskWithRequest:urlRequest completionHandler:^(NSData * _Nullable data, NSURLResponse * _Nullable response, NSError * _Nullable error) {
        if (error == nil) {
            /**
             NSJSONReadingMutableContainers 生成可变的对象,不设置这个option,默认是创建不可变对象
             NSJSONReadingMutableLeaves 生成可变的字符串MutableString(iOS7+有bug)
             NSJSONReadingAllowFragments 允许json数据最外层不是字典或者数组
             */
            NSArray *jsonData = [NSJSONSerialization JSONObjectWithData:data options:NSJSONReadingMutableLeaves error:nil];
            self.dataArr = [ZHZModel initWithArr:jsonData];
            [self.tableView reloadData];
        }
    }];
    [task resume];
}


 4547
4547

 被折叠的 条评论
为什么被折叠?
被折叠的 条评论
为什么被折叠?
 到【灌水乐园】发言


