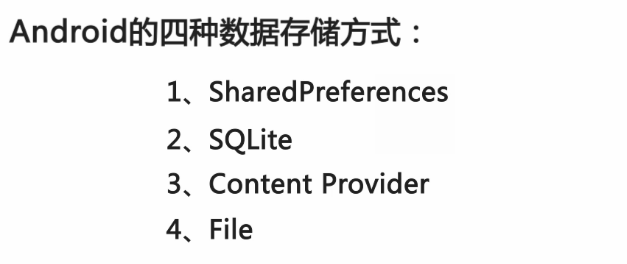
1. Android的四种数据存储方式:
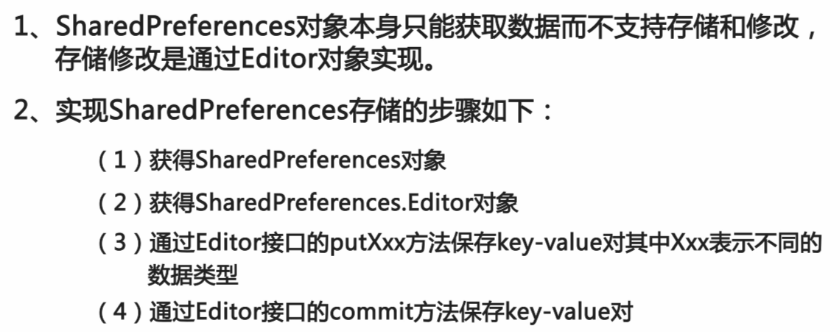
2. SharedPreferences简介:主要存放一些简单的类,int、string,复杂的数据结构就不用这个了。
3. SharedPreferences的使用:
4. 案例一:
第一步:在活动文件MainActivity中这样写:然后一定要运行一下程序才行。
package com.example.sharedpreferences;

import android.os.Bundle;
import android.preference.PreferenceManager;
import android.app.Activity;
import android.content.SharedPreferences;
import android.content.SharedPreferences.Editor;
import android.view.Menu;

public class MainActivity extends Activity {

    @Override
    protected void onCreate(Bundle savedInstanceState) {
        super.onCreate(savedInstanceState);
        setContentView(R.layout.activity_main);

        /*
         * 第一种方法:
         * 生成一个默认的SharedPreferences对象。
         * SharedPreferences pref = PreferenceManager.getDefaultSharedPreferences(MainActivity.this);
         * */
        // 第二种方法:生成并直接设置访问权限,第一个参数是文件的名字,第二个参数是文件的权限。例如是否可以被其他程序读取。
        SharedPreferences pref = getSharedPreferences("myPref",MODE_PRIVATE);
        // 获取一个编辑对象editor。
        Editor editor = pref.edit();
        // 写入数据:
        editor.putString("name", "张三");
        editor.putInt("age", 30);
        editor.putLong("time", System.currentTimeMillis());
        editor.putBoolean("default", true);
        // 提交数据:
        editor.commit();
        // 移除default这条数据:每次都要提交的。
        editor.remove("default");
        editor.commit();

    }

}
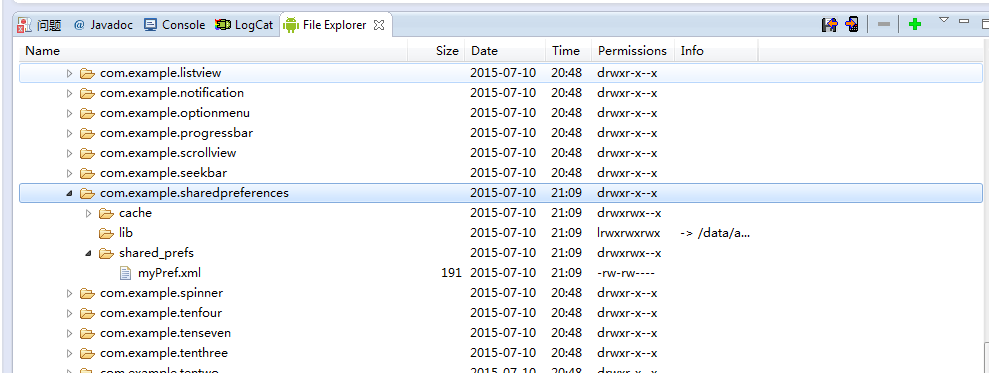
第二步:在页面中搜索File Expoler,然后在data---data---com.example.sharedpreferences(包名.类名)---shared_prefs---myPref.xml(自己创建的文件名):
然后点击右上角第一个的保存按钮,将该文件保存下来:
然后点击保存下来的myPref.xml就可以看到之前在MainActivity中写入的内容:
第三步:使用保存的内容:
在MainActivity的代码后面再加两句:
// 使用值:getString的第二个参数是没有取到内容时的一个默认值。
        System.out.println(pref.getString("name", ""));
        System.out.println(pref.getInt("age", 0));
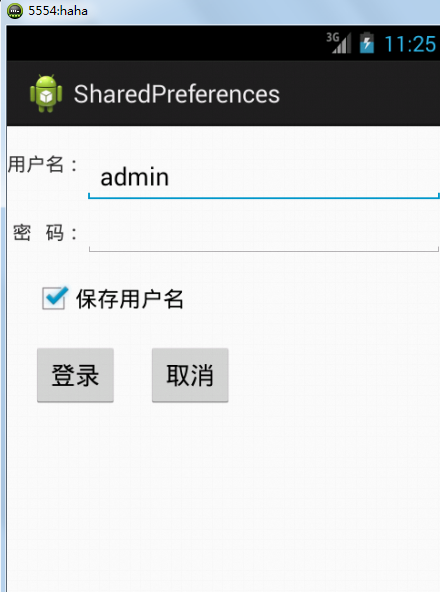
5. 案例二:存取用户名实例:
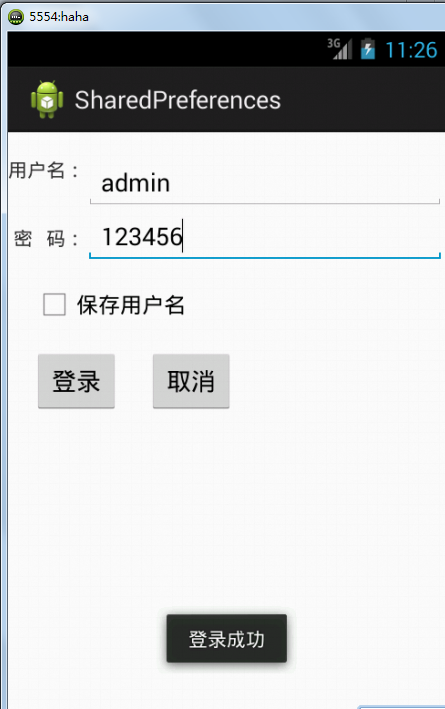
第一步:创建布局文件activity_main:
<RelativeLayout xmlns:android="http://schemas.android.com/apk/res/android"
    xmlns:tools="http://schemas.android.com/tools"
    android:layout_width="match_parent"
    android:layout_height="match_parent"
    tools:context=".MainActivity" >

    <EditText
        android:id="@+id/userName"
        android:layout_width="wrap_content"
        android:layout_height="wrap_content"
        android:layout_alignParentRight="true"
        android:layout_alignTop="@+id/text_username"
        android:layout_toRightOf="@+id/text_username"
        android:ems="10" />

    <EditText
        android:id="@+id/password"
        android:layout_width="wrap_content"
        android:layout_height="wrap_content"
        android:layout_alignLeft="@+id/userName"
        android:layout_alignParentRight="true"
        android:layout_below="@+id/userName"
        android:ems="10" />

    <CheckBox
        android:id="@+id/checkSaveName"
        android:layout_width="wrap_content"
        android:layout_height="wrap_content"
        android:layout_alignParentLeft="true"
        android:layout_below="@+id/password"
        android:layout_marginLeft="18dp"
        android:layout_marginTop="14dp"
        android:checked="false"
        android:text="保存用户名" />

    <TextView
        android:id="@+id/text_password"
        android:layout_width="wrap_content"
        android:layout_height="wrap_content"
        android:layout_alignBaseline="@+id/password"
        android:layout_alignBottom="@+id/password"
        android:layout_toLeftOf="@+id/password"
        android:text="密   码:" />

    <TextView
        android:id="@+id/text_username"
        android:layout_width="wrap_content"
        android:layout_height="wrap_content"
        android:layout_alignParentLeft="true"
        android:layout_alignParentTop="true"
        android:layout_marginTop="17dp"
        android:text="用户名:" />

    <Button
        android:id="@+id/btnLogin"
        android:layout_width="wrap_content"
        android:layout_height="wrap_content"
        android:layout_alignLeft="@+id/checkSaveName"
        android:layout_below="@+id/checkSaveName"
        android:layout_marginTop="16dp"
        android:onClick="doClick"
        android:text="登录" />

    <Button
        android:id="@+id/btnCancel"
        android:layout_width="wrap_content"
        android:layout_height="wrap_content"
        android:layout_alignBaseline="@+id/btnLogin"
        android:layout_alignBottom="@+id/btnLogin"
        android:layout_marginLeft="20dp"
        android:layout_toRightOf="@+id/btnLogin"
        android:onClick="doClick"
        android:text="取消" />

</RelativeLayout>package com.example.sharedpreferences;
import android.os.Bundle;
import android.preference.PreferenceManager;
import android.app.Activity;
import android.content.SharedPreferences;
import android.content.SharedPreferences.Editor;
import android.text.Editable;
import android.view.Menu;
import android.view.View;
import android.widget.CheckBox;
import android.widget.EditText;
import android.widget.Toast;
public class MainActivity extends Activity {
EditText etUserName,etUserPass;
CheckBox chk;
SharedPreferences pref;
Editor editor;
@Override
protected void onCreate(Bundle savedInstanceState) {
super.onCreate(savedInstanceState);
setContentView(R.layout.activity_main);
// 初始化控件:
etUserName = (EditText) findViewById(R.id.userName);
etUserPass = (EditText) findViewById(R.id.password);
chk = (CheckBox) findViewById(R.id.checkSaveName);
// 生成并直接设置访问权限:
pref = getSharedPreferences("UerInfo",MODE_PRIVATE);
// 启用编辑
editor = pref.edit();
// 自动显示上一次的用户名:
String name = pref.getString("username", "");
if(name == null){
chk.setChecked(false);
}
else{
chk.setChecked(true);
etUserName.setText(name);
}
}
public void doClick(View v){
switch(v.getId()){
case R.id.btnLogin:
// 获取输入的用户名和密码:
String name = etUserName.getText().toString().trim();
String pass = etUserPass.getText().toString().trim();
// 验证用户名和密码,默认用户名为admin,密码是123456;
if("admin".equals(name) && "123456".equals(pass)){
Toast.makeText(this, "登录成功", Toast.LENGTH_SHORT).show();
// 如果记住密码被选中,那么就要把这个用户名存入到editor里面。
if(chk.isChecked()){
editor.putString("username", name);
editor.commit();
}
else{
editor.remove("username");
editor.commit();
}
}
else{ // 登录失败
Toast.makeText(this, "登录失败", Toast.LENGTH_SHORT).show();
}
break;
default:
break;
}
}
}







 被折叠的 条评论
为什么被折叠?


