


原文地址:猜歌游戏
1. 主界面介绍:
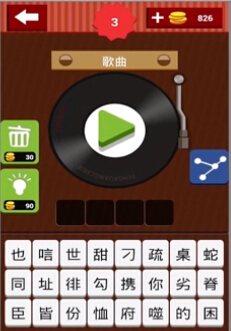
主界面可以拆分成这四个部分:
其中前三个可以放在一个LinearLayout中垂直排列,第四个可以作为一个层浮动在整个页面之上。

2. 制作title_bar:top_bar.xml:
先上top_bar.xml布局文件代码:
<?xml version="1.0" encoding="utf-8"?>
<RelativeLayout xmlns:android="http://schemas.android.com/apk/res/android"
    android:layout_width="match_parent"
    android:layout_height="wrap_content"
    android:background="@drawable/index_bar" >

    <ImageButton
        android:id="@+id/btn_bar_back"
        android:layout_width="wrap_content"
        android:layout_height="wrap_content"
        android:layout_marginLeft="10dp"
        android:layout_centerVertical="true"
        android:background="@drawable/back_button_icon" />

    <FrameLayout
        android:id="@+id/layout_bar_coin"
        android:layout_width="wrap_content"
        android:layout_height="wrap_content"
        android:layout_marginRight="10dp"
        android:layout_alignParentRight="true"
        android:layout_centerVertical="true" >

        <ImageButton
            android:id="@+id/btn_bar_add_coins"
            android:layout_width="wrap_content"
            android:layout_height="wrap_content"
            android:background="@drawable/coin_button_icon" />

        <ImageView
            android:layout_width="wrap_content"
            android:layout_height="wrap_content"
            android:layout_gravity="center_vertical"
            android:layout_marginLeft="35dp"
            android:background="@drawable/game_coin_icon" />

        <TextView
            android:id="@+id/txt_bar_coins"
            android:layout_width="wrap_content"
            android:layout_height="wrap_content"
            android:layout_gravity="center_vertical|right"
            android:layout_marginRight="15dp"
            android:text="1000"
            android:textColor="@color/white"
            android:textStyle="bold" />
    </FrameLayout>

</RelativeLayout>
我们看返回按钮,它是一个ImageButton:
<ImageButton
        android:id="@+id/btn_bar_back"
        android:layout_width="wrap_content"
        android:layout_height="wrap_content"
        android:layout_marginLeft="10dp"
        android:layout_centerVertical="true"
android:background="@drawable/back_button_icon" />而back_button_icon是创建在Drawable文件夹下的一个xml选择器文件:
<?xml version="1.0" encoding="utf-8"?>
<!-- Copyright (C) 2011 The Android Open Source Project

     Licensed under the Apache License, Version 2.0 (the "License");
     you may not use this file except in compliance with the License.
     You may obtain a copy of the License at

          http://www.apache.org/licenses/LICENSE-2.0

     Unless required by applicable law or agreed to in writing, software
     distributed under the License is distributed on an "AS IS" BASIS,
     WITHOUT WARRANTIES OR CONDITIONS OF ANY KIND, either express or implied.
     See the License for the specific language governing permissions and
     limitations under the License.
-->

<selector xmlns:android="http://schemas.android.com/apk/res/android">
    <item android:state_pressed="true" android:drawable="@drawable/all_back_sel" />
    <item android:drawable="@drawable/all_back" />
</selector>


上面有两个item,当state_pressed="true"时,选择背景图片all_back_sel,否则选择背景图片all_back。
这个方法同时在下面的另一个ImageButton中也使用了。


注意点二:右边的三个控件是放在一个FrameLayout布局中的,这样意味着它们是可以叠加的。
通过android:layout_marginLeft="35dp"或者android:layout_marginRight="15dp"这样的属性来控制它们三个叠加起来的相对位置。

注意点三:常用颜色的设定:
例如:
<TextView
            android:id="@+id/txt_bar_coins"
            android:layout_width="wrap_content"
            android:layout_height="wrap_content"
            android:layout_gravity="center_vertical|right"
            android:layout_marginRight="15dp"
            android:text="1000"
            android:textColor="@color/white"
android:textStyle="bold" />因为我们在values文件夹下创建color.xml文件:RGB三原色。
<?xml version="1.0" encoding="utf-8"?>
<resources>

    <color name="white">#ffffff</color>
    <color name="black">#000000</color>

</resources>
<FrameLayout xmlns:android="http://schemas.android.com/apk/res/android"
android:layout_width="match_parent"
android:layout_height="match_parent" >
<!-- Frame 1 -->
<LinearLayout
android:layout_width="match_parent"
android:layout_height="match_parent"
android:background="@drawable/index_background"
android:gravity="center_horizontal"
android:orientation="vertical">
<!-- Top bar -->
<include layout="@layout/top_bar" />
<!-- 唱片 -->
<include layout="@layout/pan_layout" />
<!-- 文字框 -->
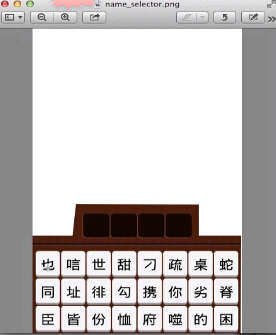
<include layout="@layout/name_select" />
</LinearLayout>
<!-- 浮动按钮 -->
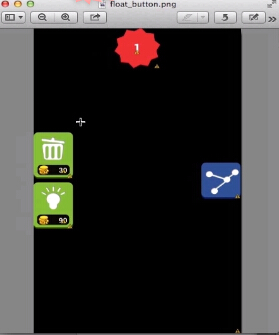
<include layout="@layout/float_buttons" />
<!-- 答案正确界面 -->
<include layout="@layout/answer_right" />
</FrameLayout><include layout="@layout/top_bar" />注意点二:将程序中所有活动的Title都隐藏,在Manifest文件中修改:
<application
        android:allowBackup="true"
        android:icon="@drawable/ic_launcher"
        android:label="@string/app_name"
android:theme="@android:style/Theme.NoTitleBar.Fullscreen" >FrameLayout中的控件放在后面的控件会落在前面的控件上。
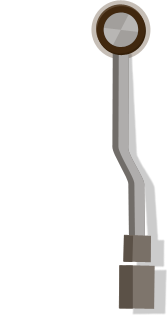
4. 盘片布局pan_layout.xml:


<?xml version="1.0" encoding="utf-8"?>
<LinearLayout xmlns:android="http://schemas.android.com/apk/res/android"
android:id="@+id/layout_pan"
android:layout_width="wrap_content"
android:layout_height="wrap_content"
android:layout_centerHorizontal="true"
android:layout_centerVertical="true"
android:layout_marginTop="30dp"
android:gravity="center"
android:orientation="vertical" >
<FrameLayout
android:layout_width="wrap_content"
android:layout_height="wrap_content" >
<ImageView
android:layout_width="wrap_content"
android:layout_height="wrap_content"
android:src="@drawable/game_title" />
<TextView
android:layout_width="wrap_content"
android:layout_height="wrap_content"
android:layout_gravity="center"
android:text="歌曲"
android:textColor="@color/white"
android:textSize="20sp" />
</FrameLayout>
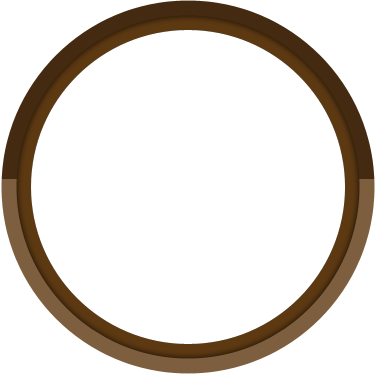
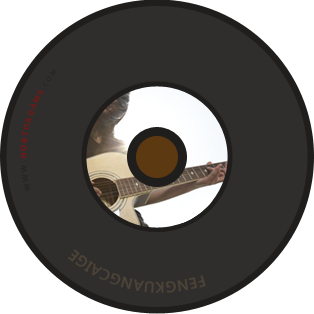
<FrameLayout
android:layout_width="260dp"
android:layout_height="wrap_content" >
<ImageView
android:id="@+id/imageView1"
android:layout_width="wrap_content"
android:layout_height="wrap_content"
android:layout_gravity="center"
android:src="@drawable/game_disc" />
<ImageView
android:layout_width="wrap_content"
android:layout_height="wrap_content"
android:layout_gravity="center"
android:src="@drawable/game_disc_light" />
<ImageButton
android:id="@+id/btn_play_start"
android:layout_width="wrap_content"
android:layout_height="wrap_content"
android:layout_gravity="center"
android:background="@drawable/play_button_icon" />
<ImageView
android:id="@+id/imageView2"
android:layout_width="50sp"
android:layout_height="140sp"
android:layout_gravity="right"
android:src="@drawable/index_pin" />
</FrameLayout>
</LinearLayout>5. 盘片动画:
盘片旋转,拨杆往左移动,拨杆往右移动。一共三个动画。用Animation实现动画,用LinearInterpolator实现动画速度,属于线性速度。
注意点一:作为你自定义的全局变量,变量名前面要加一个m,这是编码规范。
注意点二:创建动画文件:
我们需要在res文件夹下新建动画文件夹anim,并且在这个文件中创建动画xml,就比如rotate.xml文件:
<?xml version="1.0" encoding="utf-8"?>
<set xmlns:android="http://schemas.android.com/apk/res/android" >

    <rotate
        android:duration="2400"
        android:fromDegrees="0"
        android:pivotX="50%"
        android:pivotY="50%"
        android:repeatCount="3"
        android:toDegrees="359" />

</set>对于旋转,fromDegrees,toDegrees是旋转角度,
duration是旋转时间,
pivotX,pivotY是旋转基准点,
repeatCount动画重复次数。
注意点三:在MainActivity中初始化动画,并设置动画:
// 唱片相关动画
	private Animation mPanAnim;
	// 它代表动画运动速度
	private LinearInterpolator mPanLin;

	// 拨杆往左动画
	private Animation mBarInAnim;
	private LinearInterpolator mBarInLin;

	// 拨杆往右动画
	private Animation mBarOutAnim;
	private LinearInterpolator mBarOutLin;
// 初始化盘片动画
mPanAnim = AnimationUtils.loadAnimation(this, R.anim.rotate);
// 设置速度
mPanLin = new LinearInterpolator();
mPanAnim.setInterpolator(mPanLin);
// 设置点击响应
mPanAnim.setAnimationListener(new AnimationListener() {
@Override
public void onAnimationStart(Animation animation) {
}
@Override
public void onAnimationEnd(Animation animation) {
// 当圆盘转动结束的时候,启动拨杆退出动画
mViewPanBar.setAnimation(mBarOutAnim);
}
@Override
public void onAnimationRepeat(Animation animation) {
}
});
// 初始化拨杆左移动画
mBarInAnim = AnimationUtils.loadAnimation(this, R.anim.rotate_45);
mBarInLin = new LinearInterpolator();
// 这里需要注意一下。当动画播完以后保持结束状态的位置
mBarInAnim.setFillAfter(true);
mBarInAnim.setInterpolator(mBarInLin);
mBarInAnim.setAnimationListener(new AnimationListener() {
@Override
public void onAnimationStart(Animation animation) {
}
@Override
public void onAnimationEnd(Animation animation) {
// 当拨杆左移之后,启动唱片转动动画
mViewPan.startAnimatio 最低0.47元/天 解锁文章


 858
858


 被折叠的 条评论
为什么被折叠?
被折叠的 条评论
为什么被折叠?
 到【灌水乐园】发言


