


百度网盘: 👉 Spring学习书籍链接

Spring学习
1 Spring框架概述
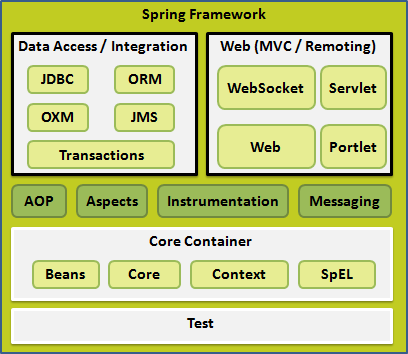
- Spring是轻量级的开源的JavaEE框架,提供了多个模块
- Spring可以解决企业应用开发的复杂性
- Spring有两个核心部分:IOC和Aop
(1)IOC:控制反转,把创建对象过程交给Spring进行管理
(2)Aop:面向切面,不修改源代码进行功能增强 - Spring特点
(1)方便解耦,简化开发
(2)Aop编程支持
(3)方便程序测试
(4)方便和其他框架进行整合
(5)方便进行事务操作
(6)降低API开发难度
2 Spring容器
Spring提供了两种容器,分别是BeanFactory和ApplicationConetxt
BeanFactory
BeanFactory是bean的实例化工厂,主要负责bean的解析、实现和保存化操作,不提供给开发人员使用
ApplicationContext
ApplicationContext继承于BeanFactory,提供更多更强大的功能,一般由开发人员进行使用
ApplicationContext context = new ClassPathXmlApplicationContext("xml路径");
或
ApplicationContext context = new FileSystemXmlApplicationContext("xml路径");

3 基于XML方式创建对象
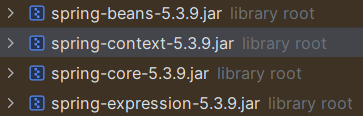
使用Spring需要的基础包:百度网盘

定义一个User类
package springstudy;//自己的包名

public class User {
    public void add() {
        System.out.println("add...");
    }
}
创建一个XML文件,注意XML文件路径
其中<bean id=“user” class=“springstudy.User”></bean> 的 id是唯一标识,class是某类的全类名,即包名.类名
<?xml version="1.0" encoding="UTF-8" ?>
<beans xmlns="http://www.springframework.org/schema/beans"
       xmlns:xsi="http://www.w3.org/2001/XMLSchema-instance"
       xsi:schemaLocation="http://www.springframework.org/schema/beans
       http://www.springframework.org/schema/beans/spring-beans.xsd">

    <!--配置User对象创建-->
    <bean id="user" class="springstudy.User"></bean>
</beans>
在Test类使用User类,注意ClassPathXmlApplicationContext(“bean1.xml”)的路径是./src/bean1.xml,其他位置需要使用ClassPathXmlApplicationContext(“file:xml文件绝对路径”)
package springstudy;//自己的包名
import org.springframework.context.ApplicationContext;
import org.springframework.context.support.ClassPathXmlApplicationContext;
public class Test {
public static void main(String[] args) {
//加载Spring配置文件
ApplicationContext context = new ClassPathXmlApplicationContext("bean1.xml");
User user = context.getBean("user", User.class);
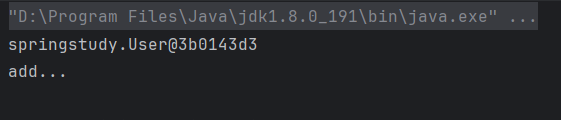
System.out.println(user);
user.add();
}
}
运行结果
设置单实例还是多实例
bean 标签里面有属性(scope)用于设置单实例还是多实例
- scope=“singleton”,表示是单实例对象,是默认值
- scope=“prototype”,表示是多实例对象

设置 scope 值是 singleton 时,加载 spring 配置文件时就会创建单实例对象;设置 scope 值是 prototype 时,不是在加载 spring 配置文件时创建对象,而是在调用getBean 方法时候创建多实例对象
4 基于XML方式注入属性
DI(Dependency Injection):依赖注入,就是注入属性
控制反转是通过依赖注入实现的,其实它们是同一个概念的不同角度描述。通俗来说就是IoC是设计思想,DI是实现方式。
4.1 通过set方法注入属性
在User类中定义set方法
	//属性
	private String name;
	private int age;
	private String address;
    private String degree;

	public User(int height, int weight) {
        this.height = height;
        this.weight = weight;
    }

    //set方法
    public void setName(String name) {
        this.name = name;
    }

    public void setAge(int age) {
        this.age = age;
    }

    public void setAddress(String address) {
        this.address = address;
    }

    public void setDegree(String degree) {
        this.degree = degree;
    }
在bean1.xml中使用 property 完成属性注入,name:类里面属性名称, value:向属性注入的值,property标签可以加 <value><![CDATA[内容]]></value> 或者<null/>(表示null)
	<property name="name" value="西施"></property>
	<property name="age"><value>18</value></property>
	<property name="address"><null/></property>
4.2 通过构造器注入属性
在User类中定义构造器
	//属性
	private int height;
    private int weight;

    //构造器
	public User(int height, int weight) {
        this.height = height;
        this.weight = weight;
    }
在bean1.xml中使用constructor-arg标签注入属性
<constructor-arg name="height" value="168"></constructor-arg>
<constructor-arg name="weight" value="90"></constructor-arg>
4.3 使用p命名空间注入属性
注:使用p命名空间注入属性,该属性必须定义set方法
在bean1.xml文件中添加p命名空间,在bean标签中添加p:属性名=“属性值”
xmlns:p="http://www.springframework.org/schema/p"
<bean id="user" class="springstudy.User" p:degree="本科">
4.4 注入bean与自动装配
创建Card类
package springstudy;

public class Card {
    private int id;
    private double money;

    public void setId(int id) {
        this.id = id;
    }

    public void setMoney(double money) {
        this.money = money;
    }

    public double getMoney() {
        return money;
    }
}
在User类定义Card属性
	private Card card;

	public void setCard(Card card) {
        this.card = card;
    }

    public Card getCard() {
        return card;
    }
在bean1.xml添加如下代码,如果通过<property name=“card.money” value=“999”></property>修改属性必须在User类中定义getCard方法
	<bean id="user" class="springstudy.User" p:degree="本科">
        <!--注入bean方式1-->
        <property name="card">
            <bean id="card" class="springstudy.Card">
                <property name="id" value="1"></property>
                <property name="money" value="1000"></property>
            </bean>
        </property>
        <!--注入bean方式2-->
        <property name="card" ref="card"></property>

        <property name="card.money" value="999"></property>
    </bean>

    <bean id="card" class="springstudy.Card">
        <property name="id" value="1"></property>
        <property name="money" value="1000"></property>
    </bean>
自动装配
自动装配是自动注入相关联的bean到另一个bean,通过bean标签的autowire属性实现
autowire=“byType”根据class类型自动装配
修改注入Bean方式1,设置autowire=“byType”,在byType(类型模式中)Spring容器会基于反射查看bean定义的类,然后找到依赖类型相同的bean注入到另外的bean中,这个过程需要set方法来完成(需要在User类中定义setCard方法),如果存在多个类型相同的bean,会注入失败,这时需要通过在不需要注入的bean中添加autowire-candidate=“false”来解决,id的属性值可以不和类中定义的属性相同(如User类中定义private Card card,但是在bean中id可以为card1)
	<bean id="user" class="springstudy.User" p:degree="本科" autowrite="byType">
	</bean>
	<bean id="card" class="springstudy.Card">
        <property name="id" value="1"></property>
        <property name="money" value="1000"></property>
    </bean>
    <bean id="card1" class="springstudy.Card" autowire-candidate=“false”>
        <property name="id" value="1"></property>
        <property name="money" value="10000"></property>
    </bean>
autowire=“byName”根据id属性值自动装配
设置autowire=“byName”,Spring会尝试将属性名和bean中的id进行匹配,如果找到的话就注入依赖中,没有找到该属性就为null(如User类中定义private Card card,需要bean中的id为card才能注入)
	<bean id="user" class="springstudy.User" p:degree="本科" autowire="byName">
	</bean>
	<bean id="card" class="springstudy.Card">
        <property name="id" value="1"></property>
        <property name="money" value="1000"></property>
    </bean>
除了通过xml方式自动装配外还可以通过注解自动装配
4.5 注入集合
在User类中定义集合的set方法
	//数组
    private String[] costumes;
    //list集合
    private List<String> list;
    private List<String> testlist;
    //map集合
    private Map<String,String> maps;
    //set集合
    private Set<String> sets;

	public void setSets(Set<String> sets) {
        this.sets = sets;
    }
    public void setCostumes(String[] costumes) {
        this.costumes = costumes;
    }
    public void setList(List<String> list) {
        this.list = list;
    }
    public void setTestlist(List<String> testlist) {
        this.testlist = testlist;
    }
    public void setMaps(Map<String, String> maps) {
        this.maps = maps;
    }
在bean1.xml注入集合属性,除了通过<array><value>值</value></array>或 <map><entry key=“值” value=“值”></entry></map>注入属性之外,还可以通过util命名空间注入属性,不过需要引入util的命令空间以及util的xsd文件
<beans xmlns="http://www.springframework.org/schema/beans"
       xmlns:xsi="http://www.w3.org/2001/XMLSchema-instance"
       xmlns:p="http://www.springframework.org/schema/p"
       xmlns:util="http://www.springframework.org/schema/util"
       xsi:schemaLocation="http://www.springframework.org/schema/beans
       http://www.springframework.org/schema/beans/spring-beans.xsd
       http://www.springframework.org/schema/util
       http://www.springframework.org/schema/util/spring-util-4.0.xsd">

	<bean id="user" class="springstudy.User" p:degree="本科">
		<!--注入集合属性-->
        <!--数组类型属性注入-->
        <property name="costumes">
            <array>
                <value>裙子</value>
                <value>汉服</value>
            </array>
        </property>
        <!--list 类型属性注入-->
        <property name="list">
            <list>
                <value>张三</value>
                <value>小三</value>
            </list>
        </property>
        <property name="testlist" ref="bookList"></property>
        <!--map 类型属性注入-->
        <property name="maps">
            <map>
                <entry key="JAVA" value="java"></entry>
                <entry key="PHP" value="php"></entry>
            </map>
        </property>
        <!--set 类型属性注入-->
        <property name="sets">
            <set>
                <value>MySQL</value>
                <value>Redis</value>
            </set>
        </property>
    </bean>

    <util:list id="bookList">
        <value>易筋经</value>
        <value>九阴真经</value>
        <value>九阳神功</value>
    </util:list>
</beans>
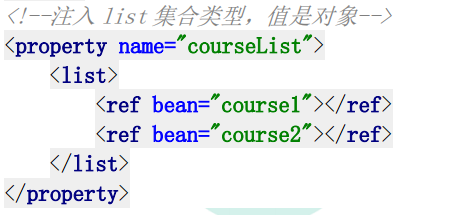
此外还可以将bean注入集合
4.6 注入外部属性文件
Spring提供了读取外部properties文件的机制,可以将读到数据为bean的属性赋值
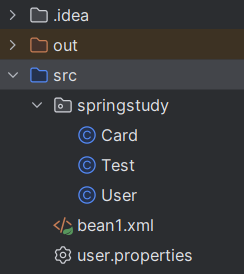
在src目录下创建user.properties配置文件
test.name=小乔
user.age=21
age=18
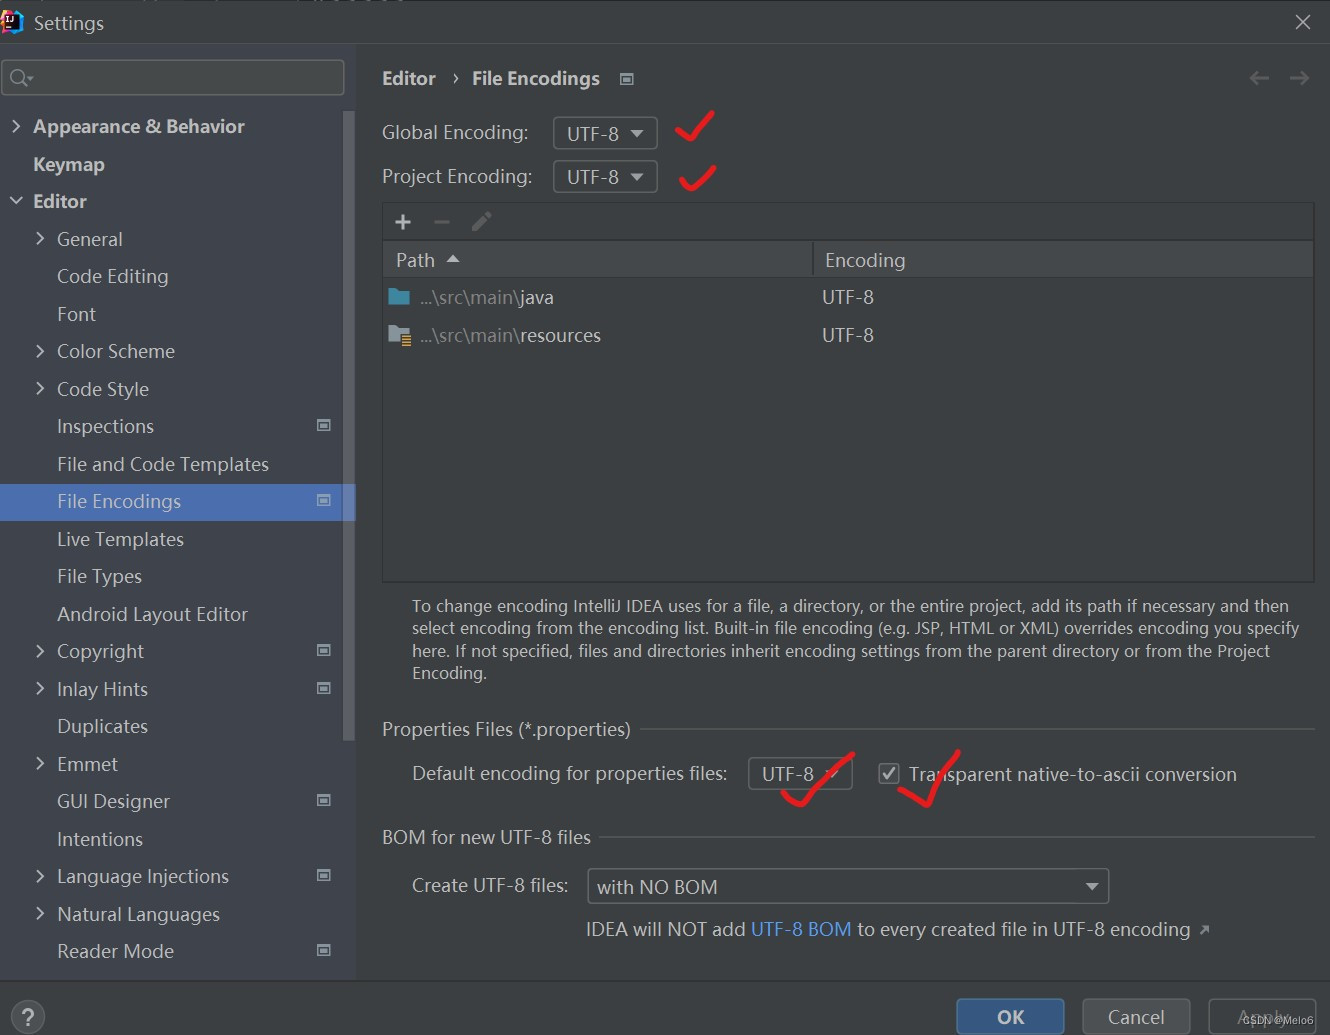
在bean1.xml文件中加入content命名空间及其xsd文件,通过property-placeholder加载properties文件(放在bean标签的外面),其中location=“classpath:user.properties” 的地址实际为 ./src/user.properties,file-encoding设置文件编码格式,避免中文乱码。如果设置file-encoding="UTF-8"出现中文为问号,请在编辑器中设置properties配置文件的格式
在IDEA打开Settings–>Editor–>File Encodings
<!--加入content命令空间及其xsd文件-->
<beans xmlns:context="http://www.springframework.org/schema/context"
	xsi:schemaLocation=http://www.springframework.org/schema/context
	http://www.springframework.org/schema/context/spring-context.xsd">

	<context:property-placeholder location="classpath:user.properties" file-encoding="UTF-8"/>
<beans>
在bean中添加属性
<property name="name" value="${test.name}"></property>
<property name="age" value="${user.age}"></property>
发现个有意思的东西,设置value=“${user.name}”,user.name是电脑的用户名,不知道其他人会不会这样
4.7 注入属性的全部代码
User类
package springstudy;

import java.util.List;
import java.util.Map;
import java.util.Set;

public class User {
    //属性
    private String name;
    private int age;
    private int height;
    private int weight;
    private String address;
    private String degree;
    private Card card;

    //数组
    private String[] costumes;
    //list集合
    private List<String> list;
    private List<String> testlist;
    //map集合
    private Map<String,String> maps;
    //set集合
    private Set<String> sets;

    public User(int height, int weight) {
        this.height = height;
        this.weight = weight;
    }

    //set方法
    public void setName(String name) {
        this.name = name;
    }

    public void setAge(int age) {
        this.age = age;
    }

    public void setAddress(String address) {
        this.address = address;
    }

    public void setDegree(String degree) {
        this.degree = degree;
    }

    public void setCard(Card card) {
        this.card = card;
    }

    public Card getCard() {
        return card;
    }

    public void setSets(Set<String> sets) {
        this.sets = sets;
    }
    public void setCostumes(String[] costumes) {
        this.costumes = costumes;
    }
    public void setList(List<String> list) {
        this.list = list;
    }
    public void setTestlist(List<String> testlist) {
        this.testlist = testlist;
    }
    public void setMaps(Map<String, String> maps) {
        this.maps = maps;
    }

    public void add() {
        System.out.println("add...");
    }

    @Override
    public String toString() {
        return "User{" +
                "name='" + name + '\'' +
                ", age=" + age +
                ", height=" + height +
                ", weight=" + weight +
                ", address='" + address + '\'' +
                ", degree='" + degree + '\'' +
                ", card.money='" + card.getMoney() + '\'' +
                '}';
    }

    //集合输出
    public void print() {
        System.out.println("---数组---");
        for (String i : costumes) {
            System.out.println(i);
        }
        System.out.println("---list---");
        for (String i : list) {
            System.out.println(i);
        }
        System.out.println("---sets---");
        for (String i : sets) {
            System.out.println(i);
        }
        System.out.println("---maps---");
        for (String key : maps.keySet()){
            String value = (String) maps.get(key);
            System.out.println(key + "=" + value);
        }
        System.out.println("---testlist---");
        for (String i : testlist) {
            System.out.println(i);
        }
    }
}
bean1.xml文件
<?xml version="1.0" encoding="UTF-8" ?>
<beans xmlns="http://www.springframework.org/schema/beans"
       xmlns:xsi="http://www.w3.org/2001/XMLSchema-instance"
       xmlns:p="http://www.springframework.org/schema/p"
       xmlns:util="http://www.springframework.org/schema/util"
       xmlns:context="http://www.springframework.org/schema/context"
       xsi:schemaLocation="http://www.springframework.org/schema/beans
       http://www.springframework.org/schema/beans/spring-beans.xsd
       http://www.springframework.org/schema/util
       http://www.springframework.org/schema/util/spring-util.xsd
       http://www.springframework.org/schema/context
       http://www.springframework.org/schema/context/spring-context.xsd">

    <context:property-placeholder location="classpath:user.properties" file-encoding="UTF-8"/>
    <!--配置User对象创建-->
    <bean id="user" class="springstudy.User" p:degree="本科" autowire="byName">
        <!--通过set方法注入属性-->
<!--        <property name="name" value="西施"></property>-->
<!--        <property name="age"><value>18</value></property>-->
        <property name="address"><null/></property>

        <!--通过构造器方法注入属性-->
        <constructor-arg name="height" value="168"></constructor-arg>
        <constructor-arg name="weight" value="90"></constructor-arg>

        <!--注入bean-->
<!--        <property name="card">-->
<!--            <bean id="card" class="springstudy.Card">-->
<!--                <property name="id" value="1"></property>-->
<!--                <property name="money" value="1000"></property>-->
<!--            </bean>-->
<!--        </property>-->
<!--        <property name="card" ref="card"></property>-->
<!--        <property name="card.money" value="999"></property>-->

        <!--注入集合属性-->
        <!--数组类型属性注入-->
        <property name="costumes">
            <array>
                <value>裙子</value>
                <value>汉服</value>
            </array>
        </property>
        <!--list 类型属性注入-->
        <property name="list">
            <list>
                <value>张三</value>
                <value>小三</value>
            </list>
        </property>
        <property name="testlist" ref="bookList"></property>
        <!--map 类型属性注入-->
        <property name="maps">
            <map>
                <entry key="JAVA" value="java"></entry>
                <entry key="PHP" value="php"></entry>
            </map>
        </property>
        <!--set 类型属性注入-->
        <property name="sets">
            <set>
                <value>MySQL</value>
                <value>Redis</value>
            </set>
        </property>
        <property name="name" value="${test.name}"></property>
        <property name="age" value="${user.age}"></property>
    </bean>
    <bean id="card" class="springstudy.Card" autowire-candidate="false">
        <property name="id" value="1"></property>
        <property name="money" value="1000"></property>
    </bean>
    <bean id="card1" class="springstudy.Card">
        <property name="id" value="1"></property>
        <property name="money" value="10000"></property>
    </bean>
    <!--list 集合类型属性注入-->
    <util:list id="bookList">
        <value>易筋经</value>
        <value>九阴真经</value>
        <value>九阳神功</value>
    </util:list>
</beans>
Card类
package springstudy;

public class Card {
    private int id;
    private double money;

    public void setId(int id) {
        this.id = id;
    }

    public void setMoney(double money) {
        this.money = money;
    }

    public double getMoney() {
        return money;
    }
}
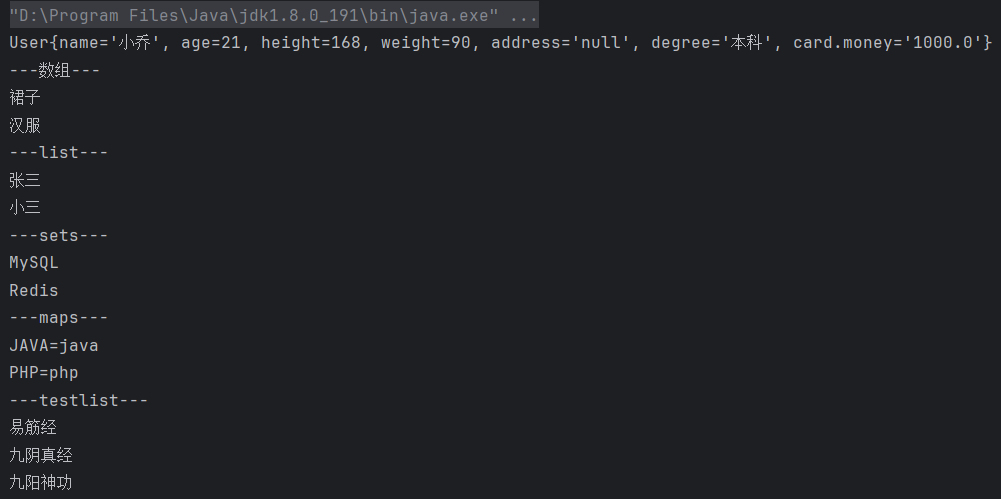
Test类,其中System.out.println(user);会自动调用User类的toString方法
package springstudy; //自己的包
import org.springframework.context.ApplicationContext;
import org.springframework.context.support.ClassPathXmlApplicationContext;

public class Test {
    public static void main(String[] args) {
        //加载Spring配置文件
        ApplicationContext context = new ClassPathXmlApplicationContext("bean1.xml");
        User user = context.getBean("user", User.class);
        System.out.println(user);
        user.print();
    }
}
user.properties文件
test.name=小乔
user.age=21
age=18
不想创建那么多文件,看起来太乱。。。


 2024
2024


 被折叠的 条评论
为什么被折叠?
被折叠的 条评论
为什么被折叠?
 到【灌水乐园】发言


