


目录
1 文件上传
SpringMVC 对文件的上传做了很好的封装,提供了两种解析器。
- CommonsMultipartResolver:兼容性较好,可以兼容 Servlet3.0 之前的版本,但是它依赖了 commons-fileupload 这个第三方工具,所以如果使用这个,一定要添加 commons-fileupload 依赖
- StandardServletMultipartResolver:兼容性较差,它适用于 Servlet3.0 之后的版本,它不依赖第三方工具,使用它,可以直接做文件上传
本文使用 CommonsMultipartResolver 解析器,通过上传图片进行测试
导入依赖
导入 commons-fileupload.jar 包,Maven 会自动帮我们导入它的依赖包 commons-io.jar
<dependency>
    <groupId>commons-fileupload</groupId>
    <artifactId>commons-fileupload</artifactId>
    <version>1.3.1</version>
</dependency>
在 SpringMVC 配置文件中配置 CommonsMultipartResolver 解析器
设置 <mvc:resources> 标签访问静态资源
<?xml version="1.0" encoding="UTF-8"?>
<beans xmlns="http://www.springframework.org/schema/beans"
       xmlns:xsi="http://www.w3.org/2001/XMLSchema-instance"
       xmlns:context="http://www.springframework.org/schema/context"
       xmlns:mvc="http://www.springframework.org/schema/mvc"
       xsi:schemaLocation="http://www.springframework.org/schema/beans
       http://www.springframework.org/schema/beans/spring-beans.xsd
       http://www.springframework.org/schema/context
       http://www.springframework.org/schema/context/spring-context.xsd
       http://www.springframework.org/schema/mvc
       https://www.springframework.org/schema/mvc/spring-mvc.xsd">

    <!-- 扫描指定包下的注解 -->
    <context:component-scan base-package="com.controller"/>

    <!-- 配置访问静态资源 -->
    <!-- img 必须是在 webapp 根目录下-->
    <!-- <mvc:resources> 标签将路径 /img/** 映射到 /img/ 目录 -->
    <!-- 这意味着当客户端访问 /img/** 路径时,SpringMVC会在 /img/ 目录下寻找对应的静态资源文件-->
    <mvc:resources mapping="/img/**" location="/img/"/>

    <!-- 配置注解驱动 -->
    <mvc:annotation-driven/>

    <!-- InternalResourceViewResolver 是 SpringMVC 中用于解析和渲染内部资源视图(通常是 JSP 页面)的视图解析器。
    它根据视图名称查找并加载对应的 JSP 文件,并将模型数据传递给 JSP 进行展示 -->
    <!-- 配置 JSP 解析器 -->
    <bean id="viewResolver" class="org.springframework.web.servlet.view.InternalResourceViewResolver">
        <!-- 配置前缀 -->
        <property name="prefix" value="/WEB-INF/pages/"/>
        <!-- 配置后缀 -->
        <property name="suffix" value=".jsp"/>
        <!-- 定义模板顺序 -->
    </bean>

    <!-- 配置文件上传数据专用的解析器 -->
    <!-- 这个bean的id必须是multipartResolver,否则上传文件会报400的错误 -->
    <bean id="multipartResolver" class="org.springframework.web.multipart.commons.CommonsMultipartResolver">
        <!-- 设置文件编码格式 -->
        <property name="defaultEncoding" value="utf-8"/>
        <!-- 设置最大上传大小 -->
        <property name="maxUploadSize" value="#{1024*1024}"/>
    </bean>
</beans>
创建上传文件的控制器
文件上传是使用 CommonsMultipartFile 还是 MultipartFile 呢?相信大家在学习上传文件时,肯定见过这两个类。额。。。没见过,正好可以了解下。
CommonsMultipartFile 和 MultipartFile 是 Java 中用于处理 HTTP 多部分表单数据 (Multipart Form Data) 的类。
- CommonsMultipartFile 是 Apache Commons FileUpload 库提供的一个类,用于处理文件上传操作。它提供了更多的功能和方法,例如获取文件名、文件内容、文件类型等信息,以及设置文件的存储位置等
- MultipartFile 是 Spring Framework 提供的一个类,用于处理文件上传和下载操作。它是基于 CommonsMultipartFile 实现的,并添加了一些 Spring 特定的功能和方法,例如通过注解进行文件解析和绑定等
在使用时,如果你使用的是 Spring Framework,建议使用 MultipartFile 类,因为它与 Spring 的其他功能集成得更好。如果你需要更多的文件上传功能或与其他框架集成,可以考虑使用 CommonsMultipartFile 类。
MultipartFile 封装了请求数据中的文件,此时这个文件存储在内存中或临时的磁盘文件中,需要将其转存到一个合适的位置,因为请求结束后临时存储将被清空。在 MultipartFile 接口中有如下方法:
| 方法名 | 返回值 | 描述 |
|---|---|---|
| getContentType() | String | 获取文件内容的类型 |
| getOriginalFilename() | String | 获取文件的原名称 |
| getName() | String | 获取 form 表单中文件组件的名字 |
| getInputStream() | InputStream | 将文件内容以输入流的形式返回 |
| getSize() | long | 获取文件的大小,单位为 byte |
| isEmpty() | boolean | 文件是否为空 |
| transferTo(File dest) | void | 将数据保存到一个目标文件中 |
@Controller
public class TestController {
    @RequestMapping("/upload")
    public String testUp(MultipartFile photo, Model model, HttpSession session) throws
            IOException {
        // 获取图片文件名
        // xxx.jpg
        String originalFilename = photo.getOriginalFilename();
        System.out.println(originalFilename);
        // 使用UUID给图片重命名,并且去掉UUID的四个"-"
        // UUID.randomUUID() 随机生成 36 位的字符串
        String fileName = UUID.randomUUID().toString().replaceAll("-", "");
        // f6522af8-3f9b-4d90-a51d-e153bdb06ec6
        //获取图片的后缀
        // lastIndexOf(".") 获得字符串中最后一个 "." 的下标
        // substring(startindex) 获得字符串中从 startindex 开始的子串,即 ".jpg"
        String extName = originalFilename.substring(originalFilename.lastIndexOf("."));
        // 拼接新的图片名称
        // f6522af83f9b4d90a51de153bdb06ec6 + .jpg
        String newFileName = fileName + extName;

        // 声明转存文件时,目标目录的虚拟路径(也就是浏览器访问服务器时,能够访问到这个目录的路径)
        // 该路径需要和 SpirngMVC 配置文件中 <mvc:resources> 标签设置的路径一致
        String virtualPath = "/img";

        // 通过 session 获得 servletContext 域对象
        ServletContext servletContext = session.getServletContext();
        // 获得 img 的绝对路径  D:\JavaWeb\SpringMVCTest\target\SpringMVCTest\img
        String photoPath = servletContext.getRealPath(virtualPath);
        System.out.println("photoPath = " + photoPath);
        // 若 D:\JavaWeb\SpringMVCTest\target\SpringMVCTest\img 不存在,则创建
        File file = new File(photoPath);
        if (!file.exists()) {
            file.mkdir();
        }

        // 图片最终路径
        // D:\JavaWeb\SpringMVCTest\target\SpringMVCTest\img + f6522af83f9b4d90a51de153bdb06ec6.jpg
        String finalPath = photoPath + File.separator + newFileName;
        System.out.println("finalPath=" + finalPath);
        // 调用transferTo()方法实现文件转存,photo 是图片,photo.transferTo 相当于将图片复制到 该路径
        photo.transferTo(new File(finalPath));

        // 为了让下一个页面能够将图片展示出来,将图片访问路径存入模型,把访问图片的路径准备好
        // servletContext.getContextPath() 获得上下文路径,即 /SpringMVCTest
        // /SpringMVCTest + /img/ + f6522af83f9b4d90a51de153bdb06ec6.jpg
        String picPath = servletContext.getContextPath() + "/img/" + newFileName;
        System.out.println("picPath = " + picPath);

        model.addAttribute("picPath", picPath);
        return "success";
    }
}
index.jsp
上传文件的表单中有三点需要注意:
- 要点1:请求方式必须是 POST
- 要点2:enctype 属性必须是 multipart/form-data, 以二进制的方式传输数据
- 要点3:文件上传框使用 input 标签,type 属性设置为 file,name 属性值和控制器的形参一致或通过 @RequestParam 注解重命名 name 属性值(请求参数的知识)
表单中 enctype 属性的详细说明:
- application/x-www=form-urlencoded:默认方式,只处理表单域中的 value 属性值,采用这种编码方式的表单会将表单域中的值处理成 URL 编码方式。
- multipart/form-data:这种编码方式会以二进制流的方式来处理表单数据,这种编码方式会把文件域指定文件的内容也封装到请求参数中,不会对字符编码。
- text/plain:除了把空格转换为 “+” 号外,其他字符都不做编码处理,这种方式适用直接通过表单发送邮件
<%@ page contentType="text/html;charset=UTF-8" language="java" %>
<html>
    <head>
        <title>文件上传</title>
    </head>
    <body>
        <h1>上传演示案例</h1>
        <form action="${pageContext.request.contextPath}/upload" method="post" enctype="multipart/form-data">
            请选择上传的图片:<input type="file" name="photo"/><br/>
            <input type="submit" value="上传文件"/>
        </form>
    </body>
</html>
success.jsp
在控制器中,使用了 model 向 request 域对象传递了数据 picPath,可以在整个请求中使用该数据 ${picPath} 或 ${requestScope.picPath} (SpringMVC 域对象的知识)。要访问静态资源,可以在 SpringMVC 配置文件中设置 <mvc:resources> 标签。
<%@ page contentType="text/html;charset=UTF-8" %>
<html lang="en" xmlns:th="http://www.thymeleaf.org">
    <head>
        <meta charset="UTF-8">
        <title>Title</title>
    </head>
    <body>
        <p>上传成功!!!</p>
        <%-- 需要在 SpringMVC 配置文件中设置 <mvc:resources> 标签访问静态文件--%>
        <img src="${picPath}" width="220" height="280" alt="找不到该图片"/>
    </body>
</html>
执行过程
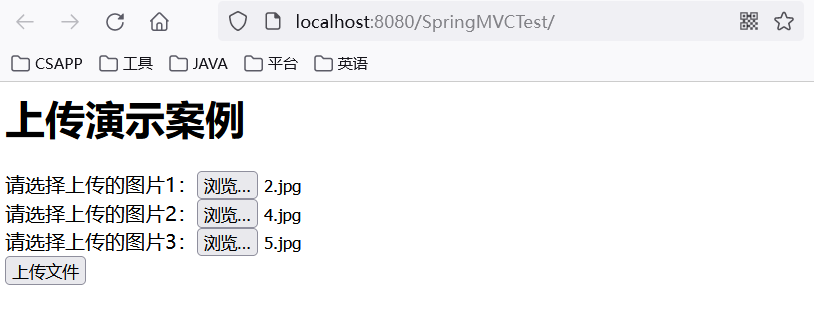
上传多张图片
修改 index.jsp
<%@ page contentType="text/html;charset=UTF-8" language="java" %>
<html>
    <head>
        <title>文件上传</title>
    </head>
    <body>
        <h1>上传演示案例</h1>
        <form action="${pageContext.request.contextPath}/upload" method="post" enctype="multipart/form-data">
            请选择上传的图片1:<input type="file" name="photos"/><br/>
            请选择上传的图片2:<input type="file" name="photos"/><br/>
            请选择上传的图片3:<input type="file" name="photos"/><br/>
            <input type="submit" value="上传文件"/>
        </form>
    </body>
</html>
修改控制器
MultipartFile photo --> List<MultipartFile> photos,input 标签中 name 属性值改为 photos
@Controller
public class TestController {
    @RequestMapping("/upload")
    public String testUp(List<MultipartFile> photos, Model model, HttpSession session) throws
            IOException {
        //用于存储发送至前台页面展示的路径
        List<String> filePathNames = new ArrayList<>();
        // 声明转存文件时,目标目录的虚拟路径(也就是浏览器访问服务器时,能够访问到这个目录的路径)

        String virtualPath = "/img";

        // 准备转存文件时,目标目录的路径。File对象要求这个路径是一个完整的物理路径。
        // 而这个物理路径又会因为在服务器上部署运行时所在的系统环境不同而不同,所以不能写死。
        // 需要调用servletContext对象的getRealPath()方法,将目录的虚拟路径转换为实际的物理路径
        ServletContext servletContext = session.getServletContext();
        // 获得 img 的绝对路径  D:\JavaWeb\SpringMVCTest\target\SpringMVCTest\img
        String photoPath = servletContext.getRealPath(virtualPath);
        System.out.println("photoPath = " + photoPath);
        // 若 D:\JavaWeb\SpringMVCTest\target\SpringMVCTest\img 不存在,则创建
        File file = new File(photoPath);
        if (!file.exists()) {
            file.mkdir();
        }

        for (MultipartFile photo : photos) {
            // 获取图片文件名
            // xxx.jpg
            String originalFilename = photo.getOriginalFilename();
            System.out.println(originalFilename);
            // 使用UUID给图片重命名,并且去掉UUID的四个"-"
            String fileName = UUID.randomUUID().toString().replaceAll("-", "");
            // f6522af8-3f9b-4d90-a51d-e153bdb06ec6
            //获取图片的后缀
            // lastIndexOf(".") 获得字符串中最后一个 "." 的下标
            // substring(startindex) 获得字符串中从 startindex 开始的子串,即 ".jpg"
            String extName = originalFilename.substring(originalFilename.lastIndexOf("."));
            // 拼接新的图片名称
            // f6522af83f9b4d90a51de153bdb06ec6 + .jpg
            String newFileName = fileName + extName;


            // 图片最终路径
            // D:\JavaWeb\SpringMVCTest\target\SpringMVCTest\img + f6522af83f9b4d90a51de153bdb06ec6.jpg
            String finalPath = photoPath + File.separator + newFileName;
            System.out.println("finalPath=" + finalPath);
            // 调用transferTo()方法实现文件转存,photo 是图片,photo.transferTo 相当于将图片复制到 该路径
            photo.transferTo(new File(finalPath));

            // 为了让下一个页面能够将图片展示出来,将图片访问路径存入模型,把访问图片的路径准备好
            // servletContext.getContextPath() 获得上下文路径,即 /SpringMVCTest
            // /SpringMVCTest + /img/ + f6522af83f9b4d90a51de153bdb06ec6.jpg
            String picPath = servletContext.getContextPath() + "/img/" + newFileName;
            System.out.println("picPath = " + picPath);
            filePathNames.add(picPath);
        }
        for(int i = 0;i < filePathNames.size(); i++) {
            model.addAttribute("picPath" + (i + 1), filePathNames.get(i));
        }
        return "success";
    }
}
修改 success.jsp
<%@ page contentType="text/html;charset=UTF-8" %>
<html lang="en" xmlns:th="http://www.thymeleaf.org">
    <head>
        <meta charset="UTF-8">
        <title>Title</title>
    </head>
    <body>
        <p>上传成功!!!</p>
        <%-- 需要在 SpringMVC 配置文件中设置 <mvc:resources> 标签访问静态文件--%>
        <div>
            <img src="${picPath1}" width="220" height="280" alt="找不到该图片"/>
            <img src="${picPath2}" width="220" height="280" alt="找不到该图片"/>
            <img src="${picPath3}" width="220" height="280" alt="找不到该图片"/>
        </div>
    </body>
</html>
运行结果

2 文件下载
文件下载控制器
传统 Servlet 文件下载方式,需要在 HttpServletResponse response 中设置各种信息,而使用 SpringMVC 的 ResponseEntity 只需要将文件二进制主体、头信息以及状态码设置好即可进行文件下载,在易用性和简洁上更胜一筹。
@RequestMapping(value = "/download")
public ResponseEntity<byte[]> testResponseEntity(String picPath, HttpSession session) throws
        IOException {
    // 获取ServletContext对象
    ServletContext servletContext = session.getServletContext();
    // 获取文件所在目录及文件名
    // picPath=/SpringMVCTest/img/05bba37fc8bc4fdfb095f41a6d2c904a.jpg
    String direcfile = "/img" + picPath.substring(picPath.lastIndexOf("/"));
    // 获取文件绝对路径
    String realPath = servletContext.getRealPath(direcfile);
    System.out.println("realPath=" + realPath);
    File file = new File(realPath);
    // 创建输入流
    InputStream is = new FileInputStream(file);
    // 创建字节数组
    byte[] bytes = new byte[is.available()];
    // 将流读到字节数组中
    is.read(bytes);
    // 创建HttpHeaders对象设置响应头信息
    MultiValueMap<String, String> headers = new HttpHeaders();
    // 设置下载文件的名字
    headers.add("Content-Disposition", "attachment; filename=" + file.getName());
    // 设置响应状态码
    HttpStatus statusCode = HttpStatus.OK;
    // 创建ResponseEntity对象
    ResponseEntity<byte[]> responseEntity = new ResponseEntity<>(bytes, headers, statusCode);
    //关闭输入流
    is.close();
    return responseEntity;
}
修改 success.jsp
<%@ page contentType="text/html;charset=UTF-8" %>
<html lang="en" xmlns:th="http://www.thymeleaf.org">
    <head>
        <meta charset="UTF-8">
        <title>Title</title>
    </head>
    <body>
        <p>上传成功!!!</p>
        <%-- 需要在 SpringMVC 配置文件中设置 可以访问静态文件--%>
        <div>
            <img src="${picPath}" width="220" height="280" alt="找不到该图片"/>
        </div>
        <a href="${pageContext.request.contextPath}/download?picPath=${picPath}">点击下载图片</a>
    </body>
</html>
演示过程


 350
350


 被折叠的 条评论
为什么被折叠?
被折叠的 条评论
为什么被折叠?
 到【灌水乐园】发言


