


新手搭建 ts + react + webpack 项目
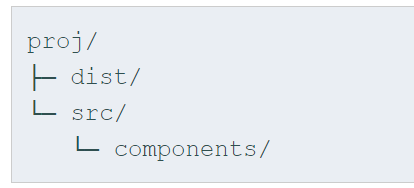
初始化项目结构
mkdir projcd projmkdir srccd srcmkdir componentscd ..npm ini
安装依赖
- 首先确保已经全局安装了Webpack。
npm install -g webpack - 现在我们添加React和React-DOM以及它们的声明文件到package.json文件里做为依赖
npm install --save react react-dom @types/react @types/react-dom
- 接下来,我们要添加开发时依赖awesome-typescript-loader和source-map-loader。
npm install --save-dev typescript awesome-typescript-loader source-map-loader
这些依赖会让TypeScript和webpack在一起良好地工作
添加TypeScript配置文件
创建一个tsconfig.json
{
    "compilerOptions": {
        "outDir": "./dist/",
        "sourceMap": true,
        "noImplicitAny": true,
        "module": "commonjs",
        "target": "es6",
        "jsx": "react"
    },
    "include": [
        "./src/**/*"
    ]
}
开始编写代码
- src/components目录下创建一个名为Hello.tsx的文件,代码如下
import * as React from "react";

export interface HelloProps { compiler: string; framework: string; }

// 'HelloProps' describes the shape of props.
// State is never set so we use the '{}' type.
export class Hello extends React.Component<HelloProps, {}> {
    render() {
        return <h1>Hello from {this.props.compiler} and {this.props.framework}!</h1>;
    }
}
- 在src下创建index.tsx文件,代码如下
import * as React from "react";
import * as ReactDOM from "react-dom";

import { Hello } from "./components/Hello";

ReactDOM.render(
    <Hello compiler="TypeScript" framework="React" />,
    document.getElementById("example")
);
- 在根目录 proj创建一个名为index.html的文件
<!DOCTYPE html>
<html>
    <head>
        <meta charset="UTF-8" />
        <title>Hello React!</title>
    </head>
    <body>
        <div id="example"></div>

        <!-- Dependencies -->
        <script src="./node_modules/react/umd/react.development.js"></script>
        <script src="./node_modules/react-dom/umd/react-dom.development.js"></script>

        <!-- Main -->
        <script src="./dist/bundle.js"></script>
    </body>
</html>
需要注意一点我们是从node_modules引入的文件。 React和React-DOM的npm包里包含了独立的 .js文件,你可以在页面上引入它们,这里我们为了快捷就直接引用了。 可以随意地将它们拷贝到其它目录下,或者从CDN上引用。
创建一个webpack配置文件
在工程根目录下创建一个webpack.config.js文件。
module.exports = {
    entry: "./src/index.tsx",
    output: {
        filename: "bundle.js",
        path: __dirname + "/dist"
    },

    // Enable sourcemaps for debugging webpack's output.
    devtool: "source-map",

    resolve: {
        // Add '.ts' and '.tsx' as resolvable extensions.
        extensions: [".ts", ".tsx", ".js", ".json"]
    },

    module: {
        rules: [
            // All files with a '.ts' or '.tsx' extension will be handled by 'awesome-typescript-loader'.
            { test: /\.tsx?$/, loader: "awesome-typescript-loader" },

            // All output '.js' files will have any sourcemaps re-processed by 'source-map-loader'.
            { enforce: "pre", test: /\.js$/, loader: "source-map-loader" }
        ]
    },

    // When importing a module whose path matches one of the following, just
    // assume a corresponding global variable exists and use that instead.
    // This is important because it allows us to avoid bundling all of our
    // dependencies, which allows browsers to cache those libraries between builds.
    externals: {
        "react": "React",
        "react-dom": "ReactDOM"
    }
};
打包执行
webpack
在打包的时候小编报错了,Cannot find module 'webpack-cli/package.json 
因为小编更改了npm全局安装包的默认路径,如你也需要更改npm全局安装包的默认路径请参考链接:Node.js配置npm全局模块路径和缓存路径
导致找不到webpack-cil,如出现次错误请参考链接
链接: Cannot find module 'webpack-cli/package.json
此时执行webpack即可打包成功,执行根目录下的index.html即可出现以下效果

重点来了,小白千万别走
此时我想要在浏览器可以实时的看到我改动的东西,又不想每次都执行webpack
- 修改package.json
在此就要修改package.json文件了,添加start: react-scripts start

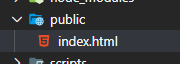
- 添加html文件
在根目录下创建public文件夹,在文件夹下添加index.html文件
<!DOCTYPE html>
<html lang="en">
  <head>
    <meta charset="utf-8" />
    <link rel="icon" href="%PUBLIC_URL%/favicon.ico" />
    <meta name="viewport" content="width=device-width, initial-scale=1" />
    <meta name="theme-color" content="#000000" />
    <meta
      name="description"
      content="Web site created using create-react-app"
    />
    <link rel="apple-touch-icon" href="%PUBLIC_URL%/logo192.png" />
    <!--
      manifest.json provides metadata used when your web app is installed on a
      user's mobile device or desktop. See https://developers.google.com/web/fundamentals/web-app-manifest/
    -->
    <link rel="manifest" href="%PUBLIC_URL%/manifest.json" />
    <!--
      Notice the use of %PUBLIC_URL% in the tags above.
      It will be replaced with the URL of the `public` folder during the build.
      Only files inside the `public` folder can be referenced from the HTML.

      Unlike "/favicon.ico" or "favicon.ico", "%PUBLIC_URL%/favicon.ico" will
      work correctly both with client-side routing and a non-root public URL.
      Learn how to configure a non-root public URL by running `npm run build`.
    -->
    <title>React App</title>
  </head>
  <body>
    <noscript>You need to enable JavaScript to run this app.</noscript>
    <div id="root"></div>
    <!--
      This HTML file is a template.
      If you open it directly in the browser, you will see an empty page.

      You can add webfonts, meta tags, or analytics to this file.
      The build step will place the bundled scripts into the <body> tag.

      To begin the development, run `npm start` or `yarn start`.
      To create a production bundle, use `npm run build` or `yarn build`.
    -->
  </body>
</html>
一定要注意, <div id="root"></div> 这里的id一定要修改为跟index.tsx文件中获取的id名称一样,不然就找不到对应的tag了就会报错

如果id不一致报错如下

只需将 index.html 文件中的id修改为 example 即可

3. 执行
运行 npm run start


 1万+
1万+


 被折叠的 条评论
为什么被折叠?
被折叠的 条评论
为什么被折叠?
 到【灌水乐园】发言


