


上一篇文章已经对定义Servlet 的方法进行了说明,过滤器(Filter)和 监听器(Listener)的注册方法和 Servlet 一样,不清楚的可以查看下上一篇文章:http://blog.csdn.net/catoop/article/details/50501686 本文将直接使用@WebFilter和@WebListener的方式,完成一个Filter 和一个 Listener。
过滤器(Filter)文件
MyFilter.Java
package org.springboot.sample.filter;

import java.io.IOException;

import javax.servlet.Filter;
import javax.servlet.FilterChain;
import javax.servlet.FilterConfig;
import javax.servlet.ServletException;
import javax.servlet.ServletRequest;
import javax.servlet.ServletResponse;
import javax.servlet.annotation.WebFilter;

/**
 * 使用注解标注过滤器
 * @WebFilter将一个实现了javax.servlet.Filter接口的类定义为过滤器
 * 属性filterName声明过滤器的名称,可选
 * 属性urlPatterns指定要过滤 的URL模式,也可使用属性value来声明.(指定要过滤的URL模式是必选属性)
 *
 * @author   单红宇(365384722)
 * @myblog  http://blog.csdn.net/catoop/
 * @create    2016年1月6日
 */
@WebFilter(filterName="myFilter",urlPatterns="/*")
public class MyFilter implements Filter {

    @Override
    public void destroy() {
        System.out.println("过滤器销毁");
    }

    @Override
    public void doFilter(ServletRequest request, ServletResponse response,
            FilterChain chain) throws IOException, ServletException {
        System.out.println("执行过滤操作");
        chain.doFilter(request, response);
    }

    @Override
    public void init(FilterConfig config) throws ServletException {
        System.out.println("过滤器初始化");
    }

}
- 1
- 2
- 3
- 4
- 5
- 6
- 7
- 8
- 9
- 10
- 11
- 12
- 13
- 14
- 15
- 16
- 17
- 18
- 19
- 20
- 21
- 22
- 23
- 24
- 25
- 26
- 27
- 28
- 29
- 30
- 31
- 32
- 33
- 34
- 35
- 36
- 37
- 38
- 39
- 40
- 41
- 42
- 43
- 44

- 1
- 2
- 3
- 4
- 5
- 6
- 7
- 8
- 9
- 10
- 11
- 12
- 13
- 14
- 15
- 16
- 17
- 18
- 19
- 20
- 21
- 22
- 23
- 24
- 25
- 26
- 27
- 28
- 29
- 30
- 31
- 32
- 33
- 34
- 35
- 36
- 37
- 38
- 39
- 40
- 41
- 42
- 43
- 44
ServletContext监听器(Listener)文件
MyServletContextListener.java
package org.springboot.sample.listener;

import javax.servlet.ServletContextEvent;
import javax.servlet.ServletContextListener;
import javax.servlet.annotation.WebListener;

/**
 * 使用@WebListener注解,实现ServletContextListener接口
 *
 * @author   单红宇(365384722)
 * @myblog  http://blog.csdn.net/catoop/
 * @create    2016年1月6日
 */
@WebListener
public class MyServletContextListener implements ServletContextListener {

    @Override
    public void contextInitialized(ServletContextEvent sce) {
        System.out.println("ServletContex初始化");
        System.out.println(sce.getServletContext().getServerInfo());
    }

    @Override
    public void contextDestroyed(ServletContextEvent sce) {
        System.out.println("ServletContex销毁");
    }

}
- 1
- 2
- 3
- 4
- 5
- 6
- 7
- 8
- 9
- 10
- 11
- 12
- 13
- 14
- 15
- 16
- 17
- 18
- 19
- 20
- 21
- 22
- 23
- 24
- 25
- 26
- 27
- 28
- 29
- 1
- 2
- 3
- 4
- 5
- 6
- 7
- 8
- 9
- 10
- 11
- 12
- 13
- 14
- 15
- 16
- 17
- 18
- 19
- 20
- 21
- 22
- 23
- 24
- 25
- 26
- 27
- 28
- 29
ServletContext监听器(Listener)文件
MyHttpSessionListener.java
package org.springboot.sample.listener;

import javax.servlet.annotation.WebListener;
import javax.servlet.http.HttpSessionEvent;
import javax.servlet.http.HttpSessionListener;

/**
 * 监听Session的创建与销毁
 *
 * @author   单红宇(365384722)
 * @myblog  http://blog.csdn.net/catoop/
 * @create    2016年1月6日
 */
@WebListener
public class MyHttpSessionListener implements HttpSessionListener {

    @Override
    public void sessionCreated(HttpSessionEvent se) {
        System.out.println("Session 被创建");
    }

    @Override
    public void sessionDestroyed(HttpSessionEvent se) {
        System.out.println("ServletContex初始化");
    }

}
- 1
- 2
- 3
- 4
- 5
- 6
- 7
- 8
- 9
- 10
- 11
- 12
- 13
- 14
- 15
- 16
- 17
- 18
- 19
- 20
- 21
- 22
- 23
- 24
- 25
- 26
- 27
- 28
- 1
- 2
- 3
- 4
- 5
- 6
- 7
- 8
- 9
- 10
- 11
- 12
- 13
- 14
- 15
- 16
- 17
- 18
- 19
- 20
- 21
- 22
- 23
- 24
- 25
- 26
- 27
- 28
注意不要忘记在 SpringBootSampleApplication.java 上添加 @ServletComponentScan 注解。
在启动的过程中我们会看到输出:
ServletContex初始化
Apache Tomcat/8.0.30
过滤器初始化
- 1
- 2
- 3

- 1
- 2
- 3
服务启动后,随便访问一个页面,会看到输出:
执行过滤操作
Session 被创建
- 1
- 2
- 1
- 2
至于如何使用代码的方式注册Filter和Listener,请参考上一篇文章关键Servlet的介绍。不同的是需要使用 FilterRegistrationBean 和 ServletListenerRegistrationBean 这两个类。
最后上一张工程结构图:
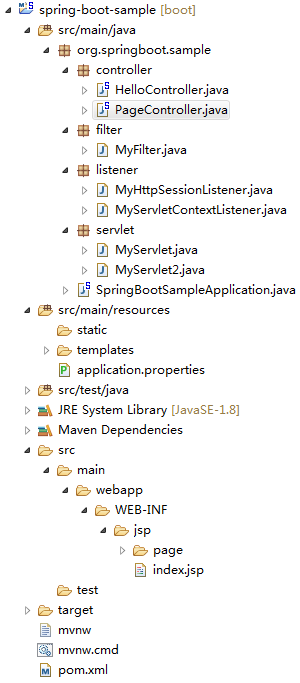
代码目前还没有一个警告 ^_^


 832
832

 被折叠的 条评论
为什么被折叠?
被折叠的 条评论
为什么被折叠?
 到【灌水乐园】发言


