


一、前言
在做性能测试,脚本的关联是一个比较棘手的问题,nGrinder 脚本是怎么关联,其实也是比较简单的,简单前提条件是自己具备一定的代码基础、http 协议、网络等基础知识,这样才能顺利开展工作。
二、什么是关联?
- 关联的目的是后面请求需要,如果不需要就不需要关联。
- 关联获取结果做断言
- 想了解更多、更详细关联知识请查找相关资料。
常见的获取请求结果方法有:
- 通过正则表达方式获取结果
- 通过 xpath 方式获取相关结果
- 通过 json 解析获取相关结果
在编写 nGrinder 脚本之前请学习下 groovy 语法这样方便写脚本,脚本编写建议在 idea 中上写脚本与调试脚本,这样有语法提示能很快写出脚本与调试脚本,写完脚本后直接复制到线上脚本中在微调验证就能使用。
三、如何编写脚本?
这里脚本编写与调试需要解析 JSON 所以需要引入 fastjson 包
仓库地址为:https://mvnrepository.com/artifact/com.alibaba/fastjson
1、线上直接写脚本
需要上传 jar 包,在脚本页面的脚本文件夹中新建 lib 文件夹,之后再 lib 文件中上传相关的jar包,如下图:

点击文件夹:

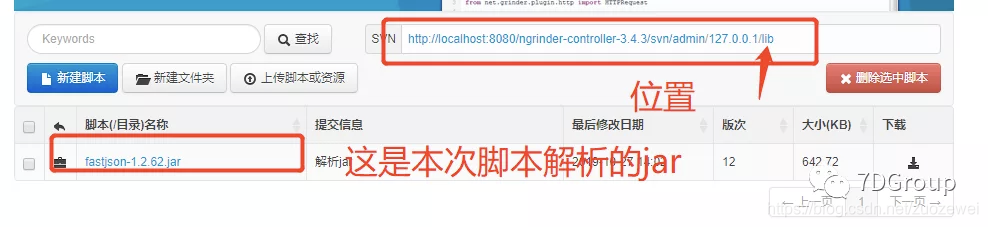
注意:
一定在脚本文件相关的地方新建 lib 文件夹,并且在 lib 下中上传 jar 包
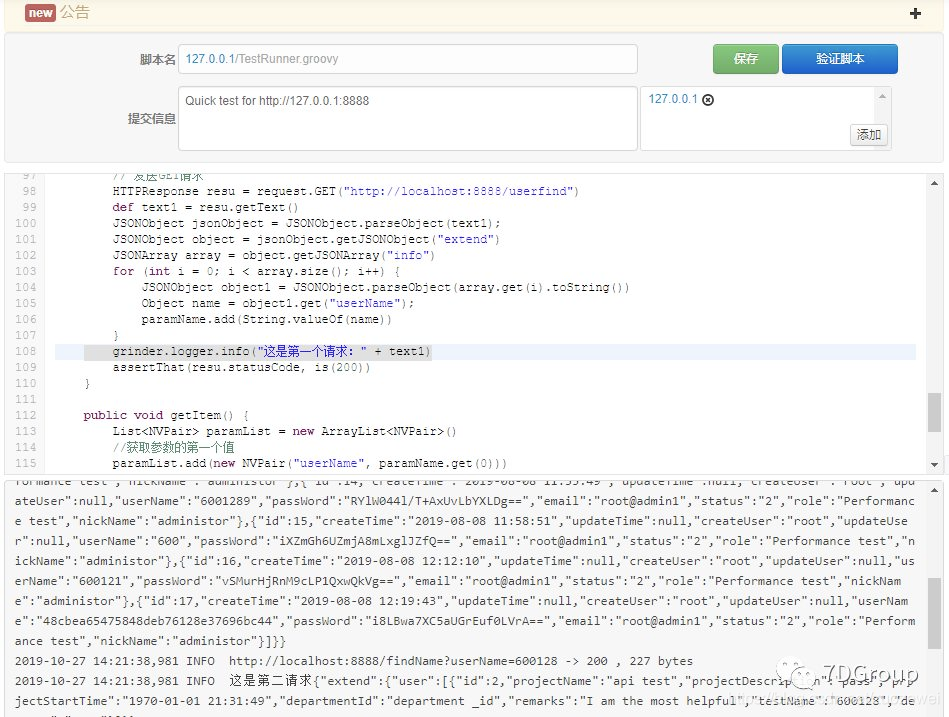
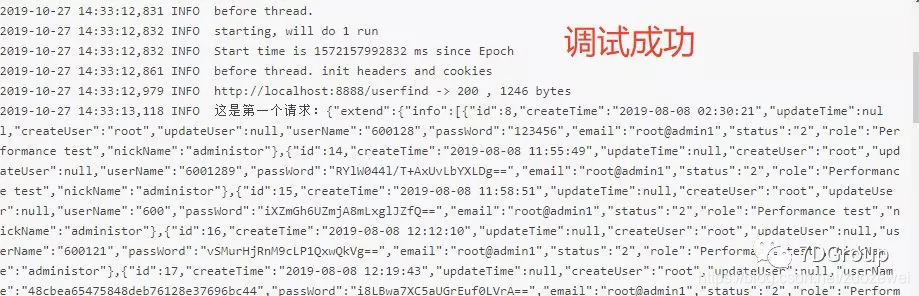
线上调试:
2、IDE 中写脚本
如果是 idea 中写代码与调试脚本,需要在脚本文件中新建 lib 文件夹之后在把 jar 包加入工程。
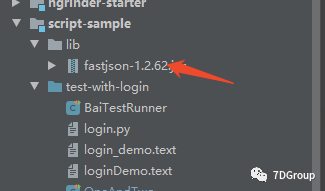
该工程下载后需要处理下才可以使用:
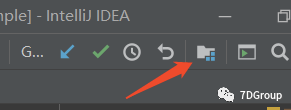
再次选择:

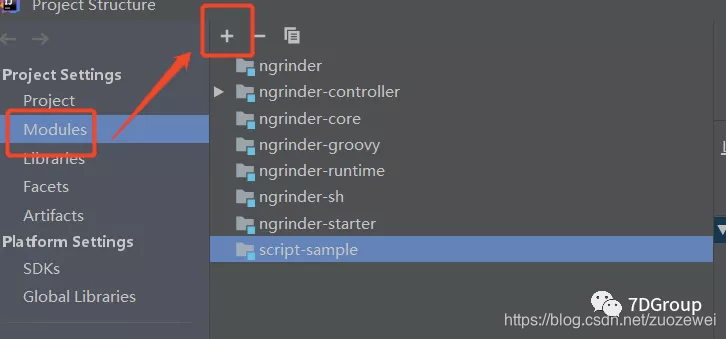
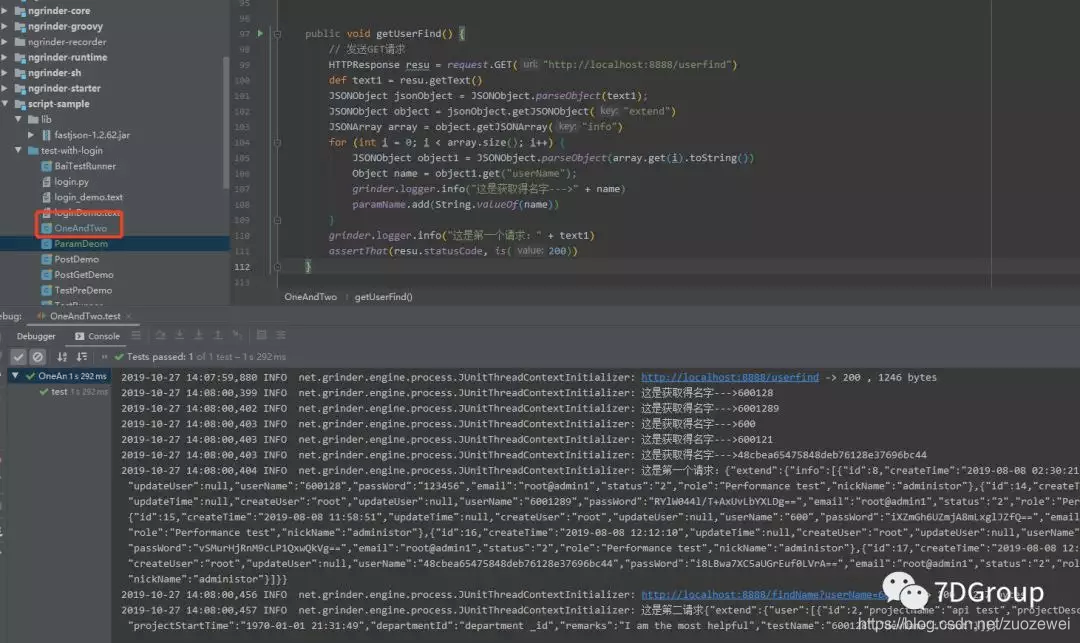
idea 中调试并且测试:
四、示例脚本
import HTTPClient.Cookie
import HTTPClient.CookieModule
import HTTPClient.HTTPResponse
import HTTPClient.NVPair
import com.alibaba.fastjson.JSON
import com.alibaba.fastjson.JSONArray
import groovy.json.JsonParser
import groovy.json.JsonSlurper
import net.grinder.plugin.http.HTTPPluginControl
import net.grinder.plugin.http.HTTPRequest
import net.grinder.script.GTest
import net.grinder.scriptengine.groovy.junit.GrinderRunner
import net.grinder.scriptengine.groovy.junit.annotation.BeforeProcess
import net.grinder.scriptengine.groovy.junit.annotation.BeforeThread
import org.junit.Before
import org.junit.Test
import org.junit.runner.RunWith
import com.alibaba.fastjson.JSONObject;
import com.alibaba.fastjson.JSON;

import static com.alibaba.fastjson.JSON.parse
import static net.grinder.script.Grinder.grinder
import static org.hamcrest.Matchers.is


// import static net.grinder.util.GrinderUtils.* // You can use this if you're using nGrinder after 3.2.3

import static org.junit.Assert.assertThat

/**
 * @Title: OneAndTwo
 * @author 7d
 * @date 2019/10/27 / 11:00
 */
@RunWith(GrinderRunner)
class OneAndTwo {

    public static GTest test
    // 定义 HTTPRequest 静态变量 request,用于发送 HTTP 请求
    public static HTTPRequest request
    // 定义 NVPair 数组 headers ,用于存放通用的请求头数据
    public static NVPair[] headers = []
    // 定义 NVPair 数组 params ,用于存放请求参数数据
    public static NVPair[] params = []
    // 定义 Cookie 数组 cookies ,用于存放通用的 cookie 数据
    public static Cookie[] cookies = []

    //存储第一个请求得参数
    def paramName = new ArrayList()


    @BeforeProcess
    public static void beforeProcess() {
        // 设置请求响应超时时间(ms)
        HTTPPluginControl.getConnectionDefaults().timeout = 6000
        // 创建GTest对象,第一个参数1代表有多个请求/事务时的执行顺序ID,
        // 第二个参数是请求/事务的名称,会显示在summary结果中,有多个请求/事务时,要创建多个GTest对象
        test = new GTest(1, "User_find_01")
        //创建 HTTPRequest 对象,用于发起 HTTP 请求
        request = new HTTPRequest()
        // Set header datas
        List<NVPair> headerList = new ArrayList<NVPair>()
        headerList.add(new NVPair("Content-Type", "application/x-www-form-urlencoded"))
        headerList.add(new NVPair("Connection", "keep-alive"))
        headers = headerList.toArray()
        // Set param datas

//        List<Cookie> cookieList = new ArrayList<Cookie>()
//        cookieList.add(new Cookie("Cookie", "null", "localhost:8888", "", new Date(), true))
//        cookies = cookieList.toArray()
        grinder.logger.info("before process.");

    }

    @BeforeThread
    public void beforeThread() {
//        注册事件,启动test,第二个参数要与@Test注解的方法名保持一致,有多个请求/事务时,要注册多个事件
        test.record(this, "test")

        //配置延迟报告统计结果
        grinder.statistics.delayReports = true;
        grinder.logger.info("before thread.");
    }

    @Before
    public void before() {
        //在这里可以添加headers属性和cookies
//        request.setHeaders(headers)
        cookies.each { CookieModule.addCookie(it, HTTPPluginControl.getThreadHTTPClientContext()) }
        grinder.logger.info("before thread. init headers and cookies");

    }

    @Test
    public void test() {
        getUserFind()
        getItem()
    }


    public void getUserFind() {
        // 发送GET请求
        HTTPResponse resu = request.GET("http://localhost:8888/userfind")
        def text1 = resu.getText()
        JSONObject jsonObject = JSONObject.parseObject(text1);
        JSONObject object = jsonObject.getJSONObject("extend")
        JSONArray array = object.getJSONArray("info")
        for (int i = 0; i < array.size(); i++) {
            JSONObject object1 = JSONObject.parseObject(array.get(i).toString())
            Object name = object1.get("userName");
            grinder.logger.info("这是获取得名字--->" + name)
            paramName.add(String.valueOf(name))
        }
        grinder.logger.info("这是第一个请求:" + text1)
        assertThat(resu.statusCode, is(200))
    }

    public void getItem() {
        List<NVPair> paramList = new ArrayList<NVPair>()
        //获取参数的第一个值
        paramList.add(new NVPair("userName", paramName.get(0)))
        params = paramList.toArray()
        // Set cookie datas
        HTTPResponse result = request.GET("http://localhost:8888/findName", params)
        def text = result.getText()

        grinder.logger.info("这是第二请求" + text)
        // 断言HTTP请求状态码
        assertThat(result.statusCode, is(200))
    }
}
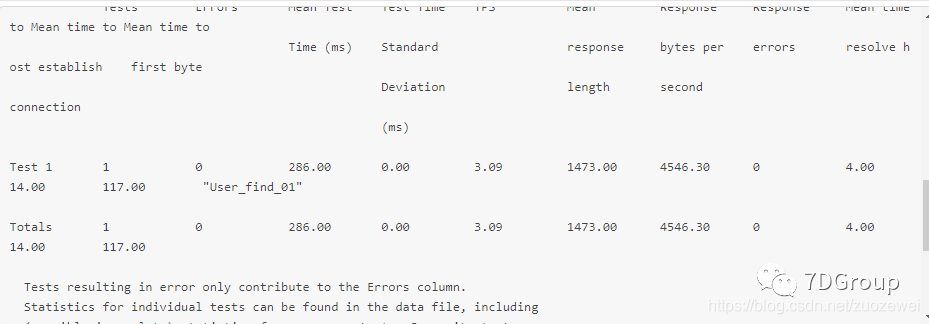
测试结果显示:
源码地址:
- https://github.com/zuozewei/blog-example/blob/master/Performance-testing/01-test-tool/nGrinder/nGrinder-demo/script-sample/test-with-login/OneAndTwo.groovy
相关系列:


 697
697


 被折叠的 条评论
为什么被折叠?
被折叠的 条评论
为什么被折叠?
 到【灌水乐园】发言


