


在iOS开发中, 为了使项目看起来更美观, 或者对图片做一些特殊处理, 经常会用到模糊视图效果, 下面就简要的说一说iOS开发中模糊视图效果的使用.
CoreImage中的模糊滤镜
直接上代码
#import "ViewController.h"
@interface ViewController ()
@end
@implementation ViewController
- (void)viewDidLoad {
[super viewDidLoad];
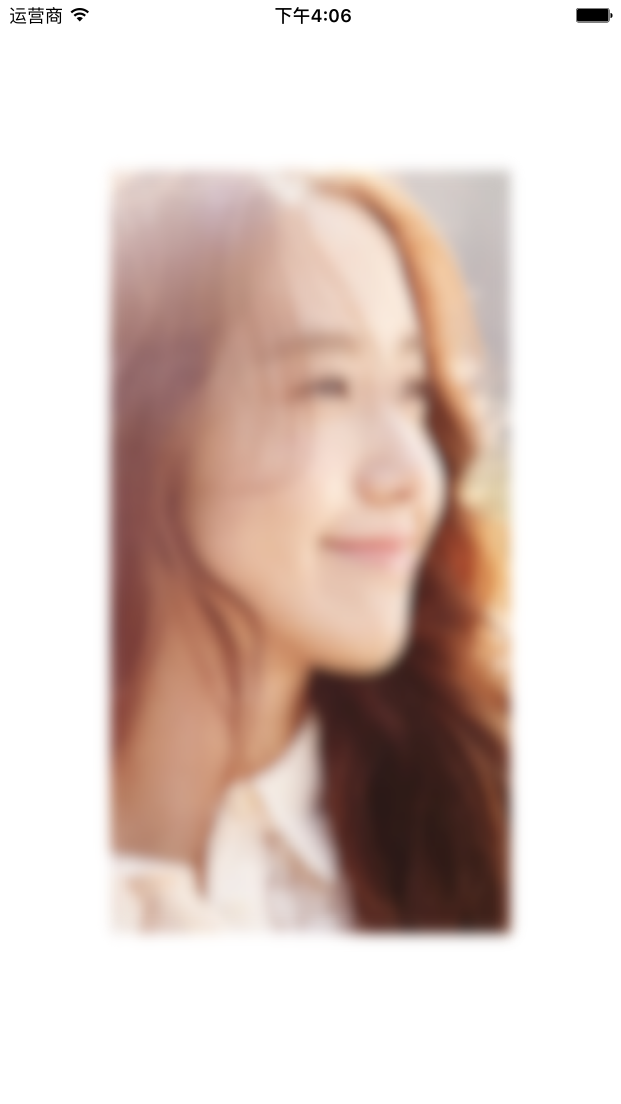
// 原始图片
UIImage *image = [UIImage imageNamed:@"picture6.jpg"];
// 第一种方法
/*---------------coreImage-------------*/
// CIImage
CIImage *ciImage = [[CIImage alloc] initWithImage:image];
// CIFilter,高斯模糊
CIFilter *blurFilter = [CIFilter filterWithName:@"CIGaussianBlur"];
// 将图片输入到滤镜中
[blurFilter setValue:ciImage forKey:kCIInputImageKey];
// 设置模糊程度
[blurFilter setValue:@(10) forKey:@"inputRadius"];
// 用来查询滤镜可以设置的参数以及一些相关的信息
NSLog(@"%@", [blurFilter attributes]);
// 将处理好的图片输出
CIImage *outCIImage = [blurFilter valueForKey:kCIOutputImageKey];
// CIContext
CIContext *context = [CIContext contextWithOptions:nil];
// 获取CGImage句柄
CGImageRef outCGImage = [context createCGImage:outCIImage fromRect:[outCIImage extent]];
// 最终获取到图片
UIImage *blurImage = [UIImage imageWithCGImage:outCGImage];
// 释放CGImage句柄
CGImageRelease(outCGImage);
/*-----------------------------------------------------*/
// 初始化UIImageView
UIImageView *imageV = [[UIImageView alloc] initWithFrame:(CGRectMake(0, 0, 640 / 2.f, 1132 / 2.f))];
imageV.image = blurImage;
imageV.center = self.view.center;
[self.view addSubview:imageV];
}
@end
效果图如下:
UIImage + ImageEffects的category模糊效果
这种模糊效果是利用第三方已经封装好的方法进行视图的模糊,第三方是基于Accelerate框架, 功能非常强大, 更多的是对工程中图形精细的要求, 内部实现结合了大量的运算, 当然我们使用起来非常简单
#import "ViewController.h"
#import "UIImage+ImageEffects.h"

@interface ViewController ()

@end

@implementation ViewController

- (void)viewDidLoad {
    [super viewDidLoad];

    //在这里我们用到一个第三方, 地址https://github.com/YouXianMing/UIImageBlur

    // 设置原始图片
    UIImage *sourceImage = [UIImage imageNamed:@"picture2.jpg"];

    // 对图片进行模糊, 在子线程中进行渲染
    dispatch_async(dispatch_get_global_queue(DISPATCH_QUEUE_PRIORITY_HIGH, 0), ^{

       // 渲染模糊效果, 在这里我们可以控制模糊效果的大小
        UIImage *blurImage = [sourceImage blurImageAtFrame:CGRectMake(0, 0, sourceImage.size.width, sourceImage.size.height / 2)];
        dispatch_async(dispatch_get_main_queue(), ^{

            // 在主线程中加载图片
            UIImageView *imageV = [[UIImageView alloc] initWithImage:blurImage];
            imageV.frame = self.view.frame;
            [self.view addSubview:imageV];
        });

    });
}

@end
效果图

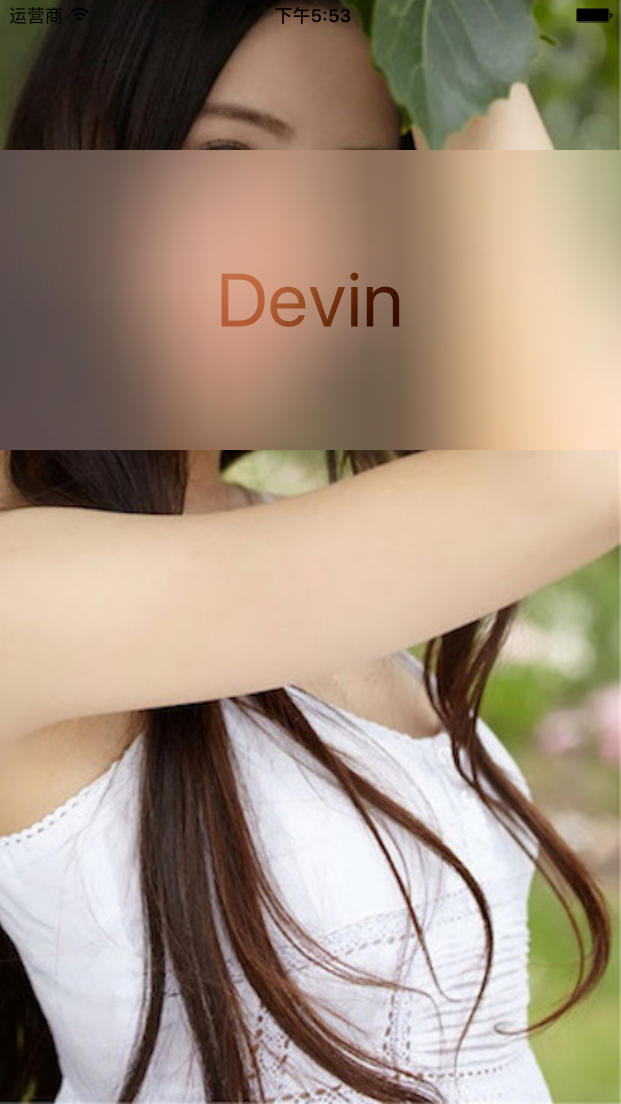
UIVisualEffectView模糊效果
UIVisualEffectView是iOS8中出现的新特性,使用简单
下面用代码来演示
#import "ViewController.h"

@interface ViewController ()

@property (nonatomic, strong) UIScrollView *scrollView;

@end

@implementation ViewController

- (void)viewDidLoad {
    [super viewDidLoad];

    // 添加展示背景,用以显示动态模糊
    self.scrollView = [[UIScrollView alloc] initWithFrame:self.view.bounds];
    UIImageView *imageV = [[UIImageView alloc] initWithImage:[UIImage imageNamed:@"picture17.jpg"]];
    self.scrollView.contentSize = imageV.image.size;
    self.scrollView.bounces = NO;
    [self.scrollView addSubview:imageV];
    [self.view addSubview:self.scrollView];


    /* ---------------添加模糊效果-------------- */
    // 1.创建模糊view
    UIVisualEffectView *effectView = [[UIVisualEffectView alloc] initWithEffect:[UIBlurEffect effectWithStyle:(UIBlurEffectStyleLight)]];

    // 2.设定尺寸
    effectView.frame = CGRectMake(0, 100, self.view.bounds.size.width, 200);

    // 3.添加到view当中
    [self.view addSubview:effectView];


    // 在模糊视图上添加一个显示文本
    UILabel *label = [[UILabel alloc] initWithFrame:effectView.bounds];
    label.text = @"Devin";
    label.font = [UIFont systemFontOfSize:50.f];
    label.textAlignment = NSTextAlignmentCenter;
    // 如果只是这样把label添加到模糊视图上,效果并不是很好,所以可以选用下面的方法进行改变
//    [effectView addSubview:label];


    /*-------添加模糊子View的UIVisualEffectView-------*/

    // 创建出子模糊View, 注意这里和上面不一样
    UIVisualEffectView *subEffectView = [[UIVisualEffectView alloc] initWithEffect:[UIVibrancyEffect effectForBlurEffect:(UIBlurEffect *)effectView.effect]];
    subEffectView.frame = effectView.bounds;

    // 将子模糊view添加到effectView的contentView才能生效
    [effectView.contentView addSubview:subEffectView];

    // 再把要显示特效的控件添加到子模糊view上
    [subEffectView.contentView addSubview:label];

}

@end
效果图如下:
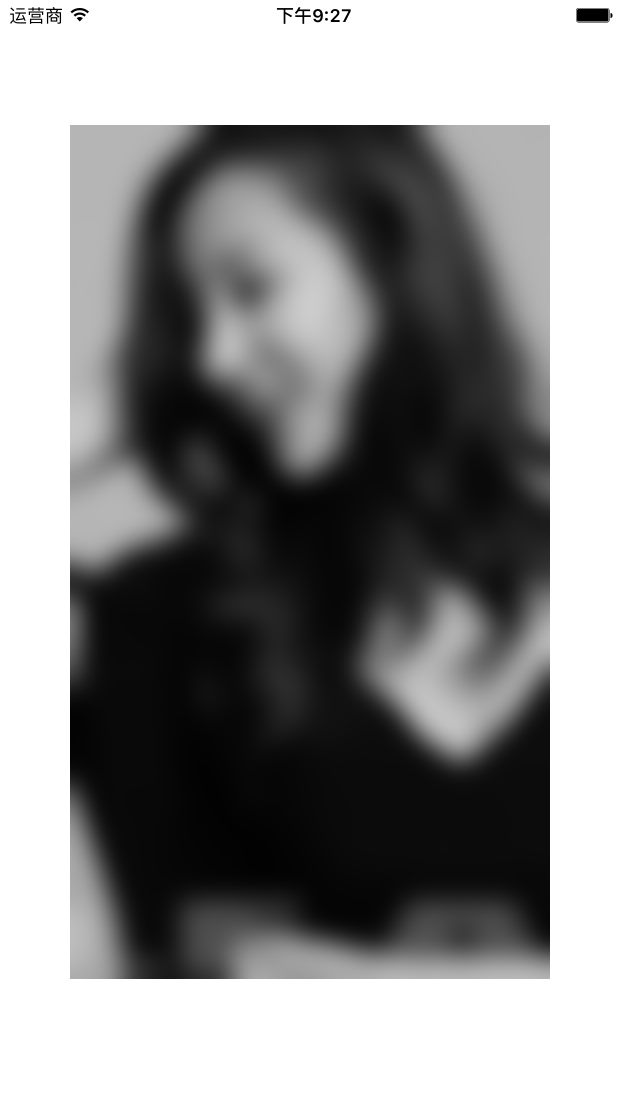
设计下载图片后自动模糊的控件
这里我们利用网上下载的图片进行封装模糊效果,首先导入两个第三方库,上面已经用过一个,第二个是GCD的三方库,地址如下:
下载第三方类库
https://github.com/YouXianMing/UIImageBlur
https://github.com/YouXianMing/GCD-Program
首先我们新建一个类, 在.h文件中的代码如下
#import <UIKit/UIKit.h>

@interface BlurDownloadPicView : UIView

@property (nonatomic, strong) NSString *pictureUrlString; // 图片下载地址
@property (nonatomic, assign) UIViewContentMode contentMode; // 图片显示的方式

// 开始执行
- (void)startProgress;


@end
在.m中的代码如下:
#import "BlurDownloadPicView.h"
#import "UIImage+ImageEffects.h"
#import "GCD.h"

@interface BlurDownloadPicView ()

@property (nonatomic, strong) UIImageView *imageV;

@end

@implementation BlurDownloadPicView

- (instancetype)initWithFrame:(CGRect)frame{
    self = [super initWithFrame:frame];
    if (self) {

        // 初始化控件
        self.imageV = [[UIImageView alloc] initWithFrame:self.bounds];
        self.imageV.alpha = 0.f;
        [self addSubview:self.imageV];
    }
    return self;
}

- (void)startProgress{

    if (self.pictureUrlString) {

        [GCDQueue executeInGlobalQueue:^{

            // 创建请求
            NSURLRequest *request = [NSURLRequest requestWithURL:[NSURL URLWithString:self.pictureUrlString]];

            // 因为是同步请求,会阻塞主线程(mainQueue)
            NSData *data = [NSURLConnection sendSynchronousRequest:request returningResponse:nil error:nil];

            // 获取图片
            UIImage *image = [[UIImage alloc] initWithData:data];

            // 对图片进行模糊, 会阻塞主线程(mainQueue)
            UIImage *blurImage = [image blurImageWithRadius:10];

            [GCDQueue executeInMainQueue:^{

                // 加载图片
                self.imageV.image = blurImage;

                [UIView animateWithDuration:1.f animations:^{

                    self.imageV.alpha = 1.f;
                }];
            }];
        }];
    }
}

@synthesize contentMode = _contentMode;
- (void)setContentMode:(UIViewContentMode)contentMode{
    _contentMode = contentMode;
    self.imageV.contentMode = contentMode;
}
- (UIViewContentMode)contentMode{
    return _contentMode;
}


@end
这样就封装好了一个类, 然后我们在viewDidLoad里面就可以直接调用了
在ViewController里的代码如下
#import "ViewController.h"
#import "BlurDownloadPicView.h"

@interface ViewController ()

@end

@implementation ViewController

- (void)viewDidLoad {
    [super viewDidLoad];


    NSString *picUrlString = @"http://d.3987.com/ydxxs_140127/004.jpg";


    BlurDownloadPicView *blurDownloadView = [[BlurDownloadPicView alloc] initWithFrame:(CGRectMake(0, 0, 320, 400))];

    blurDownloadView.center = self.view.center;
    blurDownloadView.pictureUrlString = picUrlString;
    // 避免图片的失真,调用下面方法
    blurDownloadView.contentMode = UIViewContentModeScaleAspectFill;
    [blurDownloadView startProgress];


    [self.view addSubview:blurDownloadView];

}

@end
这样就成功了封装了一个网络下载图片自动模糊的效果, 效果如下
关于模糊效果可能还有其他的方法,写的不全还请见谅


 650
650

 被折叠的 条评论
为什么被折叠?
被折叠的 条评论
为什么被折叠?
 到【灌水乐园】发言


