摘记项目的一些片段来品味一下,都是一些值得背下来的基本用法
// i.putExtra("course",course); 则直接讲course对象小包序列化取出
     course= getIntent().getParcelableExtra("course");
FragmentManager fm = getFragmentManager();
        FragmentTransaction ft = fm.beginTransaction();
        if(planCate == 1){
            tvLeft.setText(getString(R.string.plan_week_plan));
            //直接把layout里的空白的FrameLayout给替换掉
            // 考虑到week_plan和course_table的高度相似性
            FgtPlanWeek weekPlanFragment = new FgtPlanWeek();
            ft.replace(R.id.plan_content_frame,weekPlanFragment).commit();
        } else if (planCate == 2){
            tvLeft.setText(getString(R.string.plan_course_table));
            FgtPlanCourseTable courseFragment = new FgtPlanCourseTable();
            ft.replace(R.id.plan_content_frame,courseFragment).commit();
        }
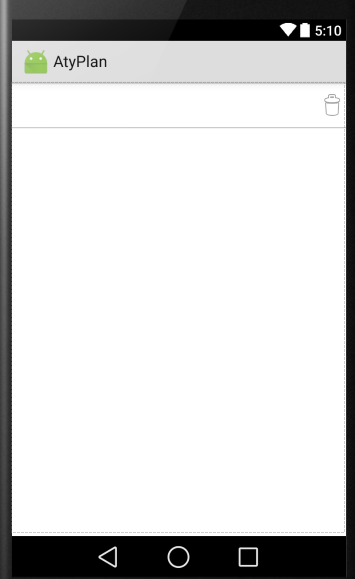
附上plan的layout和截图一张(可以看到基本是空白的)
<FrameLayout
        android:layout_width="fill_parent"
        android:layout_height="50dp">
        <TextView
            android:layout_width="wrap_content"
            android:layout_height="fill_parent"
            android:id="@+id/plan_textview_left"
            android:layout_gravity="start"
            android:textSize="30sp"
            android:gravity="center_vertical"/>
        <ImageView
            android:layout_width="wrap_content"
            android:layout_height="wrap_content"
            android:src="@android:drawable/ic_menu_delete"
            android:layout_gravity="end|center_vertical"/>
    </FrameLayout>
    <View
        android:layout_width="fill_parent"
        android:layout_height="1dp"
        android:background="#ffb0b0b0"/>

    <FrameLayout
        android:layout_width="fill_parent"
        android:layout_height="fill_parent"
        android:id="@+id/plan_content_frame"/>
 @Override
    public View getChildView(final int groupPosition, final int childPosition,
                             boolean isLastChild, View convertView, ViewGroup parent) {
        TextView myText;
        if (convertView == null) {
            convertView = LayoutInflater.from(context).inflate(R.layout.plan_child, parent, false);
        }
        myText = (TextView) convertView.findViewById(R.id.plan_child_text);
        lesson = getChild(groupPosition, childPosition);
        myText.setText(lesson.getTitle());
        ImageView iv = (ImageView) convertView.findViewById(R.id.plan_child_indicator);
        if (lesson.isLearned()) {
            iv.setImageResource(R.drawable.lesson_completed);
        } else {
            iv.setImageResource(R.drawable.lesson_uncompleted);
        }
        loadingButton = (LoadingButton) convertView.findViewById(R.id.plan_child_load_video);

       """ //when scroll ListView the ChildView will reuse/create/destroy ,so we need bind
        AtyPlan.setLoadingButton(loadingButton, course, lesson, context);
        //这个方法将按钮、按钮对应的课程进行绑定
        return convertView;"""
    }
3、关于DrawerLayout的使用
DrawerLayout是android自带的抽屉控件,可实现抽屉的效果,但确实直接覆盖在主界面上的,其实最好的抽屉效果应该是像手机QQ那样有一个拉开的效果的(猜测是需要继承Drawerlayout再重写一些方法),具体的不同朋友们可以试试手机QQ和知乎的主页面的不同就知道了,具体的实现效果Google一下吧~~


 1399
1399


 被折叠的 条评论
为什么被折叠?


