


本文基于TestDevTalk的文章,原文是基于AS旧版本的,现基于最新AS 2.1.3 功能进行了一些修改。原文地址:http://www.jianshu.com/p/03118c11c199
掌握科学上网方法的同学,也可以看英文原文 https://io2015codelabs.appspot.com/codelabs/android-studio-testing#1 。
1.概述
在这个codelab中,你将学习如何在Android Studio中配置工程用于测试,在开发机器上编写并运行单元测试,以及如何在手机上做功能UI测试。
你会学到什么
- 更新包含JUnit和Android Testing Support Library的Gradle构建文件
- 编写运行在本机Java虚拟机上的单元测试
- 编写运行在手机或者虚拟机上的Espresso测试
你需要什么
- Android Studio v2.0+
- Android 4.0+的测试设备
2.创建新的Android Studio工程
看这篇文章的默认已经掌握android基本技能,创建工程方法不再赘述。当然为了与demo中的类名包名一致,强烈建议应用名Application Name改为TestingExample,Company demain改为testing.example.com,然后其它都不改一路next到finish。
3.配置支持单元测试的工程
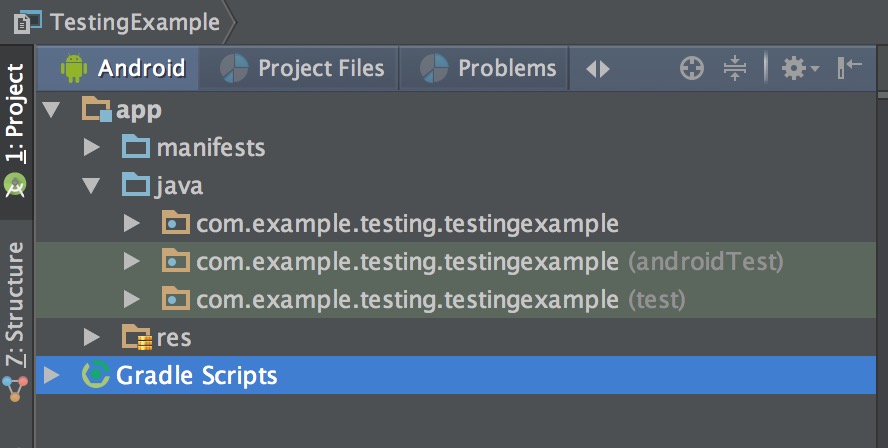
AS 2.0以上默认就开启了单元测试。我们可以看到文件目录结构是这样的。
build.gradle下面的依赖也自动添加了。

4.创建第一个单元测试
现在,万事俱备,让我们开始写第一个测试吧。首先,创建一个非常简单的被测类:Calculator类。
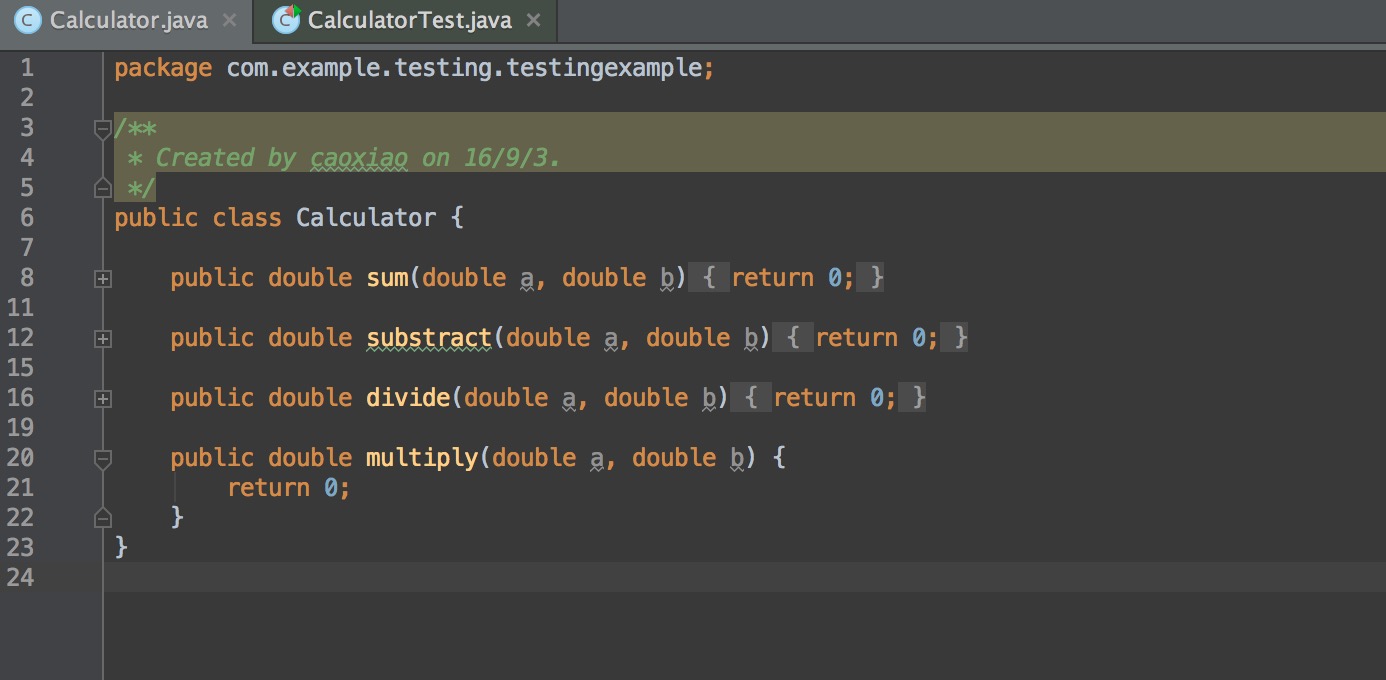
上代码,返回值先全部给0.
package com.example.testing.testingexample;

public class Calculator {

    public double sum(double a, double b){
        return 0;
    }

    public double substract(double a, double b){
        return 0;
    }

    public double divide(double a, double b){
        return 0;
    }

    public double multiply(double a, double b){
        return 0;
    }
}
在Calculator类名上右键创建Test
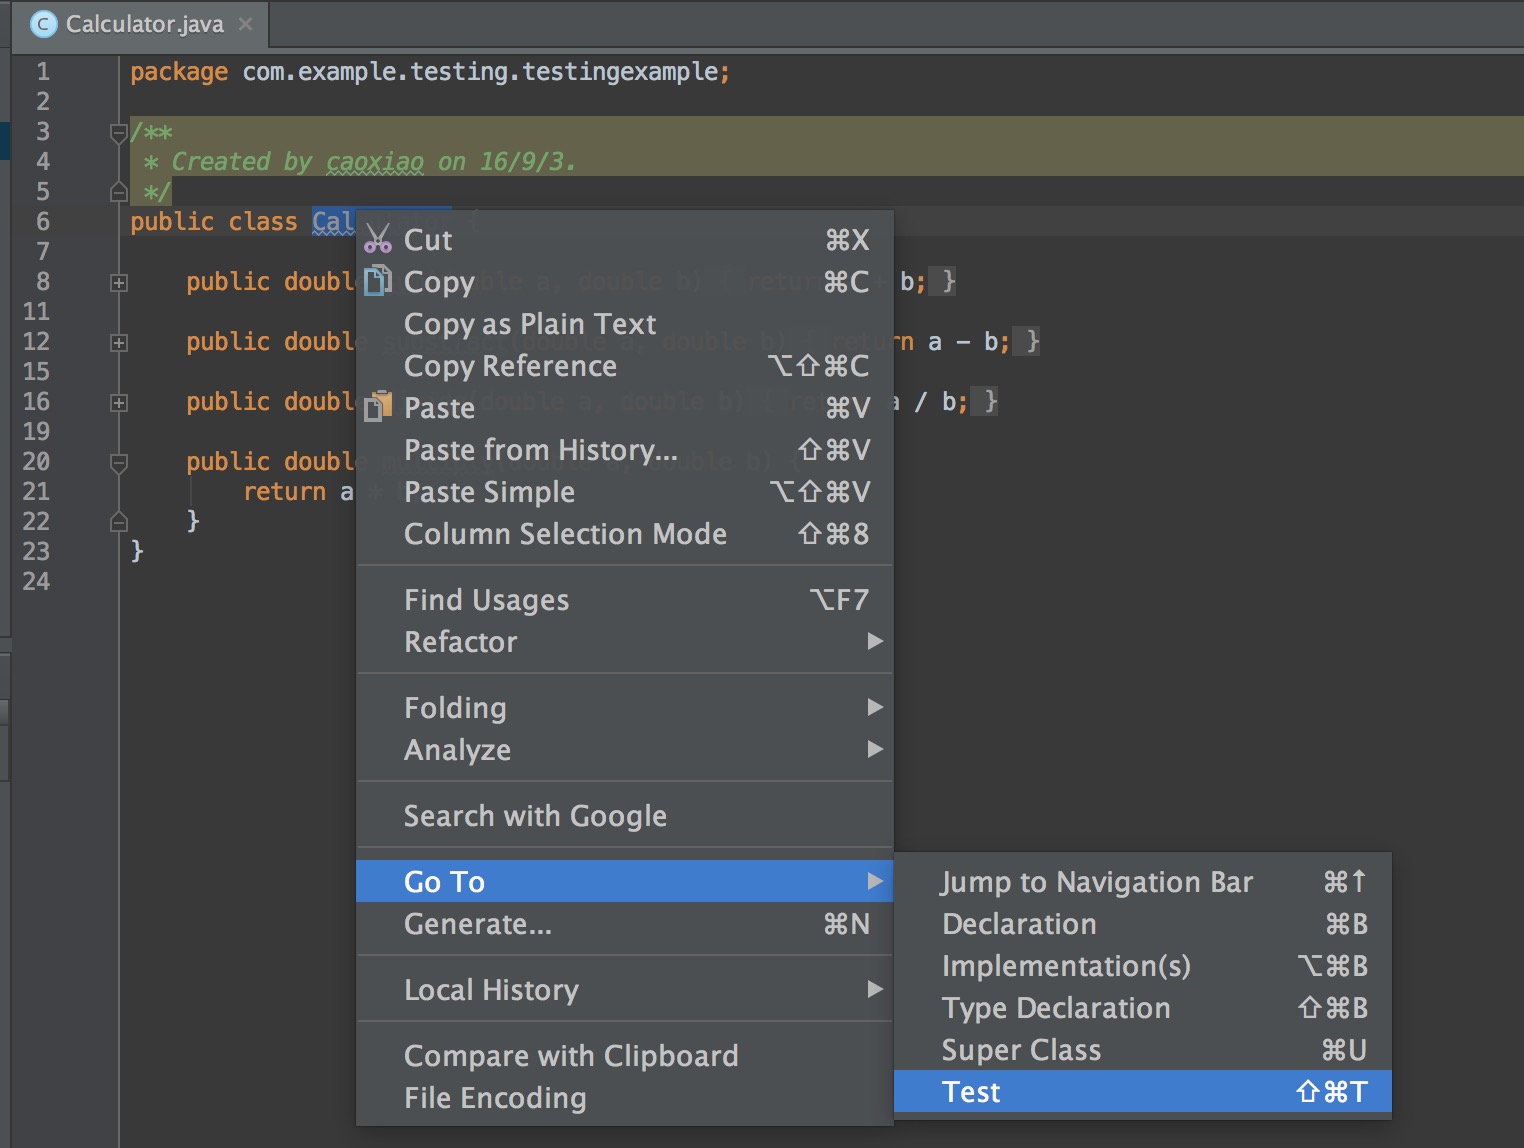
在打开的对话窗口中,选择JUnit4和”setUp/@Before”,同时为所有的计算器运算生成测试方法。
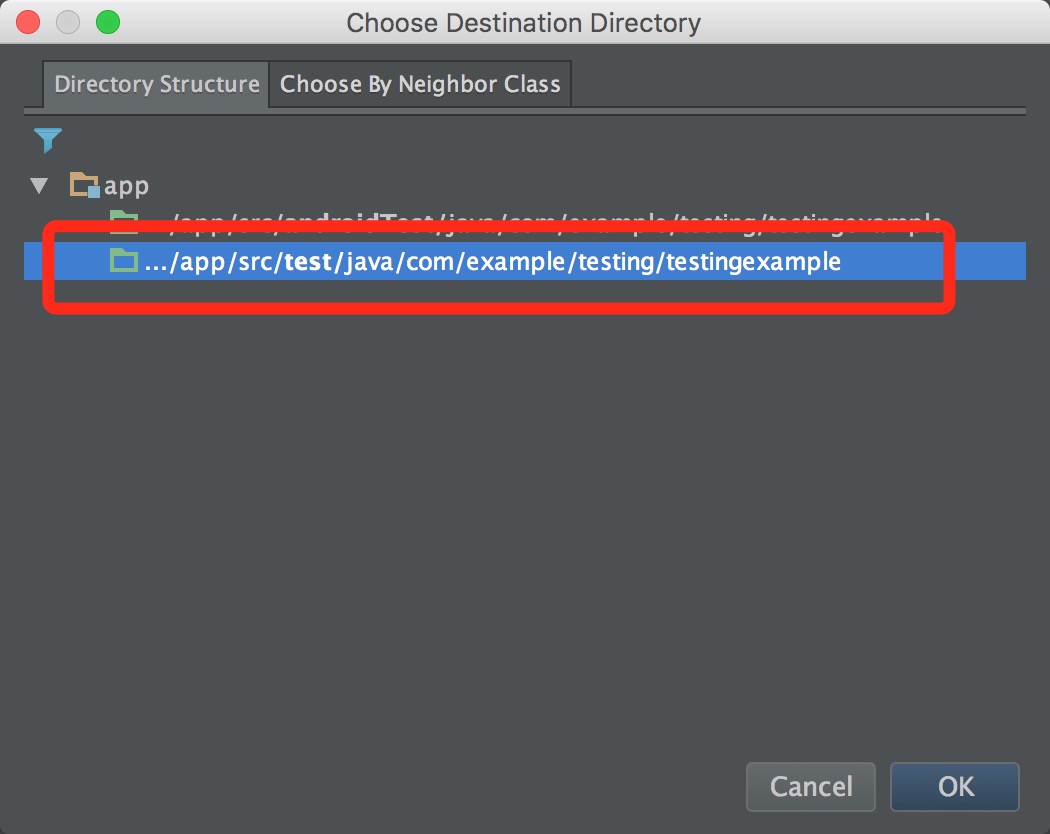
最后点击OK,生成测试类。修改CalculatorTest测试类。
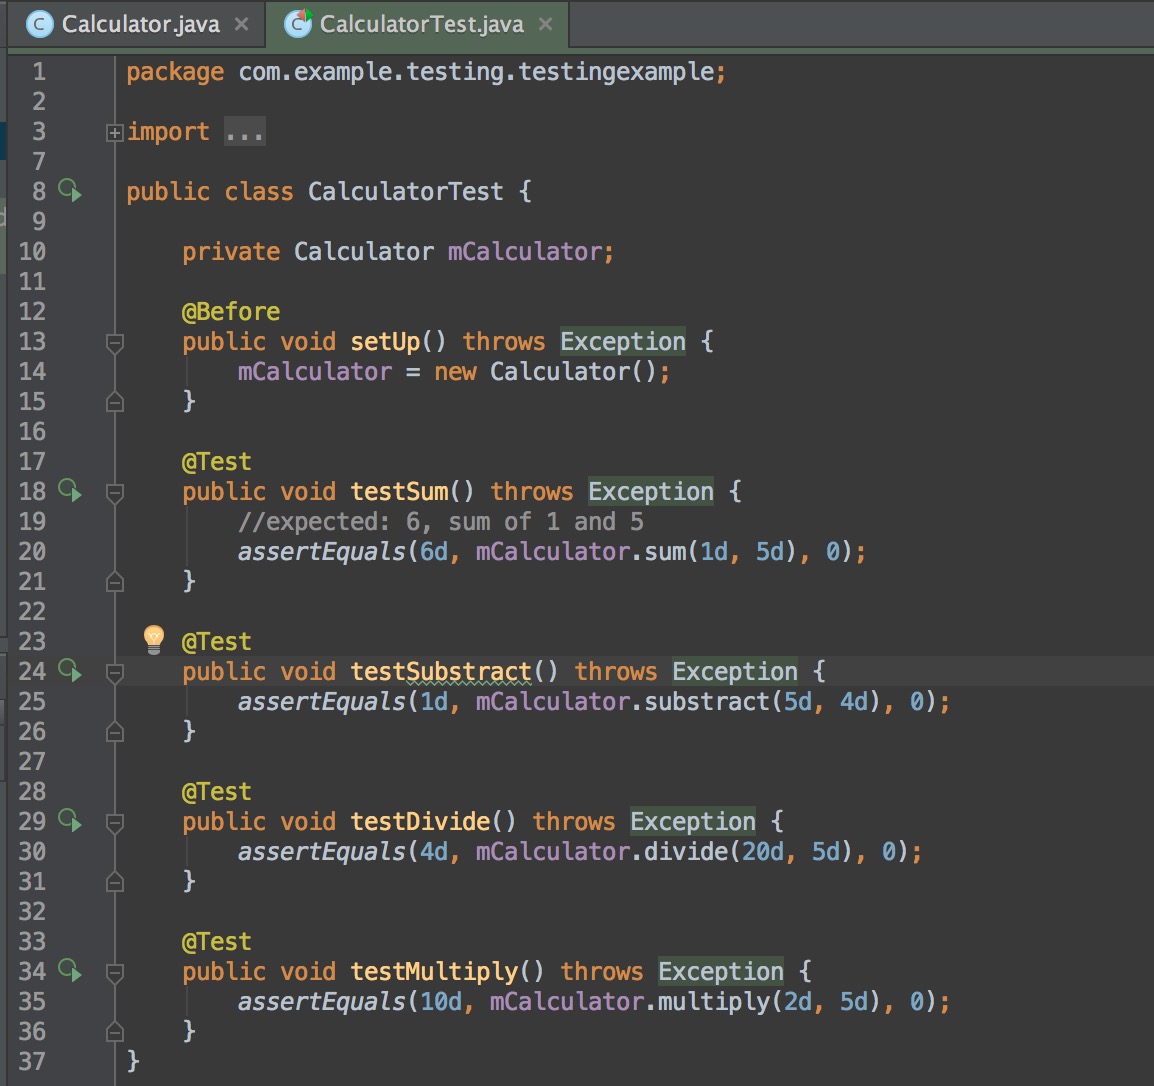
package com.example.testing.testingexample;

import org.junit.Before;
import org.junit.Test;

import static org.junit.Assert.*;

public class CalculatorTest {

    private Calculator mCalculator;

    @Before
    public void setUp() throws Exception {
        mCalculator = new Calculator();
    }

    @Test
    public void testSum() throws Exception {
        //expected: 6, sum of 1 and 5
        assertEquals(6d, mCalculator.sum(1d, 5d), 0);
    }

    @Test
    public void testSubstract() throws Exception {
        assertEquals(1d, mCalculator.substract(5d, 4d), 0);
    }

    @Test
    public void testDivide() throws Exception {
        assertEquals(4d, mCalculator.divide(20d, 5d), 0);
    }

    @Test
    public void testMultiply() throws Exception {
        assertEquals(10d, mCalculator.multiply(2d, 5d), 0);
    }
}
5.运行单元测试
终于到运行测试的时候了!右键点击CalculatorTest类,选择Run > CalculatorTest。也可以通过命令行运行测试,在工程目录内输入:
./gradlew test无论如何运行测试,都应该看到输出显示4个测试都失败了。这是预期的结果,因为我们还没有实现运算操作。
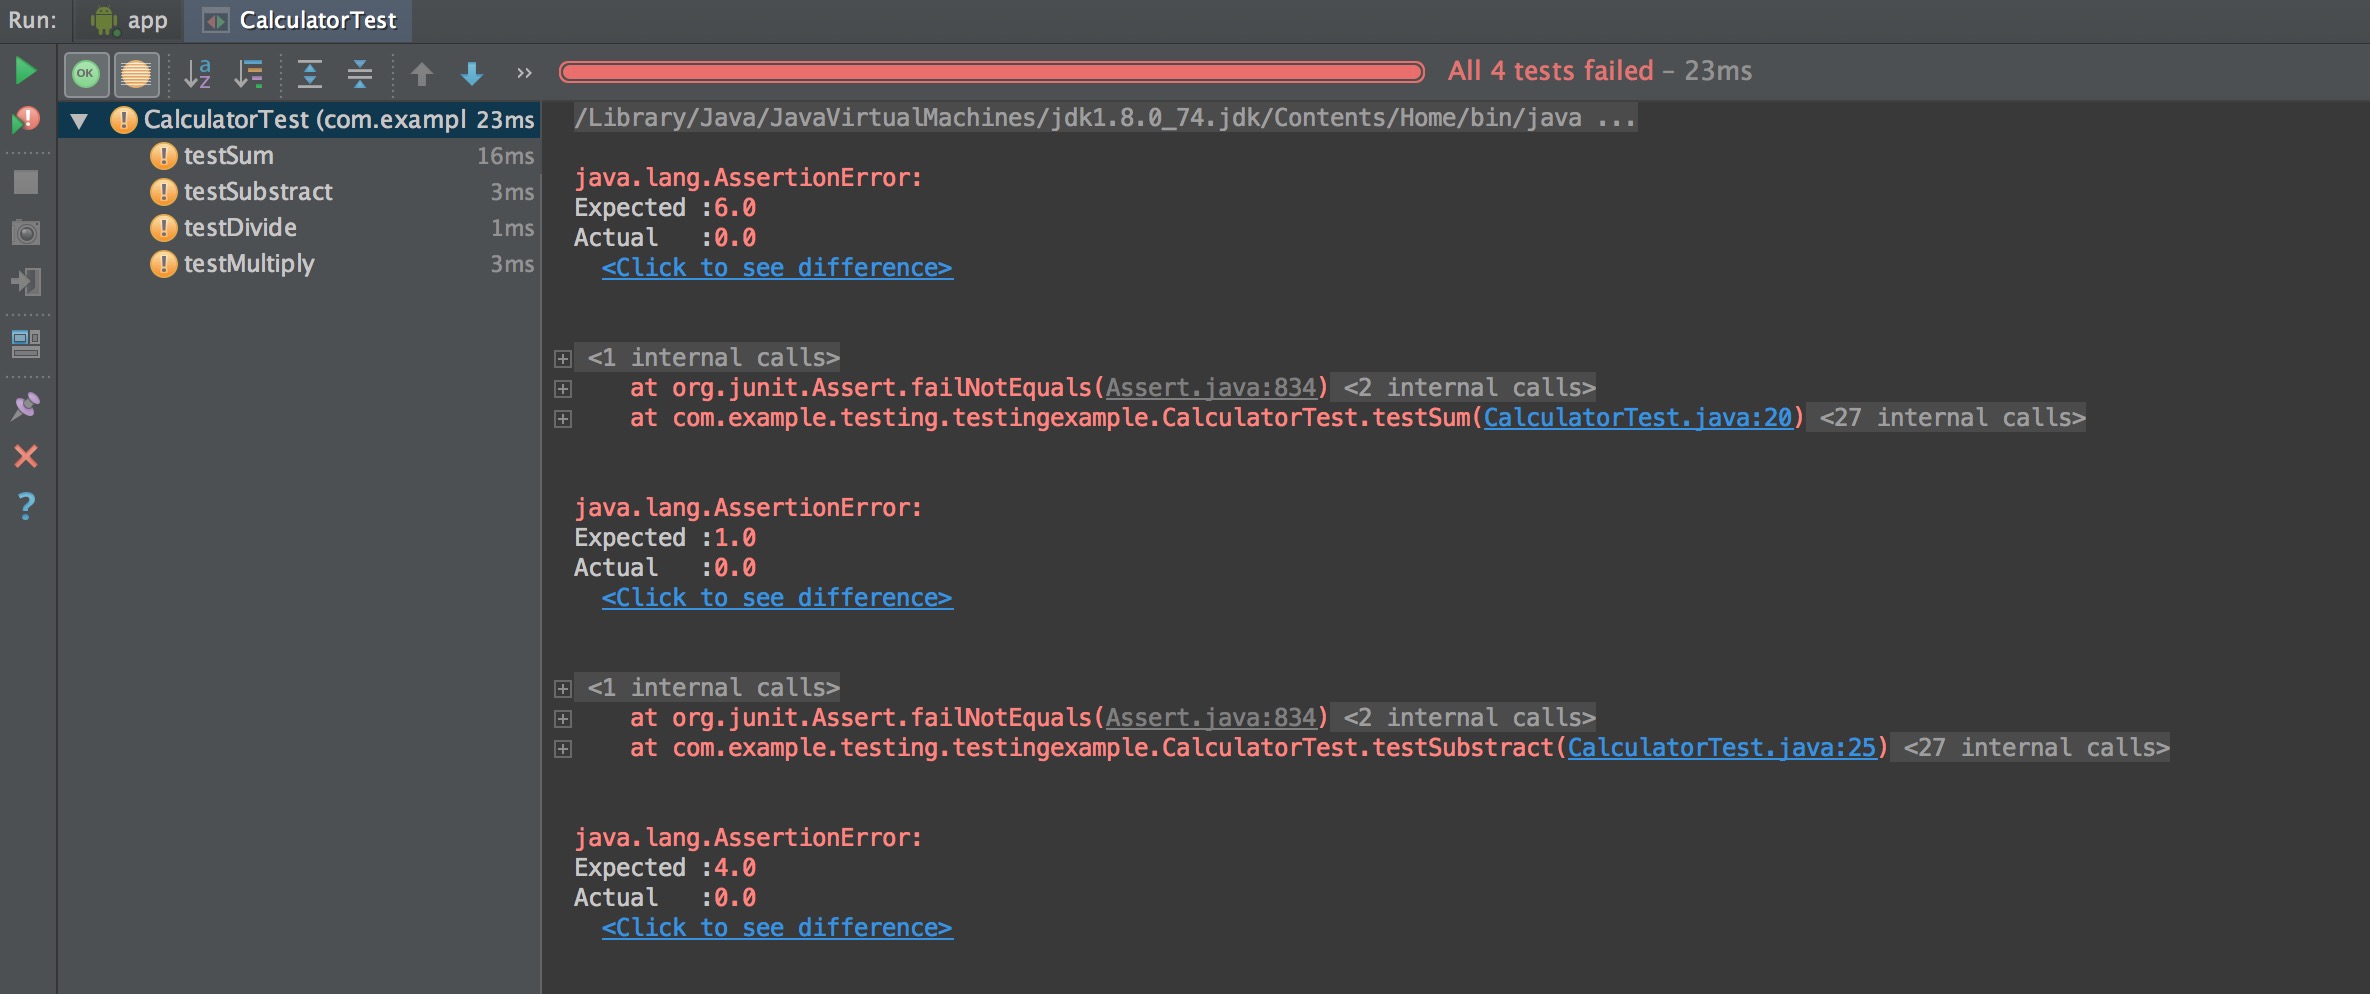
而且给了错误原因,例如期望值是6.0,实际得到0.0。我们修改一下Calculator类方法的实现。
package com.example.testing.testingexample;

public class Calculator {

    public double sum(double a, double b) {
        return a + b;
    }

    public double substract(double a, double b) {
        return a - b;
    }

    public double divide(double a, double b) {
        return a / b;
    }

    public double multiply(double a, double b) {
        return a * b;
    }
}

现在测试全部通过了。
6.配置支持Instrumentation测试的工程
配置build.gradle,然后立即同步一次。
apply plugin: 'com.android.application'

android {
    compileSdkVersion 22
    buildToolsVersion "22.0.1"//版本需要是22.0.1不然会冲突

    defaultConfig {
        applicationId "com.example.testing.testingexample"
        minSdkVersion 15
        targetSdkVersion 22
        versionCode 1
        versionName "1.0"

        //手动添加:
        testInstrumentationRunner "android.support.test.runner.AndroidJUnitRunner"
    }
    buildTypes {
        release {
            minifyEnabled false
            proguardFiles getDefaultProguardFile('proguard-android.txt'), 'proguard-rules.pro'
        }
    }

    //手动添加:
    packagingOptions {
        exclude 'LICENSE.txt'
    }
}

dependencies {
    compile fileTree(dir: 'libs', include: ['*.jar'])
    testCompile 'junit:junit:4.12'
    compile 'com.android.support:appcompat-v7:22.0.0'
    //手动添加:
    androidTestCompile 'com.android.support.test:runner:0.2'
    androidTestCompile 'com.android.support.test:rules:0.2'
    androidTestCompile 'com.android.support.test.espresso:espresso-core:2.1'
}
7.为app添加简单的交互
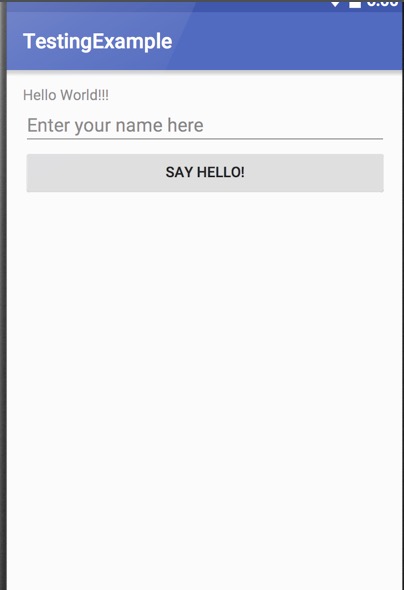
修改activity_main.xml
<RelativeLayout xmlns:android="http://schemas.android.com/apk/res/android"
    xmlns:tools="http://schemas.android.com/tools"
    android:layout_width="match_parent"
    android:layout_height="match_parent"
    android:paddingBottom="@dimen/activity_vertical_margin"
    android:paddingLeft="@dimen/activity_horizontal_margin"
    android:paddingRight="@dimen/activity_horizontal_margin"
    android:paddingTop="@dimen/activity_vertical_margin"
    tools:context=".MainActivity">

    <TextView
        android:id="@+id/textView"
        android:layout_width="wrap_content"
        android:layout_height="wrap_content"
        android:text="Hello World!!!" />

    <EditText
        android:id="@+id/editText"
        android:layout_width="match_parent"
        android:layout_height="wrap_content"
        android:layout_below="@+id/textView"
        android:hint="Enter your name here" />

    <Button
        android:layout_width="match_parent"
        android:layout_height="wrap_content"
        android:layout_below="@+id/editText"
        android:onClick="sayHello"
        android:text="Say hello!" />
</RelativeLayout>
效果如图
修改MainActivity.java
package com.example.testing.testingexample;
import android.app.Activity;
import android.os.Bundle;
import android.view.View;
import android.widget.EditText;
import android.widget.TextView;
public class MainActivity extends Activity {
@Override
protected void onCreate(Bundle savedInstanceState) {
super.onCreate(savedInstanceState);
setContentView(R.layout.activity_main);
}
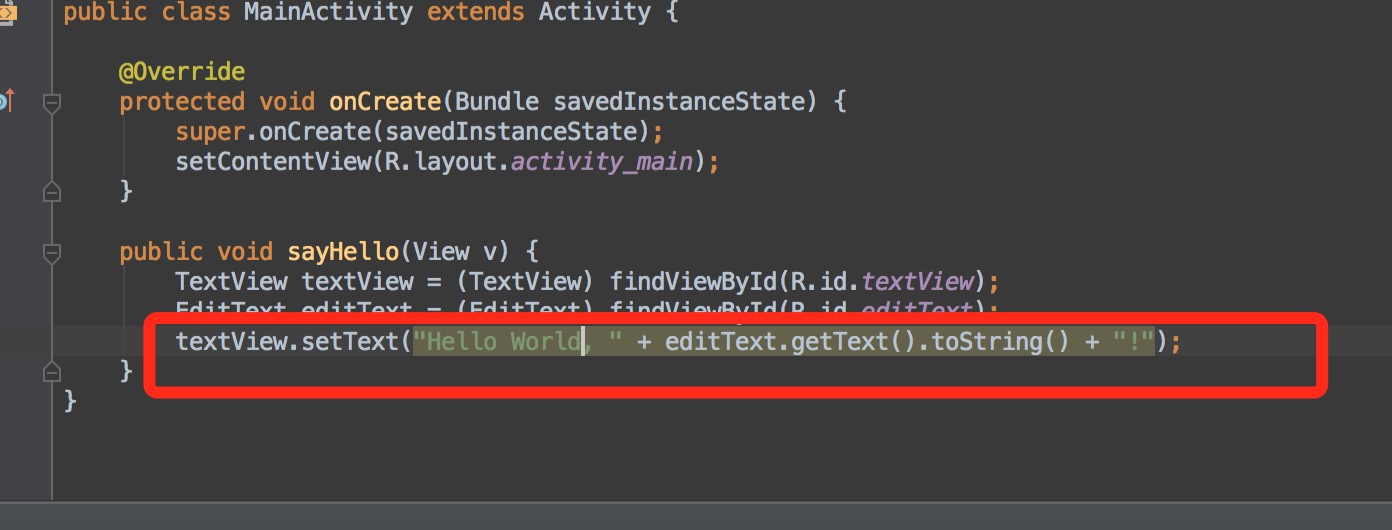
public void sayHello(View v) {
TextView textView = (TextView) findViewById(R.id.textView);
EditText editText = (EditText) findViewById(R.id.editText);
textView.setText("Hello, " + editText.getText().toString() + "!");
}
}
代码很简单,这里不做解释了。
8.创建并运行Espresso测试
在androidTest目录下,新建类MainActivityInstrumentationTest,并复制代码进去。
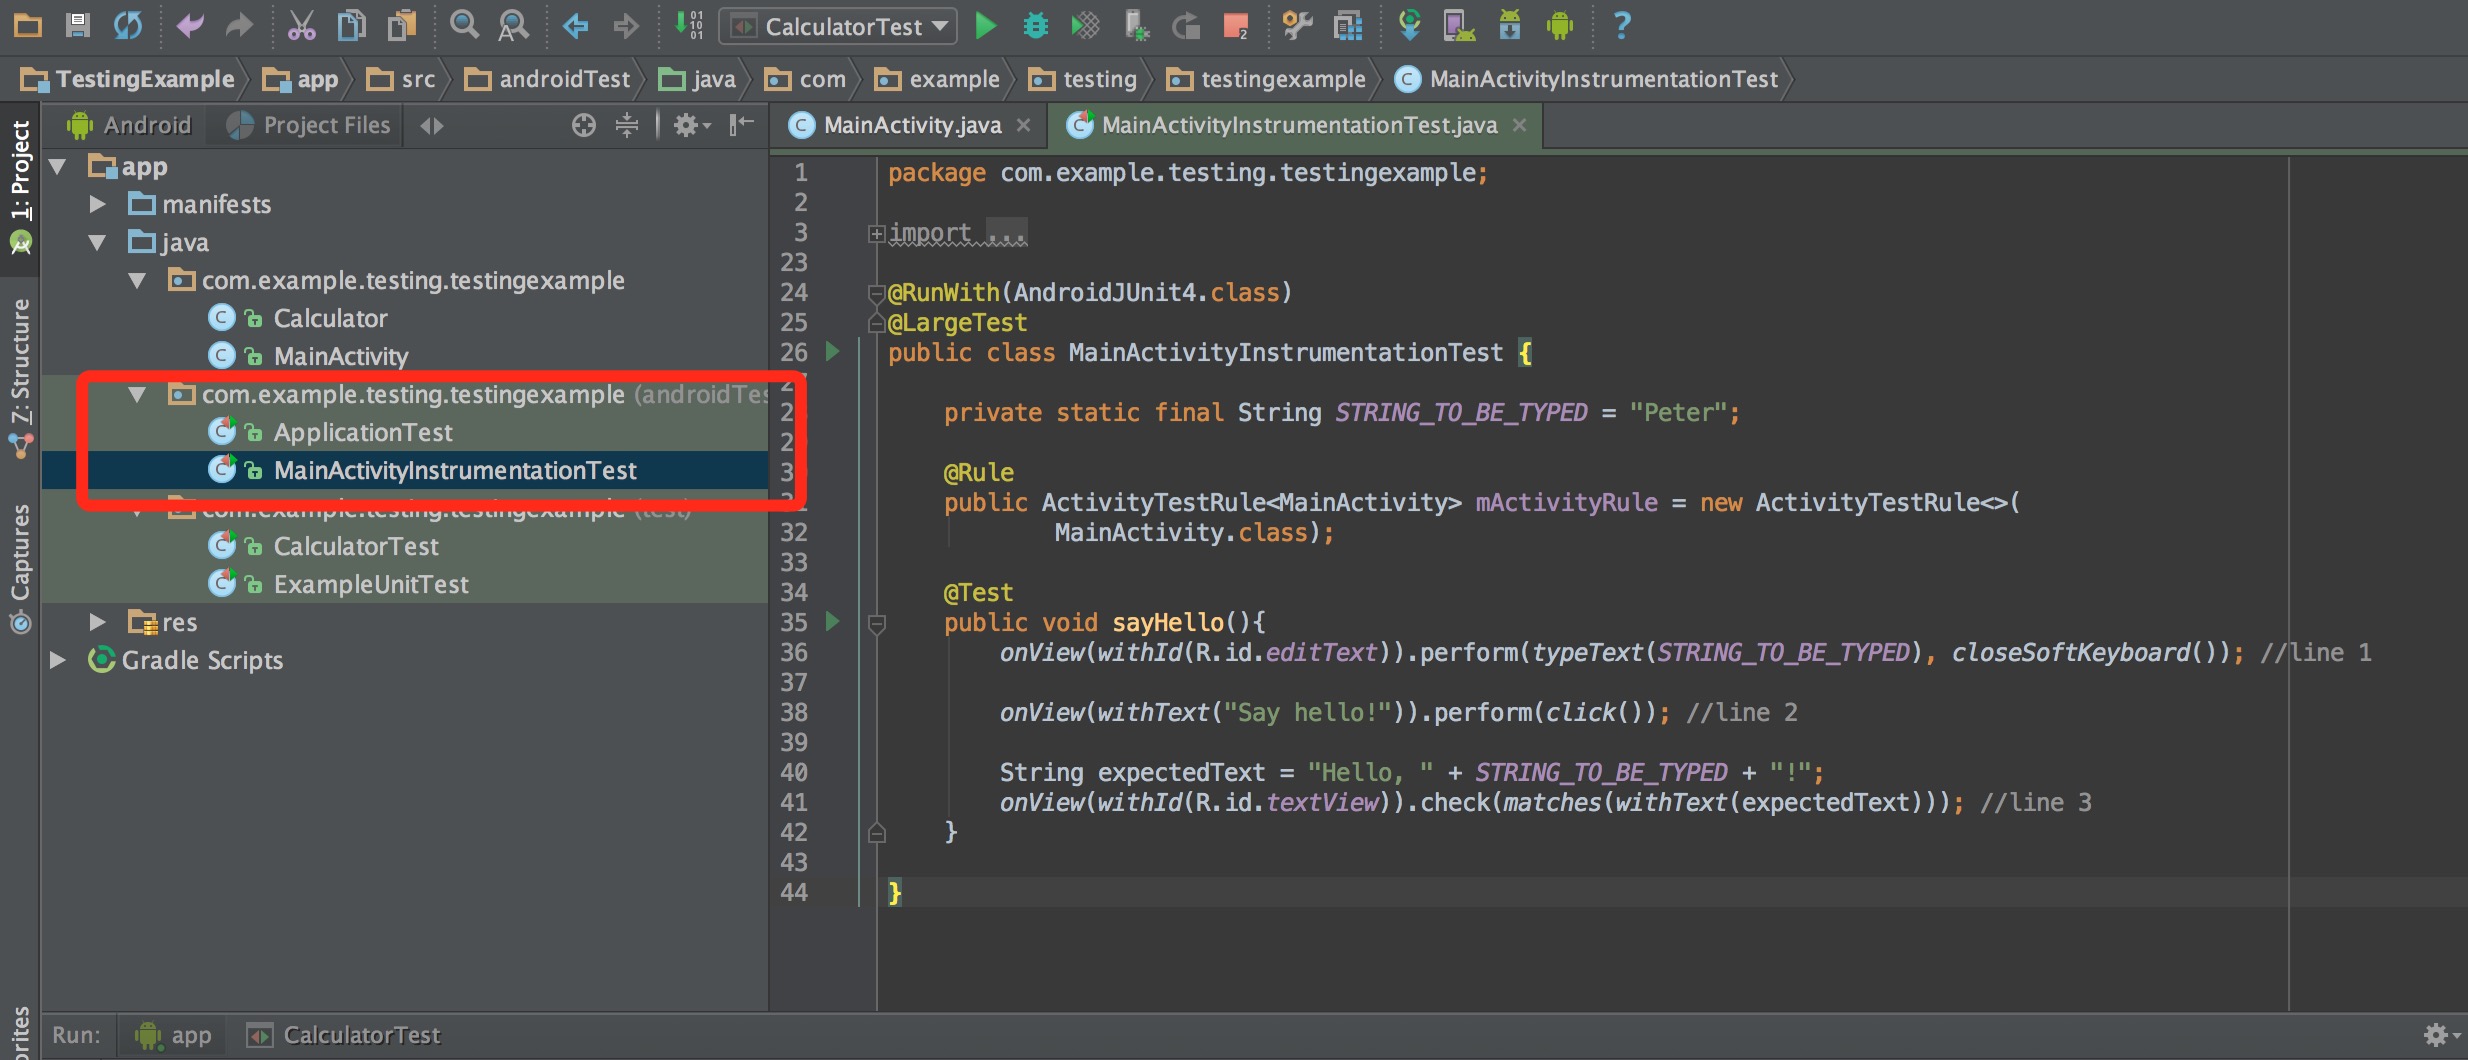
package com.example.testing.testingexample;

import android.support.test.InstrumentationRegistry;
import android.support.test.espresso.action.ViewActions;
import android.support.test.rule.ActivityTestRule;
import android.support.test.runner.AndroidJUnit4;
import android.test.ActivityInstrumentationTestCase2;
import android.test.suitebuilder.annotation.LargeTest;

import org.junit.After;
import org.junit.Before;
import org.junit.Rule;
import org.junit.Test;
import org.junit.runner.RunWith;

import static android.support.test.espresso.Espresso.onView;
import static android.support.test.espresso.action.ViewActions.click;
import static android.support.test.espresso.action.ViewActions.closeSoftKeyboard;
import static android.support.test.espresso.action.ViewActions.typeText;
import static android.support.test.espresso.assertion.ViewAssertions.matches;
import static android.support.test.espresso.matcher.ViewMatchers.withId;
import static android.support.test.espresso.matcher.ViewMatchers.withText;

@RunWith(AndroidJUnit4.class)
@LargeTest
public class MainActivityInstrumentationTest {

    private static final String STRING_TO_BE_TYPED = "Peter";

    @Rule
    public ActivityTestRule<MainActivity> mActivityRule = new ActivityTestRule<>(
        MainActivity.class);

    @Test
    public void sayHello(){
        onView(withId(R.id.editText)).perform(typeText(STRING_TO_BE_TYPED), closeSoftKeyboard()); //line 1

        onView(withText("Say hello!")).perform(click()); //line 2

        String expectedText = "Hello, " + STRING_TO_BE_TYPED + "!";
        onView(withId(R.id.textView)).check(matches(withText(expectedText))); //line 3
    }

}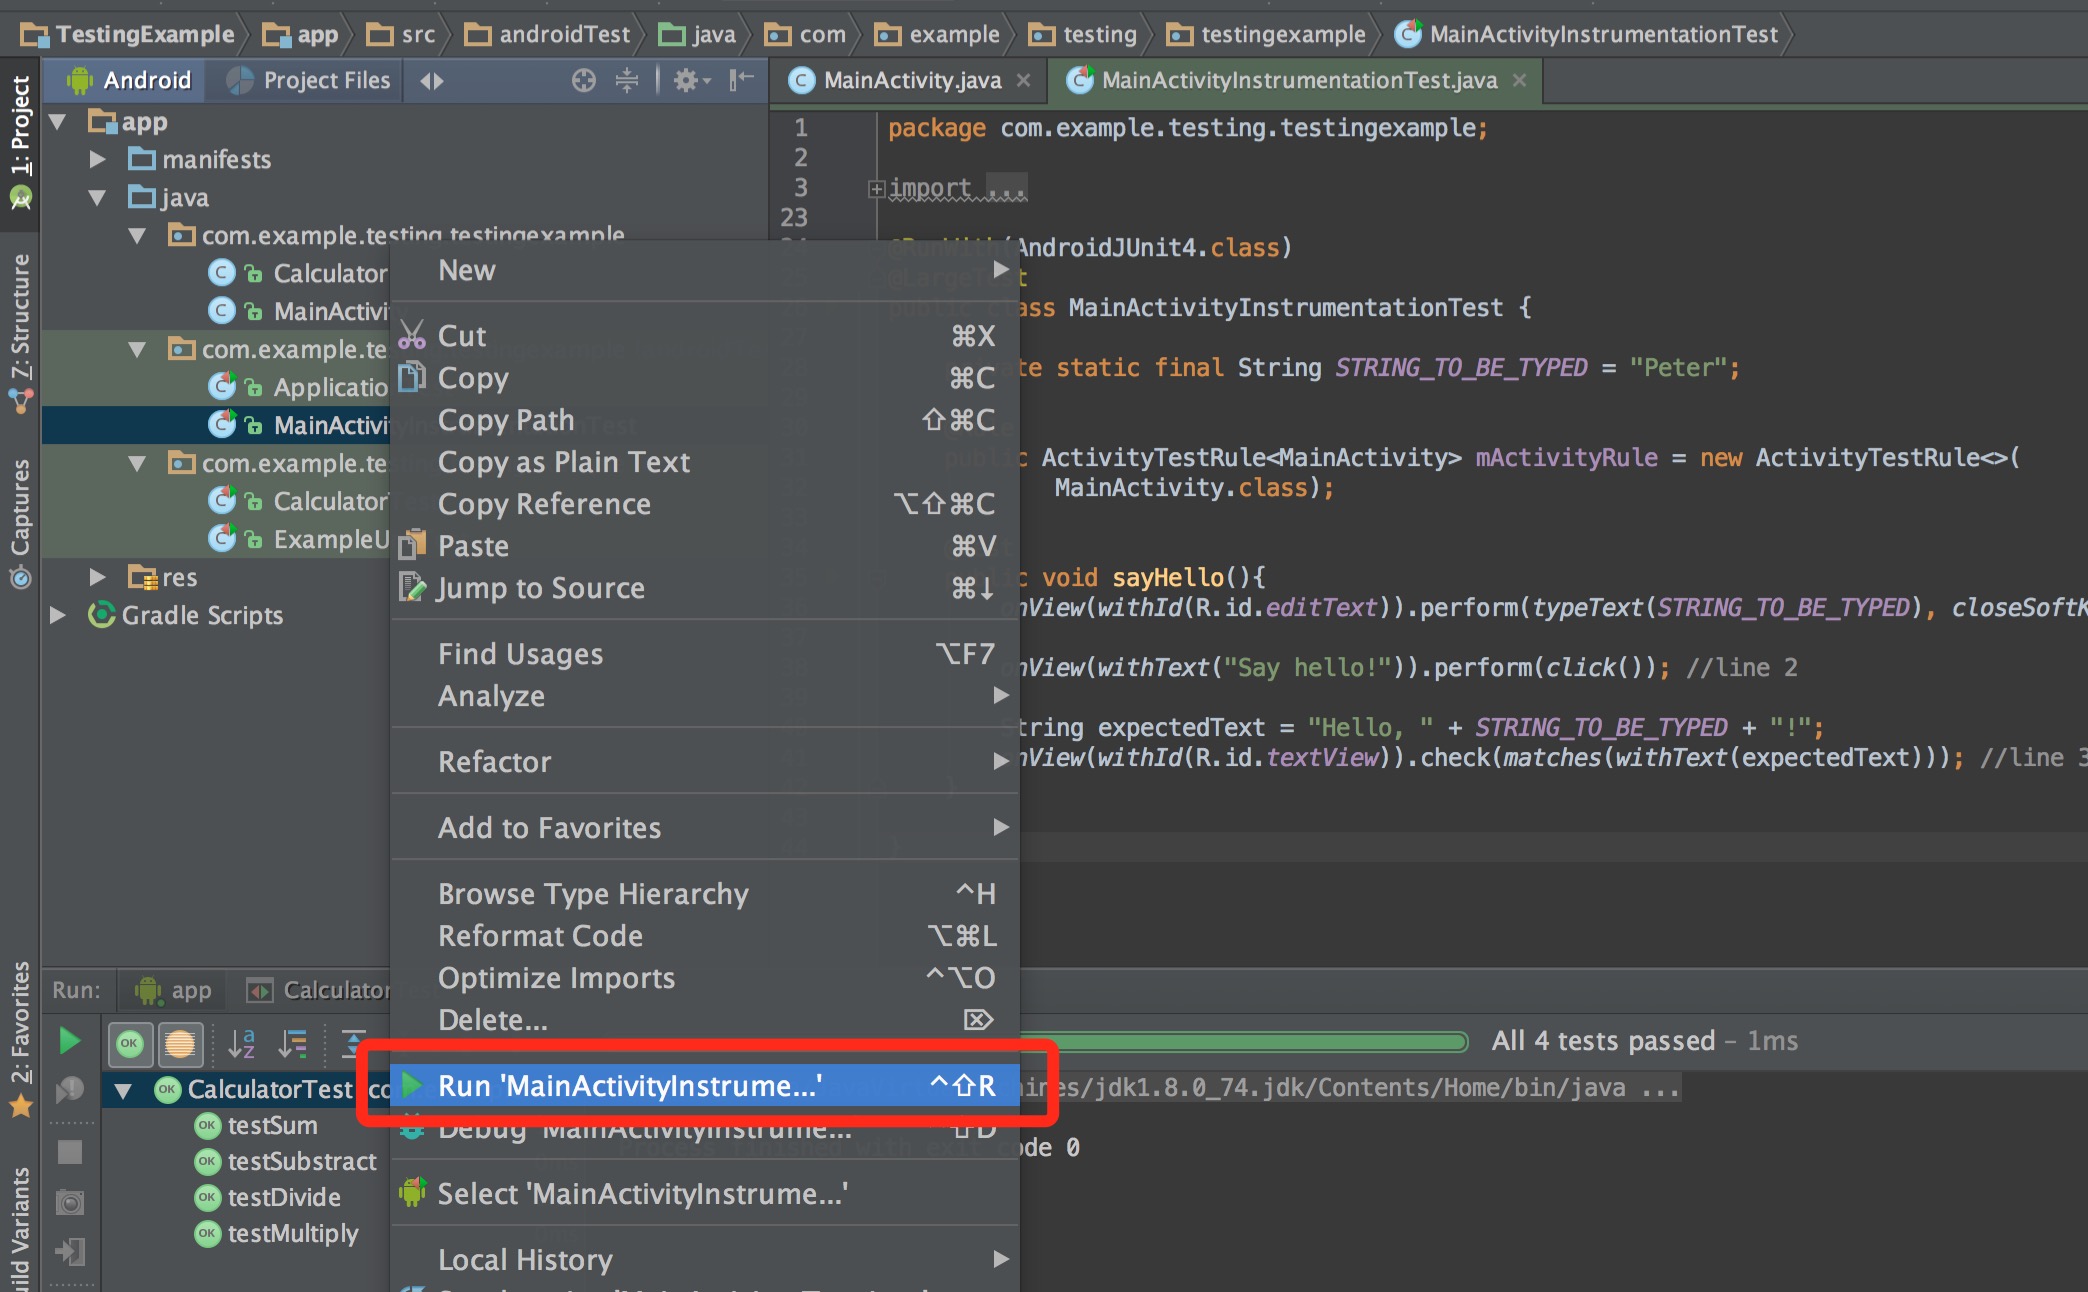
然后选择模拟器或者真机运行。
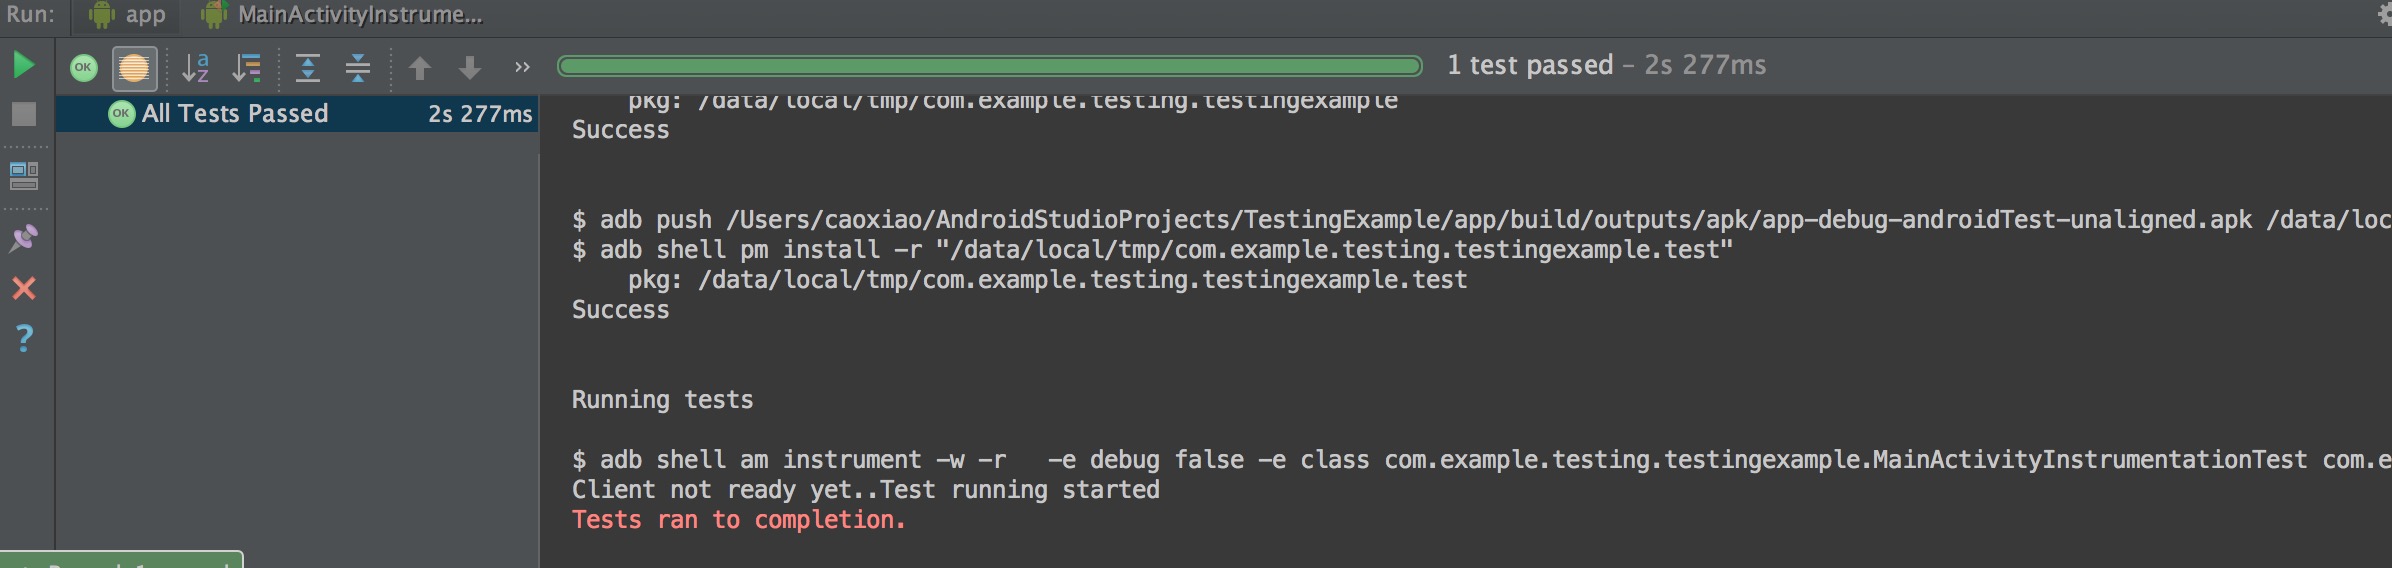
OK,我们看到测试通过,UI测试结果正确。如果改一下代码,我们再试一下。
测试结果。
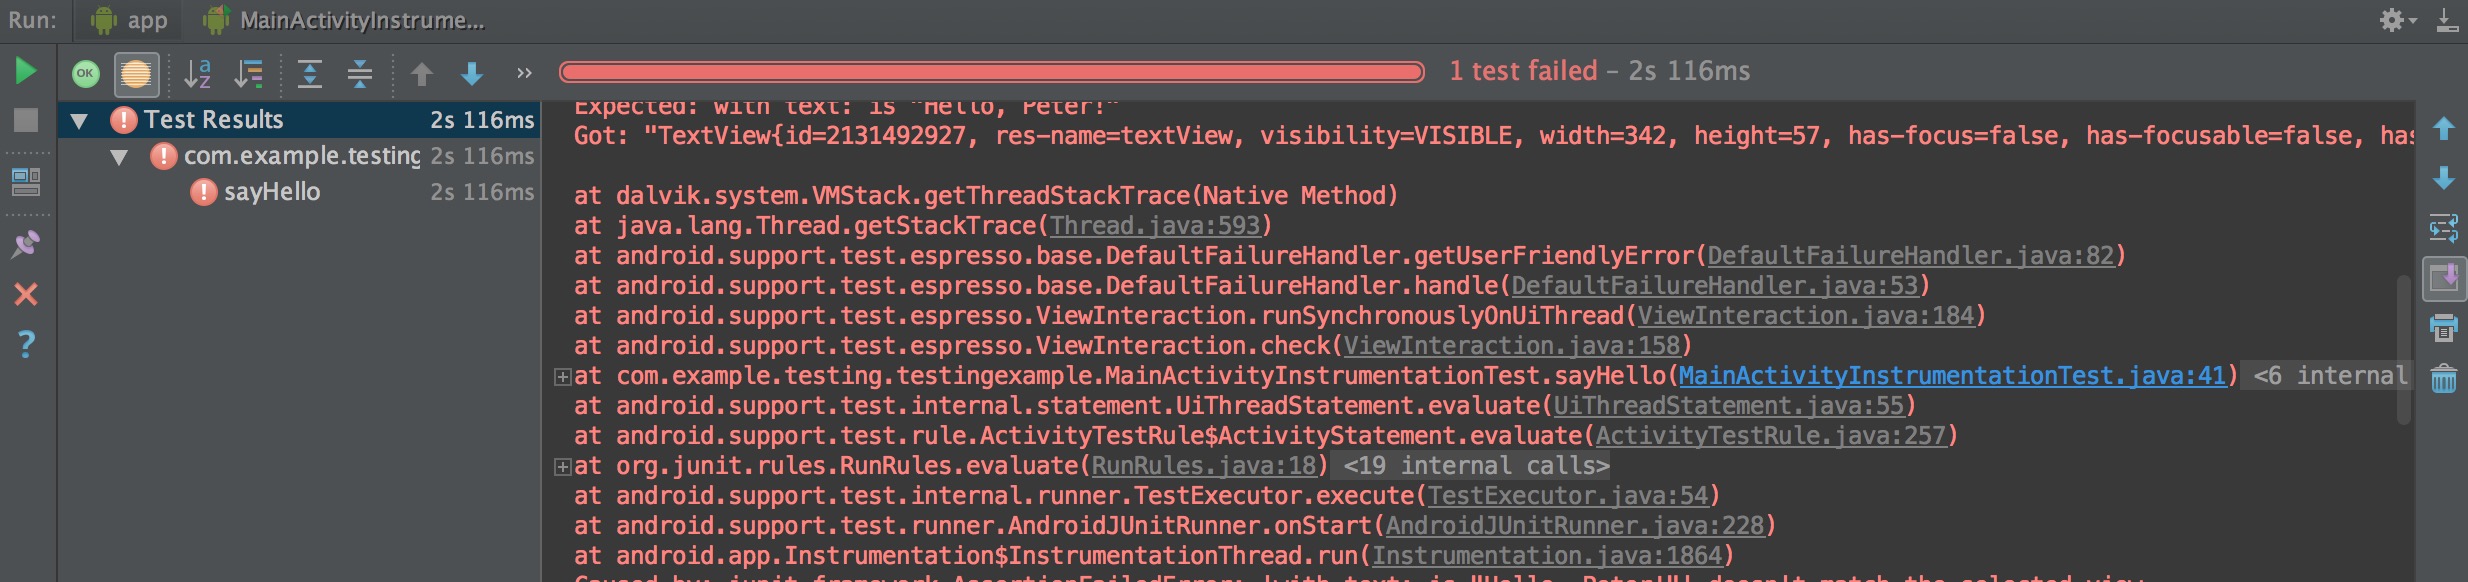
错误的行数也告诉我们了,方便排错。
9.Tips
中途Gradle出现一次莫名的build失败,尝试了移除build.gradle的依赖后问题解决,暂时没能复现,如果有遇到的同学不妨尝试一下。


 2734
2734

 被折叠的 条评论
为什么被折叠?
被折叠的 条评论
为什么被折叠?
 到【灌水乐园】发言


