


本文通过MATLAB实现,能够实时检测识别到人脸,与OpenCV模型文件兼容,版本最好matlab2017a及其以上,老版本没试过。本文主要分为3个步骤:(1)摄像头获取人脸正样本图像;(2)摄像头获取负样本图像;(3)训练识别部分,可选择从图片,视频,摄像头实时识别。
注意事项:
(a)其中变量isSample=1时,即首次运行需要采集人脸图像,以后请把isSample置为0,表示以后不需要采集正样本;(b)负样本产生我写在另一个函数createNegativeImgs()里面,大家运行它即可,负样本一定不要有你自己的人脸图像哦~ (c)importdata()函数用于把正样本的标记文件导入到MATLAB工作空间中,请注意格式。
正样本可以自己手动标记人脸框,可以从trainingImageLabeler APP交互工具获得,当然方便起见,我 从已有的人脸检测器xml文件检测人脸,从而直接得到人脸正样本,当然可以导入到trainingImageLabeler 查看预览(注意格式),我这里直接用的是lbpcascade_frontalface.xml分类器。
直接上代码,如下;
%% 用xml预训练的分类器对人脸进行筛选,记录人脸,用于训练,测试
cam = webcam();% 摄像头接口,没有的话从matlab central网站搜索下载

%% 收集样本
isSample = 0; %这里如果现场从摄像头获取你的图像作为训练样本,请把该值置为1
if isSample==1
    fig = figure;
    axes('parent',fig)
    detector = vision.CascadeObjectDetector('lbpcascade_frontalface.xml');
    detector.MinSize = [110,110];
    videoPlayer = vision.VideoPlayer;

    % 人脸检测与标记
    if ~exist('images','file') %当前目录是否存在images文件夹,没有则新建
        mkdir images
    end
    fid = fopen('images/face_rect.txt','a');% 以追加的方式进行写入
    while  ishandle(fig)
        filename = [cd,'/images/',datestr(now,'yyyy-mm-dd-HH-MM-SS-FFF'),'.png'];
        frame = snapshot(cam);
        bbox = step(detector,frame);
        imwrite(frame,filename);
        fprintf(fid,'%s  %5d%5d%5d%5d \r\n',filename,bbox);
        if isempty(bbox)
            fprintf(fid,'\r\n');
        end

        positions = bbox;
        nums = size(positions,1);
        strLabels = {'face'};%strEye = repmat({'eye'},1,nums-1);
        RGB = insertObjectAnnotation(frame,'rectangle',positions,strLabels,'color','g');
        step(videoPlayer,RGB);
    end
    fclose(fid);
end

%% 不需要训练
facerect1 = importdata();
imageNames = cellstr(facerect1.imagenames);
rects = [facerect1.x,facerect1.y,facerect1.w,facerect1.h];

faceRect = table(imageNames,rects,'VariableNames',{'imageFilename','face'});
index = ~isnan(rects(:,1));
faceTrain = faceRect(index,:);
% faceRect.imageNames = cellstr(imageNames);
% faceRect.rects = rects;%mat2cell(rects,ones(1,length(labels.imageNames)));
num = length(faceTrain.imageFilename);

%% 正样本制作
trainPosNums = 500; % 这里设置你的训练正样本数量,根据你的样本量适当选择
newTrainLabels = faceTrain(randi(num,1,trainPosNums),:); %table类型


%% 负样本制作
trainNegNums = 500; % 这里设置你的训练负样本数量,根据你的样本量适当选择
negativeImgDataStore = imageDatastore(fullfile(cd,'NegativeImgs'));
negNUM = length(negativeImgDataStore.Files);
negativeImages = negativeImgDataStore.Files( randi(negNUM,1,trainNegNums) );

%% 开始训练
xmlName = 'myLBPfaceDetector.xml';
trainCascadeObjectDetector(xmlName,newTrainLabels,negativeImages,...
    'FalseAlarmRate',0.1,'NumCascadeStages',20,...
    'FeatureType','LBP');

%% test ,选择跑的内容
detector = vision.CascadeObjectDetector(xmlName);
detector.MinSize = [100 ,100];
detector.MergeThreshold = 4;
videoPlayer = vision.VideoPlayer;

%% flag选择平台,flag = 0为跑图片,flag = 1为跑视频文件,flag=2为跑摄像头
flag = 2;% 选择

index = 0;
if flag == 0 %跑图片
    imdsTest = imageDatastore('F:\video\patform_data\6月\06',...
        'includeSubfolder',true);%图片文件,这里设置你自己的测试人脸图像路径
    for i  = 1:length(imdsTest.Files)
        imageTest = readimage(imdsTest,i);
        bbox = step(detector,imageTest);
        RGB = insertObjectAnnotation(imageTest,'rectangle',bbox,'face');
        step(videoPlayer,RGB);
        index = index+1;
        disp(index);
    end
elseif flag == 1 % 跑视频
    obj = vision.VideoFileReader('F:\video\smokeVideo2017_3_1\170405151456_1280328332795.mp4');%注意这里是你自己的视频文件路径
    while ~isDone(obj)
        frame = step(obj);
        bbox = step(detector,frame);
        if ~empty(bbox)
            RGB = insertObjectAnnotation(frame,'rectangle',bbox,'face');
        else
            RGB = frame;
        end
        step(videoPlayer,RGB);
        index = index+1;
        disp(index);
    end
elseif flag == 2 % 跑摄像头
    while 1 % command Window按ctrl+c终止循环
        frame = snapshot(cam);
        bbox = step(detector,frame);
        RGB = insertObjectAnnotation(frame,'rectangle',bbox,'face');
        step(videoPlayer,RGB);
    end
else
    disp('your input may be wrong!');
end
另外importdata()函数和createNegativeImgs()函数如下:
function faceRect = importdata()
%% Initialize variables.
filename = 'E:\MATLAB\trainMyCascadeFace\images\face_rect.txt';
delimiter = ' ';

%% Format for each line of text:
%   column1: text (%s)
%	column2: double (%f)
%   column3: double (%f)
%	column4: double (%f)
%   column5: double (%f)
% For more information, see the TEXTSCAN documentation.
formatSpec = '%s%f%f%f%f%[^\n\r]';

%% Open the text file.
fileID = fopen(filename,'r');

%% Read columns of data according to the format.
% This call is based on the structure of the file used to generate this
% code. If an error occurs for a different file, try regenerating the code
% from the Import Tool.
dataArray = textscan(fileID, formatSpec, 'Delimiter', delimiter, 'MultipleDelimsAsOne', true, 'TextType', 'string', 'EmptyValue', NaN,  'ReturnOnError', false);

%% Close the text file.
fclose(fileID);

%% Post processing for unimportable data.
% No unimportable data rules were applied during the import, so no post
% processing code is included. To generate code which works for
% unimportable data, select unimportable cells in a file and regenerate the
% script.

%% Create output variable
facerect1 = table(dataArray{1:end-1}, 'VariableNames', {'imagenames','x','y','w','h'});

%% Clear temporary variables
clearvars filename delimiter formatSpec fileID dataArray ans;
faceRect = facerect1;
-------------------------------------------------分割线-------------------------------------------
function createNegativeImgs()

cam = webcam();

if ~exist('NegativeImgs','file')
    mkdir NegativeImgs
end

videoPlayer = vision.VideoPlayer();
index = 0;
while 1
    filename = [cd,'/NegativeImgs/',datestr(now,'yyyy-mm-dd-HH-MM-SS-FFF'),'.png'];
    frame = snapshot(cam);
    imwrite(frame,filename);
    step(videoPlayer,frame);
    index = index+1;
    disp(index);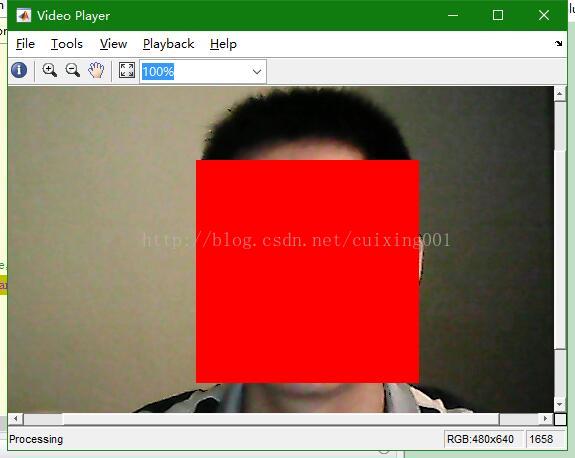
end RGB = insertShape(frame,'FilledRectangle',bbox,'Opacity',1,'color','red');


 1万+
1万+


 被折叠的 条评论
为什么被折叠?
被折叠的 条评论
为什么被折叠?
 到【灌水乐园】发言


