


 本文详细介绍了React Native中的样式应用方法,包括内联样式、外联样式及其特性,并通过实例讲解了Flexbox布局的基本原理及属性使用。
一、基本样式
(1)内联样式
在组件里面定义样式
<Text style={{color:'orange', fontSize:20}}> 小字号内联样式</Text>(2)外联样式
在组件里指向外面的样式
<Text style={[styles.orange, styles.bigFontSize]}> 大字号外联样式</Text>(3)样式具有覆盖性
如果定义相同属性的样式,后面会覆盖前面的样式,例如,后面是红色前面是蓝色样式,最终是现实的蓝色:
<Text style={[styles.red, styles.bigblue]}>红色被大蓝覆盖了</Text>(4)样式具有组合性
例如颜色颜色跟字体样式组合
案例代码:
import React, { Component } from 'react';
import { AppRegistry, StyleSheet, Text, View } from 'react-native';

class LotsOfStyles extends Component {
    render() {
        return (
            <View>
                <Text style={styles.red}>just red</Text>
                <Text style={styles.bigblue}>just bigblue</Text>
                <Text style={[styles.bigblue, styles.red]}>大蓝被红色覆盖了</Text>
                <Text style={[styles.red, styles.bigblue]}>红色被大蓝覆盖了</Text>
                <Text style={{color:'orange', fontSize:20}}> 小字号内联样式</Text>
                <Text style={[styles.orange, styles.bigFontSize]}> 大字号外联样式</Text>
            </View>
        );
    }
}

const styles = StyleSheet.create({
    bigblue: {
        color: 'blue',
        fontWeight: 'bold',
        fontSize: 30,
    },
    red: {
        color: 'red',
    },
    bigFontSize:{
        fontSize:40,
    },
    orange:
    {
        color:'orange',
    }
});

AppRegistry.registerComponent('HelloWorld', () => LotsOfStyles);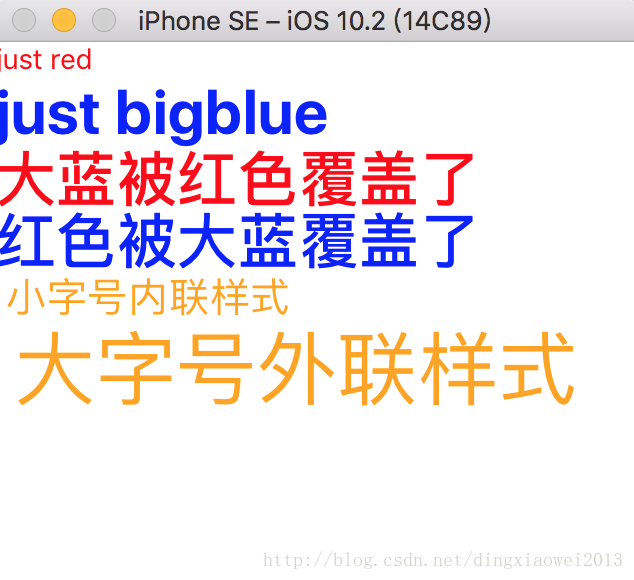
二、如何知道哪些组建支持哪些样式
作为web开发者用脚趾头都能闭眼写出来。如果我们需要知道该组件有哪些样式,又不想查手册,一个最为简单的方法是,在样式表里写错一个属性,比如我写一个没有的属性“border”。但是该属性必须写到样式的创建中去,而不能写为内联样式。写成内联样式,你是看不到报错提示的。我们改写成样式表创建类里面:
var HelloWorld = React.createClass({
        render: function() {
                return (
                    <View>
                        <View style={styles.style_1}>

                        </View>
                    </View>
                );
        }
    });

    var styles = StyleSheet.create({
        style_1:{
            border: '1px solid red',
            height:40,
            borderWidth: 1,
            borderColor: 'red',
        }
    });
这个时候你就能齐刷刷地看到样式表的报错和提示有哪些样式了,如下图所示:

上面已经展示了独立样式类了,那么样式类创建很简单,我们只需要使用React.StyleSheet来创建类。其实创建的类就是一个js对象而已。那么在组件上引用是这样的,就跟上面的代码一样。
三、Flexbox布局
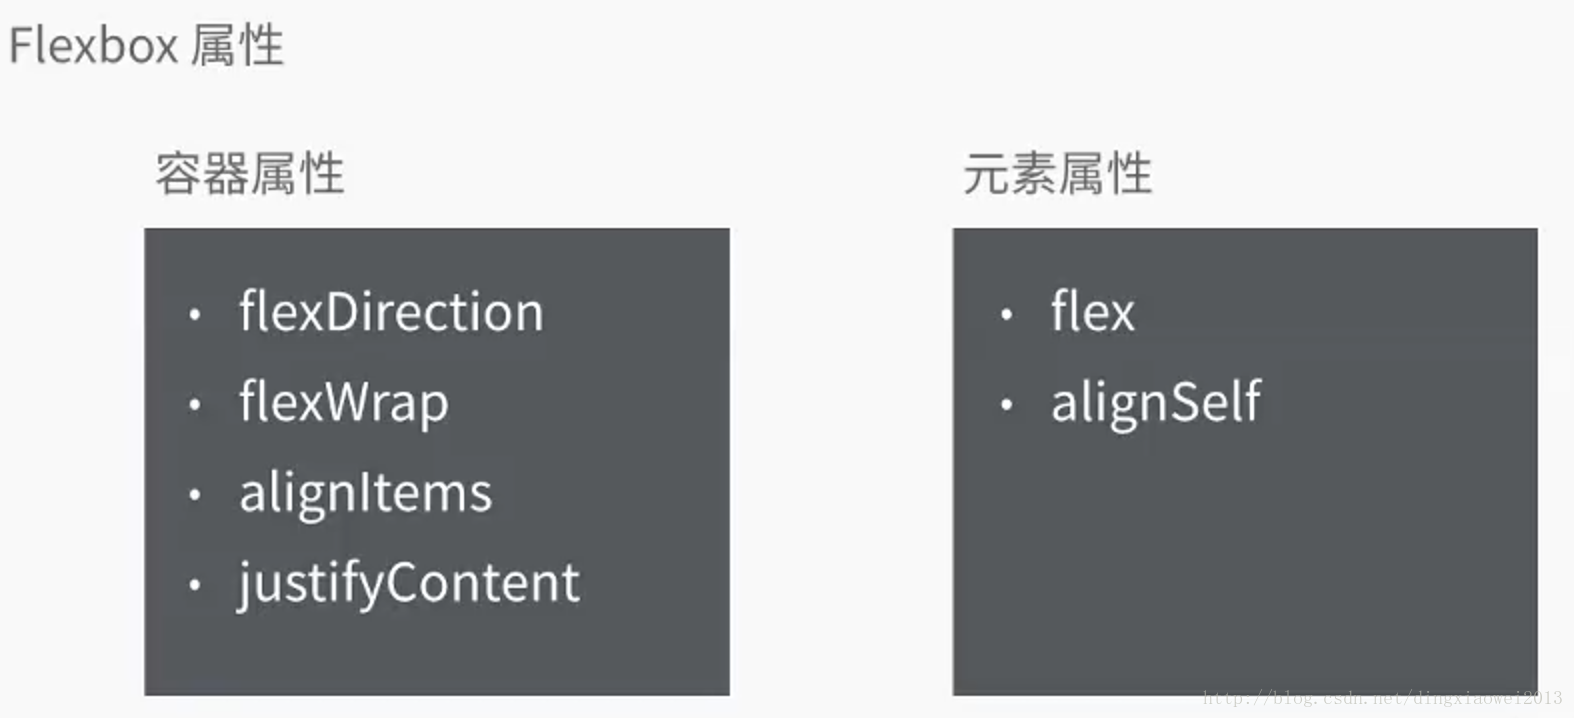
其实,这样的css样式,作为web开发者一用就会,那么说说布局的事儿。Flexbox是css3里面引入的布局模型-弹性盒子模型,旨在通过弹性的方式来对其和分布容器中内容的空间,使其能够适应不同的屏幕宽度。React Native中的Flexbox是这个规范的一个子集。除去margin, padding, position等大家熟悉的web布局的话,最为重要的就是flexbox,目前支持的属性如下,有6个:
(1)先说说flex属性
var HelloWorld = React.createClass({
render: function() {
return (
<View style={styles.style_0}>
<View style={styles.style_1}></View>
<View style={styles.style_1}></View>
<View style={{flex:10}}></View>
</View>
);
}
});
var styles = StyleSheet.create({
style_0:{
flex:1,
},
style_1:{
flex: 5,
height:40,
borderWidth: 1,
borderColor: 'red',
}
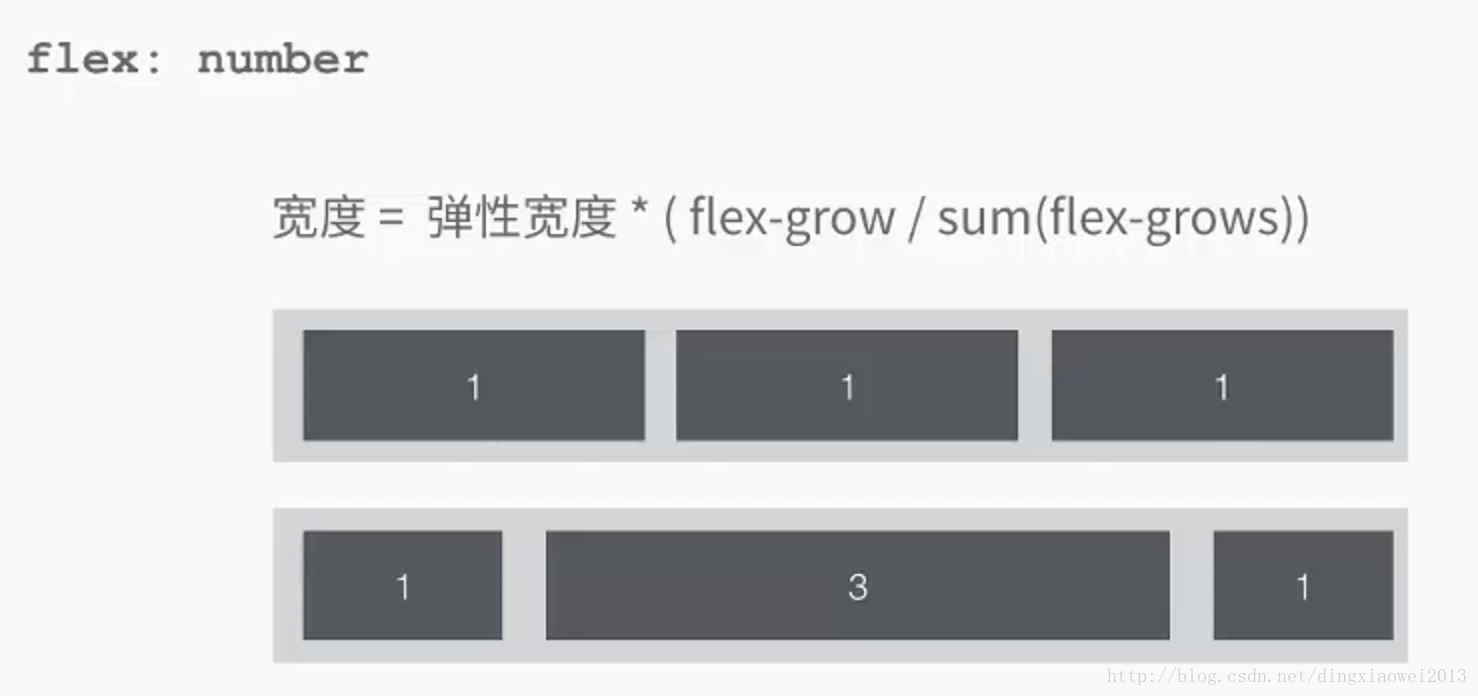
});当一个(元素)组件,定义了flex属性时,表示该元素是可伸缩的。当然flex的属性值是大于0的时候才伸缩,其小于和等于0的时候不伸缩,例如:flex:0, flex:-1等。上面的代码,最外层的view是可伸缩的,因为没有兄弟节点和它抢占空间。里层是3个view,可以看到三个view的flex属性加起来是5+5+10=20,所以第一个view和第二个view分别占1/4伸缩空间, 最后一个view占据1/2空间,具体如下图:
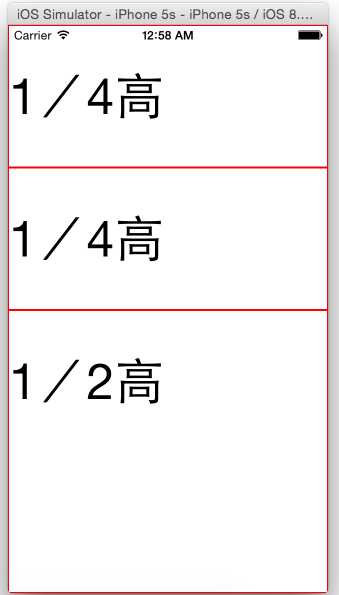
(2)flexDirection
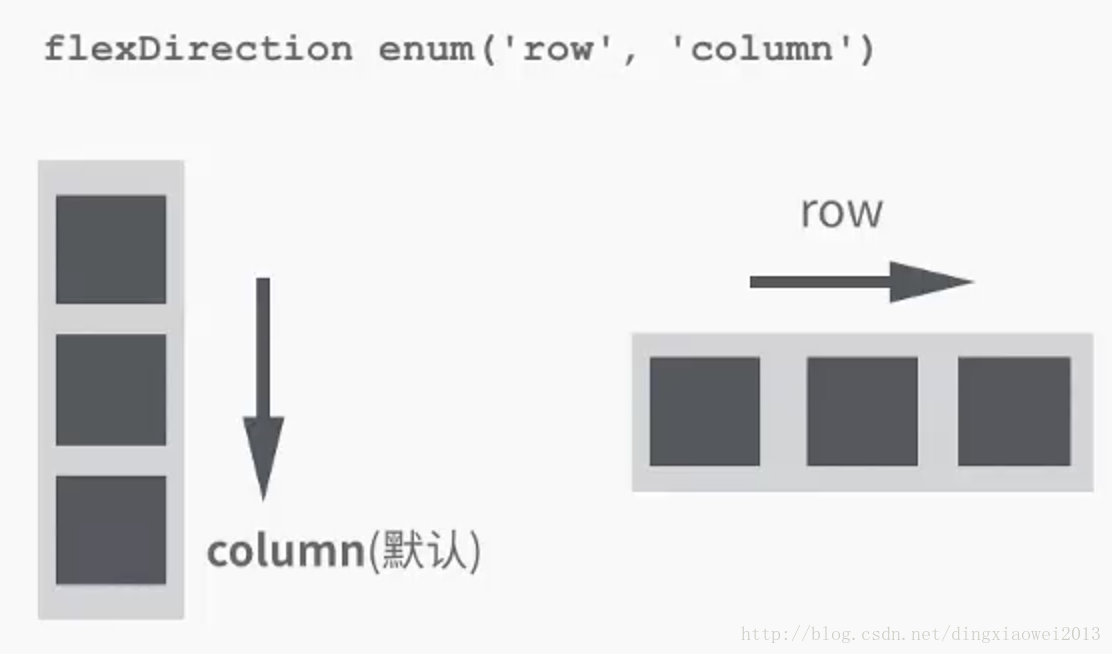
flexDirection在React-Native中只有两个属性,一个是row(横向伸缩)和column(纵向伸缩)。具体的效果可见如下代码:
var HelloWorld = React.createClass({
        render: function() {
            return (
                <View style={styles.style_0}>
                    <View style={styles.style_1}>
                    <Text style={{marginTop:40, fontSize:25}}>1/4高</Text>
                    <Text style={{marginTop:40, fontSize:25}}>1/4高</Text>
                </View>
                <View style={[styles.style_1, {flexDirection: 'column'}]}>
                    <Text style={{marginTop:40, fontSize:25}}>1/4高</Text>
                    <Text style={{marginTop:40, fontSize:25}}>1/4高</Text>
                </View>
                <View style={{flex:10, borderWidth: 1, borderColor: 'red',}}>
                    <Text style={{marginTop:40, fontSize:25}}>1/2高</Text>
                    </View>
                </View>
            );
        }
    });

    var styles = StyleSheet.create({
        style_0:{
            flex:1,
        },
        style_1:{
            flex: 5,
            flexDirection: 'row',
            height:40,
            borderWidth: 1,
            borderColor: 'red',
        }
    });
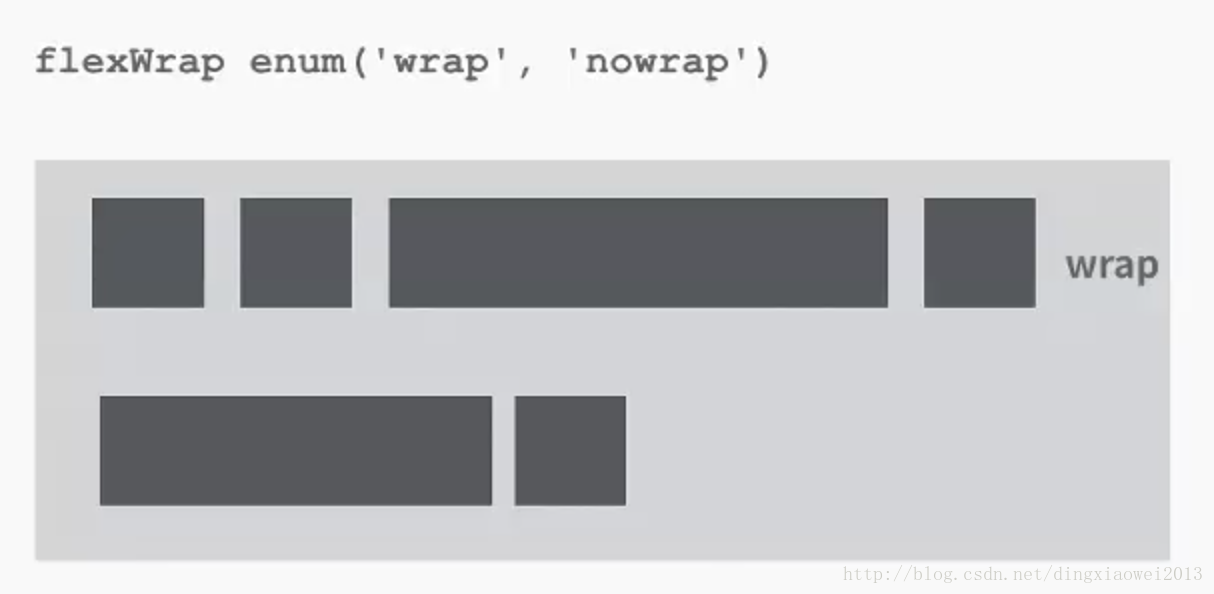
(3)flexWrap:是否换行
(4)alignItems:

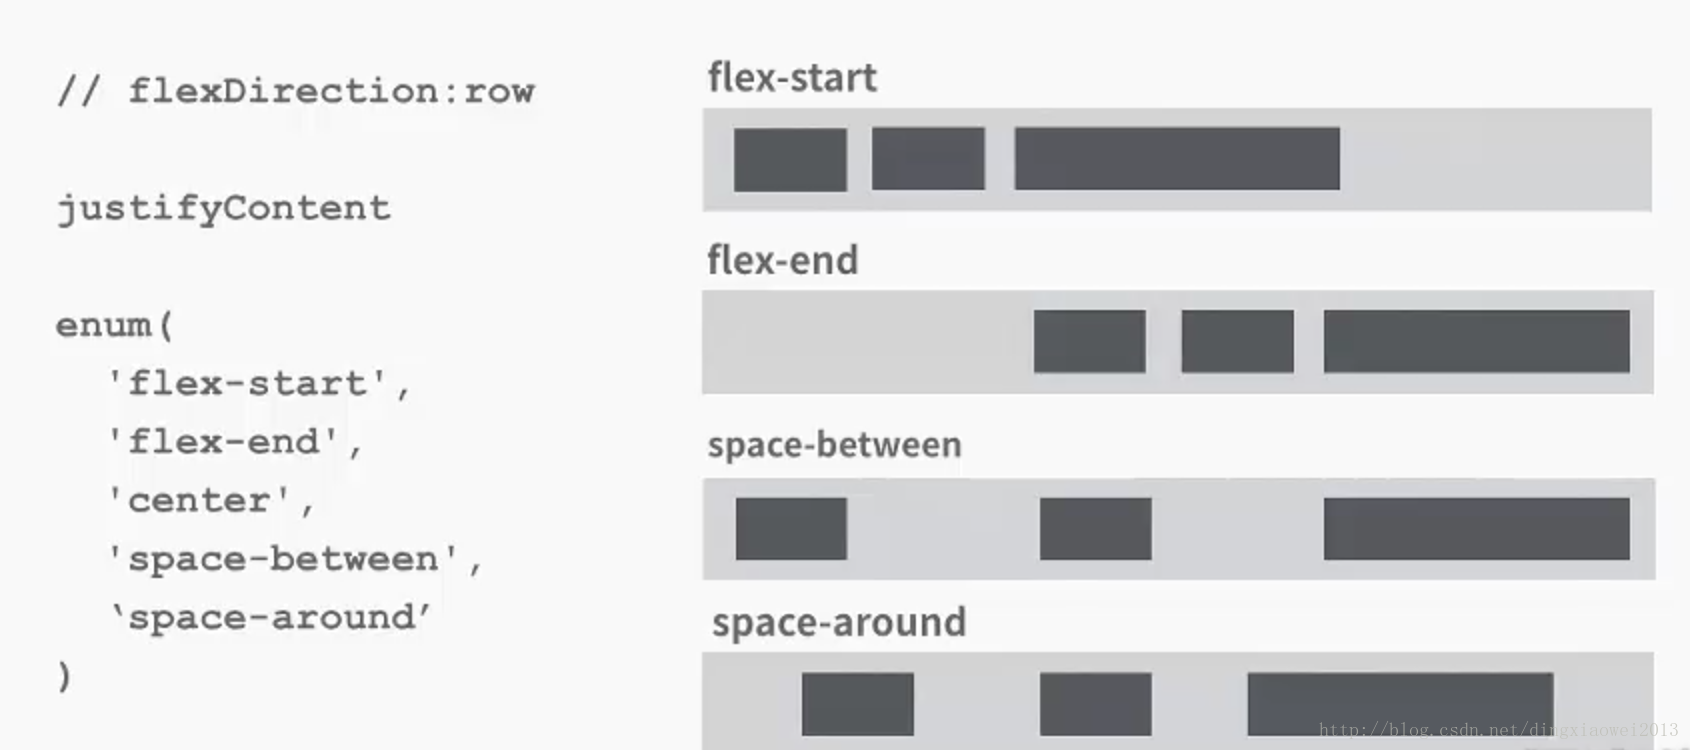
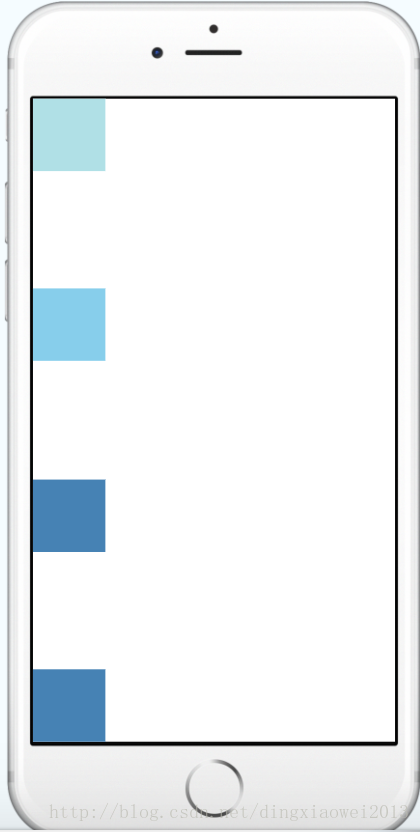
(5)justifyContent绝对布局
import React, { Component } from 'react';
import { AppRegistry, View } from 'react-native';

class JustifyContentBasics extends Component {
  render() {
    return (
      // Try setting `justifyContent` to `center`.
      // Try setting `flexDirection` to `row`.
      <View style={{
        flex: 1,
        flexDirection: 'column',
        justifyContent: 'space-between',
      }}>
        <View style={{width: 50, height: 50, backgroundColor: 'powderblue'}} />
        <View style={{width: 50, height: 50, backgroundColor: 'skyblue'}} />
        <View style={{width: 50, height: 50, backgroundColor: 'steelblue'}} />
      </View>
    );
  }
};

AppRegistry.registerComponent('AwesomeProject', () => JustifyContentBasics);
会根据水平还是垂直来布局,若干个元素均匀垂直或者水平布局满整个宽高。
(6)alignSelf:对齐方式
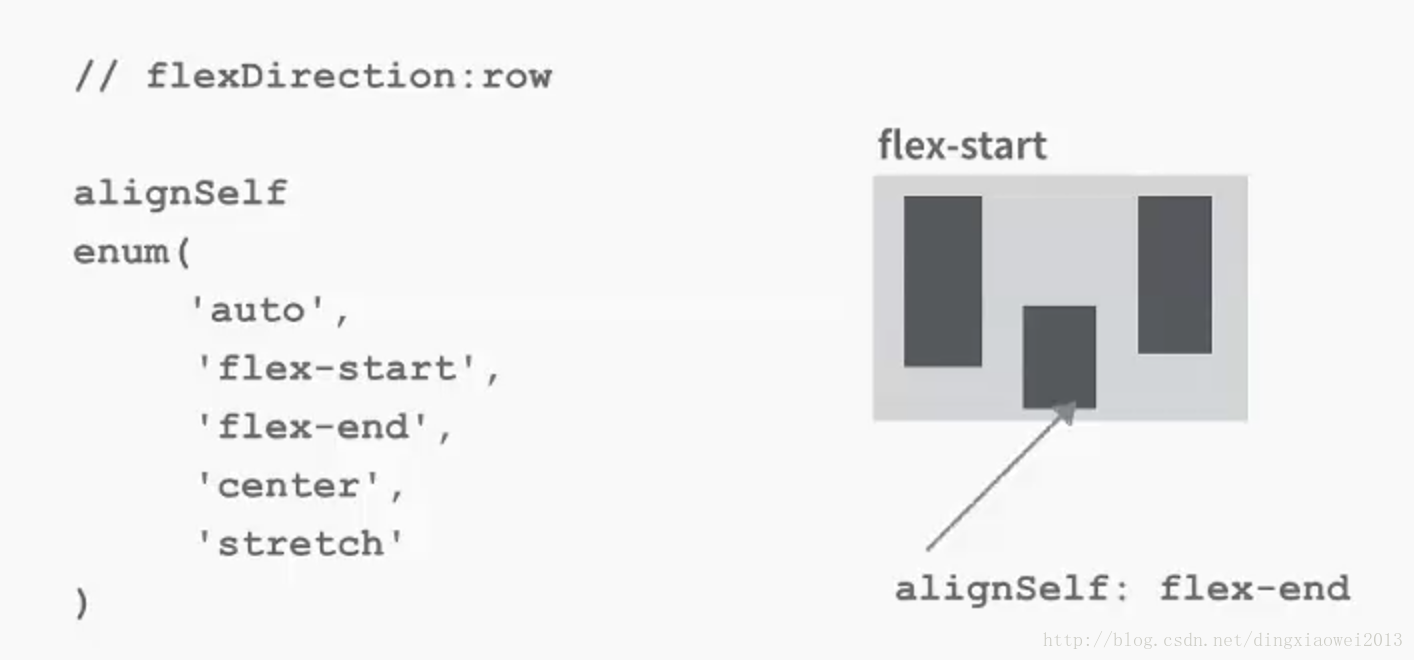
alignSelf的对齐方式主要有四种:flex-start、 flex-end、 center、 auto、 stretch。看看代码,应该就很清楚了:


 118
118

 被折叠的 条评论
为什么被折叠?
被折叠的 条评论
为什么被折叠?
 到【灌水乐园】发言


