


伴随着毕业论文的完成,这两天终于腾出了空闲,又有时间搞搞FFMPEG的研究了。想着之前一直搞的都是FFMPEG解码方面的工作,很少涉及到FFMPEG编码方面的东西,于是打算研究一下FFMPEG的编码。在网上看了一些例子,发现要不然是难度略微有些大,要不然就是类库比较陈旧,于是就决定自己做一个编码方面的例子,方便以后学习。
简介
本文的编码器实现了YUV420P的数据编码为JPEG图片。本着简单的原则,代码基本上精简到了极限。使用了2014年5月6号编译的最新的FFMPEG类库。
程序很简单,打开工程后直接运行即可将YUV数据编码为JPEG。本程序十分灵活,可以根据需要修改成编码各种图像格式的编码器,比如PNG,GIF等等。平台使用VC2010。
源代码
/**
 * 最简单的基于FFmpeg的图像编码器
 * Simplest FFmpeg Picture Encoder
 *
 * 雷霄骅 Lei Xiaohua
 * leixiaohua1020@126.com
 * 中国传媒大学/数字电视技术
 * Communication University of China / Digital TV Technology
 * http://blog.csdn.net/leixiaohua1020
 *
 * 本程序实现了YUV420P像素数据编码为JPEG图片。是最简单的FFmpeg编码方面的教程。
 * 通过学习本例子可以了解FFmpeg的编码流程。
 */

#include <stdio.h>

#define __STDC_CONSTANT_MACROS

#ifdef _WIN32
//Windows
extern "C"
{
#include "libavcodec/avcodec.h"
#include "libavformat/avformat.h"
};
#else
//Linux...
#ifdef __cplusplus
extern "C"
{
#endif
#include <libavcodec/avcodec.h>
#include <libavformat/avformat.h>
#ifdef __cplusplus
};
#endif
#endif


int main(int argc, char* argv[])
{
	AVFormatContext* pFormatCtx;
	AVOutputFormat* fmt;
	AVStream* video_st;
	AVCodecContext* pCodecCtx;
	AVCodec* pCodec;

	uint8_t* picture_buf;
	AVFrame* picture;
	AVPacket pkt;
	int y_size;
	int got_picture=0;
	int size;

	int ret=0;

	FILE *in_file = NULL;                            //YUV source
	int in_w=480,in_h=272;                           //YUV's width and height
	const char* out_file = "cuc_view_encode.jpg";    //Output file

	in_file = fopen("cuc_view_480x272.yuv", "rb");

	av_register_all();

	//Method 1
	pFormatCtx = avformat_alloc_context();
	//Guess format
	fmt = av_guess_format("mjpeg", NULL, NULL);
	pFormatCtx->oformat = fmt;
    //Output URL
	if (avio_open(&pFormatCtx->pb,out_file, AVIO_FLAG_READ_WRITE) < 0){
		printf("Couldn't open output file.");
		return -1;
	}

	//Method 2. More simple
	//avformat_alloc_output_context2(&pFormatCtx, NULL, NULL, out_file);
	//fmt = pFormatCtx->oformat;

	video_st = avformat_new_stream(pFormatCtx, 0);
	if (video_st==NULL){
		return -1;
	}
	pCodecCtx = video_st->codec;
	pCodecCtx->codec_id = fmt->video_codec;
	pCodecCtx->codec_type = AVMEDIA_TYPE_VIDEO;
	pCodecCtx->pix_fmt = AV_PIX_FMT_YUVJ420P;

	pCodecCtx->width = in_w;
	pCodecCtx->height = in_h;

	pCodecCtx->time_base.num = 1;
	pCodecCtx->time_base.den = 25;
	//Output some information
	av_dump_format(pFormatCtx, 0, out_file, 1);

	pCodec = avcodec_find_encoder(pCodecCtx->codec_id);
	if (!pCodec){
		printf("Codec not found.");
		return -1;
	}
	if (avcodec_open2(pCodecCtx, pCodec,NULL) < 0){
		printf("Could not open codec.");
		return -1;
	}
	picture = av_frame_alloc();
	size = avpicture_get_size(pCodecCtx->pix_fmt, pCodecCtx->width, pCodecCtx->height);
	picture_buf = (uint8_t *)av_malloc(size);
	if (!picture_buf)
	{
		return -1;
	}
	avpicture_fill((AVPicture *)picture, picture_buf, pCodecCtx->pix_fmt, pCodecCtx->width, pCodecCtx->height);

	//Write Header
	avformat_write_header(pFormatCtx,NULL);

	y_size = pCodecCtx->width * pCodecCtx->height;
	av_new_packet(&pkt,y_size*3);
	//Read YUV
	if (fread(picture_buf, 1, y_size*3/2, in_file) <=0)
	{
		printf("Could not read input file.");
		return -1;
	}
	picture->data[0] = picture_buf;              // Y
	picture->data[1] = picture_buf+ y_size;      // U
	picture->data[2] = picture_buf+ y_size*5/4;  // V

	//Encode
	ret = avcodec_encode_video2(pCodecCtx, &pkt,picture, &got_picture);
	if(ret < 0){
		printf("Encode Error.\n");
		return -1;
	}
	if (got_picture==1){
		pkt.stream_index = video_st->index;
		ret = av_write_frame(pFormatCtx, &pkt);
	}

	av_free_packet(&pkt);
	//Write Trailer
	av_write_trailer(pFormatCtx);

	printf("Encode Successful.\n");

	if (video_st){
		avcodec_close(video_st->codec);
		av_free(picture);
		av_free(picture_buf);
	}
	avio_close(pFormatCtx->pb);
	avformat_free_context(pFormatCtx);

	fclose(in_file);

	return 0;
}
结果
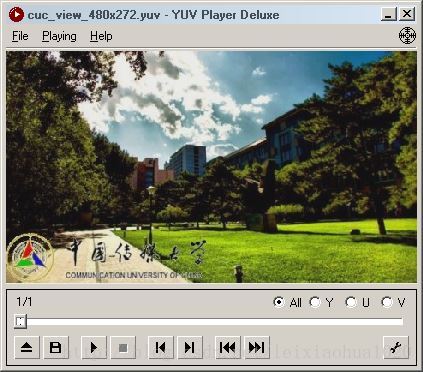
编码前的YUV420P数据:
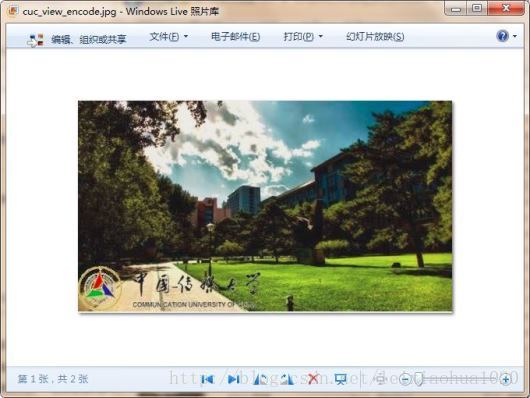
编码后的JPEG:
下载
simplest ffmpeg picture encoder
项目主页
SourceForge:https://sourceforge.net/projects/simplestffmpegpictureencoder/
Github:https://github.com/leixiaohua1020/simplest_ffmpeg_picture_encoder
开源中国:http://git.oschina.net/leixiaohua1020/simplest_ffmpeg_picture_encoder
CSDN工程下载地址:
http://download.csdn.net/detail/leixiaohua1020/7319265
PUDN工程下载地址:
http://www.pudn.com/downloads644/sourcecode/multimedia/detail2605252.html
本程序实现了YUV420P像素数据编码为JPEG图片。是最简单的FFmpeg编码方面的教程。通过学习本例子可以了解FFmpeg的编码流程。
更新-1.1(2015.2.13)=========================================
这次考虑到了跨平台的要求,调整了源代码。经过这次调整之后,源代码可以在以下平台编译通过:
VC++:打开sln文件即可编译,无需配置。
cl.exe:打开compile_cl.bat即可命令行下使用cl.exe进行编译,注意可能需要按照VC的安装路径调整脚本里面的参数。编译命令如下。
::VS2010 Environment
call "D:\Program Files\Microsoft Visual Studio 10.0\VC\vcvarsall.bat"
::include
@set INCLUDE=include;%INCLUDE%
::lib
@set LIB=lib;%LIB%
::compile and link
cl simplest_ffmpeg_picture_encoder.cpp /link avcodec.lib avformat.lib avutil.lib ^
avdevice.lib avfilter.lib postproc.lib swresample.lib swscale.lib /OPT:NOREF
MinGW:MinGW命令行下运行compile_mingw.sh即可使用MinGW的g++进行编译。编译命令如下。
g++ simplest_ffmpeg_picture_encoder.cpp -g -o simplest_ffmpeg_picture_encoder.exe \
-I /usr/local/include -L /usr/local/lib \
-lavformat -lavcodec -lavutil
GCC:Linux或者MacOS命令行下运行compile_gcc.sh即可使用GCC进行编译。编译命令如下。
gcc simplest_ffmpeg_picture_encoder.cpp -g -o simplest_ffmpeg_picture_encoder.out \
-I /usr/local/include -L /usr/local/lib -lavformat -lavcodec -lavutil
PS:相关的编译命令已经保存到了工程文件夹中
CSDN下载地址:http://download.csdn.net/detail/leixiaohua1020/8444893
SourceForge上已经更新。


 3597
3597

 被折叠的 条评论
为什么被折叠?
被折叠的 条评论
为什么被折叠?
 到【灌水乐园】发言


