


作为一个经常写博客的人,我有时会在 微博上分享博客内容,可不知道从什么时候开始,国内互联网越来越丧失信仰,所有的厂商都在试图打造一个“只进不出”的信息孤岛,进而达到增强“用户黏度”的目的。以微博为例,微博中的外链永远都会被转化为短地址,并且无法通过微博内置的浏览器进行跳转。即使你通过手动复制链接的方式打开链接,你依然需要至少两个步骤方能见到“庐山真面目”。借鉴/抄袭这一陋习的还有 简书,花时间做了一个第三方链接跳转提示页面,唯独不愿意在上面加一个a标签,你还是要手动复制黏贴。坦白说,我觉得国内互联网正在丧失着信仰,看起来电商、物流、外卖、打车、支付……此起彼伏逐渐渗透到我们生活的方方面面,成为名副其实的“互联网+”,可在信息泛滥的今天,我们越来越难找到真正有价值的信息……既然外链注定要被屏蔽掉,那我就勉为其难地顺应潮流发“长截图”咯,所以,接下来我会为大家分享实现网页"长截图"的常见思路,希望对有类似烦恼或者需求的小伙伴们有所帮助。
通过浏览器实现
要实现网页长截图,显然是和网页打交道,而和网页打交道最多的是谁呢?自然是我们每天都要用的浏览器啦!值得庆幸的是,不管是 Chrome 还是 Firefox ,我们都可以通过它们来是实现这个想法。
Chrome
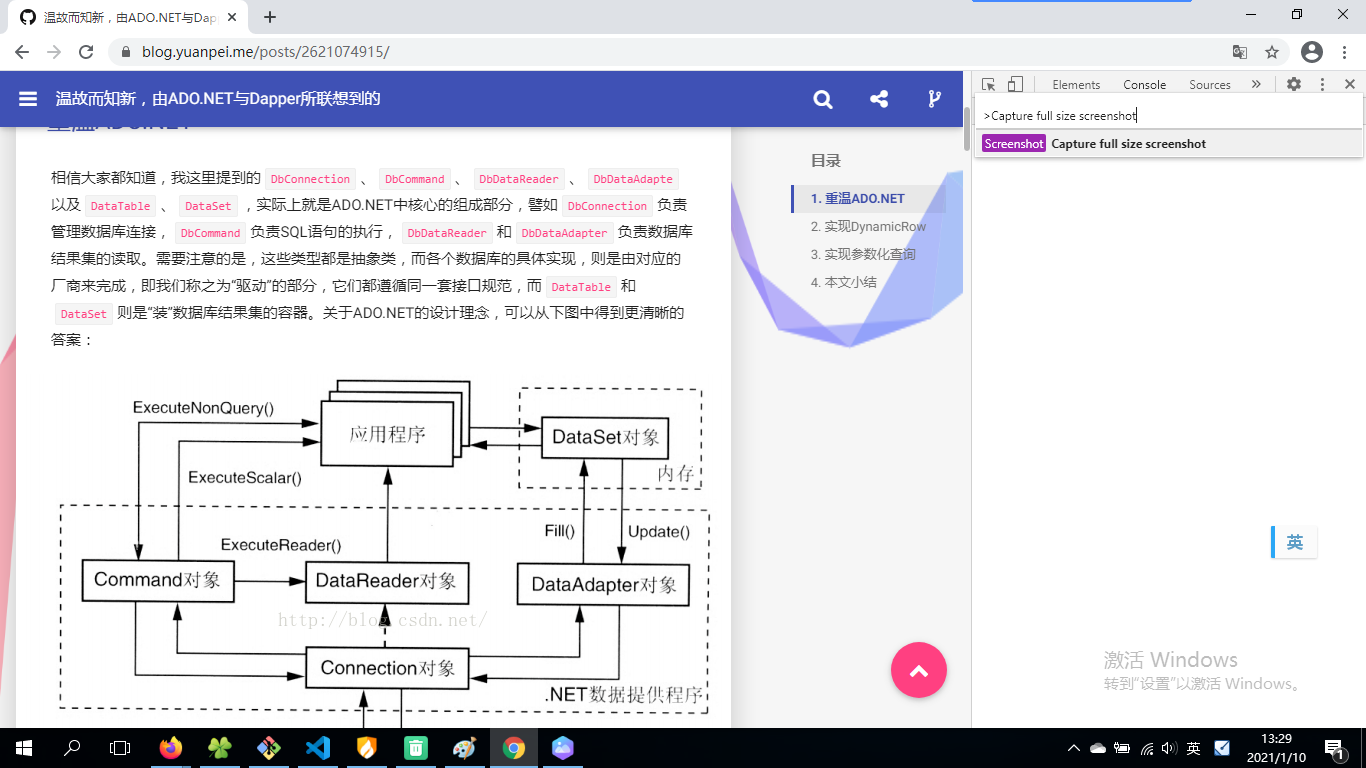
对于 Chrome 来说,我们只需要“F12”打开开发者工具,并在其中找到“控制台”选项卡,在平时输入 JavaScript 脚本的地方(即 Console 选项卡)输入Ctrl + Shift + P命令,然后你会得到一个类似 VSCode 命令行体验的输入窗口,接下来,输入:Capture full size screenshot并回车。此时,我们就可以得到完整的页面截图。而如果你希望截取网页中的一部分,则可以在选中指定 DOM 元素后采用相同的方式输入命令:Capture node screenshot。此外,更常用的截取浏览器可见范围内的内容,可以使用:Capture screenshot。可能相对于一般可以进行拖拽截图的工具而言,这个方案显得有点笨拙且简陋,可它真的可以完美地实现我们的想法,而且不需要安装任何扩展或者插件。
Firefox
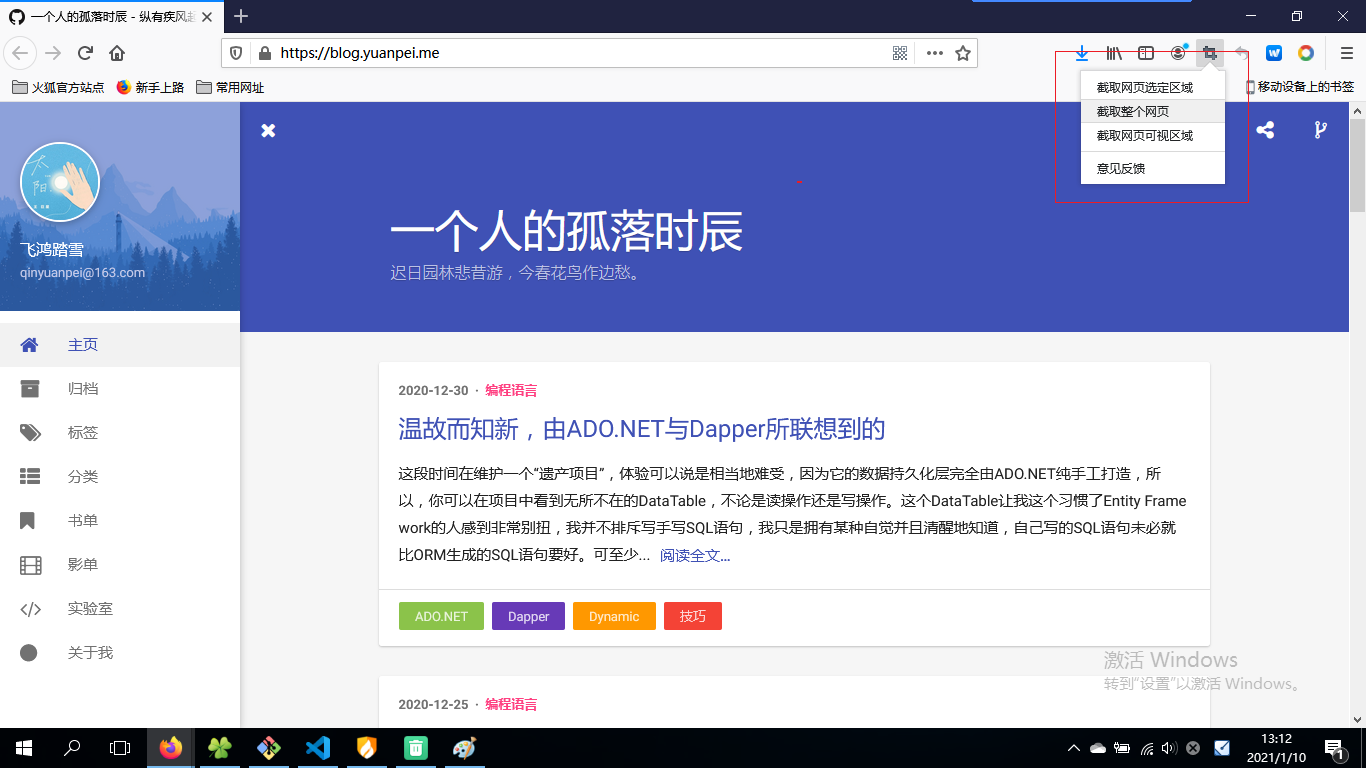
对于 Firefox 而言,它本身自带截图功能,并且支持拖拽截图,对于我们这些需要长截图的人而言,唯一需要做的就是点击几下数据,确实要比敲命令行要简单一点、友好一点,我个人更喜欢用 Firefox 一点,因为 Chrome 正在从屠龙少年变成恶龙,为了让这个世界上不是只有 Chrome 一种浏览器内核,我决定支持一下 Firefox ,2020年因为疫情的原因, Mozila 裁员25%约250人,这家几乎靠着理想主义在维护 Gecko 内核的公司,之后可能再无法和 Google 的 Chrome 抗衡,而这个世界只有一种浏览器的时代我们都曾经经历过,它的名字叫做 IE6 ,不禁令人感慨,简直是开放 Web 的罗曼蒂克消亡史。
通过Selenium实现
在我的认知中,有浏览器的地方就有爬虫,而有爬虫的地方就有Selenium。原本好端端的UI自动化测试框架,怎么就助纣为虐做起爬虫来了呢?其实,主要原因是它提供了一个可以和浏览器交互的环境,从某种意义上来讲,Selenium 、PhantomJS 以及 Playwright 都可以认为是类似的技术,这里我们以Selenium为例,而通过Selenium实现网页长截图则主要有两种方式:其一,是构造一个足够“大”的浏览器,然后调用save_screenshot()方法进行截图;其二,是通过“拖拽”滚动条来滚动截图,然后再通过PIL进行拼接,下面来看具体的代码实现:
def save_screenshot(url, fp_pic):
    fireFoxOptions = webdriver.FirefoxOptions()
    fireFoxOptions.set_headless()
    driver = webdriver.Firefox(firefox_options=fireFoxOptions)
    driver.get(url)
    time.sleep(1)
    # 设置浏览器宽度和高度
    width = driver.execute_script(
      "return document.documentElement.scrollWidth"
    )
    height = driver.execute_script(
      "return document.documentElement.scrollHeight"
    )
    driver.set_window_size(width, height)
    time.sleep(1)
    # 截图
    driver.save_screenshot(fp_pic)
    driver.close()
这里我使用的是 Firefox 的驱动,喜欢 Chrome 的按个人喜好即可,这里我假设你已经掌握了 Python 和 Selenium,如果需要一点辅助知识,可以参考博主的这篇文章:作为技术宅的我,是这样追鬼滅の刃的 。这种方式的“长截图”实现起来非常简单,可是因为需要构造一个非常“大”的浏览器,所以,如果页面适配没有做好的话,可能会出现页面元素变形的问题,其次,这种方式生成的图片体积普遍比较大,所以,从总体上看主要就是这两个缺点。而“滚动截图”实现起来会稍微复杂一点,因为里面会涉及到一小部分计算:
def save_screenshot2(url, fp_pic):
    fireFoxOptions = webdriver.FirefoxOptions()
    fireFoxOptions.set_headless()
    driver = webdriver.Firefox(firefox_options=fireFoxOptions)
    driver.fullscreen_window() # 全屏窗口
    driver.get(url)
    window_height = driver.get_window_size()['height'] # 窗口高度

    page_height = driver.execute_script(
      'return document.documentElement.scrollHeight'
    ) # 页面高度
    driver.save_screenshot('temp.png')

    if page_height > window_height:
        n = page_height // window_height # 需要滚动的次数
        base_mat = np.atleast_2d(Image.open('temp.png')) # 打开截图并转为二维矩阵

    for i in range(n):
        driver.execute_script(
          f'document.documentElement.scrollTop={window_height * (i+1)};'
        )
        time.sleep(.5)
        driver.save_screenshot(f'temp_{i}.png') # 保存截图
        mat = np.atleast_2d(Image.open(f'temp_{i}.png')) # 打开截图并转为二维矩阵
        base_mat = np.append(base_mat, mat, axis=0) # 拼接图片的二维矩阵
        Image.fromarray(base_mat).save(fp_pic, format='PNG')
        os.remove(f'temp_{i}.png')

    os.remove('temp.png')
    driver.quit()
这个方案本身没有太大的问题,可如果你的网页是那种页面滚动时头部固定的设计,譬如类似博主的博客这样的风格,此时这种方案就会有一点问题,每次截取都会包含头部这部分,和我们最后想要实现的效果有一点出入,如果可以计算出头部的高度,截图或者拼接的时候把这个高度考虑进去,就可以彻底解决这个问题,可这样这个问题就从一个通用型问题变成一个局部型问题啦,果然,世上没有完美的解决方案呢…
通过JavaScript实现
有人可能要说,博主你好偏心,为什么 Python 都出来了,作为前端三剑客之一的 JavaScript 还没有出现?嗯,对此我想说——你不用说,我知道不就是**“人生苦短,我用Python”**吗?人家前端世界里有个叫做 html2canvas 的库,博主你可有耳闻?我笑了笑,我并没有看了看我的劳力士,因为我没有劳力士。好吧,既然这里提到了这个库,那就来说说这个库的实现思路吧,人家不是说了嘛?一切可以实现的东西,最终可以用 JavaScript 来实现,我们来看看具体的代码实现,这里,首先准备一个HTML文件:
<!DOCTYPE html>
<head>
    <script src='./html2canvas.min.js'></script>
    <script src="https://cdn.jsdelivr.net/npm/vue/dist/vue.js"></script>
</head>
<body style="overflow: hidden;">
    <div id="app" style="height: 768px; overflow: hidden;">
        请输入URL: <input type="text" v-model="url">
        <button v-on:click="capture">截取</button>
        <hr>
        <iframe
          id="view"
          v-bind:src='url'
          width="100%"
          height="100%"
          frameborder="0"
          ref="view">
        </iframe>
    </div>
</body>
非常简单,输入一个地址,然后通过一个iframe进行预览,点击按钮进行截图。下面给出JavaScript代码:
<script>
    var vm = new Vue({
        el: '#app',
        data: {
            url: 'https://regularly-archive.github.io/2020/Matrix/',
        },
        methods: {
            capture: function() {
                var self = this;
                var iframe = self.$refs.view.contentWindow;
                var iframeBody = iframe.document.getElementsByTagName('body')[0]
                html2canvas(iframeBody).then(canvas => {
                    document.body.appendChild(canvas);
                    //canvas转图片
                    let canvasImg = canvas.toDataURL("image/png");
                    //模拟下载
                    var a = document.createElement('a')
                    a.href = canvasImg;
                    a.download = self.url;
                    let event = document.createEvent("MouseEvents")
                    event.initMouseEvent("click", true, false,
                       window, 0, 0, 0, 0, 0, false, false, false, false, 0, null)
                    a.dispatchEvent(event)
                });
            }
        }
    });
</script>
效果如下,你可以点击 这里 访问在线演示DEMO:

这里使用iframe可能会引入跨域的问题,大家可以参考我的这篇文章:聊聊前端跨域的爱恨情仇 ,而 html2canvas 本身就提供了关于跨域问题的解决方案,大家可以参考这里:http://html2canvas.hertzen.com/configuration。
通过第三方工具实现
我知道程序员都喜欢自己去折腾,如果是前无古人、后无来者的东西,我建议去折腾,因为梦想还是要有的,万一实现了呢?而我们这个圈子里同样有一句经典的话,叫做“不要重复制造轮子”,所以,博主这里找到了几个轮子供大家参考,不喜欢在冬天动手写代码的人,可以收藏下这几个工具,这个冬天实在是太冷了,冷到什么程度呢?大概听见笑话都不大愿意笑,用罗翔老师的话说这叫做搞笑未遂。
wkhtml2image
wkhtml系列,一个命令行工具,可以将本地HTML文件或者远程URL指向的网页转化为图片,该系列产品中还有wkhtml2pdf,顾名思义,网页转PDF,实际使用过程中基本没什么问题,输出的图片1:1还原网页,唯一的缺点是偶尔会丢失样式,尤其是页面中引入了第三方的JavaScript或者CSS的时候,整体上远程URL比本地HTML要稳定一点,推荐系数:4星。

PickFrom
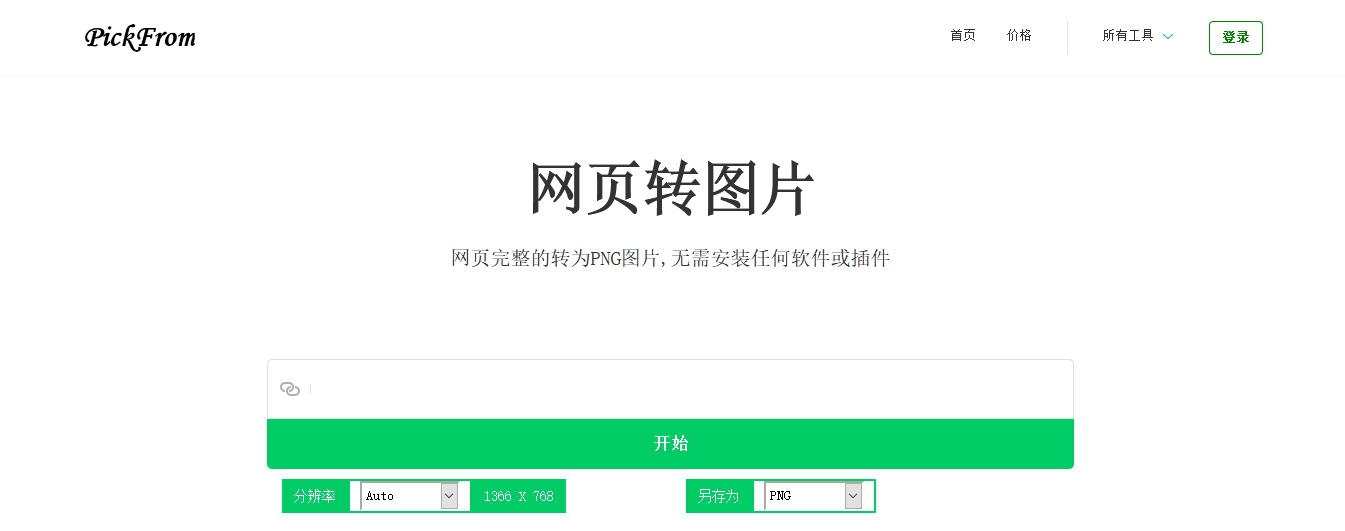
PickFrom,一个在线的网页转图片的服务,填写URL然后点击按钮即可,提供免费预览一部分图片的功能,完整图片的查看、下载均需要支付一定费用,服务质量还可以,但不适合我们这种被迫“白嫖”的穷人家的孩子,土豪们随意,推荐系数:4星
Tiomg
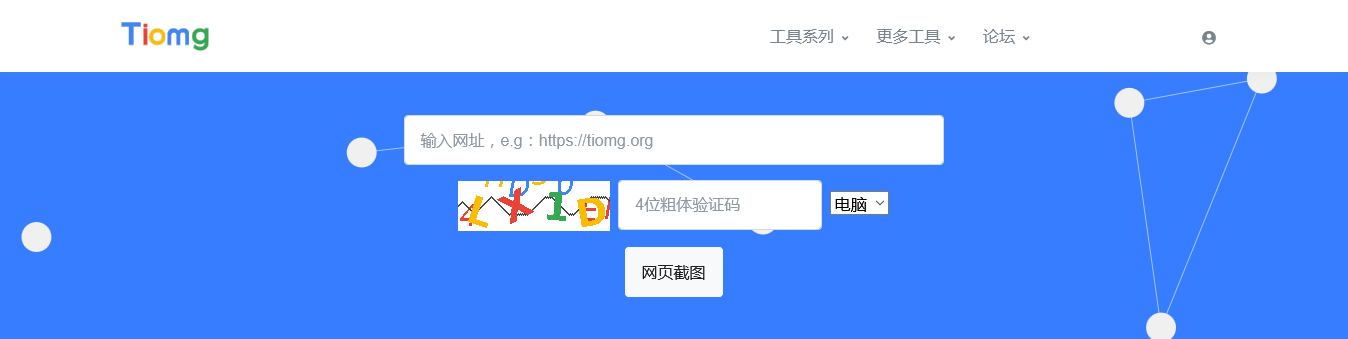
Tiomg,接下来是博主要重点推荐,它和 PickFrom 提供着相同的服务,唯一不同的是,它是完全免费的,我现在主要用这个来工具来生成“长截图”,不错,我背叛了上面我写的那些代码,为什么要重复造轮子呢?有时候我想不明白,为什么国内公司都喜欢那种“大而全”的软件,恨不得要拥有竞争对手所有的特性,可明明大家都“卷”成这样了,为什么不试试差异化的路线呢?可能,是因为低端竞争太多吧!推荐系数:5星
冬天实在是没有动力去写有技术含量的东西啊!关于“长截图”这个话题,差不多是从一周前开始关注、做实验的,所以,请允许在下偶尔写这样一篇“水文”吧!关于“视频是不能P的系列”,因为 Dlib 安装起来实在讨厌,而 OpenCV 提供的 68 特征点算法目前只支持 C++ ,研究起来难免要花一点时间,好了,这篇博客暂时先写到这里吧,博主要先去冬眠啦,再见!


 7308
7308


 被折叠的 条评论
为什么被折叠?
被折叠的 条评论
为什么被折叠?
 到【灌水乐园】发言


