


 本文将展示如何在 Android 应用中利用 DrawerLayout 控件实现侧滑菜单功能,包括布局设计、代码实现以及与 Toolbar 的整合。通过示例代码和说明,详细介绍了如何配置 DrawerLayout、ListView 和 Toolbar,使得应用界面更加美观且交互体验得到提升。
DrawerLayout是谷歌自带的一个侧滑的控件,以前没有这个的时候我们用的都是第三方的SlidingMenu(当然也有大神用ViewGroup自己写的),有了这个原生的之后大家还是用原生的吧,第三方能不用则不用,三方好用是好用只是不安全,毕竟那个东西是别人的兼容性也没有原生的好,而且这个原生的侧滑使用起来比SlidingMenu更轻松,下面来演示如何使用它。
这里我们使用前面讲过的toolbar来替代actionBar,如果你对这块只是不是很熟练,可以查看我的博客:Android之toolbar的使用。
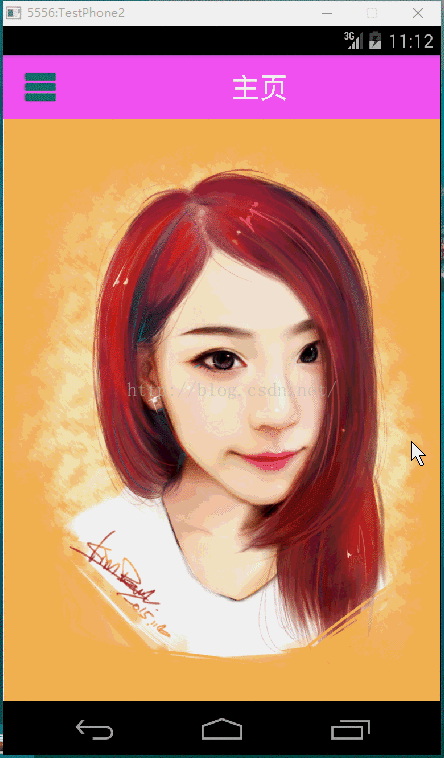
这里我们演示的效果如下:
先来看布局文件:
<?xml version="1.0" encoding="utf-8"?>
<RelativeLayout xmlns:android="http://schemas.android.com/apk/res/android"
    android:layout_width="match_parent"
    android:layout_height="match_parent">

    <android.support.v7.widget.Toolbar
        android:id="@+id/toolBar"
        android:layout_width="match_parent"
        android:layout_height="wrap_content"
        android:background="#aaff0cff"
        android:gravity="center">

        <TextView
            android:layout_width="match_parent"
            android:layout_height="wrap_content"
            android:gravity="center"
            android:text="主页"
            android:textColor="#fff"
            android:textSize="25sp" />
    </android.support.v7.widget.Toolbar>

    <android.support.v4.widget.DrawerLayout
        android:id="@+id/drawerLayout"
        android:layout_width="match_parent"
        android:layout_height="match_parent"
        android:layout_below="@id/toolBar">

        <RelativeLayout
            android:layout_width="match_parent"
            android:layout_height="match_parent">

            <ImageView
                android:layout_width="wrap_content"
                android:layout_height="wrap_content"
                android:scaleType="centerInside"
                android:src="@drawable/girl" />
        </RelativeLayout>

        <FrameLayout
            android:id="@+id/frame"
            android:layout_width="@dimen/drawer_frame_width"
            android:layout_height="match_parent"
            android:layout_gravity="start"
            android:background="#aa098976">
            <ListView
                android:id="@+id/listView"
                android:layout_width="match_parent"
                android:divider="#f00"
                android:dividerHeight="1dp"
                android:layout_height="match_parent"></ListView>
        </FrameLayout>
    </android.support.v4.widget.DrawerLayout>


</RelativeLayout>
跟布局为相对布局,里面一个toolbar和一个drawerlayout,toolbar里面包含一个TextView,drawerlayout里面包含一个相对布局和一个帧布局,相对布局里面是一张图片,用来做抽屉没有显示出来时候的界面即手机进去的屏幕界面,帧布局里面有一个listview用来做抽屉的布局。
下面来看MainActivity里面oncreate方法的代码:
    @Override
    protected void onCreate(Bundle savedInstanceState) {
        super.onCreate(savedInstanceState);
        setContentView(R.layout.activity_main);
        //找到布局中的抽屉
        drawerLayout = (DrawerLayout) findViewById(R.id.drawerLayout);
        //抽屉布局中的ListView相关设置
        listView = (ListView) findViewById(R.id.listView);
        listView.setAdapter(new ArrayAdapter<String>(this, android.R.layout.simple_list_item_1, getResources().getStringArray(R.array.listItem)));
        listView.setOnItemClickListener(new AdapterView.OnItemClickListener() {
            @Override
            public void onItemClick(AdapterView<?> parent, View view, int position, long id) {
                Toast.makeText(MainActivity.this, "点击的条目:" + position, Toast.LENGTH_SHORT).show();
            }
        });
        //toolbar的相关设计,如果不懂可以查看我相关的博客
        toolbar = (Toolbar) findViewById(R.id.toolBar);
        toolbar.setTitle("");
        setSupportActionBar(toolbar);
        toolbar.setNavigationIcon(R.drawable.navigation);

} //对toolbar中的navigation图标做点击监听
@Override
public boolean onOptionsItemSelected(MenuItem item) {
switch (item.getItemId()) {
case android.R.id.home:
if (drawerLayout.isDrawerOpen(GravityCompat.START)) {
drawerLayout.closeDrawer(GravityCompat.START);
} else {
drawerLayout.openDrawer(GravityCompat.START);
}
break;
}
return super.onOptionsItemSelected(item);
}这两个方法就构成了整个MainActivity的代码,里面我们用到了values文件夹下面的资源文件,整个这里就不演示了。
扫描关注我的微信公众号:

是不是特别简单呢?其实作为控件的drawerlayout,所有的属性我们都可以在xml文件布局的时候就可以指定了,需要注意的是drawerlayout只能有两个子控件,第一个控件用来显示主界面,第二个用来显示抽屉里面的布局。如果要求界面复杂,我们可以把这两个设置成容器控件,然后就可以在容器里面添加我们想要的布局了。
最后附上我的demo,使用android studio开发的:demo


 327
327

 被折叠的 条评论
为什么被折叠?
被折叠的 条评论
为什么被折叠?
 到【灌水乐园】发言


