


第一步需要 知道view的绘制过程
View绘制流程以及invalidate()等相关方法分析
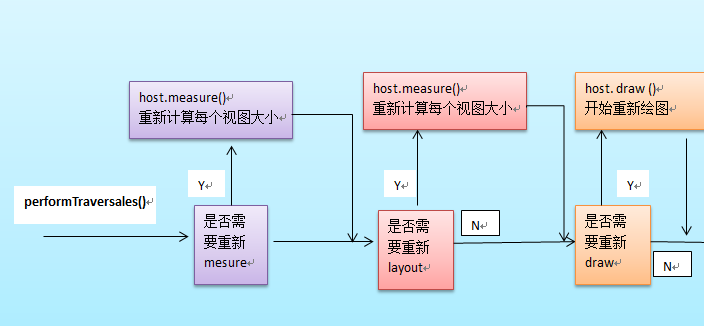
整个View树的绘图流程是在ViewRoot.java类的performTraversals()函数展开的,该函数做的执行过程可简单概况为
根据之前设置的状态,判断是否需要重新计算视图大小(measure)、是否重新需要安置视图的位置(layout)、以及是否需要重绘
(draw),其框架过程如下:
步骤其实为host.layout()
接下来温习一下整个View树的结构,对每个具体View对象的操作,其实就是个递归的实现。

流程一: mesarue()过程
主要作用:为整个View树计算实际的大小,即设置实际的高(对应属性:mMeasuredHeight)和宽(对应属性:
mMeasureWidth),每个View的控件的实际宽高都是由父视图和本身视图决定的。
具体的调用链如下:
ViewRoot根对象地属性mView(其类型一般为ViewGroup类型)调用measure()方法去计算View树的大小,回调
View/ViewGroup对象的onMeasure()方法,该方法实现的功能如下:
1、设置本View视图的最终大小,该功能的实现通过调用setMeasuredDimension()方法去设置实际的高(对应属性:
mMeasuredHeight)和宽(对应属性:mMeasureWidth) ;
2 、如果该View对象是个ViewGroup类型,需要重写该onMeasure()方法,对其子视图进行遍历的measure()过程。
2.1 对每个子视图的measure()过程,是通过调用父类ViewGroup.java类里的measureChildWithMargins()方法去
实现,该方法内部只是简单地调用了View对象的measure()方法。(由于measureChildWithMargins()方法只是一个过渡
层更简单的做法是直接调用View对象的measure()方法)。
整个measure调用流程就是个树形的递归过程
measure函数原型为 View.java 该函数不能被重载
- public final void measure(int widthMeasureSpec, int heightMeasureSpec) {
- //....
- //回调onMeasure()方法
- onMeasure(widthMeasureSpec, heightMeasureSpec);
- //more
- }
为了大家更好的理解,采用“二B程序员”的方式利用伪代码描述该measure流程
- //回调View视图里的onMeasure过程
- private void onMeasure(int height , int width){
- //设置该view的实际宽(mMeasuredWidth)高(mMeasuredHeight)
- //1、该方法必须在onMeasure调用,否者报异常。
- setMeasuredDimension(h , l) ;
- //2、如果该View是ViewGroup类型,则对它的每个子View进行measure()过程
- int childCount = getChildCount() ;
- for(int i=0 ;i<childCount ;i++){
- //2.1、获得每个子View对象引用
- View child = getChildAt(i) ;
- //整个measure()过程就是个递归过程
- //该方法只是一个过滤器,最后会调用measure()过程 ;或者 measureChild(child , h, i)方法都
- measureChildWithMargins(child , h, i) ;
- //其实,对于我们自己写的应用来说,最好的办法是去掉框架里的该方法,直接调用view.measure(),如下:
- //child.measure(h, l)
- }
- }
- //该方法具体实现在ViewGroup.java里 。
- protected void measureChildWithMargins(View v, int height , int width){
- v.measure(h,l)
- }
流程二、 layout布局过程:
主要作用 :为将整个根据子视图的大小以及布局参数将View树放到合适的位置上。
具体的调用链如下:
host.layout()开始View树的布局,继而回调给View/ViewGroup类中的layout()方法。具体流程如下
1 、layout方法会设置该View视图位于父视图的坐标轴,即mLeft,mTop,mLeft,mBottom(调用setFrame()函数去实现)
接下来回调onLayout()方法(如果该View是ViewGroup对象,需要实现该方法,对每个子视图进行布局) ;
2、如果该View是个ViewGroup类型,需要遍历每个子视图chiildView,调用该子视图的layout()方法去设置它的坐标值。
layout函数原型为 ,位于View.java
- /* final 标识符 , 不能被重载 , 参数为每个视图位于父视图的坐标轴
- * @param l Left position, relative to parent
- * @param t Top position, relative to parent
- * @param r Right position, relative to parent
- * @param b Bottom position, relative to parent
- */
- public final void layout(int l, int t, int r, int b) {
- boolean changed = setFrame(l, t, r, b); //设置每个视图位于父视图的坐标轴
- if (changed || (mPrivateFlags & LAYOUT_REQUIRED) == LAYOUT_REQUIRED) {
- if (ViewDebug.TRACE_HIERARCHY) {
- ViewDebug.trace(this, ViewDebug.HierarchyTraceType.ON_LAYOUT);
- }
- onLayout(changed, l, t, r, b);//回调onLayout函数 ,设置每个子视图的布局
- mPrivateFlags &= ~LAYOUT_REQUIRED;
- }
- mPrivateFlags &= ~FORCE_LAYOUT;
- }
同样地, 将上面layout调用流程,用伪代码描述如下:
- // layout()过程 ViewRoot.java
- // 发起layout()的"发号者"在ViewRoot.java里的performTraversals()方法, mView.layout()
- private void performTraversals(){
- //...
- View mView ;
- mView.layout(left,top,right,bottom) ;
- //....
- }
- //回调View视图里的onLayout过程 ,该方法只由ViewGroup类型实现
- private void onLayout(int left , int top , right , bottom){
- //如果该View不是ViewGroup类型
- //调用setFrame()方法设置该控件的在父视图上的坐标轴
- setFrame(l ,t , r ,b) ;
- //--------------------------
- //如果该View是ViewGroup类型,则对它的每个子View进行layout()过程
- int childCount = getChildCount() ;
- for(int i=0 ;i<childCount ;i++){
- //2.1、获得每个子View对象引用
- View child = getChildAt(i) ;
- //整个layout()过程就是个递归过程
- child.layout(l, t, r, b) ;
- }
- }
流程三、 draw()绘图过程
由ViewRoot对象的performTraversals()方法调用draw()方法发起绘制该View树,值得注意的是每次发起绘图时,并不
会重新绘制每个View树的视图,而只会重新绘制那些“需要重绘”的视图,View类内部变量包含了一个标志位DRAWN,当该
视图需要重绘时,就会为该View添加该标志位。
调用流程 :
mView.draw()开始绘制,draw()方法实现的功能如下:
1 、绘制该View的背景
2 、为显示渐变框做一些准备操作(见5,大多数情况下,不需要改渐变框)
3、调用onDraw()方法绘制视图本身 (每个View都需要重载该方法,ViewGroup不需要实现该方法)
4、调用dispatchDraw ()方法绘制子视图(如果该View类型不为ViewGroup,即不包含子视图,不需要重载该方法)
值得说明的是,ViewGroup类已经为我们重写了dispatchDraw ()的功能实现,应用程序一般不需要重写该方法,但可以重载父类
函数实现具体的功能。
4.1 dispatchDraw()方法内部会遍历每个子视图,调用drawChild()去重新回调每个子视图的draw()方法(注意,这个
地方“需要重绘”的视图才会调用draw()方法)。值得说明的是,ViewGroup类已经为我们重写了dispatchDraw()的功能
实现,应用程序一般不需要重写该方法,但可以重载父类函数实现具体的功能。
5、绘制滚动条
于是,整个调用链就这样递归下去了。
同样地,使用伪代码描述如下:
- // draw()过程 ViewRoot.java
- // 发起draw()的"发号者"在ViewRoot.java里的performTraversals()方法, 该方法会继续调用draw()方法开始绘图
- private void draw(){
- //...
- View mView ;
- mView.draw(canvas) ;
- //....
- }
- //回调View视图里的onLayout过程 ,该方法只由ViewGroup类型实现
- private void draw(Canvas canvas){
- //该方法会做如下事情
- //1 、绘制该View的背景
- //2、为绘制渐变框做一些准备操作
- //3、调用onDraw()方法绘制视图本身
- //4、调用dispatchDraw()方法绘制每个子视图,dispatchDraw()已经在Android框架中实现了,在ViewGroup方法中。
- // 应用程序程序一般不需要重写该方法,但可以捕获该方法的发生,做一些特别的事情。
- //5、绘制渐变框
- }
- //ViewGroup.java中的dispatchDraw()方法,应用程序一般不需要重写该方法
- @Override
- protected void dispatchDraw(Canvas canvas) {
- //
- //其实现方法类似如下:
- int childCount = getChildCount() ;
- for(int i=0 ;i<childCount ;i++){
- View child = getChildAt(i) ;
- //调用drawChild完成
- drawChild(child,canvas) ;
- }
- }
- //ViewGroup.java中的dispatchDraw()方法,应用程序一般不需要重写该方法
- protected void drawChild(View child,Canvas canvas) {
- // ....
- //简单的回调View对象的draw()方法,递归就这么产生了。
- child.draw(canvas) ;
- //.........
- }
View(视图)绘制不同状态背景图片原理
1、View的几种不同状态属性
2、如何根据不同状态去切换我们的背景图片。
开篇介绍:android背景选择器selector用法汇总
对Android开发有经验的同学,对 <selector>节点的使用一定很熟悉,该节点的作用就是定义一组状态资源图片,使其能够
在不同的状态下更换某个View的背景图片。例如,如下的hello_selection.xml文件定义:
- <?xml version="1.0" encoding="utf-8" ?>
- <selector xmlns:android="http://schemas.android.com/apk/res/android">
- <!-- 触摸时并且当前窗口处于交互状态 -->
- <item android:state_pressed="true" android:state_window_focused="true" android:drawable= "@drawable/pic1" />
- <!-- 触摸时并且没有获得焦点状态 -->
- <item android:state_pressed="true" android:state_focused="false" android:drawable="@drawable/pic2" />
- <!--选中时的图片背景-->
- <item android:state_selected="true" android:drawable="@drawable/pic3" />
- <!--获得焦点时的图片背景-->
- <item android:state_focused="true" android:drawable="@drawable/pic4" />
- <!-- 窗口没有处于交互时的背景图片 -->
- <item android:drawable="@drawable/pic5" />
- </selector>
更多关于 <selector>节点的使用请参考该博客<android背景选择器selector用法汇总>
其实,前面说的xml文件,最终会被Android框架解析成StateListDrawable类对象。
知识点一:StateListDrawable类介绍
类功能说明:该类定义了不同状态值下与之对应的图片资源,即我们可以利用该类保存多种状态值,多种图片资源。
常用方法为:
public void addState (int[] stateSet, Drawable drawable)
功能: 给特定的状态集合设置drawable图片资源
使用方式:参考前面的hello_selection.xml文件,我们利用代码去构建一个相同的StateListDrawable类对象,如下:
- //初始化一个空对象
- StateListDrawable stalistDrawable = new StateListDrawable();
- //获取对应的属性值 Android框架自带的属性 attr
- int pressed = android.R.attr.state_pressed;
- int window_focused = android.R.attr.state_window_focused;
- int focused = android.R.attr.state_focused;
- int selected = android.R.attr.state_selected;
- stalistDrawable.addState(new int []{pressed , window_focused}, getResources().getDrawable(R.drawable.pic1));
- stalistDrawable.addState(new int []{pressed , -focused}, getResources().getDrawable(R.drawable.pic2);
- stalistDrawable.addState(new int []{selected }, getResources().getDrawable(R.drawable.pic3);
- stalistDrawable.addState(new int []{focused }, getResources().getDrawable(R.drawable.pic4);
- //没有任何状态时显示的图片,我们给它设置我空集合
- stalistDrawable.addState(new int []{}, getResources().getDrawable(R.drawable.pic5);
上面的“-”负号表示对应的属性值为false
当我们为某个View使用其作为背景色时,会根据状态进行背景图的转换。
public boolean isStateful ()
功能: 表明该状态改变了,对应的drawable图片是否会改变。
注:在StateListDrawable类中,该方法返回为true,显然状态改变后,我们的图片会跟着改变。
知识点二:View的五种状态值
一般来说,Android框架为View定义了四种不同的状态,这些状态值的改变会引发View相关操作,例如:更换背景图片、是否
触发点击事件等;视
视图几种不同状态含义见下图:

其中selected和focused的区别有如下几点:
1,我们通过查看setSelected()方法,来获取相关信息。
SDK中对setSelected()方法----对于与selected状态有如下说明:
public void setSelected (boolean selected)
Since: APILevel 1
Changes the selection state of this view. Aview can be selected or not. Note that selection is not the same as
focus. Views are typically selected in the context of an AdapterView like ListView or GridView ;the selected view is
the view that is highlighted.
Parameters selected true if the view must be selected, false otherwise
由以上可知:selected不同于focus状态,通常在AdapterView类群下例如ListView或者GridView会使某个View处于
selected状态,并且获得该状态的View处于高亮状态。
2、一个窗口只能有一个视图获得焦点(focus),而一个窗口可以有多个视图处于”selected”状态中。
总结:focused状态一般是由按键操作引起的;
pressed状态是由触摸消息引起的;
selected则完全是由应用程序主动调用setSelected()进行控制。
例如:当我们触摸某个控件时,会导致pressed状态改变;获得焦点时,会导致focus状态变化。于是,我们可以通过这种
更新后状态值去更新我们对应的Drawable对象了。
问题:如何根据状态值的改变去绘制/显示对应的背景图?
当View任何状态值发生改变时,都会调用refreshDrawableList()方法去更新对应的背景Drawable对象。
其整体调用流程如下: View.java类中
- //路径:\frameworks\base\core\java\android\view\View.java
- /* Call this to force a view to update its drawable state. This will cause
- * drawableStateChanged to be called on this view. Views that are interested
- * in the new state should call getDrawableState.
- */
- //主要功能是根据当前的状态值去更换对应的背景Drawable对象
- public void refreshDrawableState() {
- mPrivateFlags |= DRAWABLE_STATE_DIRTY;
- //所有功能在这个函数里去完成
- drawableStateChanged();
- ...
- }
- /* This function is called whenever the state of the view changes in such
- * a way that it impacts the state of drawables being shown.
- */
- // 获得当前的状态属性--- 整型集合 ; 调用Drawable类的setState方法去获取资源。
- protected void drawableStateChanged() {
- //该视图对应的Drawable对象,通常对应于StateListDrawable类对象
- Drawable d = mBGDrawable;
- if (d != null && d.isStateful()) { //通常都是成立的
- //getDrawableState()方法主要功能:会根据当前View的状态属性值,将其转换为一个整型集合
- //setState()方法主要功能:根据当前的获取到的状态,更新对应状态下的Drawable对象。
- d.setState(getDrawableState());
- }
- }
- /*Return an array of resource IDs of the drawable states representing the
- * current state of the view.
- */
- public final int[] getDrawableState() {
- if ((mDrawableState != null) && ((mPrivateFlags & DRAWABLE_STATE_DIRTY) == 0)) {
- return mDrawableState;
- } else {
- //根据当前View的状态属性值,将其转换为一个整型集合,并返回
- mDrawableState = onCreateDrawableState(0);
- mPrivateFlags &= ~DRAWABLE_STATE_DIRTY;
- return mDrawableState;
- }
- }
通过这段代码我们可以明白View内部是如何获取更细后的状态值以及动态获取对应的背景Drawable对象----setState()方法
去完成的。这儿我简单的分析下Drawable类里的setState()方法的功能,把流程给走一下:
Step 1 、 setState()函数原型 ,
函数位于:frameworks\base\graphics\java\android\graphics\drawable\StateListDrawable.java 类中
- //如果状态态值发生了改变,就回调onStateChange()方法。
- public boolean setState(final int[] stateSet) {
- if (!Arrays.equals(mStateSet, stateSet)) {
- mStateSet = stateSet;
- return onStateChange(stateSet);
- }
- return false;
- }
该函数的主要功能: 判断状态值是否发生了变化,如果发生了变化,就调用onStateChange()方法进一步处理。
Step 2 、onStateChange()函数原型:
该函数位于 frameworks\base\graphics\java\android\graphics\drawable\StateListDrawable.java 类中
- //状态值发生了改变,我们需要找出第一个吻合的当前状态的Drawable对象
- protected boolean onStateChange(int[] stateSet) {
- //要找出第一个吻合的当前状态的Drawable对象所在的索引位置, 具体匹配算法请自己深入源码看看
- int idx = mStateListState.indexOfStateSet(stateSet);
- ...
- //获取对应索引位置的Drawable对象
- if (selectDrawable(idx)) {
- return true;
- }
- ...
- }
该函数的主要功能: 根据新的状态值,从StateListDrawable实例对象中,找到第一个完全吻合该新状态值的索引下标处 ;
继而,调用selectDrawable()方法去获取索引下标的当前Drawable对象。
具体查找算法在 mStateListState.indexOfStateSet(stateSet) 里实现了。基本思路是:查找第一个能完全吻合该新状态值
的索引下标,如果找到了,则立即返回。 具体实现过程,只好看看源码咯。
Step 3 、selectDrawable()函数原型:
该函数位于 frameworks\base\graphics\java\android\graphics\drawable\StateListDrawable.java 类中
- public boolean selectDrawable(int idx)
- {
- if (idx >= 0 && idx < mDrawableContainerState.mNumChildren) {
- //获取对应索引位置的Drawable对象
- Drawable d = mDrawableContainerState.mDrawables[idx];
- ...
- mCurrDrawable = d; //mCurrDrawable即使当前Drawable对象
- mCurIndex = idx;
- ...
- } else {
- ...
- }
- //请求该View刷新自己,这个方法我们稍后讲解。
- invalidateSelf();
- return true;
- }
该函数的主要功能是选择当前索引下标处的Drawable对象,并保存在mCurrDrawable中。
知识点三: 关于Drawable.Callback接口
该接口定义了如下三个函数:
- //该函数位于 frameworks\base\graphics\java\android\graphics\drawable\Drawable.java 类中
- public static interface Callback {
- //如果Drawable对象的状态发生了变化,会请求View重新绘制,
- //因此我们对应于该View的背景Drawable对象能够”绘制出来”.
- public void invalidateDrawable(Drawable who);
- //该函数目前还不懂
- public void scheduleDrawable(Drawable who, Runnable what, long when);
- //该函数目前还不懂
- public void unscheduleDrawable(Drawable who, Runnable what);
- }
其中比较重要的函数为:
public voidinvalidateDrawable(Drawable who)
函数功能:如果Drawable对象的状态发生了变化,会请求View重新绘制,因此我们对应于该View的背景Drawable对象
能够重新”绘制“出来。
Android框架View类继承了该接口,同时实现了这三个函数的默认处理方式,其中invalidateDrawable()方法如下:
- public class View implements Drawable.Callback, KeyEvent.Callback, AccessibilityEventSource
- {
- ...
- //Invalidates the specified Drawable.
- //默认实现,重新绘制该视图本身
- public void invalidateDrawable(Drawable drawable) {
- if (verifyDrawable(drawable)) { //是否是同一个Drawable对象,通常为真
- final Rect dirty = drawable.getBounds();
- final int scrollX = mScrollX;
- final int scrollY = mScrollY;
- //重新请求绘制该View,即重新调用该View的draw()方法 ...
- invalidate(dirty.left + scrollX, dirty.top + scrollY,
- dirty.right + scrollX, dirty.bottom + scrollY);
- }
- }
- ...
- }
因此,我们的Drawable类对象必须将View设置为回调对象,否则,即使改变了状态,也不会显示对应的背景图。 如下:
Drawable d ; // 图片资源
d.setCallback(View v) ; // 视图v的背景资源为 d 对象
知识点四:View绘制背景图片过程
在前面的博客中《Android中View绘制流程以及invalidate()等相关方法分析》,我们知道了一个视图的背景绘制过程时在
View类里的draw()方法里完成的,我们这儿在回顾下draw()的流程,同时重点讲解下绘制背景的操作。
- //方法所在路径:frameworks\base\core\java\android\view\View.java
- //draw()绘制过程
- private void draw(Canvas canvas){
- //该方法会做如下事情
- //1 、绘制该View的背景
- //其中背景图片绘制过程如下:
- //是否透明, 视图通常是透明的 , 为true
- if (!dirtyOpaque) {
- //开始绘制视图的背景
- final Drawable background = mBGDrawable;
- if (background != null) {
- final int scrollX = mScrollX; //获取偏移值
- final int scrollY = mScrollY;
- //视图的布局坐标是否发生了改变, 即是否重新layout了。
- if (mBackgroundSizeChanged) {
- //如果是,我们的Drawable对象需要重新设置大小了,即填充该View。
- background.setBounds(0, 0, mRight - mLeft, mBottom - mTop);
- mBackgroundSizeChanged = false;
- }
- //View没有发生偏移
- if ((scrollX | scrollY) == 0) {
- background.draw(canvas); //OK, 该方法会绘制当前StateListDrawable的当前背景Drawable
- } else {
- //View发生偏移,由于背景图片值显示在布局坐标中,即背景图片不会发生偏移,只有视图内容onDraw()会发生偏移
- //我们调整canvas对象的绘制区域,绘制完成后对canvas对象属性调整回来
- canvas.translate(scrollX, scrollY);
- background.draw(canvas); //OK, 该方法会绘制当前StateListDrawable的当前背景Drawable
- canvas.translate(-scrollX, -scrollY);
- }
- }
- }
- ...
- //2、为绘制渐变框做一些准备操作
- //3、调用onDraw()方法绘制视图本身
- //4、调用dispatchDraw()方法绘制每个子视图,dispatchDraw()已经在Android框架中实现了,在ViewGroup方法中。
- //5、绘制渐变框
- }
That's all ! 我们用到的知识点也就这么多吧。 如果大家有丝丝不明白的话,可以去看下源代码,具体去分析下这些流程到底
是怎么走下来的。
我们从宏观的角度分析了View绘制不同状态背景的原理,View框架就是这么做的。为了易于理解性,
下面我们通过一个小Demo来演示前面种种流程。
Demo 说明:
我们参照View框架中绘制不同背景图的实现原理,自定义一个View类,通过给它设定StateListDrawable对象,使其能够在
不同状态时能动态"绘制"背景图片。 基本流程方法和View.java类实现过程一模一样。
截图如下:


初始背景图 触摸后显示的背景图(pressed)
一、主文件MainActivity.java如下:
- /**
- *
- * @author http://http://blog.csdn.net/qinjuning
- */
- public class MainActivity extends Activity
- {
- @Override
- public void onCreate(Bundle savedInstanceState)
- {
- super.onCreate(savedInstanceState);
- LinearLayout ll = new LinearLayout(MainActivity.this);
- CustomView customView = new CustomView(MainActivity.this);
- //简单设置为 width 200px - height 100px吧
- ViewGroup.LayoutParams lp = new ViewGroup.LayoutParams(200 , 100);
- customView.setLayoutParams(lp);
- //需要将该View设置为可点击/触摸状态,否则触摸该View没有效果。
- customView.setClickable(true);
- ll.addView(customView);
- setContentView(ll);
- }
- }
功能很简单,为Activity设置了视图 。
二、 自定义View如下 , CustomView.java :
- /**
- * @author http://http://blog.csdn.net/qinjuning
- */
- //自定义View
- public class CustomView extends View /*extends Button*/
- {
- private static String TAG = "TackTextView";
- private Context mContext = null;
- private Drawable mBackground = null;
- private boolean mBGSizeChanged = true;; //视图View布局(layout)大小是否发生变化
- public CustomView(Context context)
- {
- super(context);
- mContext = context;
- initStateListDrawable(); // 初始化图片资源
- }
- // 初始化图片资源
- private void initStateListDrawable()
- {
- //有两种方式获取我们的StateListDrawable对象:
- // 获取方式一、手动构建一个StateListDrawable对象
- StateListDrawable statelistDrawable = new StateListDrawable();
- int pressed = android.R.attr.state_pressed;
- int windowfocused = android.R.attr.state_window_focused;
- int enabled = android.R.attr.state_enabled;
- int stateFoucesd = android.R.attr.state_focused;
- //匹配状态时,是一种优先包含的关系。
- // "-"号表示该状态值为false .即不匹配
- statelistDrawable.addState(new int[] { pressed, windowfocused },
- mContext.getResources().getDrawable(R.drawable.btn_power_on_pressed));
- statelistDrawable.addState(new int[]{ -pressed, windowfocused },
- mContext.getResources().getDrawable(R.drawable.btn_power_on_nor));
- mBackground = statelistDrawable;
- //必须设置回调,当改变状态时,会回掉该View进行invalidate()刷新操作.
- mBackground.setCallback(this);
- //取消默认的背景图片,因为我们设置了自己的背景图片了,否则可能造成背景图片重叠。
- this.setBackgroundDrawable(null);
- // 获取方式二、、使用XML获取StateListDrawable对象
- // mBackground = mContext.getResources().getDrawable(R.drawable.tv_background);
- }
- protected void drawableStateChanged()
- {
- Log.i(TAG, "drawableStateChanged");
- Drawable d = mBackground;
- if (d != null && d.isStateful())
- {
- d.setState(getDrawableState());
- Log.i(TAG, "drawableStateChanged and is 111");
- }
- Log.i(TAG, "drawableStateChanged and is 222");
- super.drawableStateChanged();
- }
- //验证图片是否相等 , 在invalidateDrawable()会调用此方法,我们需要重写该方法。
- protected boolean verifyDrawable(Drawable who)
- {
- return who == mBackground || super.verifyDrawable(who);
- }
- //draw()过程,绘制背景图片...
- public void draw(Canvas canvas)
- {
- Log.i(TAG, " draw -----");
- if (mBackground != null)
- {
- if(mBGSizeChanged)
- {
- //设置边界范围
- mBackground.setBounds(0, 0, getRight() - getLeft(), getBottom() - getTop());
- mBGSizeChanged = false ;
- }
- if ((getScrollX() | getScrollY()) == 0) //是否偏移
- {
- mBackground.draw(canvas); //绘制当前状态对应的图片
- }
- else
- {
- canvas.translate(getScrollX(), getScrollY());
- mBackground.draw(canvas); //绘制当前状态对应的图片
- canvas.translate(-getScrollX(), -getScrollY());
- }
- }
- super.draw(canvas);
- }
- public void onDraw(Canvas canvas) {
- ...
- }
- }
将该View设置的背景图片转换为节点xml,形式如下:
- <selector xmlns:android="http://schemas.android.com/apk/res/android">
- <item android:state_pressed="true"
- android:state_window_focused="true"
- android:drawable="@drawable/btn_power_on_pressed"></item>
- <item android:state_pressed="false"
- android:state_window_focused="true"
- android:drawable="@drawable/btn_power_on_nor"></item>
- </selector>
强调一点的就是,在这三个流程中,Google已经帮我们把draw()过程框架已经写好了,自定义的ViewGroup只需要实现
measure()过程和layout()过程即可 。
这三种情况,最终会直接或间接调用到三个函数,分别为invalidate(),requsetLaytout()以及requestFocus() ,接着
这三个函数最终会调用到ViewRoot中的schedulTraversale()方法,该函数然后发起一个异步消息,消息处理中调用
performTraverser()方法对整个View进行遍历。
invalidate()方法 :
说明:请求重绘View树,即draw()过程,假如视图发生大小没有变化就不会调用layout()过程,并且只绘制那些“需要重绘的”
视图,即谁(View的话,只绘制该View ;ViewGroup,则绘制整个ViewGroup)请求invalidate()方法,就绘制该视图。
一般引起invalidate()操作的函数如下:
1、直接调用invalidate()方法,请求重新draw(),但只会绘制调用者本身。
2、setSelection()方法 :请求重新draw(),但只会绘制调用者本身。
3、setVisibility()方法 : 当View可视状态在INVISIBLE转换VISIBLE时,会间接调用invalidate()方法,
继而绘制该View。
4 、setEnabled()方法 : 请求重新draw(),但不会重新绘制任何视图包括该调用者本身。
requestLayout()方法 :会导致调用measure()过程 和 layout()过程 。
说明:只是对View树重新布局layout过程包括measure()和layout()过程,不会调用draw()过程,但不会重新绘制
任何视图包括该调用者本身。
一般引起invalidate()操作的函数如下:
1、setVisibility()方法:
当View的可视状态在INVISIBLE/ VISIBLE 转换为GONE状态时,会间接调用requestLayout() 和invalidate方法。
同时,由于整个个View树大小发生了变化,会请求measure()过程以及draw()过程,同样地,只绘制需要“重新绘制”的视图。
requestFocus()函数说明:
说明:请求View树的draw()过程,但只绘制“需要重绘”的视图。
下面写个简单的小Demo吧,主要目的是给大家演示绘图的过程以及每个流程里该做的一些功能。截图如下:

1、 MyViewGroup.java 自定义ViewGroup类型
- /**
- * @author http://http://blog.csdn.net/qinjuning
- */
- //自定义ViewGroup 对象
- public class MyViewGroup extends ViewGroup{
- private static String TAG = "MyViewGroup" ;
- private Context mContext ;
- public MyViewGroup(Context context) {
- super(context);
- mContext = context ;
- init() ;
- }
- //xml定义的属性,需要该构造函数
- public MyViewGroup(Context context , AttributeSet attrs){
- super(context,attrs) ;
- mContext = context ;
- init() ;
- }
- //为MyViewGroup添加三个子View
- private void init(){
- //调用ViewGroup父类addView()方法添加子View
- //child 对象一 : Button
- Button btn= new Button(mContext) ;
- btn.setText("I am Button") ;
- this.addView(btn) ;
- //child 对象二 : ImageView
- ImageView img = new ImageView(mContext) ;
- img.setBackgroundResource(R.drawable.icon) ;
- this.addView(img) ;
- //child 对象三 : TextView
- TextView txt = new TextView(mContext) ;
- txt.setText("Only Text") ;
- this.addView(txt) ;
- //child 对象四 : 自定义View
- MyView myView = new MyView(mContext) ;
- this.addView(myView) ;
- }
- @Override
- //对每个子View进行measure():设置每子View的大小,即实际宽和高
- protected void onMeasure(int widthMeasureSpec, int heightMeasureSpec){
- //通过init()方法,我们为该ViewGroup对象添加了三个视图 , Button、 ImageView、TextView
- int childCount = getChildCount() ;
- Log.i(TAG, "the size of this ViewGroup is ----> " + childCount) ;
- Log.i(TAG, "**** onMeasure start *****") ;
- //获取该ViewGroup的实际长和宽 涉及到MeasureSpec类的使用
- int specSize_Widht = MeasureSpec.getSize(widthMeasureSpec) ;
- int specSize_Heigth = MeasureSpec.getSize(heightMeasureSpec) ;
- Log.i(TAG, "**** specSize_Widht " + specSize_Widht+ " * specSize_Heigth *****" + specSize_Heigth) ;
- //设置本ViewGroup的宽高
- setMeasuredDimension(specSize_Widht , specSize_Heigth) ;
- for(int i=0 ;i<childCount ; i++){
- View child = getChildAt(i) ; //获得每个对象的引用
- child.measure(50, 50) ; //简单的设置每个子View对象的宽高为 50px , 50px
- //或者可以调用ViewGroup父类方法measureChild()或者measureChildWithMargins()方法
- //this.measureChild(child, widthMeasureSpec, heightMeasureSpec) ;
- }
- }
- @Override
- //对每个子View视图进行布局
- protected void onLayout(boolean changed, int l, int t, int r, int b) {
- // TODO Auto-generated method stub
- //通过init()方法,我们为该ViewGroup对象添加了三个视图 , Button、 ImageView、TextView
- int childCount = getChildCount() ;
- int startLeft = 0 ;//设置每个子View的起始横坐标
- int startTop = 10 ; //每个子View距离父视图的位置 , 简单设置为10px吧 。 可以理解为 android:margin=10px ;
- Log.i(TAG, "**** onLayout start ****") ;
- for(int i=0 ;i<childCount ; i++){
- View child = getChildAt(i) ; //获得每个对象的引用
- child.layout(startLeft, startTop, startLeft+child.getMeasuredWidth(), startTop+child.getMeasuredHeight()) ;
- startLeft =startLeft+child.getMeasuredWidth() + 10; //校准startLeft值,View之间的间距设为10px ;
- Log.i(TAG, "**** onLayout startLeft ****" +startLeft) ;
- }
- }
- //绘图过程Android已经为我们封装好了 ,这儿只为了观察方法调用程
- protected void dispatchDraw(Canvas canvas){
- Log.i(TAG, "**** dispatchDraw start ****") ;
- super.dispatchDraw(canvas) ;
- }
- protected boolean drawChild(Canvas canvas , View child, long drawingTime){
- Log.i(TAG, "**** drawChild start ****") ;
- return super.drawChild(canvas, child, drawingTime) ;
- }
- }
2、MyView.java 自定义View类型,重写onDraw()方法 ,
- //自定义View对象
- public class MyView extends View{
- private Paint paint = new Paint() ;
- public MyView(Context context) {
- super(context);
- // TODO Auto-generated constructor stub
- }
- public MyView(Context context , AttributeSet attrs){
- super(context,attrs);
- }
- protected void onMeasure(int widthMeasureSpec, int heightMeasureSpec){
- //设置该View大小为 80 80
- setMeasuredDimension(50 , 50) ;
- }
- //存在canvas对象,即存在默认的显示区域
- @Override
- public void onDraw(Canvas canvas) {
- // TODO Auto-generated method stub
- super.onDraw(canvas);
- Log.i("MyViewGroup", "MyView is onDraw ") ;
- //加粗
- paint.setTypeface(Typeface.defaultFromStyle(Typeface.BOLD));
- paint.setColor(Color.RED);
- canvas.drawColor(Color.BLUE) ;
- canvas.drawRect(0, 0, 30, 30, paint);
- canvas.drawText("MyView", 10, 40, paint);
- }
- }
主Activity只是显示了该xml文件,在此也不罗嗦了。 大家可以查看该ViewGroup的Log仔细分析下View的绘制流程以及
相关方法的使用。第一次启动后捕获的Log如下,网上找了些资料,第一次View树绘制过程会走几遍,具体原因可能是某些
View 发生了改变,请求重新绘制,但这根本不影响我们的界面显示效果 。
总的来说: 整个绘制过程还是十分十分复杂地,每个具体方法的实现都是我辈难以立即的,感到悲剧啊。对Android提
供的一些ViewGroup对象,比如LinearLayout、RelativeLayout布局对象的实现也很有压力。 本文重在介绍整个View树的绘制
流程,希望大家在此基础上,多接触源代码进行更深入地扩展。
详解measure过程以及如何设置View宽高
今天,我着重讲解下如下三个内容:
1、 measure过程
2、WRAP_CONTENT、MATCH_PARENT/FILL_PARENT属性的原理说明
3、xml布局文件解析成View树的流程分析。
希望对大家能有帮助。- - 分析版本基于Android 2.3。
1、WRAP_CONTENT、MATCH_PARENT/FILL_PARENT
初入Android殿堂的同学们,对这三个属性一定又爱又恨。爱的是使用起来挺爽地---照葫芦画瓢即可,恨的
却是时常混淆这几个属性地意义,需要三思而后行。在带着大家重温下这几个属性的用法吧(希望我没有啰嗦)。
这三个属性都用来适应视图的水平或垂直大小,一个以视图的内容或尺寸为基础的布局比精确地指定视图范围
更加方便。
① fill_parent设置一个视图的布局为fill_parent将强制性地使视图扩展至父元素大小。
② match_parent
Android 中match_parent和fill_parent意思一样,但match_parent更贴切,于是从2.2开始两个词都可以
用,但2.3版本后建议使用match_parent。
③ wrap_content
自适应大小,强制性地使视图扩展以便显示其全部内容。以TextView和ImageView控件为例,设置为
wrap_content将完整显示其内部的文本和图像。布局元素将根据内容更改大小。
可不要重复造轮子,以上摘自<<Android fill_parent、wrap_content和match_parent的区别>>。
当然,我们可以设置View的确切宽高,而不是由以上属性指定。
- android:layout_weight="wrap_content" //自适应大小
- android:layout_weight="match_parent" //与父视图等高
- android:layout_weight="fill_parent" //与父视图等高
- android:layout_weight="100dip" //精确设置高度值为 100dip
接下来,我们需要转换下视角,看看ViewGroup.LayoutParams类及其派生类。
2、ViewGroup.LayoutParams类及其派生类
2.1、 ViewGroup.LayoutParams类说明
Android API中如下介绍:LayoutParams are used by views to tell their parents how they want to be laid out.
意思大概是说: View通过LayoutParams类告诉其父视图它想要地大小(即,长度和宽度)。
因此,每个View都包含一个ViewGroup.LayoutParams类或者其派生类,View类依赖于ViewGroup.LayoutParams。
路径:frameworks\base\core\java\android\view\View.java
- public class View implements Drawable.Callback, KeyEvent.Callback, AccessibilityEventSource {
- ...
- /**
- * The layout parameters associated with this view and used by the parent
- * {@link android.view.ViewGroup} to determine how this view should be
- * laid out.
- * {@hide}
- */
- //该View拥有的 LayoutParams属性,父试图添加该View时,会为其赋值,特别注意,其类型为ViewGroup.LayoutParams。
- protected ViewGroup.LayoutParams mLayoutParams;
- ...
- }
2.2、 ViewGroup.LayoutParams源码分析
路径位于:frameworks\base\core\java\android\view\ViewGroup.java
- public abstract class ViewGroup extends View implements ViewParent, ViewManager {
- ...
- public static class LayoutParams {
- /**
- * Special value for the height or width requested by a View.
- * FILL_PARENT means that the view wants to be as big as its parent,
- * minus the parent's padding, if any. This value is deprecated
- * starting in API Level 8 and replaced by {@link #MATCH_PARENT}.
- */
- @Deprecated
- public static final int FILL_PARENT = -1; // 注意值为-1,Android2.2版本不建议使用
- /**
- * Special value for the height or width requested by a View.
- * MATCH_PARENT means that the view wants to be as big as its parent,
- * minus the parent's padding, if any. Introduced in API Level 8.
- */
- public static final int MATCH_PARENT = -1; // 注意值为-1
- /**
- * Special value for the height or width requested by a View.
- * WRAP_CONTENT means that the view wants to be just large enough to fit
- * its own internal content, taking its own padding into account.
- */
- public static final int WRAP_CONTENT = -2; // 注意值为-2
- /**
- * Information about how wide the view wants to be. Can be one of the
- * constants FILL_PARENT (replaced by MATCH_PARENT ,
- * in API Level 8) or WRAP_CONTENT. or an exact size.
- */
- public int width; //该View的宽度,可以为WRAP_CONTENT/MATCH_PARENT 或者一个具体值
- /**
- * Information about how tall the view wants to be. Can be one of the
- * constants FILL_PARENT (replaced by MATCH_PARENT ,
- * in API Level 8) or WRAP_CONTENT. or an exact size.
- */
- public int height; //该View的高度,可以为WRAP_CONTENT/MATCH_PARENT 或者一个具体值
- /**
- * Used to animate layouts.
- */
- public LayoutAnimationController.AnimationParameters layoutAnimationParameters;
- /**
- * Creates a new set of layout parameters. The values are extracted from
- * the supplied attributes set and context. The XML attributes mapped
- * to this set of layout parameters are:、
- */
- public LayoutParams(Context c, AttributeSet attrs) {
- TypedArray a = c.obtainStyledAttributes(attrs, R.styleable.ViewGroup_Layout);
- setBaseAttributes(a,
- R.styleable.ViewGroup_Layout_layout_width,
- R.styleable.ViewGroup_Layout_layout_height);
- a.recycle();
- }
- /**
- * Creates a new set of layout parameters with the specified width
- * and height.
- */
- public LayoutParams(int width, int height) {
- this.width = width;
- this.height = height;
- }
- /**
- * Copy constructor. Clones the width and height values of the source.
- *
- * @param source The layout params to copy from.
- */
- public LayoutParams(LayoutParams source) {
- this.width = source.width;
- this.height = source.height;
- }
- /**
- * Used internally by MarginLayoutParams.
- * @hide
- */
- LayoutParams() {
- }
- /**
- * Extracts the layout parameters from the supplied attributes.
- *
- * @param a the style attributes to extract the parameters from
- * @param widthAttr the identifier of the width attribute
- * @param heightAttr the identifier of the height attribute
- */
- protected void setBaseAttributes(TypedArray a, int widthAttr, int heightAttr) {
- width = a.getLayoutDimension(widthAttr, "layout_width");
- height = a.getLayoutDimension(heightAttr, "layout_height");
- }
- }
我们发现FILL_PARENT/MATCH_PARENT值为 -1 ,WRAP_CONETENT值为-2,是不是有点诧异? 将值
设置为负值的目的是为了区别View的具体值(an exact size) 总是大于0的。
ViewGroup子类可以实现自定义LayoutParams,自定义LayoutParams提供了更好地扩展性,例如LinearLayout
就有LinearLayout. LayoutParams自定义类(见下文)。整个LayoutParams类家族还是挺复杂的。
ViewGroup.LayoutParams及其常用派生类的类图(部分类图)如下:

该类图是在太庞大了,大家有兴趣的去看看Android API吧。
前面我们说过,每个View都包含一个ViewGroup.LayoutParams类或者其派生类,下面我们的疑问是Android框架
中时如何为View设置其LayoutParams属性的。
有两种方法会设置View的LayoutParams属性:
1、 直接添加子View时,常见于如下几种方法:ViewGroup.java
- //Adds a child view.
- void addView(View child, int index)
- //Adds a child view with this ViewGroup's default layout parameters
- //and the specified width and height.
- void addView(View child, int width, int height)
- //Adds a child view with the specified layout parameters.
- void addView(View child, ViewGroup.LayoutParams params)
三个重载方法的区别只是添加View时构造LayoutParams对象的方式不同而已,稍后我们探寻一下它们的源码。
2、 通过xml布局文件指定某个View的属性为:android:layout_heigth=””以及android:layout_weight=”” 时。
总的来说,这两种方式都会设定View的LayoutParams属性值----指定的或者Default值。
方式1流程分析:
直接添加子View时,比较容易理解,我们先来看看这种方式设置LayoutParams的过程:
路径:\frameworks\base\core\java\android\view\ViewGroup.java
- public abstract class ViewGroup extends View implements ViewParent, ViewManager {
- ...
- /**
- * Adds a child view. If no layout parameters are already set on the child, the
- * default parameters for this ViewGroup are set on the child.
- *
- * @param child the child view to add
- *
- * @see #generateDefaultLayoutParams()
- */
- public void addView(View child) {
- addView(child, -1);
- }
- /**
- * Adds a child view. If no layout parameters are already set on the child, the
- * default parameters for this ViewGroup are set on the child.
- *
- * @param child the child view to add
- * @param index the position at which to add the child
- *
- * @see #generateDefaultLayoutParams()
- */
- public void addView(View child, int index) {
- LayoutParams params = child.getLayoutParams();
- if (params == null) {
- params = generateDefaultLayoutParams(); //返回默认地LayoutParams类,作为该View的属性值
- if (params == null) {//如果不能获取到LayoutParams对象,则抛出异常。
- throw new IllegalArgumentException("generateDefaultLayoutParams() cannot return null");
- }
- }
- addView(child, index, params);
- }
- /**
- * Adds a child view with this ViewGroup's default layout parameters and the
- * specified width and height.
- *
- * @param child the child view to add
- */
- public void addView(View child, int width, int height) {
- //返回默认地LayoutParams类,作为该View的属性值
- final LayoutParams params = generateDefaultLayoutParams();
- params.width = width; //重新设置width值
- params.height = height; //重新设置height值
- addView(child, -1, params); //这儿,我们有指定width、height的大小了。
- }
- /**
- * Adds a child view with the specified layout parameters.
- *
- * @param child the child view to add
- * @param params the layout parameters to set on the child
- */
- public void addView(View child, LayoutParams params) {
- addView(child, -1, params);
- }
- /**
- * Adds a child view with the specified layout parameters.
- *
- * @param child the child view to add
- * @param index the position at which to add the child
- * @param params the layout parameters to set on the child
- */
- public void addView(View child, int index, LayoutParams params) {
- ...
- // addViewInner() will call child.requestLayout() when setting the new LayoutParams
- // therefore, we call requestLayout() on ourselves before, so that the child's request
- // will be blocked at our level
- requestLayout();
- invalidate();
- addViewInner(child, index, params, false);
- }
- /**
- * Returns a set of default layout parameters. These parameters are requested
- * when the View passed to {@link #addView(View)} has no layout parameters
- * already set. If null is returned, an exception is thrown from addView.
- *
- * @return a set of default layout parameters or null
- */
- protected LayoutParams generateDefaultLayoutParams() {
- //width 为 WRAP_CONTENT大小 , height 为WRAP_CONTENT
- //ViewGroup的子类可以重写该方法,达到其特定要求。稍后会以LinearLayout类为例说明。
- return new LayoutParams(LayoutParams.WRAP_CONTENT, LayoutParams.WRAP_CONTENT);
- }
- private void addViewInner(View child, int index, LayoutParams params,
- boolean preventRequestLayout) {
- if (!checkLayoutParams(params)) { //params对象是否为null
- params = generateLayoutParams(params); //如果params对象是为null,重新构造个LayoutParams对象
- }
- //preventRequestLayout值为false
- if (preventRequestLayout) {
- child.mLayoutParams = params; //为View的mLayoutParams属性赋值
- } else {
- child.setLayoutParams(params);//为View的mLayoutParams属性赋值,但会调用requestLayout()请求重新布局
- }
- //if else 语句会设置View为mLayoutParams属性赋值
- ...
- }
- ...
- }
主要功能就是在添加子View时为其构建了一个LayoutParams对象。但更重要的是,ViewGroup的子类可以重载
上面的几个方法,返回特定的LayoutParams对象,例如:对于LinearLayout而言,则是LinearLayout.LayoutParams
对象。这么做地目的是,能在其他需要它的地方,可以将其强制转换成LinearLayout.LayoutParams对象。
LinearLayout重写函数地实现为:
- public class LinearLayout extends ViewGroup {
- ...
- @Override
- public LayoutParams generateLayoutParams(AttributeSet attrs) {
- return new LinearLayout.LayoutParams(getContext(), attrs);
- }
- @Override
- protected LayoutParams generateDefaultLayoutParams() {
- //该LinearLayout是水平方向还是垂直方向
- if (mOrientation == HORIZONTAL) {
- return new LayoutParams(LayoutParams.WRAP_CONTENT, LayoutParams.WRAP_CONTENT);
- } else if (mOrientation == VERTICAL) {
- return new LayoutParams(LayoutParams.MATCH_PARENT, LayoutParams.WRAP_CONTENT);
- }
- return null;
- }
- @Override
- protected LayoutParams generateLayoutParams(ViewGroup.LayoutParams p) {
- return new LayoutParams(p);
- }
- /**
- * Per-child layout information associated with ViewLinearLayout.
- *
- * @attr ref android.R.styleable#LinearLayout_Layout_layout_weight
- * @attr ref android.R.styleable#LinearLayout_Layout_layout_gravity
- */ //自定义的LayoutParams类
- public static class LayoutParams extends ViewGroup.MarginLayoutParams {
- /**
- * Indicates how much of the extra space in the LinearLayout will be
- * allocated to the view associated with these LayoutParams. Specify
- * 0 if the view should not be stretched. Otherwise the extra pixels
- * will be pro-rated among all views whose weight is greater than 0.
- */
- @ViewDebug.ExportedProperty(category = "layout")
- public float weight; // 见于属性,android:layout_weight="" ;
- /**
- * Gravity for the view associated with these LayoutParams.
- *
- * @see android.view.Gravity
- */
- public int gravity = -1; // 见于属性, android:layout_gravity="" ;
- /**
- * {@inheritDoc}
- */
- public LayoutParams(Context c, AttributeSet attrs) {
- super(c, attrs);
- TypedArray a =c.obtainStyledAttributes(attrs, com.android.internal.R.styleable.LinearLayout_Layout);
- weight = a.getFloat(com.android.internal.R.styleable.LinearLayout_Layout_layout_weight, 0);
- gravity = a.getInt(com.android.internal.R.styleable.LinearLayout_Layout_layout_gravity, -1);
- a.recycle();
- }
- /**
- * {@inheritDoc}
- */
- public LayoutParams(int width, int height) {
- super(width, height);
- weight = 0;
- }
- /**
- * Creates a new set of layout parameters with the specified width, height
- * and weight.
- *
- * @param width the width, either {@link #MATCH_PARENT},
- * {@link #WRAP_CONTENT} or a fixed size in pixels
- * @param height the height, either {@link #MATCH_PARENT},
- * {@link #WRAP_CONTENT} or a fixed size in pixels
- * @param weight the weight
- */
- public LayoutParams(int width, int height, float weight) {
- super(width, height);
- this.weight = weight;
- }
- public LayoutParams(ViewGroup.LayoutParams p) {
- super(p);
- }
- public LayoutParams(MarginLayoutParams source) {
- super(source);
- }
- }
- ...
- }
LinearLayout.LayoutParams类继承至ViewGroup.MarginLayoutParams类,添加了对android:layout_weight以及
android:layout_gravity这两个属性的获取和保存。而且它的重写函数返回的都是LinearLayout.LayoutParams
类型。这样,我们可以再对子View进行其他操作时,可以将将其强制转换成LinearLayout.LayoutParams对象进行
使用。
例如,LinearLayout进行measure过程,使用了LinearLayout.LayoutParam对象,有如下代码:
- public class LinearLayout extends ViewGroup {
- ...
- @Override //onMeasure方法。
- protected void onMeasure(int widthMeasureSpec, int heightMeasureSpec) {
- //判断是垂直方向还是水平方向,这儿我们假设是VERTICAL垂直方向,
- if (mOrientation == VERTICAL) {
- measureVertical(widthMeasureSpec, heightMeasureSpec);
- } else {
- measureHorizontal(widthMeasureSpec, heightMeasureSpec);
- }
- }
- /**
- * Measures the children when the orientation of this LinearLayout is set
- * to {@link #VERTICAL}.
- *
- * @param widthMeasureSpec Horizontal space requirements as imposed by the parent.
- * @param heightMeasureSpec Vertical space requirements as imposed by the parent.
- *
- * @see #getOrientation()
- * @see #setOrientation(int)
- * @see #onMeasure(int, int)
- */
- void measureVertical(int widthMeasureSpec, int heightMeasureSpec) {
- mTotalLength = 0;
- ...
- // See how tall everyone is. Also remember max width.
- for (int i = 0; i < count; ++i) {
- final View child = getVirtualChildAt(i); //获得索引处为i的子VIew
- ...
- //注意,我们将类型为 ViewGroup.LayoutParams的实例对象强制转换为了LinearLayout.LayoutParams,
- //即父对象转换为了子对象,能这样做的原因就是LinearLayout的所有子View的LayoutParams类型都为
- //LinearLayout.LayoutParams
- LinearLayout.LayoutParams lp = (LinearLayout.LayoutParams) child.getLayoutParams();
- ...
- }
- ...
- }
超类ViewGroup.LayoutParams强制转换为了子类LinearLayout.LayoutParams,因为LinearLayout的每个
”直接“子View的LayoutParams属性都是LinearLayout.LayoutParams类型,因此可以安全转换。
PS : Android 2.3源码Launcher2中也实现了自定义的LayoutParams类,在IDLE界面的每个View至少包含如下
信息:所在X方向的单元格索引和高度、所在Y方向的单元格索引和高度等。
路径: packages\apps\Launcher2\src\com\android\launcher2\CellLayout.java
- public class CellLayout extends ViewGroup {
- ...
- public static class LayoutParams extends ViewGroup.MarginLayoutParams {
- /**
- * Horizontal location of the item in the grid.
- */
- public int cellX; //X方向的单元格索引
- /**
- * Vertical location of the item in the grid.
- */
- public int cellY; //Y方向的单元格索引
- /**
- * Number of cells spanned horizontally by the item.
- */
- public int cellHSpan; //水平方向所占高度
- /**
- * Number of cells spanned vertically by the item.
- */
- public int cellVSpan; //垂直方向所占高度
- ...
- public LayoutParams(Context c, AttributeSet attrs) {
- super(c, attrs);
- cellHSpan = 1; //默认为高度 1
- cellVSpan = 1;
- }
- public LayoutParams(ViewGroup.LayoutParams source) {
- super(source); //默认为高度 1
- cellHSpan = 1;
- cellVSpan = 1;
- }
- public LayoutParams(int cellX, int cellY, int cellHSpan, int cellVSpan) {
- super(LayoutParams.MATCH_PARENT, LayoutParams.MATCH_PARENT);
- this.cellX = cellX;
- this.cellY = cellY;
- this.cellHSpan = cellHSpan;
- this.cellVSpan = cellVSpan;
- }
- ...
- }
- ...
- }
对该自定义CellLayout.LayoutParams类的使用可以参考LinearLayout.LayoutParams类,我也不再赘述了。
方法2流程分析:
使用属性android:layout_heigth=””以及android:layout_weight=”” 时,为某个View设置LayoutParams值。
其实这种赋值方法其实也如同前面那种,只不过它需要一个前期孵化过程---需要利用XML解析将布局文件
解析成一个完整的View树,可别小看它了,所有Xxx.xml的布局文件都需要解析成一个完整的View树。下面,
我们就来仔细走这个过程,重点关注如下两个方面
①、xml布局是如何解析成View树的 ;
②、android:layout_heigth=””和android:layout_weight=””的解析。
PS: 一直以来,我都想当然android:layout_heigth以及android:layout_weight这两个属性的解析过程是在
View.java内部完成的,但当我真正去找寻时,却一直没有在View.java类或者ViewGroup.java类找到。直到一位
网友的一次提问,才发现它们的藏身之地。
3、布局文件解析流程分析
解析布局文件时,使用的类为LayoutInflater。 关于该类的使用请参考如下博客:
主要有如下API方法:
public View inflate (XmlPullParser parser, ViewGroup root, boolean attachToRoot)public View inflate (int resource, ViewGroup root)
public View inflate (int resource, ViewGroup root, boolean attachToRoot)
这三个类主要迷惑之处在于地三个参数attachToRoot,即是否将该View树添加到root中去。具体可看这篇博客:
<<关于inflate的第3个参数>>
当然还有LayoutInflater的inflate()的其他重载方法,大家可以自行了解下。
我利用下面的例子给大家走走这个流程 :
- public class MainActivity extends Activity {
- /** Called when the activity is first created. */
- @Override
- public void onCreate(Bundle savedInstanceState) {
- super.onCreate(savedInstanceState);
- //1、该方法最终也会调用到 LayoutInflater的inflate()方法中去解析。
- setContentView(R.layout.main);
- //2、使用常见的API方法去解析xml布局文件,
- LayoutInflater layoutInflater = (LayoutInflater)getSystemService();
- View root = layoutInflater.inflate(R.layout.main, null);
- }
- }
Step 1、获得LayoutInflater的引用。
路径:\frameworks\base\core\java\android\app\ContextImpl.java
- /**
- * Common implementation of Context API, which provides the base
- * context object for Activity and other application components.
- */
- class ContextImpl extends Context {
- if (WINDOW_SERVICE.equals(name)) {
- return WindowManagerImpl.getDefault();
- } else if (LAYOUT_INFLATER_SERVICE.equals(name)) {
- synchronized (mSync) {
- LayoutInflater inflater = mLayoutInflater;
- //是否已经赋值,如果是,直接返回引用
- if (inflater != null) {
- return inflater;
- }
- //返回一个LayoutInflater对象,getOuterContext()指的是我们的Activity、Service或者Application引用
- mLayoutInflater = inflater = PolicyManager.makeNewLayoutInflater(getOuterContext());
- return inflater;
- }
- } else if (ACTIVITY_SERVICE.equals(name)) {
- return getActivityManager();
- }...
- }
继续去PolicyManager查询对应函数,看看内部实现。
路径:frameworks\base\core\java\com\android\internal\policy\PolicyManager.java
- public final class PolicyManager {
- private static final String POLICY_IMPL_CLASS_NAME = "com.android.internal.policy.impl.Policy";
- private static final IPolicy sPolicy; // 这可不是Binder机制额,这只是是一个接口,别想多啦
- static {
- // Pull in the actual implementation of the policy at run-time
- try {
- Class policyClass = Class.forName(POLICY_IMPL_CLASS_NAME);
- sPolicy = (IPolicy)policyClass.newInstance();
- }
- ...
- }
- ...
- public static LayoutInflater makeNewLayoutInflater(Context context) {
- return sPolicy.makeNewLayoutInflater(context); //继续去实现类中去查找
- }
- }
- //Simple implementation of the policy interface that spawns the right
- //set of objects
- public class Policy implements IPolicy{
- ...
- public PhoneLayoutInflater makeNewLayoutInflater(Context context) {
- //实际上返回的是PhoneLayoutInflater类。
- return new PhoneLayoutInflater(context);
- }
- }
- //PhoneLayoutInflater继承至LayoutInflater类
- public class PhoneLayoutInflater extends LayoutInflater {
- ...
- /**
- * Instead of instantiating directly, you should retrieve an instance
- * through {@link Context#getSystemService}
- *
- * @param context The Context in which in which to find resources and other
- * application-specific things.
- *
- * @see Context#getSystemService
- */
- public PhoneLayoutInflater(Context context) {
- super(context);
- }
- ...
- }
LayoutInflater是个抽象类,实际上我们返回的是PhoneLayoutInflater类,但解析过程的操作基本上是在
LayoutInflater中完成地。
Step 2、调用inflate()方法去解析布局文件。
- public abstract class LayoutInflater {
- ...
- public View inflate(int resource, ViewGroup root) {
- //继续看下个函数,注意root为null
- return inflate(resource, root, root != null);
- }
- public View inflate(int resource, ViewGroup root, boolean attachToRoot) {
- //获取一个XmlResourceParser来解析XML文件---布局文件。
- //XmlResourceParser类以及xml是如何解析的,大家自己有兴趣找找。
- XmlResourceParser parser = getContext().getResources().getLayout(resource);
- try {
- return inflate(parser, root, attachToRoot);
- } finally {
- parser.close();
- }
- }
- }
- /**
- * The XML parsing interface returned for an XML resource. This is a standard
- * XmlPullParser interface, as well as an extended AttributeSet interface and
- * an additional close() method on this interface for the client to indicate
- * when it is done reading the resource.
- */
- public interface XmlResourceParser extends XmlPullParser, AttributeSet {
- /**
- * Close this interface to the resource. Calls on the interface are no
- * longer value after this call.
- */
- public void close();
- }
我们获得了一个当前应用程序环境的XmlResourceParser对象,该对象的主要作用就是来解析xml布局文件的。
XmlResourceParser类是个接口类,更多关于XML解析的,大家可以参考下面博客:
<<android之XmlResourceParser类使用实例>>
- public abstract class LayoutInflater {
- ...
- /**
- * Inflate a new view hierarchy from the specified XML node. Throws
- * {@link InflateException} if there is an error.
- */
- //我们传递过来的参数如下: root 为null , attachToRoot为false 。
- public View inflate(XmlPullParser parser, ViewGroup root, boolean attachToRoot) {
- synchronized (mConstructorArgs) {
- final AttributeSet attrs = Xml.asAttributeSet(parser);
- Context lastContext = (Context)mConstructorArgs[0];
- mConstructorArgs[0] = mContext; //该mConstructorArgs属性最后会作为参数传递给View的构造函数
- View result = root; //根View
- try {
- // Look for the root node.
- int type;
- while ((type = parser.next()) != XmlPullParser.START_TAG &&
- type != XmlPullParser.END_DOCUMENT) {
- // Empty
- }
- ...
- final String name = parser.getName(); //节点名,即API中的控件或者自定义View完整限定名。
- if (TAG_MERGE.equals(name)) { // 处理<merge />标签
- if (root == null || !attachToRoot) {
- throw new InflateException("<merge /> can be used only with a valid "
- + "ViewGroup root and attachToRoot=true");
- }
- //将<merge />标签的View树添加至root中,该函数稍后讲到。
- rInflate(parser, root, attrs);
- } else {
- // Temp is the root view that was found in the xml
- //创建该xml布局文件所对应的根View。
- View temp = createViewFromTag(name, attrs);
- ViewGroup.LayoutParams params = null;
- if (root != null) {
- // Create layout params that match root, if supplied
- //根据AttributeSet属性获得一个LayoutParams实例,记住调用者为root。
- params = root.generateLayoutParams(attrs);
- if (!attachToRoot) { //重新设置temp的LayoutParams
- // Set the layout params for temp if we are not
- // attaching. (If we are, we use addView, below)
- temp.setLayoutParams(params);
- }
- }
- // Inflate all children under temp
- //添加所有其子节点,即添加所有字View
- rInflate(parser, temp, attrs);
- // We are supposed to attach all the views we found (int temp)
- // to root. Do that now.
- if (root != null && attachToRoot) {
- root.addView(temp, params);
- }
- // Decide whether to return the root that was passed in or the
- // top view found in xml.
- if (root == null || !attachToRoot) {
- result = temp;
- }
- }
- }
- ...
- return result;
- }
- }
- /*
- * default visibility so the BridgeInflater can override it.
- */
- View createViewFromTag(String name, AttributeSet attrs) {
- //节点是否为View,如果是将其重新赋值,形如 <View class="com.qin.xxxView"></View>
- if (name.equals("view")) {
- name = attrs.getAttributeValue(null, "class");
- }
- try {
- View view = (mFactory == null) ? null : mFactory.onCreateView(name,
- mContext, attrs); //没有设置工厂方法
- if (view == null) {
- //通过这个判断是Android API的View,还是自定义View
- if (-1 == name.indexOf('.')) {
- view = onCreateView(name, attrs); //创建Android API的View实例
- } else {
- view = createView(name, null, attrs);//创建一个自定义View实例
- }
- }
- return view;
- }
- ...
- }
- //获得具体视图的实例对象
- public final View createView(String name, String prefix, AttributeSet attrs) {
- Constructor constructor = sConstructorMap.get(name);
- Class clazz = null;
- //以下功能主要是获取如下三个类对象:
- //1、类加载器 ClassLoader
- //2、Class对象
- //3、类的构造方法句柄 Constructor
- try {
- if (constructor == null) {
- // Class not found in the cache, see if it's real, and try to add it
- clazz = mContext.getClassLoader().loadClass(prefix != null ? (prefix + name) : name);
- ...
- constructor = clazz.getConstructor(mConstructorSignature);
- sConstructorMap.put(name, constructor);
- } else {
- // If we have a filter, apply it to cached constructor
- if (mFilter != null) {
- ...
- }
- }
- //传递参数获得该View实例对象
- Object[] args = mConstructorArgs;
- args[1] = attrs;
- return (View) constructor.newInstance(args);
- }
- ...
- }
- }
这段代码的作用是获取xml布局文件的root View,做了如下两件事情
1、获取xml布局的View实例,通过createViewFromTag()方法获取,该方法会判断节点名是API 控件
还是自定义控件,继而调用合适的方法去实例化View。
2、判断root以及attachToRoot参数,重新设置root View值以及temp变量的LayoutParams值。
如果仔细看着段代码,不知大家心里有没有疑惑:当root为null时,我们的temp变量的LayoutParams值是为
null的,即它不会被赋值?有个View的LayoutParams值为空,那么,在系统中不会报异常吗?见下面部分
代码:
- //我们传递过来的参数如下: root 为null , attachToRoot为false 。
- public View inflate(XmlPullParser parser, ViewGroup root, boolean attachToRoot) {
- synchronized (mConstructorArgs) {
- ...
- try {
- ...
- if (TAG_MERGE.equals(name)) { // 处理<merge />标签
- ...
- } else {
- // Temp is the root view that was found in the xml
- //创建该xml布局文件所对应的根View。
- View temp = createViewFromTag(name, attrs);
- ViewGroup.LayoutParams params = null;
- //注意!!! root为null时,temp变量的LayoutParams属性不会被赋值的。
- if (root != null) {
- // Create layout params that match root, if supplied
- //根据AttributeSet属性获得一个LayoutParams实例,记住调用者为root。
- params = root.generateLayoutParams(attrs);
- if (!attachToRoot) { //重新设置temp的LayoutParams
- // Set the layout params for temp if we are not
- // attaching. (If we are, we use addView, below)
- temp.setLayoutParams(params);
- }
- }
- ...
- }
- }
- ...
- }
- }
关于这个问题的详细答案,我会在后面讲到。这儿我简单说下,任何View树的顶层View被添加至窗口时,
一般调用WindowManager.addView()添加至窗口时,在这个方法中去做进一步处理。即使,LayoutParams
值为空,UI框架每次measure()时都忽略该View的LayoutParams值,而是直接传递MeasureSpec值至View树。
接下来,我们关注另外一个函数,rInflate(),该方法会递归调用每个View下的子节点,以当前View作为根View
形成一个View树。
- /**
- * Recursive method used to descend down the xml hierarchy and instantiate
- * views, instantiate their children, and then call onFinishInflate().
- */
- //递归调用每个字节点
- private void rInflate(XmlPullParser parser, View parent, final AttributeSet attrs)
- throws XmlPullParserException, IOException {
- final int depth = parser.getDepth();
- int type;
- while (((type = parser.next()) != XmlPullParser.END_TAG ||
- parser.getDepth() > depth) && type != XmlPullParser.END_DOCUMENT) {
- if (type != XmlPullParser.START_TAG) {
- continue;
- }
- final String name = parser.getName();
- if (TAG_REQUEST_FOCUS.equals(name)) { //处理<requestFocus />标签
- parseRequestFocus(parser, parent);
- } else if (TAG_INCLUDE.equals(name)) { //处理<include />标签
- if (parser.getDepth() == 0) {
- throw new InflateException("<include /> cannot be the root element");
- }
- parseInclude(parser, parent, attrs);//解析<include />节点
- } else if (TAG_MERGE.equals(name)) { //处理<merge />标签
- throw new InflateException("<merge /> must be the root element");
- } else {
- //根据节点名构建一个View实例对象
- final View view = createViewFromTag(name, attrs);
- final ViewGroup viewGroup = (ViewGroup) parent;
- //调用generateLayoutParams()方法返回一个LayoutParams实例对象,
- final ViewGroup.LayoutParams params = viewGroup.generateLayoutParams(attrs);
- rInflate(parser, view, attrs); //继续递归调用
- viewGroup.addView(view, params); //OK,将该View以特定LayoutParams值添加至父View中
- }
- }
- parent.onFinishInflate(); //完成了解析过程,通知....
- }
值得注意的是,每次addView前都调用了viewGroup.generateLayoutParams(attrs)去构建一个LayoutParams
实例,然后在addView()方法中为其赋值。参见如下代码:ViewGroup.java
- public abstract class ViewGroup extends View implements ViewParent, ViewManager {
- ...
- public LayoutParams generateLayoutParams(AttributeSet attrs) {
- return new LayoutParams(getContext(), attrs);
- }
- public static class LayoutParams {
- ... //会调用这个构造函数
- public LayoutParams(Context c, AttributeSet attrs) {
- TypedArray a = c.obtainStyledAttributes(attrs, R.styleable.ViewGroup_Layout);
- setBaseAttributes(a,
- R.styleable.ViewGroup_Layout_layout_width,
- R.styleable.ViewGroup_Layout_layout_height);
- a.recycle();
- }
- protected void setBaseAttributes(TypedArray a, int widthAttr, int heightAttr) {
- width = a.getLayoutDimension(widthAttr, "layout_width");
- height = a.getLayoutDimension(heightAttr, "layout_height");
- }
- }
好吧 ~~ 我们还是探寻根底,去TypeArray类的getLayoutDimension()看看。
路径:/frameworks/base/core/java/android/content/res/TypedArray.java
- public class TypedArray {
- ...
- /**
- * Special version of {@link #getDimensionPixelSize} for retrieving
- * {@link android.view.ViewGroup}'s layout_width and layout_height
- * attributes. This is only here for performance reasons; applications
- * should use {@link #getDimensionPixelSize}.
- *
- * @param index Index of the attribute to retrieve.
- * @param name Textual name of attribute for error reporting.
- *
- * @return Attribute dimension value multiplied by the appropriate
- * metric and truncated to integer pixels.
- */
- public int getLayoutDimension(int index, String name) {
- index *= AssetManager.STYLE_NUM_ENTRIES;
- final int[] data = mData;
- //获得属性对应的标识符 , Identifies,目前还没有仔细研究相关类。
- final int type = data[index+AssetManager.STYLE_TYPE];
- if (type >= TypedValue.TYPE_FIRST_INT
- && type <= TypedValue.TYPE_LAST_INT) {
- return data[index+AssetManager.STYLE_DATA];
- } else if (type == TypedValue.TYPE_DIMENSION) { //类型为dimension类型
- return TypedValue.complexToDimensionPixelSize(
- data[index+AssetManager.STYLE_DATA], mResources.mMetrics);
- }
- //没有提供layout_weight和layout_height会来到此处 ,这儿会报异常!
- //因此布局文件中的View包括自定义View必须加上属性layout_weight和layout_height。
- throw new RuntimeException(getPositionDescription()
- + ": You must supply a " + name + " attribute.");
- }
- ...
- }
从上面得知, 我们将View的AttributeSet属性传递给generateLayoutParams()方法,让其构建合适地
LayoutParams对象,并且初始化属性值weight和height。同时我们也得知 布局文件中的View包括自定义View
必须加上属性layout_weight和layout_height,否则会报异常。
首先,获得了了布局文件地root View,即布局文件中最顶层的View。
其次,通过递归调用,我们形成了整个View树以及设置了每个View的LayoutParams对象。
1、MeasureSpc类说明
2、measure过程详解(揭秘其细节);
3、root View被添加至窗口时,UI框架是如何设置其LayoutParams值得。
在讲解measure过程前,我们非常有必要理解MeasureSpc类的使用,否则理解起来也只能算是囫囵吞枣。
1、MeasureSpc类说明
1.1 SDK 说明如下
A MeasureSpec encapsulates the layout requirements passed from parent to child. Each MeasureSpecrepresents a requirement for either the width or the height. A MeasureSpec is comprised of a size and
a mode.
即:
MeasureSpc类封装了父View传递给子View的布局(layout)要求。每个MeasureSpc实例代表宽度或者高度
(只能是其一)要求。 它有三种模式:
①、UNSPECIFIED(未指定),父元素部队自元素施加任何束缚,子元素可以得到任意想要的大小;
②、EXACTLY(完全),父元素决定自元素的确切大小,子元素将被限定在给定的边界里而忽略它本身大小;
③、AT_MOST(至多),子元素至多达到指定大小的值。
常用的三个函数:
static int getMode(int measureSpec) : 根据提供的测量值(格式)提取模式(上述三个模式之一)
static int getSize(int measureSpec) : 根据提供的测量值(格式)提取大小值(这个大小也就是我们通常所说的大小)
static int makeMeasureSpec(int size,int mode) : 根据提供的大小值和模式创建一个测量值(格式)
以上摘取自: <<MeasureSpec介绍及使用详解>>
1.2 MeasureSpc类源码分析 其为View.java类的内部类,路径:\frameworks\base\core\java\android\view\View.java
- public class View implements ... {
- ...
- public static class MeasureSpec {
- private static final int MODE_SHIFT = 30; //移位位数为30
- //int类型占32位,向右移位30位,该属性表示掩码值,用来与size和mode进行"&"运算,获取对应值。
- private static final int MODE_MASK = 0x3 << MODE_SHIFT;
- //向右移位30位,其值为00 + (30位0) , 即 0x0000(16进制表示)
- public static final int UNSPECIFIED = 0 << MODE_SHIFT;
- //向右移位30位,其值为01 + (30位0) , 即0x1000(16进制表示)
- public static final int EXACTLY = 1 << MODE_SHIFT;
- //向右移位30位,其值为02 + (30位0) , 即0x2000(16进制表示)
- public static final int AT_MOST = 2 << MODE_SHIFT;
- //创建一个整形值,其高两位代表mode类型,其余30位代表长或宽的实际值。可以是WRAP_CONTENT、MATCH_PARENT或具体大小exactly size
- public static int makeMeasureSpec(int size, int mode) {
- return size + mode;
- }
- //获取模式 ,与运算
- public static int getMode(int measureSpec) {
- return (measureSpec & MODE_MASK);
- }
- //获取长或宽的实际值 ,与运算
- public static int getSize(int measureSpec) {
- return (measureSpec & ~MODE_MASK);
- }
- }
- ...
- }
MeasureSpec类的处理思路是:
①、右移运算,使int 类型的高两位表示模式的实际值,其余30位表示其余30位代表长或宽的实际值----可以是
WRAP_CONTENT、MATCH_PARENT或具体大小exactly size。
②、通过掩码MODE_MASK进行与运算 “&”,取得模式(mode)以及长或宽(value)的实际值。
2、measure过程详解
2.1 measure过程深入分析
之前的一篇博文<< Android中View绘制流程以及invalidate()等相关方法分析>>,我们从”二B程序员”的角度简单 解了measure过程的调用过程。过了这么多,我们也该升级了,- - 。现在请开始从”普通程序员”角度去理解这个
过程。我们重点查看measure过程中地相关方法。
我们说过,当UI框架开始绘制时,皆是从ViewRoot.java类开始绘制的。
ViewRoot类简要说明: 任何显示在设备中的窗口,例如:Activity、Dialog等,都包含一个ViewRoot实例,该
类主要用来与远端 WindowManagerService交互以及控制(开始/销毁)绘制。
Step 1、 开始UI绘制 , 具体绘制方法则是:
- 路径:\frameworks\base\core\java\android\view\ViewRoot.java
- public final class ViewRoot extends Handler implements ViewParent,View.AttachInfo.Callbacks {
- ...
- //mView对象指添加至窗口的root View ,对Activity窗口而言,则是DecorView对象。
- View mView;
- //开始View绘制流程
- private void performTraversals(){
- ...
- //这两个值我们在后面讨论时,在回过头来看看是怎么赋值的。现在只需要记住其值MeasureSpec.makeMeasureSpec()构建的。
- int childWidthMeasureSpec; //其值由MeasureSpec类构建 , makeMeasureSpec
- int childHeightMeasureSpec;//其值由MeasureSpec类构建 , makeMeasureSpec
- // Ask host how big it wants to be
- host.measure(childWidthMeasureSpec, childHeightMeasureSpec);
- ...
- }
- ...
- }
Step 2 、调用measure()方法去做一些前期准备
measure()方法原型定义在View.java类中,final修饰符修饰,其不能被重载:
- public class View implements ... {
- ...
- /**
- * This is called to find out how big a view should be. The parent
- * supplies constraint information in the width and height parameters.
- *
- * @param widthMeasureSpec Horizontal space requirements as imposed by the
- * parent
- * @param heightMeasureSpec Vertical space requirements as imposed by the
- * parent
- * @see #onMeasure(int, int)
- */
- public final void measure(int widthMeasureSpec, int heightMeasureSpec) {
- //判断是否为强制布局,即带有“FORCE_LAYOUT”标记 以及 widthMeasureSpec或heightMeasureSpec发生了改变
- if ((mPrivateFlags & FORCE_LAYOUT) == FORCE_LAYOUT ||
- widthMeasureSpec != mOldWidthMeasureSpec ||
- heightMeasureSpec != mOldHeightMeasureSpec) {
- // first clears the measured dimension flag
- //清除MEASURED_DIMENSION_SET标记 ,该标记会在onMeasure()方法后被设置
- mPrivateFlags &= ~MEASURED_DIMENSION_SET;
- // measure ourselves, this should set the measured dimension flag back
- // 1、 测量该View本身的大小 ; 2 、 设置MEASURED_DIMENSION_SET标记,否则接写来会报异常。
- onMeasure(widthMeasureSpec, heightMeasureSpec);
- // flag not set, setMeasuredDimension() was not invoked, we raise
- // an exception to warn the developer
- if ((mPrivateFlags & MEASURED_DIMENSION_SET) != MEASURED_DIMENSION_SET) {
- throw new IllegalStateException("onMeasure() did not set the"
- + " measured dimension by calling" + " setMeasuredDimension()");
- }
- mPrivateFlags |= LAYOUT_REQUIRED; //下一步是layout了,添加LAYOUT_REQUIRED标记
- }
- mOldWidthMeasureSpec = widthMeasureSpec; //保存值
- mOldHeightMeasureSpec = heightMeasureSpec; //保存值
- }
- ...
- }
参数widthMeasureSpec和heightMeasureSpec 由父View构建,表示父View给子View的测量要求。其值地构建
会在下面步骤中详解。
measure()方法显示判断是否需要重新调用设置改View大小,即调用onMeasure()方法,然后操作两个标识符:
①、重置MEASURED_DIMENSION_SET : onMeasure()方法中,需要添加该标识符,否则,会报异常;
②、添加LAYOUT_REQUIRED: 表示需要进行layout操作。
最后,保存当前的widthMeasureSpec和heightMeasureSpec值。
Step 3 、调用onMeasure()方法去真正设置View的长宽值,其默认实现为:
- /**
- * Measure the view and its content to determine the measured width and the
- * measured height. This method is invoked by {@link #measure(int, int)} and
- * should be overriden by subclasses to provide accurate and efficient
- * measurement of their contents.
- *
- * @param widthMeasureSpec horizontal space requirements as imposed by the parent.
- * The requirements are encoded with
- * @param heightMeasureSpec vertical space requirements as imposed by the parent.
- * The requirements are encoded with
- */
- //设置该View本身地大小
- protected void onMeasure(int widthMeasureSpec, int heightMeasureSpec) {
- setMeasuredDimension(getDefaultSize(getSuggestedMinimumWidth(), widthMeasureSpec),
- getDefaultSize(getSuggestedMinimumHeight(), heightMeasureSpec));
- }
- /**
- * Utility to return a default size. Uses the supplied size if the
- * MeasureSpec imposed no contraints. Will get larger if allowed
- * by the MeasureSpec.
- *
- * @param size Default size for this view
- * @param measureSpec Constraints imposed by the parent
- * @return The size this view should be.
- */
- //@param size参数一般表示设置了android:minHeight属性或者该View背景图片的大小值
- public static int getDefaultSize(int size, int measureSpec) {
- int result = size;
- int specMode = MeasureSpec.getMode(measureSpec);
- int specSize = MeasureSpec.getSize(measureSpec);
- //根据不同的mode值,取得宽和高的实际值。
- switch (specMode) {
- case MeasureSpec.UNSPECIFIED: //表示该View的大小父视图未定,设置为默认值
- result = size;
- break;
- case MeasureSpec.AT_MOST: //表示该View的大小由父视图指定了
- case MeasureSpec.EXACTLY:
- result = specSize;
- break;
- }
- return result;
- }
- //获得设置了android:minHeight属性或者该View背景图片的大小值, 最为该View的参考值
- protected int getSuggestedMinimumWidth() {
- int suggestedMinWidth = mMinWidth; // android:minHeight
- if (mBGDrawable != null) { // 背景图片对应地Width。
- final int bgMinWidth = mBGDrawable.getMinimumWidth();
- if (suggestedMinWidth < bgMinWidth) {
- suggestedMinWidth = bgMinWidth;
- }
- }
- return suggestedMinWidth;
- }
- //设置View在measure过程中宽和高
- protected final void setMeasuredDimension(int measuredWidth, int measuredHeight) {
- mMeasuredWidth = measuredWidth;
- mMeasuredHeight = measuredHeight;
- mPrivateFlags |= MEASURED_DIMENSION_SET; //设置了MEASURED_DIMENSION_SET标记
- }
主要功能就是根据该View属性(android:minWidth和背景图片大小)和父View对该子View的"测量要求",设置该 View的 mMeasuredWidth 和 mMeasuredHeight 值。
这儿只是一般的View类型地实现方法。一般来说,父View,也就是ViewGroup类型,都需要在重写onMeasure() 方法,遍历所有子View,设置每个子View的大小。基本思想如下:遍历所有子View,设置每个子View的大小。伪
代码表示为:
- //某个ViewGroup类型的视图
- protected void onMeasure(int widthMeasureSpec, int heightMeasureSpec) {
- //必须调用super.ononMeasure()或者直接调用setMeasuredDimension()方法设置该View大小,否则会报异常。
- super.onMeasure(widthMeasureSpec , heightMeasureSpec)
- //setMeasuredDimension(getDefaultSize(getSuggestedMinimumWidth(), widthMeasureSpec),
- // getDefaultSize(getSuggestedMinimumHeight(), heightMeasureSpec));
- //遍历每个子View
- for(int i = 0 ; i < getChildCount() ; i++){
- View child = getChildAt(i);
- //调用子View的onMeasure,设置他们的大小。childWidthMeasureSpec , childHeightMeasureSpec ?
- child.onMeasure(childWidthMeasureSpec, childHeightMeasureSpec);
- }
- }
Step 2、Step 3 代码也比较好理解,但问题是我们示例代码中widthMeasureSpec、heightMeasureSpec是如何
确定的呢?父View是如何设定其值的?
要想回答这个问题,我们看是去源代码里找找答案吧。在ViewGroup.java类中,为我们提供了三个方法,去设置
每个子View的大小,基本思想也如同我们之前描述的思想:遍历所有子View,设置每个子View的大小。
主要有如下方法:
- /**
- * Ask all of the children of this view to measure themselves, taking into
- * account both the MeasureSpec requirements for this view and its padding.
- * We skip children that are in the GONE state The heavy lifting is done in
- * getChildMeasureSpec.
- */
- //widthMeasureSpec 和 heightMeasureSpec 表示该父View的布局要求
- //遍历每个子View,然后调用measureChild()方法去实现每个子View大小
- protected void measureChildren(int widthMeasureSpec, int heightMeasureSpec) {
- final int size = mChildrenCount;
- final View[] children = mChildren;
- for (int i = 0; i < size; ++i) {
- final View child = children[i];
- if ((child.mViewFlags & VISIBILITY_MASK) != GONE) { // 不处于 “GONE” 状态
- measureChild(child, widthMeasureSpec, heightMeasureSpec);
- }
- }
- }
- /**
- * Ask one of the children of this view to measure itself, taking into
- * account both the MeasureSpec requirements for this view and its padding.
- * The heavy lifting is done in getChildMeasureSpec.
- *
- * @param child The child to measure
- * @param parentWidthMeasureSpec The width requirements for this view
- * @param parentHeightMeasureSpec The height requirements for this view
- */
- //测量每个子View高宽时,清楚了该View本身的边距大小,即android:padding属性 或android:paddingLeft等属性标记
- protected void measureChild(View child, int parentWidthMeasureSpec,
- int parentHeightMeasureSpec) {
- final LayoutParams lp = child.getLayoutParams(); // LayoutParams属性
- //设置子View的childWidthMeasureSpec属性,去除了该父View的边距值 mPaddingLeft + mPaddingRight
- final int childWidthMeasureSpec = getChildMeasureSpec(parentWidthMeasureSpec,
- mPaddingLeft + mPaddingRight, lp.width);
- //设置子View的childHeightMeasureSpec属性,去除了该父View的边距值 mPaddingTop + mPaddingBottom
- final int childHeightMeasureSpec = getChildMeasureSpec(parentHeightMeasureSpec,
- mPaddingTop + mPaddingBottom, lp.height);
- child.measure(childWidthMeasureSpec, childHeightMeasureSpec);
- }
measureChildren()方法:遍历所有子View,调用measureChild()方法去设置该子View的属性值。
measureChild() 方法 : 获取特定子View的widthMeasureSpec、heightMeasureSpec,调用measure()方法
设置子View的实际宽高值。
getChildMeasureSpec()就是获取子View的widthMeasureSpec、heightMeasureSpec值。
- /**
- * Does the hard part of measureChildren: figuring out the MeasureSpec to
- * pass to a particular child. This method figures out the right MeasureSpec
- * for one dimension (height or width) of one child view.
- *
- * The goal is to combine information from our MeasureSpec with the
- * LayoutParams of the child to get the best possible results.
- */
- // spec参数 表示该父View本身所占的widthMeasureSpec 或 heightMeasureSpec值
- // padding参数 表示该父View的边距大小,见于android:padding属性 或android:paddingLeft等属性标记
- // childDimension参数 表示该子View内部LayoutParams属性的值,可以是wrap_content、match_parent、一个精确指(an exactly size),
- // 例如:由android:width指定等。
- public static int getChildMeasureSpec(int spec, int padding, int childDimension) {
- int specMode = MeasureSpec.getMode(spec); //获得父View的mode
- int specSize = MeasureSpec.getSize(spec); //获得父View的实际值
- int size = Math.max(0, specSize - padding); //父View为子View设定的大小,减去边距值,
- int resultSize = 0; //子View对应地 size 实际值 ,由下面的逻辑条件赋值
- int resultMode = 0; //子View对应地 mode 值 , 由下面的逻辑条件赋值
- switch (specMode) {
- // Parent has imposed an exact size on us
- //1、父View是EXACTLY的 !
- case MeasureSpec.EXACTLY:
- //1.1、子View的width或height是个精确值 (an exactly size)
- if (childDimension >= 0) {
- resultSize = childDimension; //size为精确值
- resultMode = MeasureSpec.EXACTLY; //mode为 EXACTLY 。
- }
- //1.2、子View的width或height为 MATCH_PARENT/FILL_PARENT
- else if (childDimension == LayoutParams.MATCH_PARENT) {
- // Child wants to be our size. So be it.
- resultSize = size; //size为父视图大小
- resultMode = MeasureSpec.EXACTLY; //mode为 EXACTLY 。
- }
- //1.3、子View的width或height为 WRAP_CONTENT
- else if (childDimension == LayoutParams.WRAP_CONTENT) {
- // Child wants to determine its own size. It can't be
- // bigger than us.
- resultSize = size; //size为父视图大小
- resultMode = MeasureSpec.AT_MOST; //mode为AT_MOST 。
- }
- break;
- // Parent has imposed a maximum size on us
- //2、父View是AT_MOST的 !
- case MeasureSpec.AT_MOST:
- //2.1、子View的width或height是个精确值 (an exactly size)
- if (childDimension >= 0) {
- // Child wants a specific size... so be it
- resultSize = childDimension; //size为精确值
- resultMode = MeasureSpec.EXACTLY; //mode为 EXACTLY 。
- }
- //2.2、子View的width或height为 MATCH_PARENT/FILL_PARENT
- else if (childDimension == LayoutParams.MATCH_PARENT) {
- // Child wants to be our size, but our size is not fixed.
- // Constrain child to not be bigger than us.
- resultSize = size; //size为父视图大小
- resultMode = MeasureSpec.AT_MOST; //mode为AT_MOST
- }
- //2.3、子View的width或height为 WRAP_CONTENT
- else if (childDimension == LayoutParams.WRAP_CONTENT) {
- // Child wants to determine its own size. It can't be
- // bigger than us.
- resultSize = size; //size为父视图大小
- resultMode = MeasureSpec.AT_MOST; //mode为AT_MOST
- }
- break;
- // Parent asked to see how big we want to be
- //3、父View是UNSPECIFIED的 !
- case MeasureSpec.UNSPECIFIED:
- //3.1、子View的width或height是个精确值 (an exactly size)
- if (childDimension >= 0) {
- // Child wants a specific size... let him have it
- resultSize = childDimension; //size为精确值
- resultMode = MeasureSpec.EXACTLY; //mode为 EXACTLY
- }
- //3.2、子View的width或height为 MATCH_PARENT/FILL_PARENT
- else if (childDimension == LayoutParams.MATCH_PARENT) {
- // Child wants to be our size... find out how big it should
- // be
- resultSize = 0; //size为0! ,其值未定
- resultMode = MeasureSpec.UNSPECIFIED; //mode为 UNSPECIFIED
- }
- //3.3、子View的width或height为 WRAP_CONTENT
- else if (childDimension == LayoutParams.WRAP_CONTENT) {
- // Child wants to determine its own size.... find out how
- // big it should be
- resultSize = 0; //size为0! ,其值未定
- resultMode = MeasureSpec.UNSPECIFIED; //mode为 UNSPECIFIED
- }
- break;
- }
- //根据上面逻辑条件获取的mode和size构建MeasureSpec对象。
- return MeasureSpec.makeMeasureSpec(resultSize, resultMode);
- }
为了便于分析,我将上面的逻辑判断语句使用列表项进行了说明.
getChildMeasureSpec()方法的主要功能如下:
根据父View的measureSpec值(widthMeasureSpec,heightMeasureSpec)值以及子View的子View内部
LayoutParams属性值,共同决定子View的measureSpec值的大小。主要判断条件主要为MeasureSpec的mode
类型以及LayoutParams的宽高实际值(lp.width,lp.height),见于以上所贴代码中的列表项: 1、 1.1 ; 1.2 ; 1.3 ;
2、2.1等。
例如,分析列表3:假设当父View为MeasureSpec.UNSPECIFIED类型,即未定义时,只有当子View的width
或height指定时,其mode才为MeasureSpec.EXACTLY,否者该View size为 0 ,mode为MeasureSpec.UNSPECIFIED时
,即处于未指定状态。
由此可以得出, 每个View大小的设定都事由其父View以及该View共同决定的。但这只是一个期望的大小,每个
View在测量时最终大小的设定是由setMeasuredDimension()最终决定的。因此,最终确定一个View的“测量长宽“是
由以下几个方面影响:
1、父View的MeasureSpec属性;
2、子View的LayoutParams属性 ;
3、setMeasuredDimension()或者其它类似设定 mMeasuredWidth 和 mMeasuredHeight 值的方法。
setMeasuredDimension()原型:
- //设置View在measure过程中宽和高
- protected final void setMeasuredDimension(int measuredWidth, int measuredHeight) {
- mMeasuredWidth = measuredWidth;
- mMeasuredHeight = measuredHeight;
- mPrivateFlags |= MEASURED_DIMENSION_SET; //设置了MEASURED_DIMENSION_SET标记
- }
将上面列表项转换为表格为:

这张表格更能帮助我们分析View的MeasureSpec的确定条件关系。
为了帮助大家理解,下面我们分析某个窗口使用地xml布局文件,我们弄清楚该xml布局文件中每个View的
MeasureSpec值的组成。
- <?xml version="1.0" encoding="utf-8"?>
- <LinearLayout xmlns:android="http://schemas.android.com/apk/res/android"
- android:id="@+id/llayout"
- android:orientation="vertical"
- android:layout_width="match_parent"
- android:layout_height="match_parent">
- <TextView android:id="@+id/tv"
- android:layout_width="match_parent"
- android:layout_height="wrap_content"
- android:text="@string/hello" />
- </LinearLayout>
该布局文件共有两个View: ①、id为llayout的LinearLayout布局控件 ;
②、id为tv的TextView控件。
假设LinearLayout的父View对应地widthSpec和heightSpec值皆为MeasureSpec.EXACTLY类型(Activity窗口
的父View为DecorView,具体原因见第三部分说明)。
对LinearLayout而言比较简单,由于android:layout_width="match_parent",因此其width对应地widthSpec
mode值为MeasureSpec.EXACTLY , size由父视图大小指定 ; 由于android:layout_height = "match_parent",
因此其height对应地heightSpec mode值为MeasureSpec.EXACTLY,size由父视图大小指定 ;
对TextView而言 ,其父View为LinearLayout的widthSpec和heightSpec值皆为MeasureSpec.EXACTLY类型,
由于android:layout_width="match_parent" , 因此其width对应地widthSpec mode值为MeasureSpec.EXACTLY,
size由父视图大小指定 ; 由于android:layout_width="wrap_content" , 因此其height对应地widthSpec mode值为
MeasureSpec.AT_MOST,size由父视图大小指定 。
我们继续窥测下LinearLayout类是如何进行measure过程的:
- public class LinearLayout extends ViewGroup {
- ...
- @Override //onMeasure方法。
- protected void onMeasure(int widthMeasureSpec, int heightMeasureSpec) {
- //判断是垂直方向还是水平方向,这儿我们假设是VERTICAL垂直方向,
- if (mOrientation == VERTICAL) {
- measureVertical(widthMeasureSpec, heightMeasureSpec);
- } else {
- measureHorizontal(widthMeasureSpec, heightMeasureSpec);
- }
- }
- //垂直方向布局
- void measureVertical(int widthMeasureSpec, int heightMeasureSpec) {
- mTotalLength = 0; //该LinearLayout测量子View时的总高度。
- float totalWeight = 0; //所有子View的权重和 , android:layout_weight
- int maxWidth = 0; //保存子View中最大width值
- ...
- final int count = getVirtualChildCount(); //子View的个数
- final int widthMode = MeasureSpec.getMode(widthMeasureSpec);
- final int heightMode = MeasureSpec.getMode(heightMeasureSpec);
- ...
- // See how tall everyone is. Also remember max width.
- for (int i = 0; i < count; ++i) {
- final View child = getVirtualChildAt(i);
- ...
- LinearLayout.LayoutParams lp = (LinearLayout.LayoutParams) child.getLayoutParams();
- totalWeight += lp.weight;
- //满足该条件地View会在该LinearLayout有剩余高度时,才真正调用measure()
- if (heightMode == MeasureSpec.EXACTLY && lp.height == 0 && lp.weight > 0) {
- ...
- } else {
- int oldHeight = Integer.MIN_VALUE;
- //如果View的hight值为0,并且设置了android:layout_weight属性,重新纠正其height值为WRAP_CONTENT
- if (lp.height == 0 && lp.weight > 0) {
- oldHeight = 0;
- lp.height = LayoutParams.WRAP_CONTENT;
- }
- // Determine how big this child would like to be. If this or
- // previous children have given a weight, then we allow it to
- // use all available space (and we will shrink things later
- // if needed).
- //对每个子View调用measure()方法
- measureChildBeforeLayout(
- child, i, widthMeasureSpec, 0, heightMeasureSpec,
- totalWeight == 0 ? mTotalLength : 0);
- //这三行代码做了如下两件事情:
- //1、获得该View的measuredHeight值,每个View都会根据他们地属性正确设置值 > 0 ;
- //2、更新mTotalLength值:取当前高度mTotalLength值与mTotalLength + childHeight 的最大值
- // 于是对于android:layout_height="wrap_height"属性地LinearLayout控件也就知道了它的确切高度值了。
- final int childHeight = child.getMeasuredHeight();
- final int totalLength = mTotalLength;
- mTotalLength = Math.max(totalLength, totalLength + childHeight + lp.topMargin +
- lp.bottomMargin + getNextLocationOffset(child));
- ...
- }
- final int margin = lp.leftMargin + lp.rightMargin;
- final int measuredWidth = child.getMeasuredWidth() + margin;
- maxWidth = Math.max(maxWidth, measuredWidth);
- ...
- }
- //后续还有很多处理,包括继续measure()某些符合条件地子View
- ...
- }
- void measureChildBeforeLayout(View child, int childIndex,
- int widthMeasureSpec, int totalWidth, int heightMeasureSpec,
- int totalHeight) {
- //调用measureChildWithMargins()方法去设置子View大小
- measureChildWithMargins(child, widthMeasureSpec, totalWidth,
- heightMeasureSpec, totalHeight);
- }
- ...
继续看看measureChildWithMargins()方法,该方法定义在ViewGroup.java内,基本流程同于measureChild()方法,但添加了对子View Margin的处理,即:android:margin属性或者android:marginLeft等属性的处理。
measureChildWithMargins@ViewGroup.java
- /**
- * Ask one of the children of this view to measure itself, taking into
- * account both the MeasureSpec requirements for this view and its padding
- * and margins. The child must have MarginLayoutParams The heavy lifting is
- * done in getChildMeasureSpec.
- */
- //基本流程同于measureChild()方法,但添加了对子View Margin的处理,即:android:margin属性或者android:marginLeft等属性的处理
- //widthUsed参数 表示该父View已经使用的宽度
- //heightUsed参数 表示该父View已经使用的高度
- protected void measureChildWithMargins(View child,
- int parentWidthMeasureSpec, int widthUsed,
- int parentHeightMeasureSpec, int heightUsed) {
- final MarginLayoutParams lp = (MarginLayoutParams) child.getLayoutParams();
- //获得子View的childWidthMeasureSpec和childHeightMeasureSpec值
- final int childWidthMeasureSpec = getChildMeasureSpec(parentWidthMeasureSpec,
- mPaddingLeft + mPaddingRight + lp.leftMargin + lp.rightMargin
- + widthUsed, lp.width);
- final int childHeightMeasureSpec = getChildMeasureSpec(parentHeightMeasureSpec,
- mPaddingTop + mPaddingBottom + lp.topMargin + lp.bottomMargin
- + heightUsed, lp.height);
- child.measure(childWidthMeasureSpec, childHeightMeasureSpec);
- }
measure()过程时,LinearLayout类做了如下事情 :
1、遍历每个子View,对其调用measure()方法;
2、子View measure()完成后,需要取得该子View地宽高实际值,继而做处理(例如:LinearLayout属性为
android:widht="wrap_content"时,LinearLayout的实际width值则是每个子View的width值的累加值)。
2.2 WRAP_CONTENT、MATCH_PARENT以及measure动机揭秘
子View地宽高实际值 ,即child.getMeasuredWidth()值得返回最终会是一个确定值? 难道WRAP_CONTENT(
其值为-2) 、MATCH_PARENT(值为-1)或者说一个具体值(an exactly size > 0)。前面我们说过,View最终“测量”值的
确定是有三个部分组成地:
①、父View的MeasureSpec属性;
②、子View的LayoutParams属性 ;
③、setMeasuredDimension()或者其它类似设定 mMeasuredWidth 和 mMeasuredHeight 值的方法。
因此,一个View必须以某种合适地方法确定它地最终大小。例如,如下自定义View:
- //自定义View
- public Class MyView extends View {
- //针对不同地mode值,设置本View地大小
- protected void onMeasure(int widthMeasureSpec, int heightMeasureSpec){
- //获得父View传递给我们地测量需求
- int widthMode = MeasureSpec.getMode(widthMeasureSpec);
- int heightMode = MeasureSpec.getMode(heightMeasureSpec);
- int width = 0 ;
- int height = 0 ;
- //对UNSPECIFIED 则抛出异常
- if(widthMode == MeasureSpec.UNSPECIFIED || heightMode == MeasureSpec.UNSPECIFIED)
- throw new RuntimeException("widthMode or heightMode cannot be UNSPECIFIED");
- //精确指定
- if(widthMode == MeasureSpec.EXACTLY){
- width = 100 ;
- }
- //模糊指定
- else if(widthMode == MeasureSpec.AT_MOST )
- width = 50 ;
- //精确指定
- if(heightMode == MeasureSpec.EXACTLY){
- height = 100 ;
- }
- //模糊指定
- else if(heightMode == MeasureSpec.AT_MOST )
- height = 50 ;
- setMeasuredDimension(width , height) ;
- }
- }
该View的mMeasuredWidth 和 mMeasuredHeight值。
对于TextView而言,如果它地mode不是Exactly类型 , 它会根据一些属性,例如:android:textStyle
、android:textSizeandroid:typeface等去确定TextView类地需要占用地长和宽。
因此,如果你地自定义View必须手动对不同mode做出处理。否则,则是mode对你而言是无效的。
Android框架中提供地一系列View/ViewGroup都需要去进行这个measure()过程地 ,因为在layout()过程中,父
View需要调用getMeasuredWidth()或getMeasuredHeight()去为每个子View设置他们地布局坐标,只有确定布局
坐标后,才能真正地将该View 绘制(draw)出来,否则该View的layout大小为0,得不到期望效果。我们继续看看
LinearLayout的layout布局过程:
- public class LinearLayout extends ViewGroup {
- ...
- @Override //layout 过程
- protected void onLayout(boolean changed, int l, int t, int r, int b) {
- //假定是垂直方向布局
- if (mOrientation == VERTICAL) {
- layoutVertical();
- } else {
- layoutHorizontal();
- }
- }
- //对每个子View调用layout过程
- void layoutVertical() {
- ...
- final int count = getVirtualChildCount();
- ...
- for (int i = 0; i < count; i++) {
- final View child = getVirtualChildAt(i);
- if (child == null) { //一般为非null
- childTop += measureNullChild(i);
- } else if (child.getVisibility() != GONE) {
- //获得子View测量时的实际宽高值,
- final int childWidth = child.getMeasuredWidth();
- final int childHeight = child.getMeasuredHeight();
- ...
- // 封装了child.layout()方法,见如下
- setChildFrame(child, childLeft, childTop + getLocationOffset(child),
- childWidth, childHeight);
- childTop += childHeight + lp.bottomMargin + getNextLocationOffset(child);
- i += getChildrenSkipCount(child, i);
- }
- }
- }
- //width = getMeasuredWidth() ; height = childHeight(); View的大小就是测量大小
- private void setChildFrame(View child, int left, int top, int width, int height) {
- child.layout(left, top, left + width, top + height);
- }
- ...
- }
对一个View进行measure操作地主要目的就是为了确定该View地布局大小,见上面所示代码。但measure操作
通常是耗时的,因此对自定义ViewGroup而言,我们可以自由控制measure、layout过程,如果我们知道如何layout
一个View,我们可以跳过该ViewGroup地measure操作(onMeasure()方法中measure所有子View地),直接去layout
在前面一篇博客<<Android中滑屏初探 ---- scrollTo 以及 scrollBy方法使用说明>>中,我们自定义了一个 ViewGroup, 并且重写了onMeasure()和onLayout()方法去分别操作每个View。就该ViewGroup而言,我们只需要
重写onLayout()操作即可,因为我们知道如何layout每个子View。如下代码所示:
- //自定义ViewGroup , 包含了三个LinearLayout控件,存放在不同的布局位置
- public class MultiViewGroup extends ViewGroup {
- private void init() {
- // 初始化3个 LinearLayout控件
- LinearLayout oneLL = new LinearLayout(mContext);
- oneLL.setBackgroundColor(Color.RED);
- addView(oneLL);
- ...
- }
- @Override
- // 我们知晓每个子View的layout布局大小,因此我们不需要为每个子View进行measure()操作了。
- // protected void onMeasure(int widthMeasureSpec, int heightMeasureSpec) {
- // setMeasuredDimension(width, height);
- // // 设置该ViewGroup的大小
- // int width = MeasureSpec.getSize(widthMeasureSpec);
- // int height = MeasureSpec.getSize(heightMeasureSpec);
- // int childCount = getChildCount();
- // for (int i = 0; i < childCount; i++) {
- // View child = getChildAt(i);
- // // 设置每个子视图的大小 , 即全屏
- // child.measure(MultiScreenActivity.screenWidth, MultiScreenActivity.scrrenHeight);
- // }
- }
- // layout过程
- @Override
- protected void onLayout(boolean changed, int l, int t, int r, int b) {
- // TODO Auto-generated method stub
- Log.i(TAG, "--- start onLayout --");
- int startLeft = 0; // 每个子视图的起始布局坐标
- int startTop = 10; // 间距设置为10px 相当于 android:marginTop= "10px"
- int childCount = getChildCount();
- Log.i(TAG, "--- onLayout childCount is -->" + childCount);
- for (int i = 0; i < childCount; i++) {
- View child = getChildAt(i);
- child.layout(startLeft, startTop,
- startLeft + MultiScreenActivity.screenWidth,
- startTop + MultiScreenActivity.scrrenHeight);
- startLeft = startLeft + MultiScreenActivity.screenWidth ; //校准每个子View的起始布局位置
- //三个子视图的在屏幕中的分布如下 [0 , 320] / [320,640] / [640,960]
- }
- }
- }
更多关于自定义ViewGroup无须重写measure动作的,可以参考 Android API :
中文翻译见于:<< Android中View绘制优化之三---- 优化View>>
3、root View被添加至窗口时,UI框架是如何设置其LayoutParams值
- <?xml version="1.0" encoding="utf-8"?>
- <LinearLayout xmlns:android="http://schemas.android.com/apk/res/android"
- android:orientation="vertical"
- android:layout_width="fill_parent"
- android:layout_height="fill_parent"
- >
- <TextView
- android:layout_width="fill_parent"
- android:layout_height="wrap_content"
- android:text="@string/hello"
- />
- </LinearLayout>
- //显示一个悬浮窗吧 , just so so
- public void showView()
- {
- //解析布局文件
- LayoutInflater layoutInflater = (LayoutInflater)getSystemService(Context.LAYOUT_INFLATER_SERVICE);
- //rootView对应地LayoutParams属性值为null,将会在UI绘制时设定其值
- View rootView = layoutInflater.inflate(R.layout.main, null);
- WindowManager windowManager = (WindowManager)getSystemService(Context.WINDOW_SERVICE);
- //设置WindowManager.LayoutParams参数值,作为该窗口的各种属性
- WindowManager.LayoutParams winparams = WindowManager.LayoutParams();
- // 以屏幕左上角为原点,设置x、y初始值
- winparams.x = 0;
- winparams.y = 0;
- //设置悬浮窗口长宽数据
- winparams.width = WindowManager.LayoutParams.WRAP_CONTENT;;
- winparams.height = WindowManager.LayoutParams.WRAP_CONTENT;;
- windowManager.addView(rootView, winparams);
- }
- @Override
- public Object getSystemService(String name) {
- if (WINDOW_SERVICE.equals(name)) {
- return WindowManagerImpl.getDefault();
- }
- ...
- }
- public class WindowManagerImpl implements WindowManager{
- public static WindowManagerImpl getDefault()
- {
- return mWindowManager;
- }
- //以特定Window属性添加一个窗口
- public void addView(View view, ViewGroup.LayoutParams params)
- {
- addView(view, params, false);
- }
- //参数nest表示该窗口是不是一个字窗口
- private void addView(View view, ViewGroup.LayoutParams params, boolean nest)
- { ...
- final WindowManager.LayoutParams wparams = (WindowManager.LayoutParams)params;
- ViewRoot root;
- View panelParentView = null; //该子窗口对应地父窗口View
- synchronized (this) {
- ...//需要对传递过来地参数进行检测...
- //对每个窗口皆构建一个ViewRoot对象
- root = new ViewRoot(view.getContext());
- root.mAddNesting = 1;
- //设置root View 的LayoutParams为wparams,即WindowManager.LayoutParams类型
- view.setLayoutParams(wparams);
- ...//对参数检测,以及拷贝原有数组...
- //将窗口对应地view、root、wparams保存在属性集合中
- mViews[index] = view;
- mRoots[index] = root;
- mParams[index] = wparams;
- }
- // do this last because it fires off messages to start doing things
- // 调用ViewRoot对象去通知系统添加一个窗口
- root.setView(view, wparams, panelParentView);
- }
- ...
- //这三个数组分别保存了一个窗口对应地属性
- private View[] mViews; //root View对象 , View类型
- private ViewRoot[] mRoots; //ViewRoot类型 , 与WMS通信
- private WindowManager.LayoutParams[] mParams; //窗口属性
- //WindowManagerImpl实现了单例模式
- private static WindowManagerImpl mWindowManager = new WindowManagerImpl();
- }
WindowManagerImpl类的三个数组集合保存了每个窗口相关属性,这样我们可以通过这些属性去操作特定的
- public final class ViewRoot extends Handler implements ViewParent,View.AttachInfo.Callbacks {
- View mView; //所有窗口地root View
- final WindowManager.LayoutParams mWindowAttributes = new WindowManager.LayoutParams();
- ...
- /**
- * We have one child
- */
- public void setView(View view, WindowManager.LayoutParams attrs,
- View panelParentView) {
- synchronized (this) {
- if (mView == null) {
- mView = view;
- mWindowAttributes.copyFrom(attrs); //保存WindowManager.LayoutParams属性值
- attrs = mWindowAttributes;
- ...
- mAdded = true;
- int res; /* = WindowManagerImpl.ADD_OKAY; */
- // Schedule the first layout -before- adding to the window
- // manager, to make sure we do the relayout before receiving
- // any other events from the system.
- requestLayout(); //请求UI开始绘制。
- mInputChannel = new InputChannel(); //创建一个InputChannel对象,接受消息
- try {
- //通知WindowManagerService添加一个窗口
- res = sWindowSession.add(mWindow, mWindowAttributes,
- getHostVisibility(), mAttachInfo.mContentInsets,
- mInputChannel);
- }
- ...
- view.assignParent(this); //将root View的父View设置为该ViewRoot对象(实现了ViewParent接口)
- ...
- }
- }
- }
- }
1、保存相关属性值,例如:mView、mWindowAttributes等;
2、调用requestLayout()方法请求UI绘制,由于ViewRoot是个Handler对象,异步请求;
3、通知WindowManagerService添加一个窗口;
4、注册一个事件监听管道,用来监听:按键(KeyEvent)和触摸(MotionEvent)事件。
- /**
- * {@inheritDoc}
- */
- public void requestLayout() {
- checkThread(); //检查是不是UI线程调用,如果不是UI线程,会报异常
- mLayoutRequested = true; //置为真,表示需要进行measure和layout过程
- scheduleTraversals();
- }
- //开始UI绘制流程
- public void scheduleTraversals() {
- if (!mTraversalScheduled) {
- mTraversalScheduled = true; //防止多次调用
- sendEmptyMessage(DO_TRAVERSAL); //异步请求UI绘制
- }
- }
- @Override
- public void handleMessage(Message msg) {
- switch (msg.what) {
- case DO_TRAVERSAL:
- performTraversals(); //开始UI绘制
- break;
- }
- }
- private void performTraversals() {
- // cache mView since it is used so much below...
- final View host = mView;
- mTraversalScheduled = false;
- boolean surfaceChanged = false;
- WindowManager.LayoutParams lp = mWindowAttributes;
- int desiredWindowWidth; //表示该窗口期望width值
- int desiredWindowHeight; //表示该窗口期望width值
- int childWidthMeasureSpec; //保存root View的widthMeasureSpec
- int childHeightMeasureSpec; //保存root View的heightMeasureSpec
- final View.AttachInfo attachInfo = mAttachInfo;
- final int viewVisibility = getHostVisibility();
- boolean viewVisibilityChanged = mViewVisibility != viewVisibility
- || mNewSurfaceNeeded;
- float appScale = mAttachInfo.mApplicationScale;
- WindowManager.LayoutParams params = null;
- if (mWindowAttributesChanged) {
- mWindowAttributesChanged = false;
- surfaceChanged = true;
- params = lp;
- }
- Rect frame = mWinFrame;
- if (mFirst) { //mFirst表示是否是第一次绘制该Window
- fullRedrawNeeded = true;
- mLayoutRequested = true;
- DisplayMetrics packageMetrics =
- mView.getContext().getResources().getDisplayMetrics();
- //第一次绘制时desiredWindowWidth,desiredWindowHeight 值大小为屏幕大小
- desiredWindowWidth = packageMetrics.widthPixels;
- desiredWindowHeight = packageMetrics.heightPixels;
- ...
- } else { //不是第一次绘制,则desiredWindowWidth值为frame保存大小,frame值会由WMS填充
- desiredWindowWidth = frame.width();
- desiredWindowHeight = frame.height();
- ...
- }
- ...
- boolean insetsChanged = false;
- if (mLayoutRequested) {
- ...//获得root View的widthMeasureSpec 和 heightMeasureSpec值
- childWidthMeasureSpec = getRootMeasureSpec(desiredWindowWidth, lp.width);
- childHeightMeasureSpec = getRootMeasureSpec(desiredWindowHeight, lp.height);
- //开始measure过程
- host.measure(childWidthMeasureSpec, childHeightMeasureSpec);
- }
- ...
- final boolean didLayout = mLayoutRequested;
- boolean triggerGlobalLayoutListener = didLayout
- || attachInfo.mRecomputeGlobalAttributes;
- if (didLayout) {
- ... //layout过程
- host.layout(0, 0, host.mMeasuredWidth, host.mMeasuredHeight);
- ...
- }
- ...
- if (!cancelDraw && !newSurface) {
- mFullRedrawNeeded = false;
- draw(fullRedrawNeeded);
- ...
- }
- /**
- * @param windowSize The available width or height of the window
- *
- * @param rootDimension The layout params for one dimension (width or height) of the window.
- */
- private int getRootMeasureSpec(int windowSize, int rootDimension) {
- int measureSpec;
- switch (rootDimension) {
- case ViewGroup.LayoutParams.MATCH_PARENT:
- // Window can't resize. Force root view to be windowSize.
- measureSpec = MeasureSpec.makeMeasureSpec(windowSize, MeasureSpec.EXACTLY);
- break;
- case ViewGroup.LayoutParams.WRAP_CONTENT:
- // Window can resize. Set max size for root view.
- measureSpec = MeasureSpec.makeMeasureSpec(windowSize, MeasureSpec.AT_MOST);
- break;
- default:
- // Window wants to be an exact size. Force root view to be that size.
- measureSpec = MeasureSpec.makeMeasureSpec(rootDimension, MeasureSpec.EXACTLY);
- break;
- }
- return measureSpec;
- }
第二步我们看measure与onmeasure
android中onMeasure
有两个对布局界面影响很的方法,onDraw(),和onMeasure().
onDraw()比较好理解.onMeasure()就比较难理解一些,也更复杂些 ,引用文档中的说法就是:
onMeasure() is a little more involved.其实还有另一个方面的原因就是我对这个单词measure不是很知道,然后果了下词典,就放了下心,确实是测量的意思.
实现onMeasure()方法基本需要完成下面三个方面的事情(最终结果是你自己写相应代码得出测量值并调用view的一个方法进行设置,告诉给你的view安排位置大小的父容器你要多大的空间.):
1.传递进来的参数,widthMeasureSpec,和heightMeasureSpec是你对你应该得出来的测量值的限制.
The overidden onMeasure() method is called with width and height measure specifications(widthMeasureSpec and heightMeasureSpec parameters,both are integer codes representing dimensions) which should be treated as requirements for the restrictions on the width and height measurements you should produce.
2. 你在onMeasure计算出来设置的width和height将被用来渲染组件.应当尽量在传递进来的width和height 声明之间.
虽然你也可以选择你设置的尺寸超过传递进来的声明.但是这样的话,父容器可以选择,如clipping,scrolling,或者抛出异常,或者(也许是用新的声明参数)再次调用onMeasure()
Your component's onMeasure() method should calculate a measurement width and height which will be required to render the component.it should try to stay within the specified passed in.although it can choose to exceed them(in this case,the parent can choose what to do,including clipping,scrolling,throwing an excption,or asking the onMeasure to try again,perhaps with different measurement specifications).
3.一但width和height计算好了,就应该调用View.setMeasuredDimension(int width,int height)方法,否则将导致抛出异常.
Once the width and height are calculated,the setMeasureDimension(int width,int height) method must be called with the calculated measurements.Failure to do this will result in an exceptiion being thrown
在Android提提供的一个自定义View示例中(在API demos 中的 view/LabelView)可以看到一个重写onMeasure()方法的
实例,也比较好理解.
01 | /** |
02 | * @see android.view.View#measure(int, int) |
03 | */ |
04 | @Override |
05 | protected void onMeasure(int widthMeasureSpec, int heightMeasureSpec) { |
06 | setMeasuredDimension(measureWidth(widthMeasureSpec), |
07 | measureHeight(heightMeasureSpec)); |
08 | } |
09 |
10 | /** |
11 | * Determines the width of this view |
12 | * @param measureSpec A measureSpec packed into an int |
13 | * @return The width of the view, honoring constraints from measureSpec |
14 | */ |
15 | private int measureWidth(int measureSpec) { |
16 | int result = 0; |
17 | int specMode = MeasureSpec.getMode(measureSpec); |
18 | int specSize = MeasureSpec.getSize(measureSpec); |
19 |
20 | if (specMode == MeasureSpec.EXACTLY) { |
21 | // We were told how big to be |
22 | result = specSize; |
23 | } else { |
24 | // Measure the text |
25 | result = (int) mTextPaint.measureText(mText) + getPaddingLeft() |
26 | + getPaddingRight(); |
27 | if (specMode == MeasureSpec.AT_MOST) { |
28 | // Respect AT_MOST value if that was what is called for by measureSpec |
29 | result = Math.min(result, specSize); |
30 | } |
31 | } |
32 |
33 | return result; |
34 | } |
直接看measureWidth()
首先看到的是参数,分别代表宽度和高度的MeasureSpec
android2.2文档中对于MeasureSpec中的说明是:
一个MeasureSpec封装了从父容器传递给子容器的布局需求.
每一个MeasureSpec代表了一个宽度,或者高度的说明.
一个MeasureSpec是一个大小跟模式的组合值.一共有三种模式.
A MeasureSpec encapsulates the layout requirements passed from parent to child Each MeasureSpec represents a requirement for either the width or the height.A MeasureSpec is compsized of a size and a mode.There are three possible modes:
(1)UPSPECIFIED :父容器对于子容器没有任何限制,子容器想要多大就多大.
UNSPECIFIED The parent has not imposed any constraint on the child.It can be whatever size it wants
(2) EXACTLY
父容器已经为子容器设置了尺寸,子容器应当服从这些边界,不论子容器想要多大的空间.
EXACTLY The parent has determined and exact size for the child.The child is going to be given those bounds regardless of how big it wants to be.
(3) AT_MOST
子容器可以是声明大小内的任意大小.
AT_MOST The child can be as large as it wants up to the specified size
MeasureSpec是View类下的静态公开类,MeasureSpec中的值作为一个整型是为了减少对象的分配开支.此类用于
将size和mode打包或者解包为一个整型.
MeasureSpecs are implemented as ints to reduce object allocation.This class is provided to pack and unpack the size,mode tuple into the int
我比较好奇的是怎么样将两个值打包到一个int中,又如何解包.
MeasureSpec类代码如下 :(注释已经被我删除了,因为在上面说明了.)
01 | public static class MeasureSpec { |
02 | private static final int MODE_SHIFT = 30; |
03 | private static final int MODE_MASK = 0x3 << MODE_SHIFT; |
04 |
05 | public static final int UNSPECIFIED = 0 << MODE_SHIFT; |
06 | public static final int EXACTLY = 1 << MODE_SHIFT; |
07 | public static final int AT_MOST = 2 << MODE_SHIFT; |
08 |
09 | public static int makeMeasureSpec(int size, int mode) { |
10 | return size + mode; |
11 | } |
12 | public static int getMode(int measureSpec) { |
13 | return (measureSpec & MODE_MASK); |
14 | } |
15 | public static int getSize(int measureSpec) { |
16 | return (measureSpec & ~MODE_MASK); |
17 | } } |
我无聊的将他们的十进制值打印出来了:
mode_shift=30,mode_mask=-1073741824,UNSPECIFIED=0,EXACTLY=1073741824,AT_MOST=-2147483648
然后觉得也应该将他们的二进制值打印出来,如下:
mode_shift=11110, // 30
mode_mask=11000000000000000000000000000000,
UNSPECIFIED=0,
EXACTLY=1000000000000000000000000000000,
AT_MOST=10000000000000000000000000000000
1 | MODE_MASK = 0x3 << MODE_SHIFT //也就是说MODE_MASK是由11左移30位得到的.因为Java用补码表示数值.最后得到的值最高位是1所以就是负数了 |
1 |
而把MODE_SHIFF就看成30.那为什么是二进制 的11呢?
呢,因为只有三各模式,如果有四种模式就是111了因为111三个位才可以有四种组合对吧.
我们这样来看,
UNSPECIFIED=00000000000000000000000000000000,
EXACTLY=01000000000000000000000000000000,
AT_MOST=10000000000000000000000000000000
也就是说,0,1,2
对应 00,01,10
当跟11想与时 00 &11 还是得到 00,11&01 -> 01,10&
我觉得到了这个份上相信,看我博客的也都理解了.
return (measureSpec & ~MODE_MASK);应该是 return (measureSpec & (~MODE_MASK));
第二步这里我补充几点
measure()方法是final类型的,onmeasure()方法可以重写
measure方法里面会调用onmeasure方法
onmeasure方法里面确定宽高
如果是ViewGroup则再次调用measure方法,然后onmeasure确定宽高
layout()方法也如此即layout是final的,onlayout是可以重写的
继承自GroupView的时候得重写onLayout方法,调用layout(l,t,r,b)布局子View视图坐标
第三步我们看draw方法--------->>总结如下几点:
draw()方法与上面不同的是他可以重写
View的draw()方法调用了ondraw(),dispatchDraw()方法
第四步我们看dispatchDraw()方法
* 绘制VIew本身的内容,通过调用View.onDraw(canvas)函数实现,绘制自己的child通过dispatchDraw(canvas)实现
* 绘制自己的孩子通过dispatchDraw(canvas)实现 当它没有背景时直接调用的是dispatchDraw()方法,
* 而绕过了draw()方法,当它有背景的时候就调用draw()方法,而draw()方法里包含了dispatchDraw()方法的调用。
* 因此要在ViewGroup上绘制东西的时候往往重写的是dispatchDraw()方法而不是onDraw()方法
* 注意此处有三个方法一个draw 一个ondraw() 一个dispatchdraw
接下来我们进入第二个阶段 研究onInterceptTouchEvent
onInterceptTouchEvent和onTouchEvent调用时序
onInterceptTouchEvent()是ViewGroup的一个方法,目的是在系统向该ViewGroup及其各个childView触发onTouchEvent()之前对相关事件进行一次拦截,Android这么设计的想法也很好理解,由于ViewGroup会包含若干childView,因此需要能够统一监控各种touch事件的机会,因此纯粹的不能包含子view的控件是没有这个方法的,如LinearLayout就有,TextView就没有。
onInterceptTouchEvent()使用也很简单,如果在ViewGroup里覆写了该方法,那么就可以对各种touch事件加以拦截。但是如何拦截,是否所有的touch事件都需要拦截则是比较复杂的,touch事件在onInterceptTouchEvent()和onTouchEvent以及各个childView间的传递机制完全取决于onInterceptTouchEvent()和onTouchEvent()的返回值。并且,针对down事件处理的返回值直接影响到后续move和up事件的接收和传递。
关于返回值的问题,基本规则很清楚,如果return true,那么表示该方法消费了此次事件,如果return false,那么表示该方法并未处理完全,该事件仍然需要以某种方式传递下去继续等待处理。
SDK给出的说明如下:
· You will receive the down event here.
· The down event will be handled either by a child of this view group, or given to your own onTouchEvent() method to handle; this means you should implement onTouchEvent() to return true, so you will continue to see the rest of the gesture (instead of looking for a parent view to handle it). Also, by returning true from onTouchEvent(), you will not receive any following events in onInterceptTouchEvent() and all touch processing must happen in onTouchEvent() like normal.
· For as long as you return false from this function, each following event (up to and including the final up) will be delivered first here and then to the target's onTouchEvent().
· If you return true from here, you will not receive any following events: the target view will receive the same event but with the action ACTION_CANCEL, and all further events will be delivered to your onTouchEvent() method and no longer appear here.
由于onInterceptTouchEvent()的机制比较复杂,上面的说明写的也比较复杂,总结一下,基本的规则是:
1. down事件首先会传递到onInterceptTouchEvent()方法
2. 如果该ViewGroup的onInterceptTouchEvent()在接收到down事件处理完成之后return false,那么后续的move, up等事件将继续会先传递给该ViewGroup,之后才和down事件一样传递给最终的目标view的onTouchEvent()处理。
3. 如果该ViewGroup的onInterceptTouchEvent()在接收到down事件处理完成之后return true,那么后续的move, up等事件将不再传递给onInterceptTouchEvent(),而是和down事件一样传递给该ViewGroup的onTouchEvent()处理,注意,目标view将接收不到任何事件。
4. 如果最终需要处理事件的view的onTouchEvent()返回了false,那么该事件将被传递至其上一层次的view的onTouchEvent()处理。
5. 如果最终需要处理事件的view 的onTouchEvent()返回了true,那么后续事件将可以继续传递给该view的onTouchEvent()处理。
下面用一个简单的实验说明上述复杂的规则。视图自底向上共3层,其中LayoutView1和LayoutView2就是LinearLayout, MyTextView就是TextView:
对应的xml布局文件如下:
<?xml version="1.0" encoding="utf-8"?>
<com.touchstudy.LayoutView1 xmlns:android="http://schemas.android.com/apk/res/android"
android:orientation="vertical"
android:layout_width="fill_parent"
android:layout_height="fill_parent" >
<com.touchstudy.LayoutView2
android:orientation="vertical"
android:layout_width="fill_parent"
android:layout_height="fill_parent"
android:gravity="center">
<com.touchstudy.MyTextView
android:layout_width="wrap_content"
android:layout_height="wrap_content"
android:id="@+id/tv"
android:text="AB"
android:textSize="40sp"
android:textStyle="bold"
android:background="#FFFFFF"
android:textColor="#0000FF"/>
</com.touchstudy.LayoutView2>
</com.touchstudy.LayoutView1>
下面看具体情况:
1. onInterceptTouchEvent()处理down事件均返回false,onTouchEvent()处理事件均返回true
------------------------------------------------------------------------------------------------------------------------------
04-11 03:58:42.620: DEBUG/LayoutView1(614): onInterceptTouchEvent action:ACTION_DOWN
04-11 03:58:42.620: DEBUG/LayoutView2(614): onInterceptTouchEvent action:ACTION_DOWN
04-11 03:58:42.620: DEBUG/MyTextView(614): onTouchEvent action:ACTION_DOWN
04-11 03:58:42.800: DEBUG/LayoutView1(614): onInterceptTouchEvent action:ACTION_MOVE
04-11 03:58:42.800: DEBUG/LayoutView2(614): onInterceptTouchEvent action:ACTION_MOVE
04-11 03:58:42.800: DEBUG/MyTextView(614): onTouchEvent action:ACTION_MOVE
…… //省略过多的ACTION_MOVE
04-11 03:58:43.130: DEBUG/LayoutView1(614): onInterceptTouchEvent action:ACTION_UP
04-11 03:58:43.130: DEBUG/LayoutView2(614): onInterceptTouchEvent action:ACTION_UP
04-11 03:58:43.150: DEBUG/MyTextView(614): onTouchEvent action:ACTION_UP
------------------------------------------------------------------------------------------------------------------------------
这是最常见的情况,onInterceptTouchEvent并没有做任何改变事件传递时序的操作,效果上和没有覆写该方法是一样的。可以看到,各种事件的传递本身是自底向上的,次序是:LayoutView1->LayoutView2->MyTextView。注意,在onInterceptTouchEvent均返回false时,LayoutView1和LayoutView2的onTouchEvent并不会收到事件,而是最终传递给了MyTextView。
2. LayoutView1的onInterceptTouchEvent()处理down事件返回true,
MyTextView的onTouchEvent()处理事件返回true
------------------------------------------------------------------------------------------------------------------------------
04-11 03:09:27.589: DEBUG/LayoutView1(446): onInterceptTouchEvent action:ACTION_DOWN
04-11 03:09:27.589: DEBUG/LayoutView1(446): onTouchEvent action:ACTION_DOWN
04-11 03:09:27.629: DEBUG/LayoutView1(446): onTouchEvent action:ACTION_MOVE
04-11 03:09:27.689: DEBUG/LayoutView1(446): onTouchEvent action:ACTION_MOVE
…… //省略过多的ACTION_MOVE
04-11 03:09:27.959: DEBUG/LayoutView1(446): onTouchEvent action:ACTION_UP
------------------------------------------------------------------------------------------------------------------------------
从Log可以看到,由于LayoutView1在拦截第一次down事件时return true,所以后续的事件(包括第一次的down)将由LayoutView1本身处理,事件不再传递下去。
3. LayoutView1,LayoutView2的onInterceptTouchEvent()处理down事件返回false,
MyTextView的onTouchEvent()处理事件返回false
LayoutView2的onTouchEvent()处理事件返回true
----------------------------------------------------------------------------------------------------------------------------
04-11 09:50:21.147: DEBUG/LayoutView1(301): onInterceptTouchEvent action:ACTION_DOWN
04-11 09:50:21.147: DEBUG/LayoutView2(301): onInterceptTouchEvent action:ACTION_DOWN
04-11 09:50:21.147: DEBUG/MyTextView(301): onTouchEvent action:ACTION_DOWN
04-11 09:50:21.147: DEBUG/LayoutView2(301): onTouchEvent action:ACTION_DOWN
04-11 09:50:21.176: DEBUG/LayoutView1(301): onInterceptTouchEvent action:ACTION_MOVE
04-11 09:50:21.176: DEBUG/LayoutView2(301): onTouchEvent action:ACTION_MOVE
04-11 09:50:21.206: DEBUG/LayoutView1(301): onInterceptTouchEvent action:ACTION_MOVE
04-11 09:50:21.217: DEBUG/LayoutView2(301): onTouchEvent action:ACTION_MOVE
…… //省略过多的ACTION_MOVE
04-11 09:50:21.486: DEBUG/LayoutView1(301): onInterceptTouchEvent action:ACTION_UP
04-11 09:50:21.486: DEBUG/LayoutView2(301): onTouchEvent action:ACTION_UP
----------------------------------------------------------------------------------------------------------------------------
可以看到,由于MyTextView在onTouchEvent()中return false,down事件被传递给其父view,即LayoutView2的onTouchEvent()方法处理,由于在LayoutView2的onTouchEvent()中return true,所以down事件传递并没有上传到LayoutView1。注意,后续的move和up事件均被传递给LayoutView2的onTouchEvent()处理,而没有传递给MyTextView。
----------------------------------------------------------------------------------------------------------------
应大家的要求,我把源代码贴上,其实很简单,就是基础文件,主要是用来观察事件的传递。
主Activity: InterceptTouchStudyActivity.java:
public class InterceptTouchStudyActivityextends Activity {
static final String TAG = "ITSActivity";
TextView tv;
/** Calledwhen the activity is first created. */
@Override
public void onCreate(Bundle savedInstanceState) {
super.onCreate(savedInstanceState);
setContentView(R.layout.layers_touch_pass_test);
}
}
LayoutView1.java:
public class LayoutView1 extends LinearLayout {
private final String TAG = "LayoutView1";
public LayoutView1(Context context, AttributeSet attrs) {
super(context, attrs);
Log.d(TAG,TAG);
}
@Override
public boolean onInterceptTouchEvent(MotionEvent ev) {
int action = ev.getAction();
switch(action){
case MotionEvent.ACTION_DOWN:
Log.d(TAG,"onInterceptTouchEventaction:ACTION_DOWN");
// return true;
break;
case MotionEvent.ACTION_MOVE:
Log.d(TAG,"onInterceptTouchEventaction:ACTION_MOVE");
break;
case MotionEvent.ACTION_UP:
Log.d(TAG,"onInterceptTouchEventaction:ACTION_UP");
break;
case MotionEvent.ACTION_CANCEL:
Log.d(TAG,"onInterceptTouchEventaction:ACTION_CANCEL");
break;
}
return false;
}
@Override
public boolean onTouchEvent(MotionEvent ev) {
int action = ev.getAction();
switch(action){
case MotionEvent.ACTION_DOWN:
Log.d(TAG,"onTouchEventaction:ACTION_DOWN");
break;
case MotionEvent.ACTION_MOVE:
Log.d(TAG,"onTouchEventaction:ACTION_MOVE");
break;
case MotionEvent.ACTION_UP:
Log.d(TAG,"onTouchEventaction:ACTION_UP");
break;
case MotionEvent.ACTION_CANCEL:
Log.d(TAG,"onTouchEventaction:ACTION_CANCEL");
break;
}
return true;
}
@Override
protected void onLayout(boolean changed, int l, int t, int r, int b) {
// TODO Auto-generatedmethod stub
super.onLayout(changed, l, t, r, b);
}
@Override
protected void onMeasure(int widthMeasureSpec, int heightMeasureSpec) {
// TODO Auto-generatedmethod stub
super.onMeasure(widthMeasureSpec, heightMeasureSpec);
}
}
LayoutView2.java:
public class LayoutView2 extends LinearLayout {
private final String TAG = "LayoutView2";
public LayoutView2(Context context, AttributeSet attrs) {
super(context, attrs);
Log.d(TAG,TAG);
}
@Override
public boolean onInterceptTouchEvent(MotionEvent ev) {
int action = ev.getAction();
switch(action){
case MotionEvent.ACTION_DOWN:
Log.d(TAG,"onInterceptTouchEventaction:ACTION_DOWN");
break;
case MotionEvent.ACTION_MOVE:
Log.d(TAG,"onInterceptTouchEventaction:ACTION_MOVE");
break;
case MotionEvent.ACTION_UP:
Log.d(TAG,"onInterceptTouchEventaction:ACTION_UP");
break;
case MotionEvent.ACTION_CANCEL:
Log.d(TAG,"onInterceptTouchEventaction:ACTION_CANCEL");
break;
}
return false;
}
@Override
public boolean onTouchEvent(MotionEvent ev) {
int action = ev.getAction();
switch(action){
case MotionEvent.ACTION_DOWN:
Log.d(TAG,"onTouchEventaction:ACTION_DOWN");
break;
case MotionEvent.ACTION_MOVE:
Log.d(TAG,"onTouchEventaction:ACTION_MOVE");
break;
case MotionEvent.ACTION_UP:
Log.d(TAG,"onTouchEventaction:ACTION_UP");
break;
case MotionEvent.ACTION_CANCEL:
Log.d(TAG,"onTouchEventaction:ACTION_CANCEL");
break;
}
return true;
}
}
MyTextView.java:
public class MyTextView extends TextView {
private final String TAG = "MyTextView";
public MyTextView(Context context, AttributeSet attrs) {
super(context, attrs);
Log.d(TAG,TAG);
}
@Override
public boolean onTouchEvent(MotionEvent ev) {
int action = ev.getAction();
switch(action){
case MotionEvent.ACTION_DOWN:
Log.d(TAG,"onTouchEventaction:ACTION_DOWN");
break;
case MotionEvent.ACTION_MOVE:
Log.d(TAG,"onTouchEventaction:ACTION_MOVE");
break;
case MotionEvent.ACTION_UP:
Log.d(TAG,"onTouchEventaction:ACTION_UP");
break;
case MotionEvent.ACTION_CANCEL:
Log.d(TAG,"onTouchEventaction:ACTION_CANCEL");
break;
}
return false;
}
public void onClick(View v) {
Log.d(TAG, "onClick");
}
public boolean onLongClick(View v) {
Log.d(TAG, "onLongClick");
return false;
}
}
最后我们来研究Scroller与computeScroll
Scroller这个类理解起来有一定的困难,刚开始接触Scroller类的程序员可能无法理解Scroller和View系统是怎么样联系起来的。我经过自己的学习和实践,对Scroller的用法和工作原理有了一定的理解,在这里和大家分享一下,希望大家多多指教。
首先从源码开始分析:
View.java
- /**
- * Called by a parent to request that a child update its values for mScrollX
- * and mScrollY if necessary. This will typically be done if the child is
- * animating a scroll using a {@link android.widget.Scroller Scroller}
- * object.
- */
- public void computeScroll()
- {
- }
computeScroll是一个空函数,很明显我们需要去实现它,至于做什么,就由我们自己来决定了。
因为View的子类很多,在下面的例子中,我会在一个自定义的类MyLinearLayout中去实现它。
ViewGroup.java
- @Override
- protected void dispatchDraw(Canvas canvas) {
- .......
- .......
- .......
- .......
- for (int i = 0; i < count; i++) {
- final View child = children[i];
- if ((child.mViewFlags & VISIBILITY_MASK) == VISIBLE || child.getAnimation() != null)
- {
- more |= drawChild(canvas, child, drawingTime);
- }
- .......
- .......
- .......
从dispatchDraw函数可以看出,ViewGroup会对它的每个孩子调用drawChild(), 在下面的例子中, ContentLinearLayout的孩子有2个,是2个MyLinearLayout类型的实例。
再看看drawChild函数:
- protected boolean drawChild(Canvas canvas, View child, long drawingTime) {
- ................
- ................
- child.computeScroll();
- ................
- ................
- }
看到这里,我想大家应该就明白了,在父容器重画自己的孩子时,它会调用孩子的computScroll方法,也就是说例程中的ContentLinearLayout在调用dispatchDraw()函数时会调用MyLinearLayout的computeScroll方法。
这个computeScroll()函数正是我们大展身手的地方,在这个函数里我们可以去取得事先设置好的成员变量mScroller中的位置信息、速度信息等等,用这些参数来做我们想做的事情。
看到这里大家一定迫不及待的想看代码了,代码如下:
- package com.yulongfei.scroller;
- import android.widget.LinearLayout;
- import android.widget.Scroller;
- import android.app.Activity;
- import android.content.Context;
- import android.graphics.Canvas;
- import android.os.Bundle;
- import android.util.Log;
- import android.view.View;
- import android.widget.Button;
- import android.view.View.OnClickListener;
- public class TestScrollerActivity extends Activity {
- private static final String TAG = "TestScrollerActivity";
- LinearLayout lay1,lay2,lay0;
- private Scroller mScroller;
- @Override
- public void onCreate(Bundle savedInstanceState) {
- super.onCreate(savedInstanceState);
- mScroller = new Scroller(this);
- lay1 = new MyLinearLayout(this);
- lay2 = new MyLinearLayout(this);
- lay1.setBackgroundColor(this.getResources().getColor(android.R.color.darker_gray));
- lay2.setBackgroundColor(this.getResources().getColor(android.R.color.white));
- lay0 = new ContentLinearLayout(this);
- lay0.setOrientation(LinearLayout.VERTICAL);
- LinearLayout.LayoutParams p0 = new LinearLayout.LayoutParams
- (LinearLayout.LayoutParams.FILL_PARENT,LinearLayout.LayoutParams.FILL_PARENT);
- this.setContentView(lay0, p0);
- LinearLayout.LayoutParams p1 = new LinearLayout.LayoutParams
- (LinearLayout.LayoutParams.FILL_PARENT,LinearLayout.LayoutParams.FILL_PARENT);
- p1.weight=1;
- lay0.addView(lay1,p1);
- LinearLayout.LayoutParams p2 = new LinearLayout.LayoutParams
- (LinearLayout.LayoutParams.FILL_PARENT,LinearLayout.LayoutParams.FILL_PARENT);
- p2.weight=1;
- lay0.addView(lay2,p2);
- MyButton btn1 = new MyButton(this);
- MyButton btn2 = new MyButton(this);
- btn1.setText("btn in layout1");
- btn2.setText("btn in layout2");
- btn1.setOnClickListener(new OnClickListener(){
- @Override
- public void onClick(View v) {
- mScroller.startScroll(0, 0, -30, -30, 50);
- }
- });
- btn2.setOnClickListener(new OnClickListener(){
- @Override
- public void onClick(View v) {
- mScroller.startScroll(20, 20, -50, -50, 50);
- }
- });
- lay1.addView(btn1);
- lay2.addView(btn2);
- }
- class MyButton extends Button
- {
- public MyButton(Context ctx)
- {
- super(ctx);
- }
- @Override
- protected void onDraw(Canvas canvas)
- {
- super.onDraw(canvas);
- Log.d("MyButton", this.toString() + " onDraw------");
- }
- }
- class MyLinearLayout extends LinearLayout
- {
- public MyLinearLayout(Context ctx)
- {
- super(ctx);
- }
- @Override
- /**
- * Called by a parent to request that a child update its values for mScrollX
- * and mScrollY if necessary. This will typically be done if the child is
- * animating a scroll using a {@link android.widget.Scroller Scroller}
- * object.
- */
- public void computeScroll()
- {
- Log.d(TAG, this.toString() + " computeScroll-----------");
- if (mScroller.computeScrollOffset())//如果mScroller没有调用startScroll,这里将会返回false。
- {
- //因为调用computeScroll函数的是MyLinearLayout实例,
- //所以调用scrollTo移动的将是该实例的孩子,也就是MyButton实例
- scrollTo(mScroller.getCurrX(), 0);
- Log.d(TAG, "getCurrX = " + mScroller.getCurrX());
- //继续让系统重绘
- getChildAt(0).invalidate();
- }
- }
- }
- class ContentLinearLayout extends LinearLayout
- {
- public ContentLinearLayout(Context ctx)
- {
- super(ctx);
- }
- @Override
- protected void dispatchDraw(Canvas canvas)
- {
- Log.d("ContentLinearLayout", "contentview dispatchDraw");
- super.dispatchDraw(canvas);
- }
- }
- }
对代码做一个简单介绍:
例子中定义了2个MyButton实例btn1和btn2,它们将被其父容器MyLinearLayout实例lay1和lay2通过调用scrollTo来移动。
ContentLinearLayout实例lay0为Activity的contentview,它有2个孩子,分别是lay1和lay2。
mScroller是一个封装位置和速度等信息的变量,startScroll()函数只是对它的一些成员变量做一些设置,这个设置的唯一效果就是导致mScroller.computeScrollOffset() 返回true。
这里大家可能有个疑问,既然startScroll()只是虚晃一枪,那scroll的动态效果到底是谁触发的呢?
后面我将给出答案。
运行程序,我们来看看Log
点击btn1:
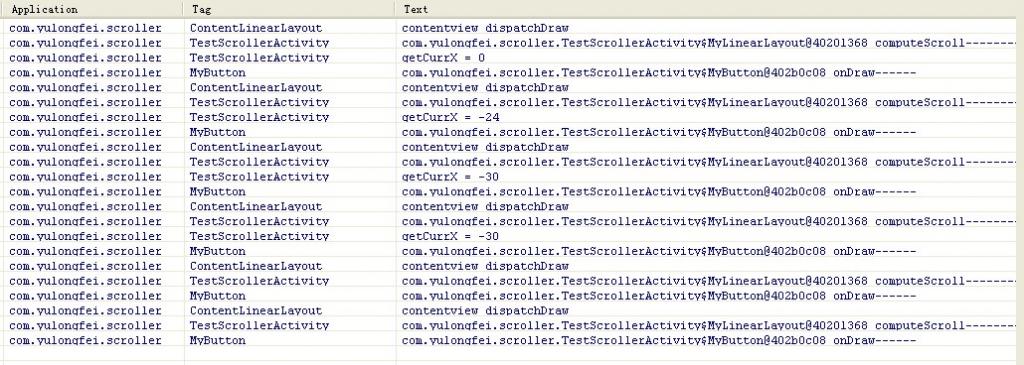
点击btn2: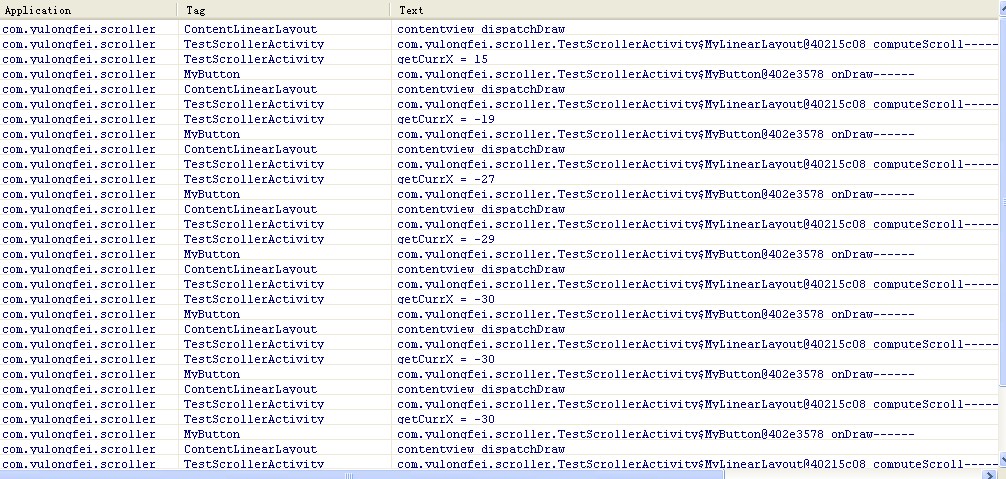
对照Log,我从button被点击开始,对整个绘制流程进行分析,首先button被点击(这里将回答上文的问题),button的背景将发生变化,这时button将调用invalidate()请求重绘,这就是View系统重绘的源头,即scroll动态效果的触发者。与此同时,mScroller.startScroll被调用了,mScroller在此时被设置了一些有效值。
好了,既然重绘请求已发出了,那么整个View系统就会来一次自上而下的绘制了,首先输出的Log就是“contentview dispatchDraw”了,它将绘制需要重绘的孩子(lay1和lay2中的一个),接着会调用drawChild,使得computeScroll函数被触发(drawChild里面会调用child.computeScroll()),于是,lay1或者lay2就会以mScroller的位置信息为依据来调用scrollTo了,它的孩子btn1或者btn2就会被移动了。之后又调用了getChildAt(0).invalidate(),这将导致系统不断重绘,直到startScroll中设置的时间耗尽mScroller.computeScrollOffset()返回false才停下来。
好了,现在整个流程都分析完了,相信大家应该清楚了Scroller类与View系统的关系了吧。理解了Scroller的工作原理,你会发现原来Scroller类并不神秘,甚至有点被动,它除了储存一些数值,什么其他的事情都没做,Scroller类中的一些变量mStartX, mFinalX, mDuration等等的意义也很好理解。
注意:
1、之前有朋友反馈button点击不能移动,这是因为android 4.0默认打开了硬件加速,如果想让button移动,请在AndroidManifest的Application标签或者activity标签中加入:android:hardwareAccelerated="false"
2、代码中的 getChildAt(0).invalidate(); 是多余的,可以不写,多谢网友指出这一点。
scroller讲解
1、掌握View(视图)的"视图坐标"以及"布局坐标",以及scrollTo()和scrollBy()方法的作用 ----- 必须理解
如果对这方面知识不太清楚的话,建议先看看我的这篇博客
<Android中滑屏初探 ---- scrollTo 以及 scrollBy方法使用说明>,
不夸张地说,这篇博客理论上来说是我们这篇博文的基础。
2、知道onInterceptTouchEvent()以及onTouchEvent()对触摸事件的分发流程 ---- 不是必须
3、知道怎么绘制自定义ViewGroup即可 ---- 不是必须
OK。 继续往下看,请一定有所准备 。大家跟着我一步一步来咯。
知识点一: 关于scrollTo()和scrollBy()以及偏移坐标的设置/取值问题
在前面一篇博文中《Android中滑屏初探 ---- scrollTo 以及 scrollBy方法使用说明》,我们掌握了scrollTo()和
scrollBy()方法的作用,这两个方法的主要作用是将View/ViewGroup移至指定的坐标中,并且将偏移量保存起来。另外:
mScrollX 代表X轴方向的偏移坐标
mScrollY 代表Y轴方向的偏移坐标
关于偏移量的设置我们可以参看下源码:
- package com.qin.customviewgroup;
- public class View {
- ....
- protected int mScrollX; //该视图内容相当于视图起始坐标的偏移量 , X轴 方向
- protected int mScrollY; //该视图内容相当于视图起始坐标的偏移量 , Y轴方向
- //返回值
- public final int getScrollX() {
- return mScrollX;
- }
- public final int getScrollY() {
- return mScrollY;
- }
- public void scrollTo(int x, int y) {
- //偏移位置发生了改变
- if (mScrollX != x || mScrollY != y) {
- int oldX = mScrollX;
- int oldY = mScrollY;
- mScrollX = x; //赋新值,保存当前便宜量
- mScrollY = y;
- //回调onScrollChanged方法
- onScrollChanged(mScrollX, mScrollY, oldX, oldY);
- if (!awakenScrollBars()) {
- invalidate(); //一般都引起重绘
- }
- }
- }
- // 看出原因了吧 。。 mScrollX 与 mScrollY 代表我们当前偏移的位置 , 在当前位置继续偏移(x ,y)个单位
- public void scrollBy(int x, int y) {
- scrollTo(mScrollX + x, mScrollY + y);
- }
- //...
- }
于是,在任何时刻我们都可以获取该View/ViewGroup的偏移位置了,即调用getScrollX()方法和getScrollY()方法
知识点二: Scroller类的介绍
在初次看Launcher滑屏的时候,我就对Scroller类的学习感到非常蛋疼,完全失去了继续研究的欲望。如今,没得办法,
得重新看Launcher模块,基本上将Launcher大部分类以及功能给掌握了。当然,也花了一天时间来学习Launcher里的滑屏实现
,基本上业是拨开云雾见真知了。
我们知道想把一个View偏移至指定坐标(x,y)处,利用scrollTo()方法直接调用就OK了,但我们不能忽视的是,该方法本身
来的的副作用:非常迅速的将View/ViewGroup偏移至目标点,而没有对这个偏移过程有任何控制,对用户而言可能是不太
友好的。于是,基于这种偏移控制,Scroller类被设计出来了,该类的主要作用是为偏移过程制定一定的控制流程(后面我们会
知道的更多),从而使偏移更流畅,更完美。
可能上面说的比较悬乎,道理也没有讲透。下面我就根据特定情景帮助大家分析下:
情景: 从上海如何到武汉?
普通的人可能会想,so easy : 飞机、轮船、11路公交车...
文艺的人可能会想, 小 case : 时空忍术(火影的招数)、翻个筋斗(孙大圣的招数)...
不管怎么样,我们想出来的套路可能有两种:
1、有个时间控制过程才能抵达(缓慢的前进) ----- 对应于Scroller的作用
假设做火车,这个过程可能包括: 火车速率,花费周期等;
2、瞬间抵达(超神太快了,都眩晕了,用户体验不太好) ------ 对应于scrollTo()的作用
模拟Scroller类的实现功能:
假设从上海做动车到武汉需要10个小时,行进距离为1000km ,火车速率200/h 。采用第一种时间控制方法到达武汉的
整个配合过程可能如下:
我们每隔一段时间(例如1小时),计算火车应该行进的距离,然后调用scrollTo()方法,行进至该处。10小时过完后,
我们也就达到了目的地了。
相信大家心里应该有个感觉了。我们就分析下源码里去看看Scroller类的相关方法.
其源代码(部分)如下: 路径位于 \frameworks\base\core\java\android\widget\Scroller.java
- public class Scroller {
- private int mStartX; //起始坐标点 , X轴方向
- private int mStartY; //起始坐标点 , Y轴方向
- private int mCurrX; //当前坐标点 X轴, 即调用startScroll函数后,经过一定时间所达到的值
- private int mCurrY; //当前坐标点 Y轴, 即调用startScroll函数后,经过一定时间所达到的值
- private float mDeltaX; //应该继续滑动的距离, X轴方向
- private float mDeltaY; //应该继续滑动的距离, Y轴方向
- private boolean mFinished; //是否已经完成本次滑动操作, 如果完成则为 true
- //构造函数
- public Scroller(Context context) {
- this(context, null);
- }
- public final boolean isFinished() {
- return mFinished;
- }
- //强制结束本次滑屏操作
- public final void forceFinished(boolean finished) {
- mFinished = finished;
- }
- public final int getCurrX() {
- return mCurrX;
- }
- /* Call this when you want to know the new location. If it returns true,
- * the animation is not yet finished. loc will be altered to provide the
- * new location. */
- //根据当前已经消逝的时间计算当前的坐标点,保存在mCurrX和mCurrY值中
- public boolean computeScrollOffset() {
- if (mFinished) { //已经完成了本次动画控制,直接返回为false
- return false;
- }
- int timePassed = (int)(AnimationUtils.currentAnimationTimeMillis() - mStartTime);
- if (timePassed < mDuration) {
- switch (mMode) {
- case SCROLL_MODE:
- float x = (float)timePassed * mDurationReciprocal;
- ...
- mCurrX = mStartX + Math.round(x * mDeltaX);
- mCurrY = mStartY + Math.round(x * mDeltaY);
- break;
- ...
- }
- else {
- mCurrX = mFinalX;
- mCurrY = mFinalY;
- mFinished = true;
- }
- return true;
- }
- //开始一个动画控制,由(startX , startY)在duration时间内前进(dx,dy)个单位,即到达坐标为(startX+dx , startY+dy)出
- public void startScroll(int startX, int startY, int dx, int dy, int duration) {
- mFinished = false;
- mDuration = duration;
- mStartTime = AnimationUtils.currentAnimationTimeMillis();
- mStartX = startX; mStartY = startY;
- mFinalX = startX + dx; mFinalY = startY + dy;
- mDeltaX = dx; mDeltaY = dy;
- ...
- }
- }
其中比较重要的两个方法为:
public void startScroll(int startX, int startY, int dx, int dy, int duration)
函数功能说明:根据当前已经消逝的时间计算当前的坐标点,保存在mCurrX和mCurrY值中
public void startScroll(int startX, int startY, int dx, int dy, int duration)
函数功能说明:开始一个动画控制,由(startX , startY)在duration时间内前进(dx,dy)个单位,到达坐标为
(startX+dx , startY+dy)处。
PS : 强烈建议大家看看该类的源码,便于后续理解。
知识点二: computeScroll()方法介绍
为了易于控制滑屏控制,Android框架提供了 computeScroll()方法去控制这个流程。在绘制View时,会在draw()过程调用该
方法。因此, 再配合使用Scroller实例,我们就可以获得当前应该的偏移坐标,手动使View/ViewGroup偏移至该处。
computeScroll()方法原型如下,该方法位于ViewGroup.java类中
- /**
- * Called by a parent to request that a child update its values for mScrollX
- * and mScrollY if necessary. This will typically be done if the child is
- * animating a scroll using a {@link android.widget.Scroller Scroller}
- * object.
- */由父视图调用用来请求子视图根据偏移值 mScrollX,mScrollY重新绘制
- public void computeScroll() { //空方法 ,自定义ViewGroup必须实现方法体
- }
为了实现偏移控制,一般自定义View/ViewGroup都需要重载该方法 。
其调用过程位于View绘制流程draw()过程中,如下:
- @Override
- protected void dispatchDraw(Canvas canvas){
- ...
- for (int i = 0; i < count; i++) {
- final View child = children[getChildDrawingOrder(count, i)];
- if ((child.mViewFlags & VISIBILITY_MASK) == VISIBLE || child.getAnimation() != null) {
- more |= drawChild(canvas, child, drawingTime);
- }
- }
- }
- protected boolean drawChild(Canvas canvas, View child, long drawingTime) {
- ...
- child.computeScroll();
- ...
- }
Demo说明:
我们简单的复用了之前写的一个自定义ViewGroup,与以前一次有区别的是,我们没有调用scrollTo()方法去进行瞬间
偏移。 本次做法如下:
第一、调用Scroller实例去产生一个偏移控制(对应于startScroll()方法)
第二、手动调用invalid()方法去重新绘制,剩下的就是在 computeScroll()里根据当前已经逝去的时间,获取当前
应该偏移的坐标(由Scroller实例对应的computeScrollOffset()计算而得),
第三、当前应该偏移的坐标,调用scrollBy()方法去缓慢移动至该坐标处。
截图如下:


原始界面 点击按钮或者触摸屏之后的显示界面
附:由于滑动截屏很难,只是简单的截取了两个个静态图片,触摸的话可以实现左右滑动切屏了。
更多知识点,请看代码注释。。
- //自定义ViewGroup , 包含了三个LinearLayout控件,存放在不同的布局位置,通过scrollBy或者scrollTo方法切换
- public class MultiViewGroup extends ViewGroup {
- ...
- //startScroll开始移至下一屏
- public void startMove(){
- curScreen ++ ;
- Log.i(TAG, "----startMove---- curScreen " + curScreen);
- //使用动画控制偏移过程 , 3s内到位
- mScroller.startScroll((curScreen-1) * getWidth(), 0, getWidth(), 0,3000);
- //其实点击按钮的时候,系统会自动重新绘制View,我们还是手动加上吧。
- invalidate();
- //使用scrollTo一步到位
- //scrollTo(curScreen * MultiScreenActivity.screenWidth, 0);
- }
- // 由父视图调用用来请求子视图根据偏移值 mScrollX,mScrollY重新绘制
- @Override
- public void computeScroll() {
- // TODO Auto-generated method stub
- Log.e(TAG, "computeScroll");
- // 如果返回true,表示动画还没有结束
- // 因为前面startScroll,所以只有在startScroll完成时 才会为false
- if (mScroller.computeScrollOffset()) {
- Log.e(TAG, mScroller.getCurrX() + "======" + mScroller.getCurrY());
- // 产生了动画效果,根据当前值 每次滚动一点
- scrollTo(mScroller.getCurrX(), mScroller.getCurrY());
- Log.e(TAG, "### getleft is " + getLeft() + " ### getRight is " + getRight());
- //此时同样也需要刷新View ,否则效果可能有误差
- postInvalidate();
- }
- else
- Log.i(TAG, "have done the scoller -----");
- }
- //马上停止移动,如果已经超过了下一屏的一半,我们强制滑到下一个屏幕
- public void stopMove(){
- Log.v(TAG, "----stopMove ----");
- if(mScroller != null){
- //如果动画还没结束,我们就按下了结束的按钮,那我们就结束该动画,即马上滑动指定位置
- if(!mScroller.isFinished()){
- int scrollCurX= mScroller.getCurrX() ;
- //判断是否超过下一屏的中间位置,如果达到就抵达下一屏,否则保持在原屏幕
- // 这样的一个简单公式意思是:假设当前滑屏偏移值即 scrollCurX 加上每个屏幕一半的宽度,除以每个屏幕的宽度就是
- // 我们目标屏所在位置了。 假如每个屏幕宽度为320dip, 我们滑到了500dip处,很显然我们应该到达第二屏,索引值为1
- //即(500 + 320/2)/320 = 1
- int descScreen = ( scrollCurX + getWidth() / 2) / getWidth() ;
- Log.i(TAG, "-mScroller.is not finished scrollCurX +" + scrollCurX);
- Log.i(TAG, "-mScroller.is not finished descScreen +" + descScreen);
- mScroller.abortAnimation();
- //停止了动画,我们马上滑倒目标位置
- scrollTo(descScreen *getWidth() , 0);
- curScreen = descScreen ; //纠正目标屏位置
- }
- else
- Log.i(TAG, "----OK mScroller.is finished ---- ");
- }
- }
- ...
- }
如何实现触摸滑屏?
其实网上有很多关于Launcher实现滑屏的博文,基本上也把道理阐释的比较明白了 。我这儿也是基于自己的理解,将一些
重要方面的知识点给补充下,希望能帮助大家理解。
想要实现滑屏操作,值得考虑的事情包括如下几个方面:
其中:onInterceptTouchEvent()主要功能是控制触摸事件的分发,例如是子视图的点击事件还是滑动事件。
其他所有处理过程均在onTouchEvent()方法里实现了。
1、屏幕的滑动要根据手指的移动而移动 ---- 主要实现在onTouchEvent()方法中
2、当手指松开时,可能我们并没有完全滑动至某个屏幕上,这是我们需要手动判断当前偏移至去计算目标屏(当前屏或者
前后屏),并且优雅的偏移到目标屏(当然是用Scroller实例咯)。
3、调用computeScroll ()去实现缓慢移动过程。
知识点介绍:
VelocityTracker类
功能: 根据触摸位置计算每像素的移动速率。
常用方法有:
public void addMovement (MotionEvent ev)
public void computeCurrentVelocity (int units)
provides pixels per millisecond, 1000 provides pixels per second, etc.
ViewConfiguration类
功能: 获得一些关于timeouts(时间)、sizes(大小)、distances(距离)的标准常量值 。
常用方法:
public int getScaledEdgeSlop()
说明:获得一个触摸移动的最小像素值。也就是说,只有超过了这个值,才代表我们该滑屏处理了。
public static int getLongPressTimeout()
说明:获得一个执行长按事件监听(onLongClickListener)的值。也就是说,对某个View按下触摸时,只有超过了
这个时间值在,才表示我们该对该View回调长按事件了;否则,小于这个时间点松开手指,只执行onClick监听
我能写下来的也就这么多了,更多的东西参考代码注释吧。 在掌握了上面我罗列的知识后(重点scrollTo、Scroller类),
其他方面的知识都是关于点与点之间的计算了以及触摸事件的分发了。这方面感觉也没啥可写的。
- //自定义ViewGroup , 包含了三个LinearLayout控件,存放在不同的布局位置,通过scrollBy或者scrollTo方法切换
- public class MultiViewGroup extends ViewGroup {
- private static String TAG = "MultiViewGroup";
- private int curScreen = 0 ; //当前屏幕
- private Scroller mScroller = null ; //Scroller对象实例
- public MultiViewGroup(Context context) {
- super(context);
- mContext = context;
- init();
- }
- public MultiViewGroup(Context context, AttributeSet attrs) {
- super(context, attrs);
- mContext = context;
- init();
- }
- //初始化
- private void init() {
- ...
- //初始化Scroller实例
- mScroller = new Scroller(mContext);
- // 初始化3个 LinearLayout控件
- ...
- //初始化一个最小滑动距离
- mTouchSlop = ViewConfiguration.get(getContext()).getScaledTouchSlop();
- }
- // 由父视图调用用来请求子视图根据偏移值 mScrollX,mScrollY重新绘制
- @Override
- public void computeScroll() {
- // TODO Auto-generated method stub
- Log.e(TAG, "computeScroll");
- // 如果返回true,表示动画还没有结束
- // 因为前面startScroll,所以只有在startScroll完成时 才会为false
- if (mScroller.computeScrollOffset()) {
- Log.e(TAG, mScroller.getCurrX() + "======" + mScroller.getCurrY());
- // 产生了动画效果,根据当前值 每次滚动一点
- scrollTo(mScroller.getCurrX(), mScroller.getCurrY());
- Log.e(TAG, "### getleft is " + getLeft() + " ### getRight is " + getRight());
- //此时同样也需要刷新View ,否则效果可能有误差
- postInvalidate();
- }
- else
- Log.i(TAG, "have done the scoller -----");
- }
- //两种状态: 是否处于滑屏状态
- private static final int TOUCH_STATE_REST = 0; //什么都没做的状态
- private static final int TOUCH_STATE_SCROLLING = 1; //开始滑屏的状态
- private int mTouchState = TOUCH_STATE_REST; //默认是什么都没做的状态
- //--------------------------
- //处理触摸事件 ~
- public static int SNAP_VELOCITY = 600 ; //最小的滑动速率
- private int mTouchSlop = 0 ; //最小滑动距离,超过了,才认为开始滑动
- private float mLastionMotionX = 0 ; //记住上次触摸屏的位置
- //处理触摸的速率
- private VelocityTracker mVelocityTracker = null ;
- // 这个感觉没什么作用 不管true还是false 都是会执行onTouchEvent的 因为子view里面onTouchEvent返回false了
- @Override
- public boolean onInterceptTouchEvent(MotionEvent ev) {
- // TODO Auto-generated method stub
- Log.e(TAG, "onInterceptTouchEvent-slop:" + mTouchSlop);
- final int action = ev.getAction();
- //表示已经开始滑动了,不需要走该Action_MOVE方法了(第一次时可能调用)。
- //该方法主要用于用户快速松开手指,又快速按下的行为。此时认为是出于滑屏状态的。
- if ((action == MotionEvent.ACTION_MOVE) && (mTouchState != TOUCH_STATE_REST)) {
- return true;
- }
- final float x = ev.getX();
- final float y = ev.getY();
- switch (action) {
- case MotionEvent.ACTION_MOVE:
- Log.e(TAG, "onInterceptTouchEvent move");
- final int xDiff = (int) Math.abs(mLastionMotionX - x);
- //超过了最小滑动距离,就可以认为开始滑动了
- if (xDiff > mTouchSlop) {
- mTouchState = TOUCH_STATE_SCROLLING;
- }
- break;
- case MotionEvent.ACTION_DOWN:
- Log.e(TAG, "onInterceptTouchEvent down");
- mLastionMotionX = x;
- mLastMotionY = y;
- Log.e(TAG, mScroller.isFinished() + "");
- mTouchState = mScroller.isFinished() ? TOUCH_STATE_REST : TOUCH_STATE_SCROLLING;
- break;
- case MotionEvent.ACTION_CANCEL:
- case MotionEvent.ACTION_UP:
- Log.e(TAG, "onInterceptTouchEvent up or cancel");
- mTouchState = TOUCH_STATE_REST;
- break;
- }
- Log.e(TAG, mTouchState + "====" + TOUCH_STATE_REST);
- return mTouchState != TOUCH_STATE_REST;
- }
- public boolean onTouchEvent(MotionEvent event){
- super.onTouchEvent(event);
- Log.i(TAG, "--- onTouchEvent--> " );
- // TODO Auto-generated method stub
- Log.e(TAG, "onTouchEvent start");
- //获得VelocityTracker对象,并且添加滑动对象
- if (mVelocityTracker == null) {
- mVelocityTracker = VelocityTracker.obtain();
- }
- mVelocityTracker.addMovement(event);
- //触摸点
- float x = event.getX();
- float y = event.getY();
- switch(event.getAction()){
- case MotionEvent.ACTION_DOWN:
- //如果屏幕的动画还没结束,你就按下了,我们就结束上一次动画,即开始这次新ACTION_DOWN的动画
- if(mScroller != null){
- if(!mScroller.isFinished()){
- mScroller.abortAnimation();
- }
- }
- mLastionMotionX = x ; //记住开始落下的屏幕点
- break ;
- case MotionEvent.ACTION_MOVE:
- int detaX = (int)(mLastionMotionX - x ); //每次滑动屏幕,屏幕应该移动的距离
- scrollBy(detaX, 0);//开始缓慢滑屏咯。 detaX > 0 向右滑动 , detaX < 0 向左滑动 ,
- Log.e(TAG, "--- MotionEvent.ACTION_MOVE--> detaX is " + detaX );
- mLastionMotionX = x ;
- break ;
- case MotionEvent.ACTION_UP:
- final VelocityTracker velocityTracker = mVelocityTracker ;
- velocityTracker.computeCurrentVelocity(1000);
- //计算速率
- int velocityX = (int) velocityTracker.getXVelocity() ;
- Log.e(TAG , "---velocityX---" + velocityX);
- //滑动速率达到了一个标准(快速向右滑屏,返回上一个屏幕) 马上进行切屏处理
- if (velocityX > SNAP_VELOCITY && curScreen > 0) {
- // Fling enough to move left
- Log.e(TAG, "snap left");
- snapToScreen(curScreen - 1);
- }
- //快速向左滑屏,返回下一个屏幕)
- else if(velocityX < -SNAP_VELOCITY && curScreen < (getChildCount()-1)){
- Log.e(TAG, "snap right");
- snapToScreen(curScreen + 1);
- }
- //以上为快速移动的 ,强制切换屏幕
- else{
- //我们是缓慢移动的,因此先判断是保留在本屏幕还是到下一屏幕
- snapToDestination();
- }
- //回收VelocityTracker对象
- if (mVelocityTracker != null) {
- mVelocityTracker.recycle();
- mVelocityTracker = null;
- }
- //修正mTouchState值
- mTouchState = TOUCH_STATE_REST ;
- break;
- case MotionEvent.ACTION_CANCEL:
- mTouchState = TOUCH_STATE_REST ;
- break;
- }
- return true ;
- }
- 我们是缓慢移动的,因此需要根据偏移值判断目标屏是哪个?
- private void snapToDestination(){
- //当前的偏移位置
- int scrollX = getScrollX() ;
- int scrollY = getScrollY() ;
- Log.e(TAG, "### onTouchEvent snapToDestination ### scrollX is " + scrollX);
- //判断是否超过下一屏的中间位置,如果达到就抵达下一屏,否则保持在原屏幕
- //直接使用这个公式判断是哪一个屏幕 前后或者自己
- //判断是否超过下一屏的中间位置,如果达到就抵达下一屏,否则保持在原屏幕
- // 这样的一个简单公式意思是:假设当前滑屏偏移值即 scrollCurX 加上每个屏幕一半的宽度,除以每个屏幕的宽度就是
- // 我们目标屏所在位置了。 假如每个屏幕宽度为320dip, 我们滑到了500dip处,很显然我们应该到达第二屏
- int destScreen = (getScrollX() + MultiScreenActivity.screenWidth / 2 ) / MultiScreenActivity.screenWidth ;
- Log.e(TAG, "### onTouchEvent ACTION_UP### dx destScreen " + destScreen);
- snapToScreen(destScreen);
- }
- //真正的实现跳转屏幕的方法
- private void snapToScreen(int whichScreen){
- //简单的移到目标屏幕,可能是当前屏或者下一屏幕
- //直接跳转过去,不太友好
- //scrollTo(mLastScreen * MultiScreenActivity.screenWidth, 0);
- //为了友好性,我们在增加一个动画效果
- //需要再次滑动的距离 屏或者下一屏幕的继续滑动距离
- curScreen = whichScreen ;
- //防止屏幕越界,即超过屏幕数
- if(curScreen > getChildCount() - 1)
- curScreen = getChildCount() - 1 ;
- //为了达到下一屏幕或者当前屏幕,我们需要继续滑动的距离.根据dx值,可能想左滑动,也可能像又滑动
- int dx = curScreen * getWidth() - getScrollX() ;
- Log.e(TAG, "### onTouchEvent ACTION_UP### dx is " + dx);
- mScroller.startScroll(getScrollX(), 0, dx, 0,Math.abs(dx) * 2);
- //由于触摸事件不会重新绘制View,所以此时需要手动刷新View 否则没效果
- invalidate();
- }
- //开始滑动至下一屏
- public void startMove(){
- ...
- }
- //理解停止滑动
- public void stopMove(){
- ...
- }
- // measure过程
- @Override
- protected void onMeasure(int widthMeasureSpec, int heightMeasureSpec) {
- ...
- }
- // layout过程
- @Override
- protected void onLayout(boolean changed, int l, int t, int r, int b) {
- ...
- }
- }


 6389
6389


 被折叠的 条评论
为什么被折叠?
被折叠的 条评论
为什么被折叠?
 到【灌水乐园】发言


