


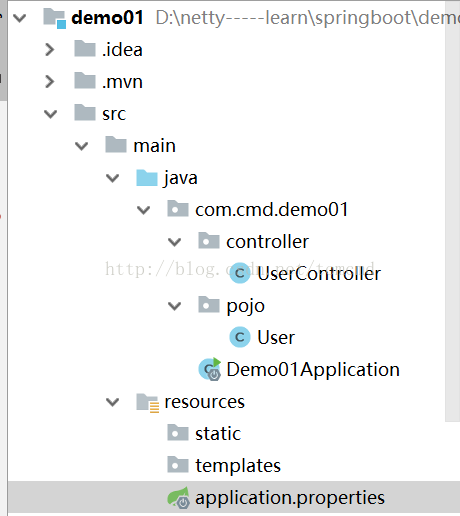
demo目录结构如下:
这里用到了lombok,在pom文件中引入依赖
<dependency>
			<groupId>org.projectlombok</groupId>
			<artifactId>lombok</artifactId>
			<version>1.16.10</version>
		</dependency>
在Intellij idea中快速构建Springboot web工程,
创建User类:
@Data
@NoArgsConstructor
public class User {
    private String username;
    private String password;
    public User(String username, String password) {
        this.username = username;
        this.password = password;
    }
}@RestController
public class UserController {
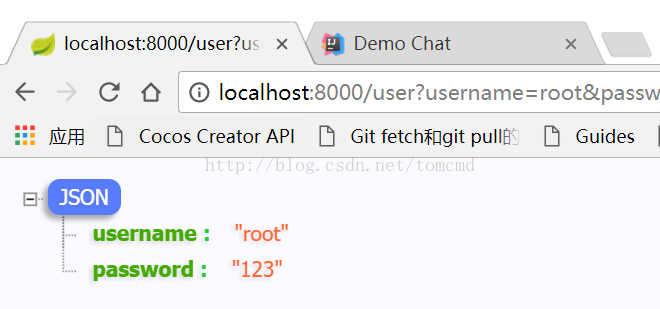
@RequestMapping("/user")
public User helloUser(@RequestParam(value="username",defaultValue = "tomcmd") String username,
@RequestParam(value = "password",defaultValue = "123456") String password){
return new User(username,password);
}
}启动类代码,这里不需要更改
@SpringBootApplication
public class Demo01Application {

	public static void main(String[] args) {
		SpringApplication.run(Demo01Application.class, args);
	}
}server.port=8000


 301
301

 被折叠的 条评论
为什么被折叠?
被折叠的 条评论
为什么被折叠?
 到【灌水乐园】发言


