


Android 上发送 HTTP 请求的一般有两种方式,HttpURLConnection 和 HttpClient。下面分别简述两种方式的用法。
1. HttpURLConnection
1, 获取 HttpURLConnection 的实例。
一般只需 new 出一个 URL 对象,并传入目标的网络地址,然后调用 openConnection()方法即可。如下所示:
URL url = new URL("http://www.baidu.com");
HttpURLConnection connection = (HttpURLConnection) url.openConnection();
2, 设置 HTTP 请求方法。
常用的方法有两个:GET 和 POST。GET 表示希望从服务器那里获取数据,而 POST 则表示希望提交数据给服务器。写法如下:
connection.setRequestMethod("GET");3, 其他设置,如设置连接超时、读取超时的毫秒数等。可根据实际情况来写,例如:
connection.setConnectTimeout(5000);// 设置连接超时为5000毫秒
connection.setReadTimeout(5000);
4, 用 getInputStream() 方法获取服务器返回的输入流,然后读取输入流。代码如下所示:
InputStream in = connection.getInputStream();5, 关闭 HTTP 连接
connection.disconnect();MainActivity 代码实现:
public class MainActivity extends Activity implements OnClickListener {
public static final int SHOW_RESPONSE = 0;
private Button sendRequest;
private TextView responseText;
private Handler handler = new Handler() {
public void handleMessage(Message msg) {
switch(msg.what) {
case SHOW_RESPONSE:
String response = (String) msg.obj;
// 在这里进行UI操作,将结果显示到界面上
responseText.setText(response);
}
};
};
@Override
protected void onCreate(Bundle savedInstanceState) {
super.onCreate(savedInstanceState);
setContentView(R.layout.activity_main);
sendRequest = (Button) findViewById(R.id.send_request);
responseText = (TextView) findViewById(R.id.response);
sendRequest.setOnClickListener(this);
}
@Override
public void onClick(View v) {
// TODO Auto-generated method stub
if (v.getId() == R.id.send_request) {
sendRequestWithHttpURLConnection();
}
}
private void sendRequestWithHttpURLConnection() {
// 开启线程来发送网络请求
new Thread(new Runnable() {
@Override
public void run() {
HttpURLConnection connection = null;
try {
// 获取 HttpURLConnection 的实例
URL url = new URL("http://www.baidu.com");
connection = (HttpURLConnection) url.openConnection();
connection.setRequestMethod("GET");// 设置 HTTP 请求方法为 GET
connection.setConnectTimeout(5000);// 设置连接超时、读取超时的毫秒数
connection.setReadTimeout(5000);
InputStream in = connection.getInputStream();// 获取服务器返回的输入流
// 读取获取到的输入流
BufferedReader reader = new BufferedReader(new InputStreamReader(in));
StringBuilder response = new StringBuilder();
String line;
while ((line = reader.readLine()) != null) {
response.append(line);
}
Message message = new Message();
message.what = SHOW_RESPONSE;
// 将服务器返回的结果存放到 Message 中
message.obj = response.toString();
handler.sendMessage(message);
} catch(Exception e) {
e.printStackTrace();
} finally {
if (connection != null) {
connection.disconnect();// 关闭 HTTP 连接
}
}
}
}).start();
}
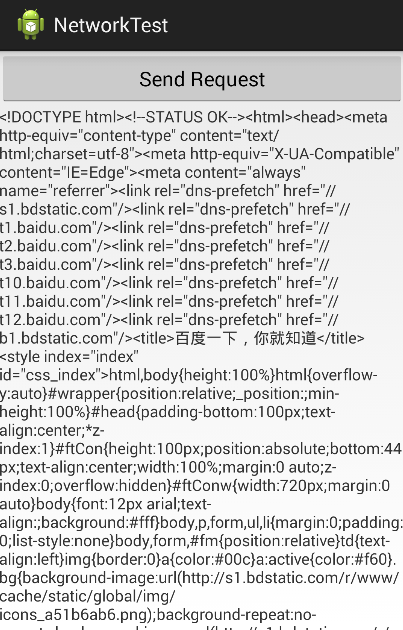
}声明网络权限:
<uses-permission android:name="android.permission.INTERNET" />运行后点击按钮,效果如下图所示:

布局文件代码:
<LinearLayout xmlns:android="http://schemas.android.com/apk/res/android"
    android:layout_width="match_parent"
    android:layout_height="match_parent"
    android:orientation="vertical">

    <Button
        android:id="@+id/send_request"
        android:layout_width="match_parent"
        android:layout_height="wrap_content"
        android:text="Send Request"
        />

    <ScrollView android:layout_width="match_parent"
        android:layout_height="match_parent">

        <TextView
            android:id="@+id/response"
            android:layout_width="match_parent"
            android:layout_height="wrap_content"
            />
    </ScrollView>

</LinearLayout>
此外,若要提交数据给服务器,只需把 HTTP 请求方法改为 POST,并在获取输入流之前把要提交的数据写出即可。
需要注意的是:每条数据都要以 键 - 值 对的形式存在,数据与数据之间用 & 符号隔开。例如向服务器提交用户名和密码,可以这样写:
connection.setRequestMethod("POST");
DataOutputStream out = new DataOutputStream(connection.getOutputStream());
out.writeBytes("username=hello&password=123");
2. HttpClient
HttpClient 可以完成和 HttpURLConnection 几乎一样的效果。但需要注意的是,HttpClient 是一个接口,因此无法创建它的实例。
1, 通常会创建一个 DefaultHttpClient 的实例,
HttpClient httpClient = new DefaultHttpClient();2, 若想要发起一条 GET 请求,就可以创建一个 HttpGet 对象,并传入目标的网络地址,然后调用 HttpClient 的 execute()方法即可:
HttpGet httpGet = new HttpGet("http://www.baidu.com");
HttpResponse httpResponse = httpClient.execute(httpGet);
若是发起一条 POST 请求会比 GET 稍微复杂,我们需要创建一个 HttpPost 对象,并传入目标的网络地址,如下所示:
HttpPost httpPost = new HttpPost("http://www.baidu.com");然后通过一个 NameValuePair 集合来存放待提交的参数,并将这个参数集合传入到一个UrlEncodedFormEntity 中,然后调用 HttpPost 的 setEntity()方法将构建好的 UrlEncodedFormEntity 传入,如下所示:
List<NameValuePair> params = new ArrayList<NameValuePair>();
 params.add(new BasicNameValuePair("username", "admin"));
 params.add(new BasicNameValuePair("password", "123456"));
 UrlEncodedFormEntity entity = new UrlEncodedFormEntity(params, "utf-8");
 httpPost.setEntity(entity);
接下来的操作就和 HttpGet 一样了,调用 HttpClient 的 execute()方法,并将 HttpPost 对象传入即可:
httpClient.execute(httpPost);
执行 execute()方法后会返回一个 HttpResponse 对象,服务器返回的所有信息就会包含在这里。通常我们会先取出服务器返回的状态码,如果等于 200 就说明请求和响应都成功了,如下所示:
if (httpResponse.getStatusLine().getStatusCode() == 200) {
    // 请求和响应都成功了
}
3, 在这个 if 判断的内部取出服务返回的内容。可调用 getEntity()方法获取到一个 HttpEntity 实例,然后再用 EntityUtils.toString()这个静态方法将 HttpEntity 转换成字符串即可:
HttpEntity entity = httpResponse.getEntity();
String response = EntityUtils.toString(entity);
注意:
如果服务器返回的数据是带有中文的,直接调用 EntityUtils.toString()方法进行转换会有乱码的情况出现,这个时候只需要在转换的时候将字符集指定成 utf-8 就可以了,如下所示:
String response = EntityUtils.toString(entity, "utf-8");
MainActivity 代码实现:
public class MainActivity extends Activity implements OnClickListener {

    public static final int SHOW_RESPONSE = 0;
    private Button sendRequest;
    private TextView responseText;

    private Handler handler = new Handler() {
        public void handleMessage(Message msg) {
            switch(msg.what) {
            case SHOW_RESPONSE:
                String response = (String) msg.obj;
                // 在这里进行UI操作,将结果显示到界面上
                responseText.setText(response);
            }
        };
    };

    @Override
    protected void onCreate(Bundle savedInstanceState) {
        super.onCreate(savedInstanceState);
        setContentView(R.layout.activity_main);

        sendRequest = (Button) findViewById(R.id.send_request);
        responseText = (TextView) findViewById(R.id.response);
        sendRequest.setOnClickListener(this);
    }

    @Override
    public void onClick(View v) {
        // TODO Auto-generated method stub
        if (v.getId() == R.id.send_request) {
            sendRequestWithHttpClient();
        }
    }

    private void sendRequestWithHttpClient() {
        new Thread(new Runnable() {

            @Override
            public void run() {
                try {
                    HttpClient httpClient = new DefaultHttpClient();
                    HttpGet httpGet = new HttpGet("http://www.baidu.com");
                    HttpResponse httpResponse = httpClient.execute(httpGet);
                    if (httpResponse.getStatusLine().getStatusCode() == 200) {
                        // 请求和响应都成功了
                        HttpEntity entity = httpResponse.getEntity();
                        String response = EntityUtils.toString(entity, "utf-8");
                        Message message = new Message();
                        message.what = SHOW_RESPONSE;
                        // 将服务器返回的结果存放到 Message 中
                        message.obj = response.toString();
                        handler.sendMessage(message);
                    }
                } catch (Exception e) {
                    e.printStackTrace();
                }
            }
        }).start();
    }
}
运行后点击按钮,效果如下图所示:
PS:二者看起来很像,不过个人觉得有些小差别。
3. 常用 http 请求写法
发送 http 请求的代码基本都是相同的,没必要每次发送的时候都写一遍。一般将这些通用的网络操作提取到一个公共类中,并提供一个静态方法,需要发起网络请求时调用该方法即可。常用写法如下:
首先定义一个接口:
public interface HttpCallbackListenr {

    /**
     * 服务器成功响应请求的时候调用
     */
    void onFinish(String response);

    /**
     * 进行网络操作出现错误的时候调用
     */
    void onError(Exception e);
}
定义一个类,类中定义一个静态方法:
public class HttpUtil {

    public static void sendHttpRequest(final String address, final HttpCallbackListenr listener) {
        new Thread(new Runnable() {

            @Override
            public void run() {
                HttpURLConnection connection = null;
                try {
                    URL url = new URL(address);
                    connection = (HttpURLConnection) url.openConnection();
                    connection.setRequestMethod("GET");
                    connection.setConnectTimeout(5000);// 设置连接超时、读取超时的毫秒数
                    connection.setReadTimeout(5000);
                    connection.setDoInput(true);// 以后可以使用conn.getInputStream().read();
                    connection.setDoOutput(true);// 以后可以使用conn.getOutputStream().write()
                    InputStream in = connection.getInputStream();// 获取服务器返回的输入流

                    // 下面对获取到的输入流进行读取
                    BufferedReader reader = new BufferedReader(new InputStreamReader(in));
                    StringBuilder response = new StringBuilder();
                    String line;
                    while ((line = reader.readLine()) != null) {
                        response.append(line);
                    }
                    if (listener != null) {
                        listener.onFinish(response.toString());
                    }
                } catch (Exception e) {
                    if (listener != null) {
                        listener.onError(e);
                    }
                } finally {
                    if (connection != null) {
                        connection.disconnect();// 关闭 HTTP 连接
                    }
                }
            }
        }).start();
    }

}
网络请求属于耗时操作,
- 若 sendHttpRequest() 方法内部不开线程,有可能导致调用 sendHttpRequest() 方法的时候主线程被阻塞;
- 若开启子线程,那么服务器响应的数据是无法进行返回的,所有的耗时逻辑都是在子线程里进行的, sendHttpRequest()方法会在服务器还来得及响应的时候就执行结束了,当然也无法返回响应的数据。【暂时还不理解,先记下来】
- 因此用到了 Java 的回调机制,即定义一个回调接口。


 96
96

 被折叠的 条评论
为什么被折叠?
被折叠的 条评论
为什么被折叠?
 到【灌水乐园】发言


