前言
Behavior是Android新出的Design库里新增的布局概念。Behavior只有是CoordinatorLayout的直接子View才有意义。可以为任何View添加一个Behavior。Behavior是一系列回调。让你有机会以非侵入的为View添加动态的依赖布局,和处理父布局(CoordinatorLayout)滑动手势的机会。
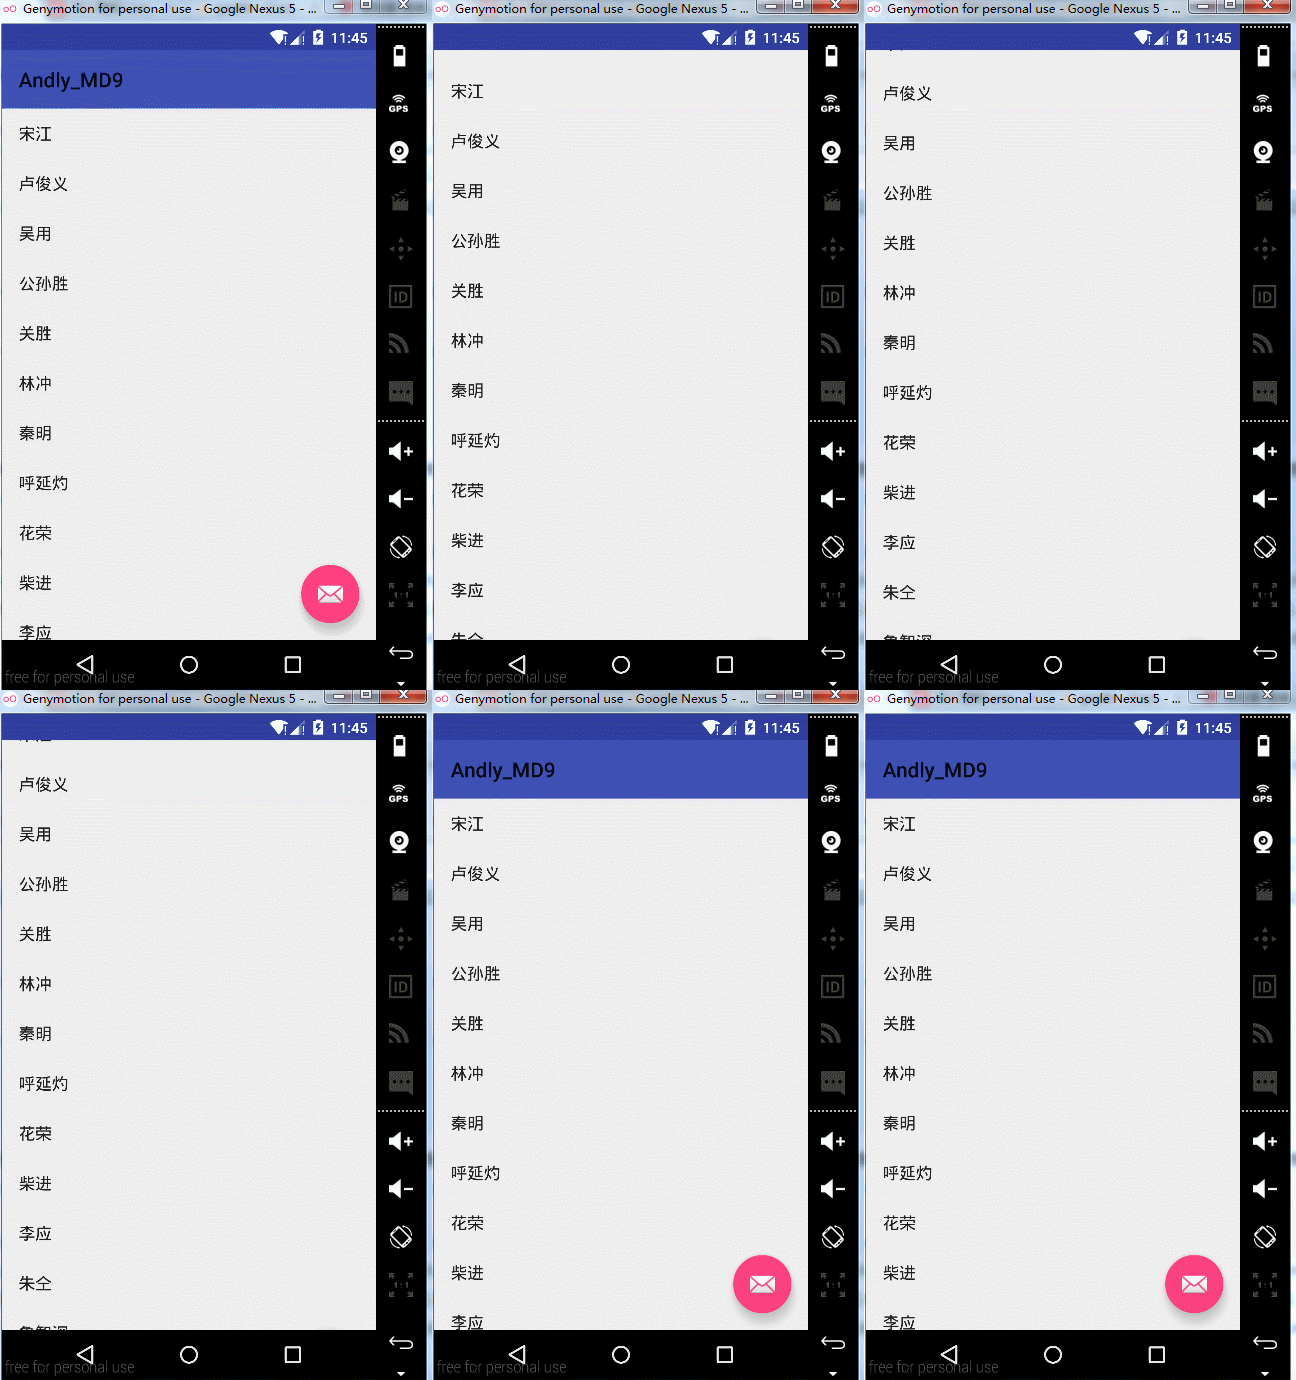
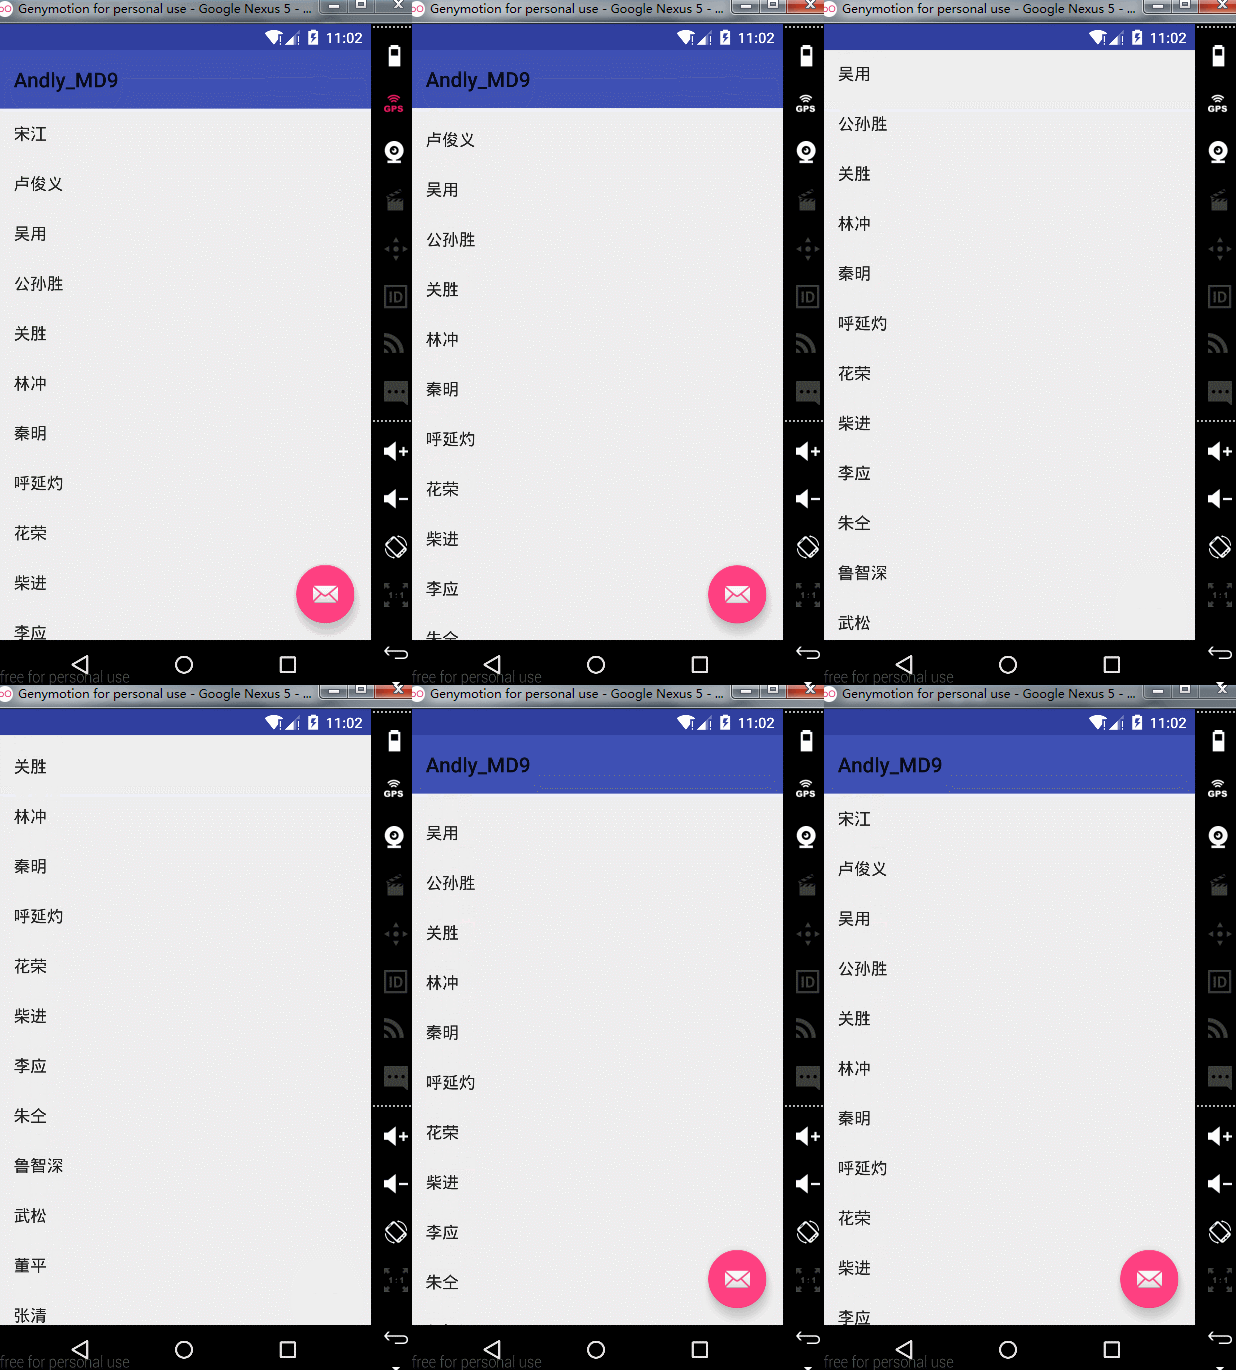
效果~
Part 1、利用监听事件来实现显示和隐藏动画
布局
<RelativeLayout
    xmlns:android="http://schemas.android.com/apk/res/android"
    xmlns:app="http://schemas.android.com/apk/res-auto"
    xmlns:tools="http://schemas.android.com/tools"
    android:id="@+id/activity_main"
    android:layout_width="match_parent"
    android:layout_height="match_parent"
    tools:context="com.andly.administrator.andly_md9.MainActivity">

    <android.support.v7.widget.RecyclerView
        android:id="@+id/recyclerview"
        android:layout_width="match_parent"
        android:layout_height="match_parent"
        android:clipChildren="false"
        android:clipToPadding="false"
        android:paddingTop="?attr/actionBarSize"
        />

    <android.support.v7.widget.Toolbar
        android:id="@+id/toolbar"
        android:layout_width="match_parent"
        android:layout_height="?attr/actionBarSize"
        android:background="?attr/colorPrimary"/>


    <android.support.design.widget.FloatingActionButton
        android:id="@+id/fab"
        android:layout_width="wrap_content"
        android:layout_height="wrap_content"
        android:layout_alignParentBottom="true"
        android:layout_alignParentRight="true"
        android:src="@android:drawable/ic_dialog_email"
        android:layout_margin="16dp"
        app:elevation="10dp"
        app:fabSize="normal"
        app:pressedTranslationZ="12dp"
        app:rippleColor="#ff0"
        />
</RelativeLayout>rv.addOnScrollListener(new FabScrollListener(this));public class FabScrollListener extends RecyclerView.OnScrollListener {
private int distance = 0;//滑动的距离,根据距离于临界值比较判断是向上滑还是向下滑
private HideScrollListener hideListener;//这里使用监听让Activity进行实现
private boolean visible = true;//是否可见
public FabScrollListener(HideScrollListener hideScrollListener) {
// TODO Auto-generated constructor stub
this.hideListener = hideScrollListener;
}
@Override
public void onScrolled(RecyclerView recyclerView, int dx, int dy) {
super.onScrolled(recyclerView, dx, dy);
//dy有正有负,向上滑为负 向下滑为正
if (distance < -ViewConfiguration.getTouchSlop() && !visible) {
//显示Fab和ToolBar
hideListener.onShow();
distance = 0;
visible = true;
} else if (distance > ViewConfiguration.getTouchSlop() && visible) {
//隐藏Fab和ToolBar
hideListener.onHide();
distance = 0;
visible = false;
}
if ((dy > 0 && visible) || (dy < 0 && !visible))//向下滑并且可见 或者 向上滑并且不可见
distance += dy;
}
}相应的实现
    @Override
    public void onHide() {
        mToolbar.animate().translationY(-mToolbar.getHeight()).setInterpolator(new AccelerateInterpolator(3));
        RelativeLayout.LayoutParams layoutParams = (RelativeLayout.LayoutParams) fab.getLayoutParams();
        ViewCompat.animate(fab).translationY(fab.getHeight() + layoutParams.bottomMargin + layoutParams.topMargin).setInterpolator(new AccelerateInterpolator(3));
    }

    @Override
    public void onShow() {
        mToolbar.animate().translationY(0).setInterpolator(new DecelerateInterpolator(3));
        ViewCompat.animate(fab).translationY(0).setInterpolator(new DecelerateInterpolator(3));
    }
Part 2、Behavior控制Toolbar&Fab的显示和隐藏
CoordinatorLayout继承ViewGroup,通过协调并调度里面的子控件来实现触摸并产生一些相关的动画,可以通过设置View的Behavior来实现触摸的动画调度
布局
<android.support.design.widget.CoordinatorLayout
    xmlns:android="http://schemas.android.com/apk/res/android"
    xmlns:app="http://schemas.android.com/apk/res-auto"
    xmlns:tools="http://schemas.android.com/tools"
    android:id="@+id/activity_main"
    android:layout_width="match_parent"
    android:layout_height="match_parent"
    tools:context="com.andly.administrator.andly_md9.MainActivity">

    <android.support.v7.widget.RecyclerView
        android:id="@+id/recyclerview"
        android:layout_width="match_parent"
        android:layout_height="match_parent"
        android:paddingTop="?attr/actionBarSize"
        />

    <android.support.v7.widget.Toolbar
        android:id="@+id/toolbar"
        android:layout_width="match_parent"
        android:layout_height="?attr/actionBarSize"
        android:background="?attr/colorPrimary"/>


    <android.support.design.widget.FloatingActionButton
        android:id="@+id/fab"
        android:layout_width="wrap_content"
        android:layout_height="wrap_content"
        android:layout_gravity="bottom|end"
        android:layout_margin="16dp"
        android:src="@android:drawable/ic_dialog_email"
        app:elevation="10dp"
        app:fabSize="normal"
        app:layout_behavior=".FabBehavior"
        app:pressedTranslationZ="12dp"
        app:rippleColor="#ff0"/>


</android.support.design.widget.CoordinatorLayout>1、要用CoordinatorLayout进行包裹
2、app:layout_behavior="包名+类名" 这里注意的是在Behavior子类加上构造方法
    public FabBehavior(Context context, AttributeSet attrs) {
        super();
}相应的自定义Behavior,这里继承的是FloatingActionButton.Behavior类
public class FabBehavior extends FloatingActionButton.Behavior {
    private boolean visible = true;//是否可见

    public FabBehavior(Context context, AttributeSet attrs) {
        super();
    }

    @Override
    public boolean onStartNestedScroll(CoordinatorLayout coordinatorLayout,
                                       FloatingActionButton child, View directTargetChild, View target,
                                       int nestedScrollAxes) {
        return nestedScrollAxes == ViewCompat.SCROLL_AXIS_VERTICAL || super.onStartNestedScroll(coordinatorLayout, child, directTargetChild,
                target, nestedScrollAxes);
    }

    @Override
    public void onNestedScroll(CoordinatorLayout coordinatorLayout,
                               FloatingActionButton child, View target, int dxConsumed,
                               int dyConsumed, int dxUnconsumed, int dyUnconsumed) {
        super.onNestedScroll(coordinatorLayout, child, target, dxConsumed, dyConsumed,
                dxUnconsumed, dyUnconsumed);
        if (dyConsumed > 0 && visible) {
            //show
            visible = false;
            onHide(child, (Toolbar) coordinatorLayout.getChildAt(1));
        } else if (dyConsumed < 0) {
            //hide
            visible = true;
            onShow(child, (Toolbar) coordinatorLayout.getChildAt(1));
        }

    }

    public void onHide(FloatingActionButton fab, Toolbar toolbar) {
        toolbar.animate().translationY(-toolbar.getHeight()).setInterpolator(new AccelerateInterpolator(3));
        CoordinatorLayout.LayoutParams layoutParams = (CoordinatorLayout.LayoutParams) fab.getLayoutParams();
        fab.animate().translationY(fab.getHeight() + layoutParams.bottomMargin).setInterpolator(new AccelerateInterpolator(3));
    }

    public void onShow(FloatingActionButton fab, Toolbar toolbar) {
        toolbar.animate().translationY(0).setInterpolator(new DecelerateInterpolator(3));
        fab.animate().translationY(0).setInterpolator(new DecelerateInterpolator(3));
    }

}1、onStartNestedScroll() : 当观察的View滑动开始的时候进行回调
2、onNestedScroll() : 当观察的View滑动的时候回调
3、nestedScrollAxes : 滑动的关联轴,这里只考虑竖直方向
当然你可以使用github上第三方库https://github.com/makovkastar/FloatingActionButton
步骤:
1、添加依赖
dependencies {
    compile 'com.melnykov:floatingactionbutton:1.3.0'
}<FrameLayout xmlns:android="http://schemas.android.com/apk/res/android"
xmlns:fab="http://schemas.android.com/apk/res-auto"
android:layout_width="match_parent"
android:layout_height="match_parent">
<ListView
android:id="@android:id/list"
android:layout_width="match_parent"
android:layout_height="match_parent" />
<com.melnykov.fab.FloatingActionButton
android:id="@+id/fab"
android:layout_width="wrap_content"
android:layout_height="wrap_content"
android:layout_gravity="bottom|right"
android:layout_margin="16dp"
android:src="@drawable/ic_action_content_new"
fab:fab_colorNormal="@color/primary"
fab:fab_colorPressed="@color/primary_pressed"
fab:fab_colorRipple="@color/ripple" />
</FrameLayout>ListView listView = (ListView) findViewById(android.R.id.list);
FloatingActionButton fab = (FloatingActionButton) findViewById(R.id.fab);
fab.attachToListView(listView); fab:fab_type="mini"
fab:fab_colorNormal="@color/primary"
fab:fab_colorPressed="@color/primary_pressed"
fab:fab_shadow="false"
fab:fab_colorRipple="@color/ripple" fab.setType(FloatingActionButton.TYPE_MINI);
fab.setColorNormal(getResources().getColor(R.color.primary));
fab.setColorPressed(getResources().getColor(R.color.primary_pressed));
fab.setShadow(false);
fab.show();
fab.hide();
fab.show(false); // Show without an animation
fab.hide(false); // Hide without an animation
fab.setColorRipple(getResources().getColor(R.color.ripple));


 1143
1143

 被折叠的 条评论
为什么被折叠?


