


Glide是什么
一个图片加载库
Glide 与 Picasso
功能与Picasso一样。Google I/O 2015 的 app 就是使用这个库,同时在使用过 Picasso 后,对比看了下,感觉 Glide 比较灵活。
为什么要使用Glide
假如我们要从网络加载一张图片到ImageView,一般要进行的操作如下
1. 从网络下载图片
2. 压缩图片并缓存图片
3. 加载到ImageView中
而这些步骤,如果我们手动操作的话,是非常麻烦的,当然 Android 官网上给出了加载加载图片的流程(https://developer.android.com/training/displaying-bitmaps/index.html) , 可以从这里了解到加载图片的细节,当然你也可以感受到自己写一个图片加载的流程是多么麻烦,所以我们需要一个成熟的图片加载框架。
读懂官网的文章还是有必要的,让你能了解很多细节知识。
初步使用 Glide
我打算用 RecyclerView 来加载显示图片,但是我并不打算介绍如何用 RecyclerView,本文重点在于如何用 Glide 加载图片。
RecyclerView 的 LayoutManager 用 GridLayoutManager
RecyclerView recyclerView = (RecyclerView) findViewById(R.id.photo);
recyclerView.setLayoutManager(new GridLayoutManager(this, 2, GridLayoutManager.VERTICAL, false));
recyclerView.setAdapter(new PhotoAdapter());
加载图片位置是在 RecyclerView 的 Adapter 中的 onBindViewHolder
@Override
public void onBindViewHolder(PhotoAdapter.ViewHolder holder, int position) {
    Glide.with(MainActivity.this)
            .load(Images.urls[position])
            .into(holder.mImageView);
}
布局文件 item.xml
<?xml version="1.0" encoding="utf-8"?>

<ImageView
    xmlns:android="http://schemas.android.com/apk/res/android"
    android:id="@+id/item_image"
    android:layout_width="match_parent"
    android:layout_height="150dp"
    android:src="@mipmap/ic_launcher"/>
基本效果如下:
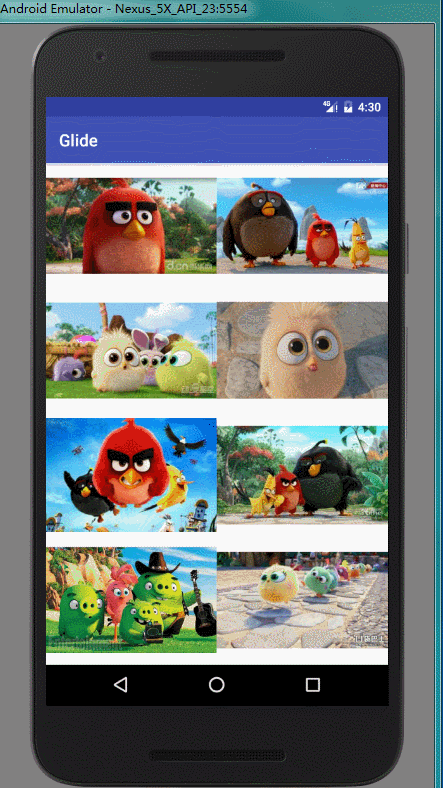
我们可以看到图片的大小不一,看起来不美观,我们第一想法就是调整 ImageView 的 scaleType,这并没有错,不过 Glide 也提供了三个方法对图片大小进行调整
1. overridde(width,height):非常简单粗暴的调用显示的宽和高
2. centerCrop():按比例放大图片,直到图片的宽和高都不小于 ImageView 的宽和高,然后 ImageView 和 图片的中心位置重合后裁减图片额外的部分。 这就有可能造成显示不全。但是对于缩略图来说,我们只需要知道这个图片是什么就行。
3. fitCenter():按比例缩小图片,直到图片的宽和调节都不大于 ImageView 的宽和高,然后显示。 这可能造成图片不完全填充 ImageView,一般用于显示大图的时候使用。
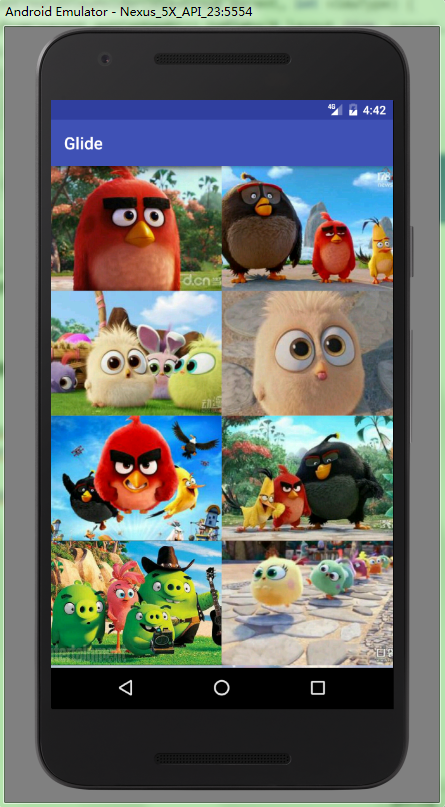
Glide 的这三个方法我大致做了概括,因此在缩略图上我们用 centerCrop(),也就是
Glide.with(MainActivity.this)
        .load(Images.urls[position])
        .centerCrop()
        .into(holder.mImageView);
我们再来看下效果
Question
产品的需要是无止境的,我相信懂的都懂。Glide提供的三种方法在 ImageView 中设置属性就可以达到 。 那么如果 PM 说,给咱产品先来个圆形图片看看效果,那么我们又要如何做呢?其实 centerCrop() 就是利用 Glide 中的 Transformation 接口实现的。
Glide 加入 Transformation 接口的方法,针对 Bitmap 的有两个
1. Glide.transform(BitmapTransformation… transformation)
2. Glide.BitmapTransform(Transformation… bitmapTransforamtion)
BitmapTransformation 是实现了 Transformation 接口的抽象类
那么现在,做个最简单的例子,我们实现一个圆形的图片
private class CircleBitmapTransformation extends BitmapTransformation {
    private Paint mPaint = new Paint(Paint.ANTI_ALIAS_FLAG);

    public CircleBitmapTransformation(Context context) {
        super(context);
    }

    @Override
    protected Bitmap transform(BitmapPool pool, Bitmap toTransform, int outWidth, int outHeight) {
        return getCircleBitmap(toTransform);
    }

    @Override
    public String getId() {
        return "MyCircleBitmap";
    }

    private Bitmap getCircleBitmap(Bitmap sourceBitmap) {
        int width = sourceBitmap.getWidth();
        int height = sourceBitmap.getHeight();
        int radius = width >= height ? height / 2 : width / 2;
        Bitmap output = Bitmap.createBitmap(width, height, Bitmap.Config.ARGB_8888);
        Canvas canvas = new Canvas(output);
        canvas.drawCircle(width / 2, height / 2, radius, mPaint);
        mPaint.setXfermode(new PorterDuffXfermode(PorterDuff.Mode.SRC_IN));
        canvas.drawBitmap(sourceBitmap, 0, 0, mPaint);
        mPaint.reset();
        return output;
    }
}Glide.with(MainActivity.this)
.load(Images.urls[position])
.transform(new CircleBitmapTransformation(MainActivity.this))
.into(holder.mImageView);现在效果就是这样
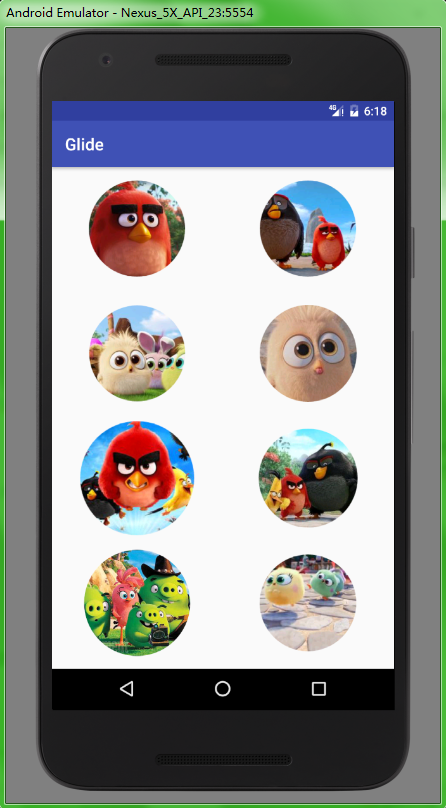
虽然效果有点差,但是重点在于我们要知道如何对图片进行处理,恩,说了这么多,就是要懂得原理是什么。
Transformation 库
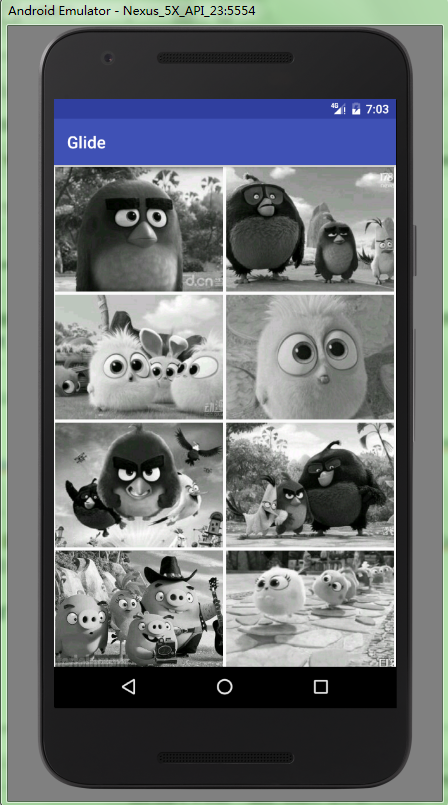
compile 'jp.wasabeef:glide-transformations:2.0.0'我们不可能每次都是动手实现效果,所以我们需要现成的库。它能提供很多效果,举个例子。
Glide.with(MainActivity.this)
        .load(Images.urls[position])
        .bitmapTransform(new GrayscaleTransformation(MainActivity.this))
        .into(holder.mImageView);
因为 transformation 效果是会相互替代的,所以我们不能用 centerCrop(),只能在 ImageView 中设置 相应的scaleType,上面的代码就需要设置 scaleType 为 centerCrop
看下效果
再看几个效果
灰色圆形效果
Glide.with(MainActivity.this)
        .load(Images.urls[position])
        .bitmapTransform(
                new CropCircleTransformation(MainActivity.this),
                new GrayscaleTransformation(MainActivity.this))
        .into(holder.mImageView);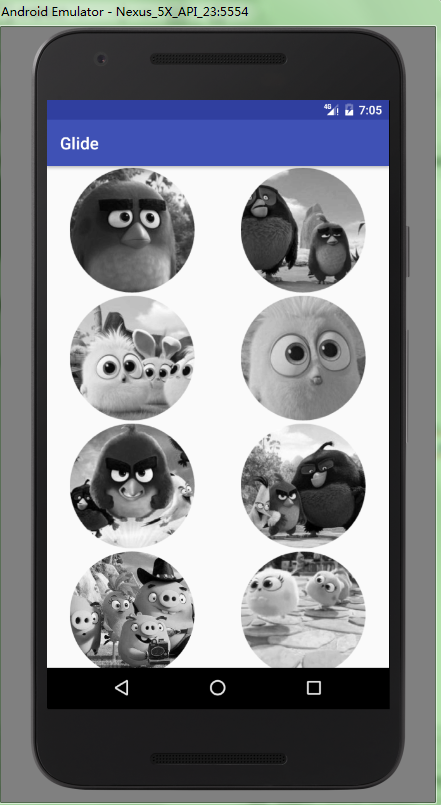
圆角效果
Glide.with(MainActivity.this)
        .load(Images.urls[position])
        .bitmapTransform(
                new RoundedCornersTransformation(MainActivity.this,20,0)
                )
        .into(holder.mImageView);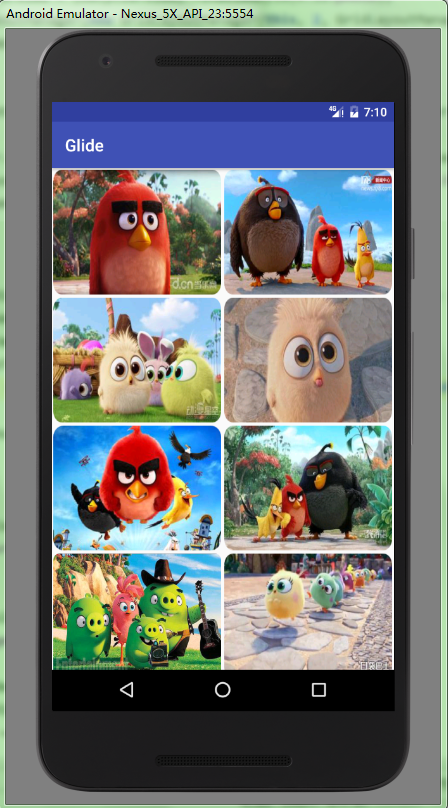
ImageView 的 scaleType 为 fitXY
模糊效果
Glide.with(MainActivity.this)
        .load(Images.urls[position])
        .bitmapTransform(
                new BlurTransformation(MainActivity.this)
        )
        .into(holder.mImageView);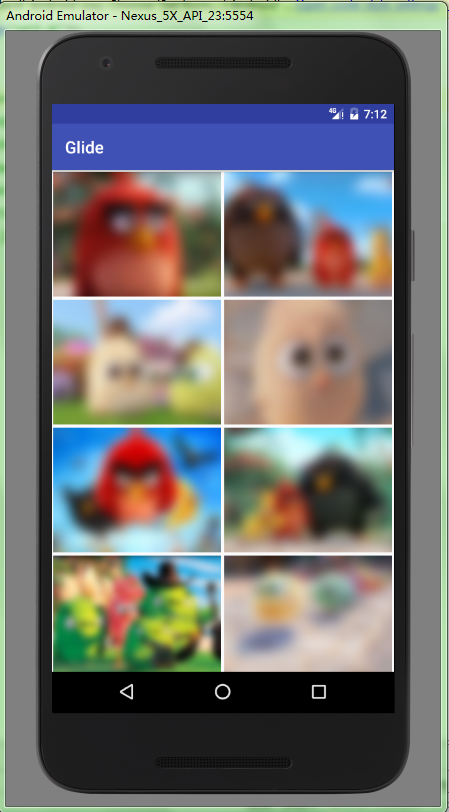
总结
在这篇文章中,我们认识了 Glide ,以及怎样加载一个效果比较好的图片。当然这只是一个初步 ,下篇文章,我将介绍如何用 Glide 优化用户体验。
参考:
https://futurestud.io/tutorials/glide-how-to-rotate-images
https://github.com/bumptech/glide
https://github.com/wasabeef/glide-transformations


 1825
1825

 被折叠的 条评论
为什么被折叠?
被折叠的 条评论
为什么被折叠?
 到【灌水乐园】发言


