


MyBatis
一、mybatis入门程序
1、需求分析
掌握Maven项目集成Mybatis框架。MySQL数据库安装、建库建表,配置Maven,Mybatis从MySQL数据库读取数据,封装数据,并打
印输出。
2、编程实现
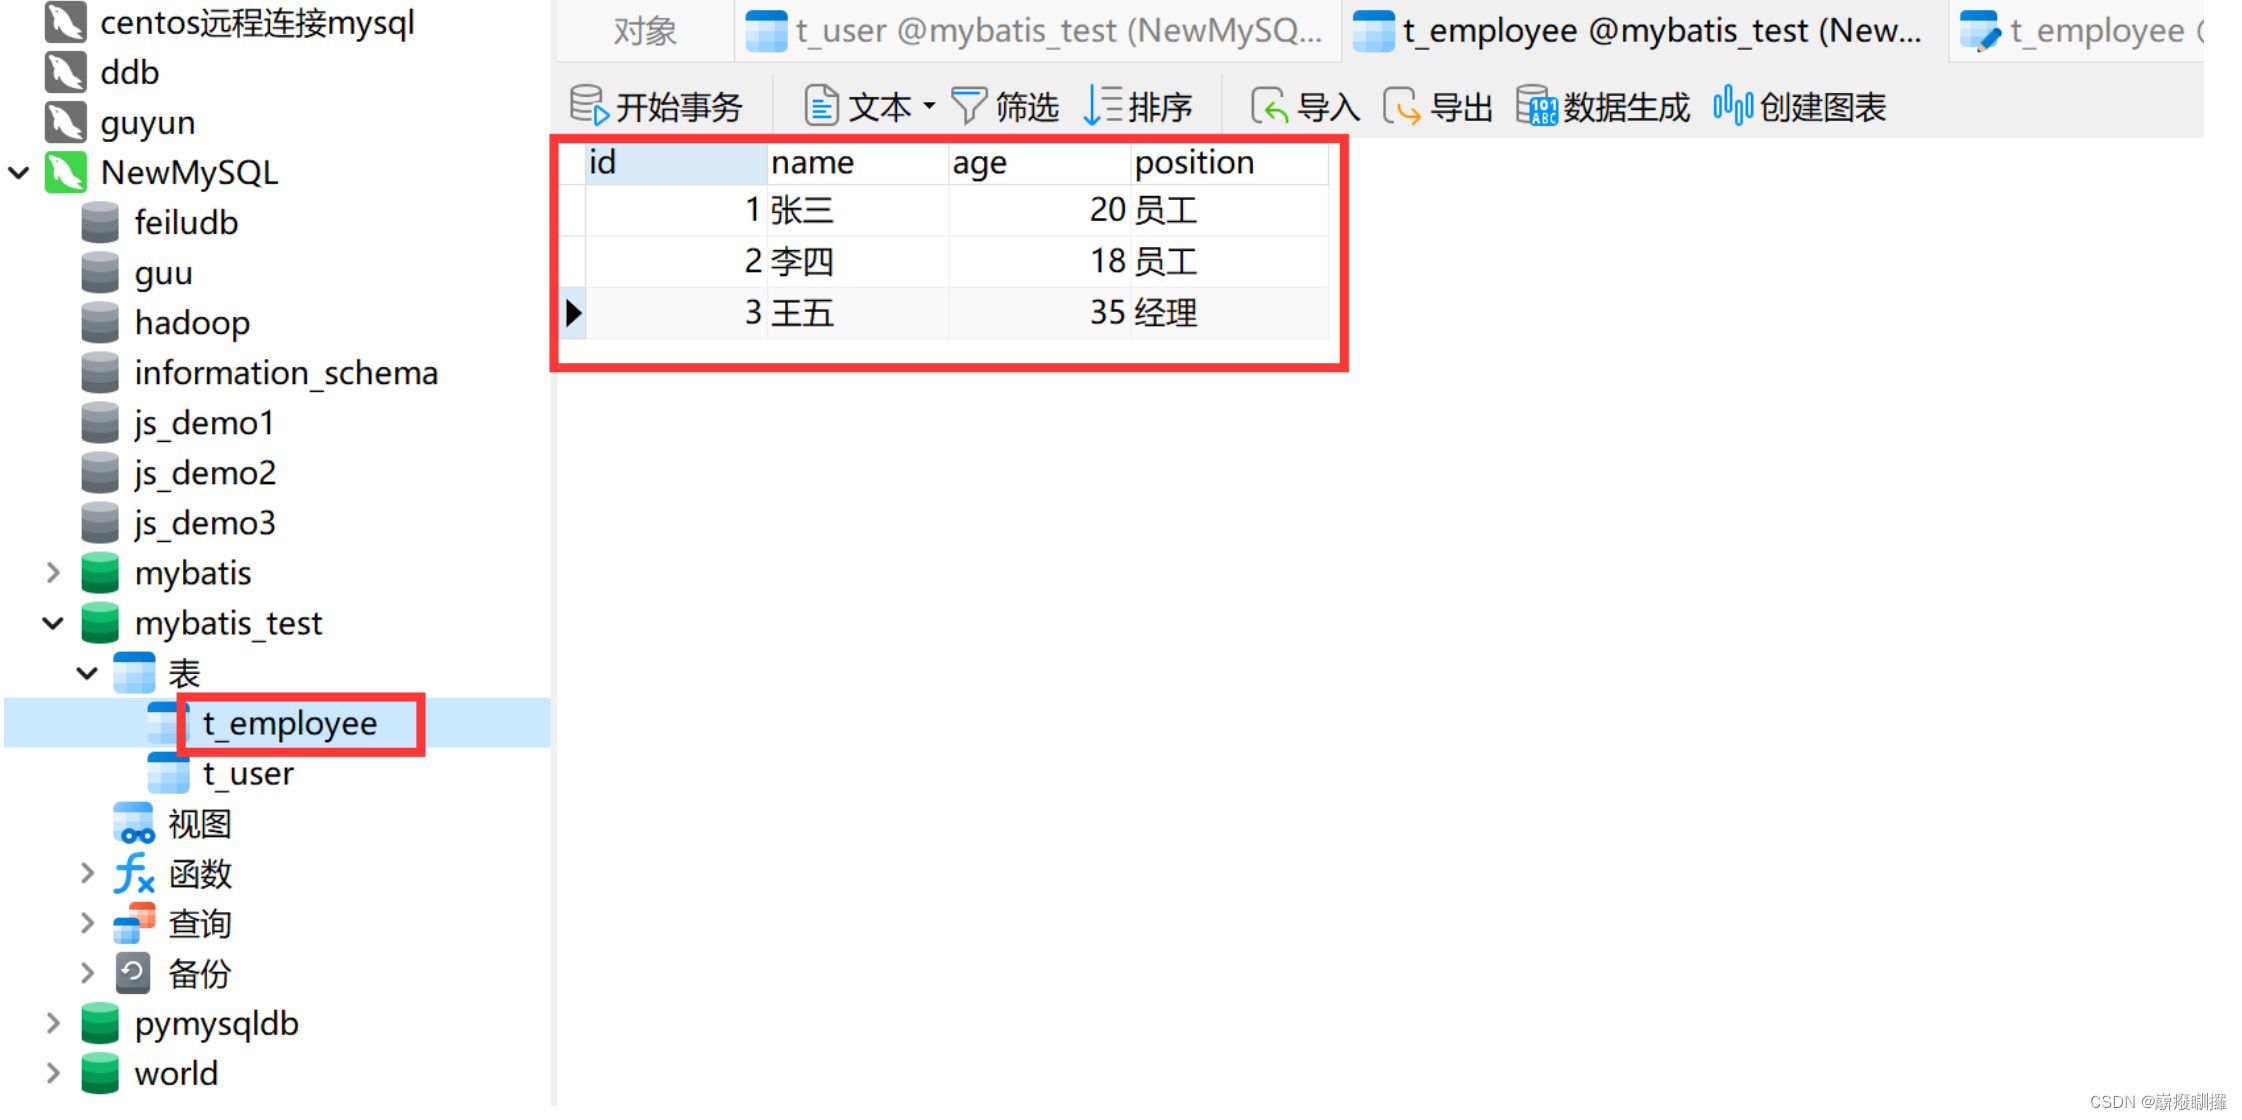
1)mysql创建数据库
mybatis_test数据库、t_user表

2)新建项目
File — New — Project — (选择)Maven — Next — (neme)MyBatisProject — (Groupld)com.sw — Finish
3)引入依赖
pom.xml文件
<dependencies>
        <dependency>
            <groupId>org.mybatis</groupId>
            <artifactId>mybatis</artifactId>
            <version>3.5.2</version>
        </dependency>
        <dependency>
            <groupId>mysql</groupId>
            <artifactId>mysql-connector-java</artifactId>
            <version>8.0.27</version>
        </dependency>
    </dependencies>
4)数据库连接的配置文件
src/main/resources,新建数据库连接的配置文件db.properties。要求MySQL9版本及以上
注意:里面数据库的名称(mybatis_test)
mysql.driver=com.msql.cj.jdbc.Driver

db.url = jdbc:mysql://localhost:3306/mybatis_test?serverTimezone=UTC&characterEncoding=utf8&useUnicode=true&useSSL=false
db.username = root
db.password = 123456
5)mybatis核心配置文件
src/main/resources,新建mybatis的核心配置文件mybatis-config.xml
<?xml version="1.0" encoding="UTF-8" ?>
<!DOCTYPE configuration
        PUBLIC "-//mybatis.org//DTD Config 3.0//EN"
        "https://mybatis.org/dtd/mybatis-3-config.dtd">
<configuration>
    <!--配置连接数据库的环境-->
    <properties resource="db.properties"/>
    <environments default="development">
        <environment id="development">
            <transactionManager type="JDBC"/>

            <dataSource type="POOLED">
                <property name="driver" value="com.mysql.cj.jdbc.Driver"/>
                <property name="url" value="jdbc:mysql://localhost:3306/mybatis_test?serverTimezone=UTC"/>
                <property name="username" value="root"/>
                <property name="password" value="123456"/>
            </dataSource>
        </environment>
    </environments>
    <!--引入mybatis的映射文件-->
    <mappers>

    </mappers>
</configuration>
6)数据封装类User
src/main/java,新建com.sw.pojo包,新建User类
package com.sw.pojo;

public class User {
    private int uid;
    private String uname;
    private int uage;

    public int getUid() {
        return uid;
    }

    public void setUid(int uid) {
        this.uid = uid;
    }

    public String getUname() {
        return uname;
    }

    public void setUname(String uname) {
        this.uname = uname;
    }

    public int getUage() {
        return uage;
    }

    public void setUage(int uage) {
        this.uage = uage;
    }

    @Override
    public String toString() {
        return "User{" +
                "uid=" + uid +
                ", uname='" + uname + '\'' +
                ", uage=" + uage +
                '}';
    }
}
7)mybatis映射文件
src/main/resources,新建mapper文件夹,新建UserMapper.xml映射文件
<?xml version="1.0" encoding="UTF-8" ?>
<!DOCTYPE mapper
        PUBLIC "-//mybatis.org//DTD Mapper 3.0//EN"
        "https://mybatis.org/dtd/mybatis-3-mapper.dtd">

<mapper namespace="com.sw.pojo.User">
    <select id="findById" parameterType="int" resultType="com.sw.pojo.User">
        select * from t_user where uid = #{uid};
    </select>

</mapper>
8)修改mybatis核心配置文件
<!--引入mybatis的映射文件-->
    <mappers>
        <mapper resource="mapper/UserMapper.xml"/>
    </mappers>
9)测试输出
test/java,新建User_test类
import com.sw.pojo.User;
import org.apache.ibatis.io.Resources;
import org.apache.ibatis.session.SqlSession;
import org.apache.ibatis.session.SqlSessionFactory;
import org.apache.ibatis.session.SqlSessionFactoryBuilder;

import java.io.IOException;
import java.io.Reader;

public class User_test {
    public static void main(String[] args) throws IOException {
        // 1、 获取核心配置wj
        Reader reader = Resources.getResourceAsReader("mybatis-config.xml");

        // 2、创建SqlSessionFactory 工厂对象
        SqlSessionFactory sqlSessionFactory = new SqlSessionFactoryBuilder().build(reader);

        // 3、创建SqlSession
        SqlSession sqlSession = sqlSessionFactory.openSession();

        // 4、执行sql语句,sql语句的唯一标识,namespace.statementId
        // 根据uid查找对象
        User user = sqlSession.selectOne("com.sw.pojo.User.findById", 1);
        System.out.println(user);

        // 5、释放资源
        sqlSession.close();

    }
}
输出结果
User{uid=1, uname='张三', uage=18}
二、mybatis核心配置方式
1、搭建环境
略
2、mybatis入门程序方式
略
3、mybatis核心配置方式
1)开启延迟加载
修改核心配置文件mybatis-config.xml
<!--  开启延迟加载  -->
    <settings>
        <setting name="lazyLoadingEnabled" value="true"/>
    </settings>
2)设置别名
修改核心配置文件mybatis-config.xml
<!--  设置别名  -->
    <typeAliases>
        <package name="com.sw.pojo"/>
    </typeAliases>
3)引入映射文件
- 创建mapper接口,src/main/java创建com.sw.mapper包,新建EmployeeMapper接口,getOne方法
public interface EmployeeMapper {
    Employee getOne(int id);
}
-
修改映射文件EmployeeMapper.xml的namespace属性,namespace属性值必须为接口的完整类名
-
映射文件的引入方式修改为“使用包名引入”核心配置文件mybatis-config.xml
注意: 映射文件的位置必须放在接口的同包目录下,映射文件名必须和接口同名
<!--mybatis文件路径配置--> <mappers> <mapper resource="mapper/UserMapper.xml"/> <!-- <mapper resource="mapper/EmployeeMapper.xml"/> --> <package name="com.sw.mapper"/> </mappers> -
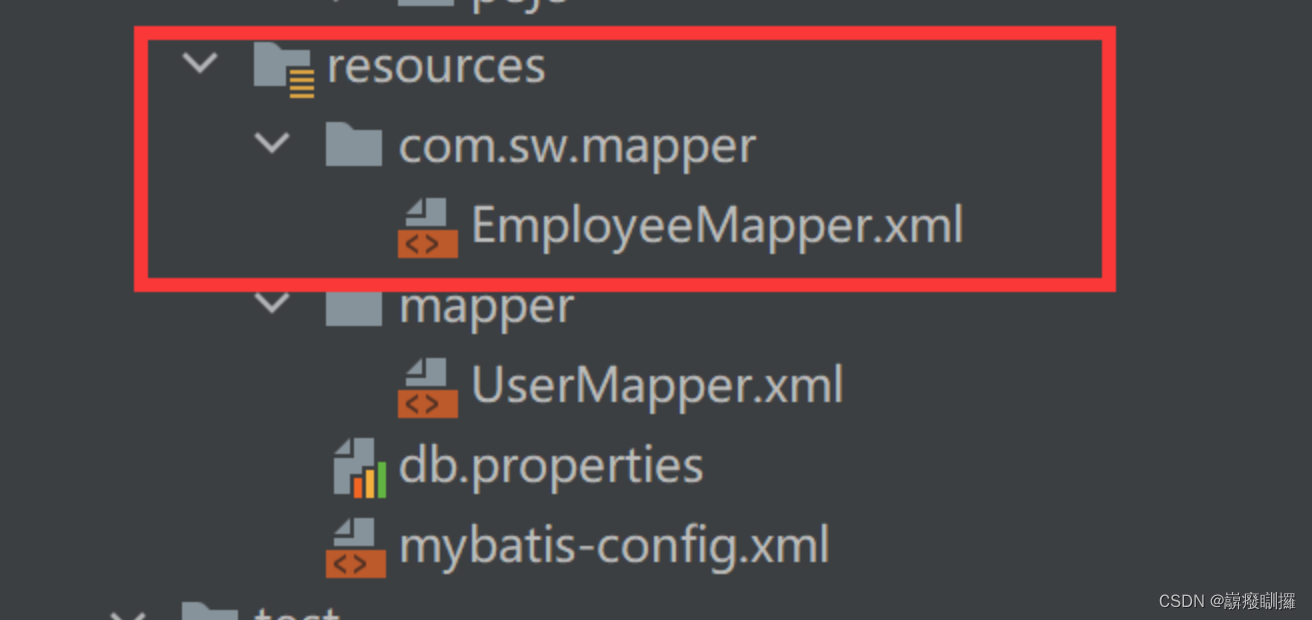
修改项目结构
src/main/resources目录下,新建com/sw/mapper目录
4)测试查找数据功能
为com.sw.mapper包EmployeeMapper接囗的getOne方法创建测试,右键 — Generate — Test

EmployeeMapperTest
package com.sw.mapper;

import com.sw.pojo.Employee;
import junit.framework.TestCase;
import org.apache.ibatis.io.Resources;
import org.apache.ibatis.session.SqlSession;
import org.apache.ibatis.session.SqlSessionFactory;
import org.apache.ibatis.session.SqlSessionFactoryBuilder;

import java.io.Reader;


public class EmployeeMapperTest extends TestCase {

    SqlSession sqlSession = null;
    EmployeeMapper employeeMapper = null;

    public void setUp() throws Exception {
        // 1、 获取核心配置文件
        Reader reader = Resources.getResourceAsReader("mybatis-config.xml");

        // 2、创建SqlSessionFactory 工厂对象
        SqlSessionFactory sqlSessionFactory = new SqlSessionFactoryBuilder().build(reader);

        // 3、创建SqlSession
        sqlSession = sqlSessionFactory.openSession();
        employeeMapper = sqlSession.getMapper(EmployeeMapper.class);

    }

    public void tearDown() throws Exception {
        // 5、释放资源
        sqlSession.close();
    }

    public void testGetOne() {
        Employee employee = employeeMapper.getOne(1);
        System.out.println(employee);
    }
}
5)插入数据功能
- 修改接口EmployeeMapper
int insertOne(Employee employee);
- 修改映射文件EmployeeMapper.xml
<insert id="insertOne" parameterType="Employee" keyProperty="id" useGeneratedKeys="true">
        insert into t_employee (name, age, position) values (#{name}, #{age}, #{position});
    </insert>
- 测试
// 插入数据
    public void testInsertOne() {
        Employee employee = new Employee();
        employee.setName("赵六");
        employee.setAge(40);
        employee.setPosition("员工");
        int res = employeeMapper.insertOne(employee);
        //提交事物(查询不需要提交事物,修改、删除都要提交事物)
        sqlSession.commit();
        if (res>0) {
            System.out.println("插入数据成功!");
        }
    }
注意:需要将表中的id字段设为自增长
6)修改数据功能
将员工“赵六”的职位修改为“经理”
- 修改接口EmployeeMapper
// 更新
    int updateOne(Employee employee);
- 修改映射文件EmployeeMapper.xml
<!-- 更新 -->
    <update id="updateOne" parameterType="Employee">
        update t_employee set name = #{name}, age = #{age}, position = #{position}
        where id = #{id};
    </update>
注意:在update语句中不要直接更新id字段,因为id字段是主键,直接更新可能导致主键重复的问题。使用WHERE子句来指定要更新的记录的条件,通常是基于主键来定位要更新的记录。
- 测试
 // 更新
    public void testUpdateOne() {
        Employee employee = new Employee();
        employee.setId(4);
        employee.setName("赵六");
        employee.setAge(40);
        employee.setPosition("总经理");
        int res = employeeMapper.updateOne(employee);
        sqlSession.commit();
        if (res>0) {
            System.out.println("修改数据成功!");
        }
    }
7)删除数据功能
删除员工“赵六”
- 修改接口EmployeeMapper
int deleteOne(int id);
- 修改映射文件EmployeeMapper.xml
 <!-- 删除 -->
    <delete id="deleteOne" parameterType="int">
        delete from t_employee where id = #{id};
    </delete>
- 测试
 // 删除
    public void testDeleteOne() {
        int res = employeeMapper.deleteOne(4);
        sqlSession.commit();
        if (res>0) {
            System.out.println("删除数据成功!");
        }
    }
三、mybatis动态sql-1
1、需求分析
MyBatis框架的动态SQL,能根据不同的条件拼接SQL语句,还能确保不能遗漏必要的空格、标点符号等,功能非常强大。
- if元素
当客户名称不为空,根据客户名称进行客户筛选; 当客户职业不为空,根据客户职业进行客户筛选。 - choose、when、otherwise元系
当客户名称不为空,则只根据客户名称进行客户选;当客户名称为空,而客户职业不为空,则只根据客户职业进行客户筛选。当客户
名称和客户职业都为空,则要求查询出所有电话不为空的客户信息。 - where、trim元系
实现“拼接”功能。 - set元素
实现动态更新功能。 - foreach元素
迭代List类型、数组类型、Map类型
2、代码实现
1、搭建环境
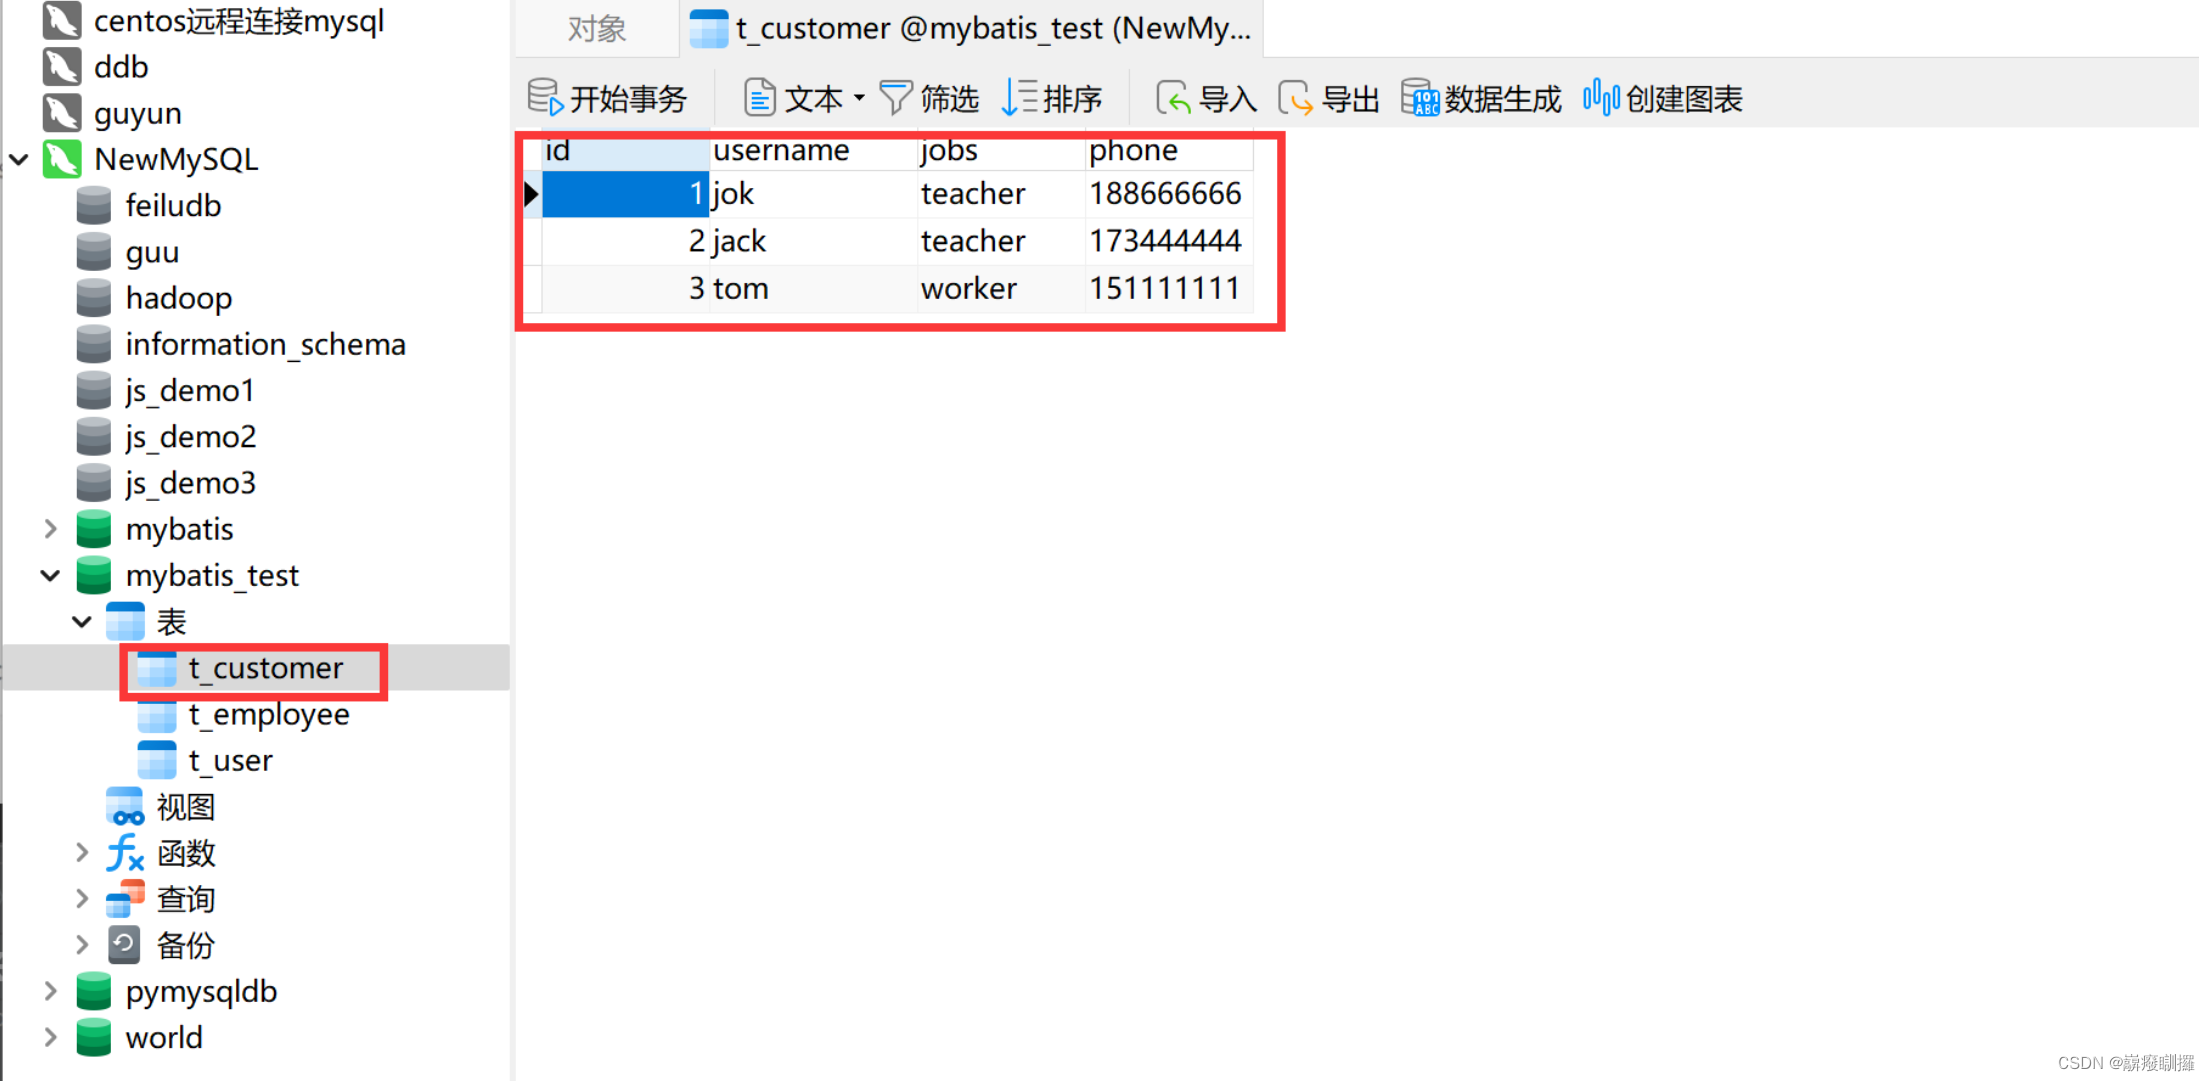
1)数据库环境
mybatis_test数据库、t_customer表
2)引入依赖
pom.xml文件
3)数据库连接的配置文件
src/main/resources,数据库连接的配置文件db.properties
4)mybatis核心配置文件
src/mian/resources, mybatis的核心配置文件mybatis-config.xml
5)数据封装类
src/main/java,新建com.sw.pojo包,新建Customer类
package com.sw.pojo;

public class Customer {
    private int id;
    private String username;
    private String jobs;
    private String phone;

    public int getId() {
        return id;
    }

    public void setId(int id) {
        this.id = id;
    }

    public String getUsername() {
        return username;
    }

    public void setUsername(String username) {
        this.username = username;
    }

    public String getJobs() {
        return jobs;
    }

    public void setJobs(String jobs) {
        this.jobs = jobs;
    }

    public String getPhone() {
        return phone;
    }

    public void setPhone(String phone) {
        this.phone = phone;
    }

    @Override
    public String toString() {
        return "Customer{" +
                "id=" + id +
                ", username='" + username + '\'' +
                ", jobs='" + jobs + '\'' +
                ", phone='" + phone + '\'' +
                '}';
    }
}
6)mapper接口
src/main/java创建com.sw.mapper包,新建CustomerMapper接口
7)映射文件
src/main/resources目录下,新建com/sw/mapper目录,CustomerMapper.xml
2、if 元素
当客户名称不为空,根据客户名称进行客户筛选; 当客户职业不为空,根据客户职业进行客户选。
- 修改接口CustomerMapper
@ResultMap("customerResultMap")
List<Customer> getListByIf(Customer customer);
- 修改映射文件CustomerMapper.xml
<mapper namespace="com.sw.mapper.CustomerMapper">
    <resultMap id="customerResultMap" type="Customer">
        <id property="id" column="id"/>
        <result property="username" column="username"/>
        <result property="jobs" column="jobs"/>
    </resultMap>

    <select id="getListByIf" parameterType="Customer" resultMap="customerResultMap">
        select * from t_customer where 1=1
        <if test="username != null and username != ''">
            and username like concat('%', #{username}, '%')
        </if>
        <if test="jobs !=null and jobs != ''">
            and jobs = #{jobs}
        </if>
    </select>

</mapper>
- 测试
package com.sw.mapper;

import com.sw.pojo.Customer;
import junit.framework.TestCase;
import org.apache.ibatis.io.Resources;
import org.apache.ibatis.session.SqlSession;
import org.apache.ibatis.session.SqlSessionFactory;
import org.apache.ibatis.session.SqlSessionFactoryBuilder;

import java.io.Reader;
import java.util.List;

public class CustomerMapperTest extends TestCase {

    SqlSession sqlSession = null;
    CustomerMapper customerMapper = null;

    public void setUp() throws Exception {
        // 1、 获取核心配置文件
        Reader reader = Resources.getResourceAsReader("mybatis-config.xml");

        // 2、创建SqlSessionFactory 工厂对象
        SqlSessionFactory sqlSessionFactory = new SqlSessionFactoryBuilder().build(reader);

        // 3、创建SqlSession
        sqlSession = sqlSessionFactory.openSession();

        // 4.获取Mapper对象
        customerMapper = sqlSession.getMapper(CustomerMapper.class);

    }

    public void tearDown() throws Exception {
        // 5、释放资源
        sqlSession.close();
    }

    // if元素
    public void testGetListByIf() {
        Customer customer = new Customer();
        customer.setUsername("o");
        customer.setJobs("teacher");
        List<Customer> customerList = customerMapper.getListByIf(customer);
        for (Customer c : customerList) {
            System.out.println(c);
        }
    }
}
3、choose、when、otherwise元素
当客户名称不为空,则只根据客户名称进行客户选:当客户名称为空,而客户职业不为空,则只根据客户职业进行客户选。当客户名称和客户职业都为空,则要求查询出所有电话不为空的客户信息。
- 修改接口CustomerMapper
List<Custome> getListBychoose(Customer customer);
- 修改映射文件CustomerMapper.xml
<!-- choose、when、otherwise -->
    <select id="getListByChoose" parameterType="Customer" resultType="Customer">
        select * from t_customer where 1=1
        <choose>
            <when test="username != null and username != ''">
                and username like concat('%', #{username}, '%')
            </when>
            <when test="jobs !=null and jobs != ''">
                and jobs = #{jobs}
            </when>
            <otherwise>
                and phone is not null and phone != ''
            </otherwise>
        </choose>
    </select>
- 测试
// choose、when、otherwise
    public void testGetListByChoose() {
        Customer customer = new Customer();
        customer.setUsername("o");
        customer.setJobs("teacher");
        List<Customer> customerList = customerMapper.getListByChoose(customer);
        for (Customer c : customerList) {
            System.out.println(c);
        }
    }
4、where、trim元素
修改接口CustomerMapper,getListByChoose方法和getListByChoose方法
<!--  if  -->
    <select id="getListByIf" parameterType="Customer" resultType="Customer">
        select * from t_customer where 1=1
        <if test="username != null and username != ''">
            and username like concat('%', #{username}, '%')
        </if>
        <if test="jobs !=null and jobs != ''">
            and jobs = #{jobs}
        </if>
    </select>

<!-- 将where 1=1 改变 -->
 <select id="getListByIf" parameterType="Customer" resultType="Customer">
        select * from t_customer
        <where>
            <if test="username != null and username != ''">
                and username like concat('%', #{username}, '%')
            </if>
            <if test="jobs !=null and jobs != ''">
                and jobs = #{jobs}
            </if>
        </where>
    </select>
5、set元素
只更新需要更新的字段
- 修改接口CustomerMapper
// set
    int updateOne(Customer customer);
- 修改映射文件CustomerMapper.xml
<!-- set -->
    <update id="updateOne" parameterType="Customer">
        update t_customer
        <set>
            <if test="username != null and username != ''">
                username = #{username}
            </if>
            <if test="jobs !=null and jobs != ''">
                jobs = #{jobs}
            </if>
            <if test="phone !=null and phone != ''">
                phone = #{phone}
            </if>
        </set>
        where id = #{id}
    </update>
- 测试
// set
    public void testUpdateOne() {
        Customer customer = new Customer();
        customer.setId(1);
        customer.setJobs("worker");
        int res = customerMapper.updateOne(customer);
        sqlSession.commit();
        if (res>0) {
            System.out.println("更新成功!");
        }
    }
6、foreach元素
1)迭代List类型
根据所给id查找员工列表
- 修改接口CustomerMapper
// foreach(迭代List类型)
    List<Customer> getListByIdList(List<Integer> ids);
- 修改映射文件CustomerMapper.xml
<!-- foreach(迭代List类型) -->
    <select id="getListByIdList" parameterType="java.util.List" resultType="Customer">
        select * from t_customer where id in
        <foreach collection="list" index="index" item="id" open="(" separator="," close= ")">
            #{id}
        </foreach>
    </select>
- 测试
// foreach(迭代List类型)
    public void testGetListByIdList() {
        List<Integer> ids = new ArrayList<>();
        ids.add(1);
        ids.add(2);
        List<Customer> customersList = customerMapper.getListByIdList(ids);
        for (Customer c : customersList) {
            System.out.println(c);
        }
    }
2)迭代Array(数组)类型
根据所给id查找员工列表
- 修改接口CustomerMapper
 // foreach(迭代Array类型)
    List<Customer> getListByIdArray(Integer[] ids);
- 修改映射文件CustomerMapper.xml
 <!-- foreach(迭代Array类型) -->
    <select id="getListByIdArray" parameterType="java.util.Arrays" resultType="Customer">
        select * from t_customer where id in
        <foreach collection="array" index="index" item="id" open="(" separator="," close= ")">
            #{id}
        </foreach>
    </select>
- 测试
// foreach(迭代Array类型)
    public void testGetListByIdArray() {
        Integer[] ids = new Integer[2];
        ids[0] = 1;
        ids[1] = 3;
        List<Customer> customerList = customerMapper.getListByIdArray(ids);
        for (Customer c : customerList) {
            System.out.println(c);
        }
    }
3)迭代Map类型
根据id(多个)和jobs(单个)查找员工列表
- 修改接口CustomerMapper
// foreach(迭代Map类型)
    List<Customer> getListByMap(Map<String, Object> map);
- 修改映射文件CustomerMapper.xml
<!-- foreach(迭代Map类型) -->
    <select id="getListByMap" parameterType="java.util.Map" resultType="Customer">
        select * from t_customer
        <where>
            <if test="ids != null">
                and id in
                <foreach collection="ids" index="index" item="id" open="(" separator="," close=")">
                    #{id}
                </foreach>
            </if>
            <if test="jobs != null and jobs != ''">
                and jobs = #{jobs}
            </if>
        </where>
    </select>
- 测试
// foreach(迭代Map类型)
    public void testGetListByMap() {
        Map<String, Object> map = new HashMap<String, Object>();
        List<Integer> ids = new ArrayList<>();
        ids.add(1);
        ids.add(2);
        ids.add(3);
        map.put("ids",ids);
        map.put("jobs", "worker");
        List<Customer> customerList = customerMapper.getListByMap(map);
        for (Customer c : customerList) {
            System.out.println(c);
        }
    }
四、mybatis动态sql-2学生信息查询系统
1、需求分析
本案例要求利用本章所学知识完成一个学生信息查询系统,该系统要求实现2个以下功能。
-
单条件查询
查询出所有id值小于5的学生的信息; -
多条件查询
当用户输入的学生姓名不为空,则只根据学生姓名进行学生信息的查询:
当用户输入的学生姓名为空,而学生专业不为空,则只根据学生专业进行学生的;否则返回学号不为空的学生信息。
2、编码实现
1、搭建环境
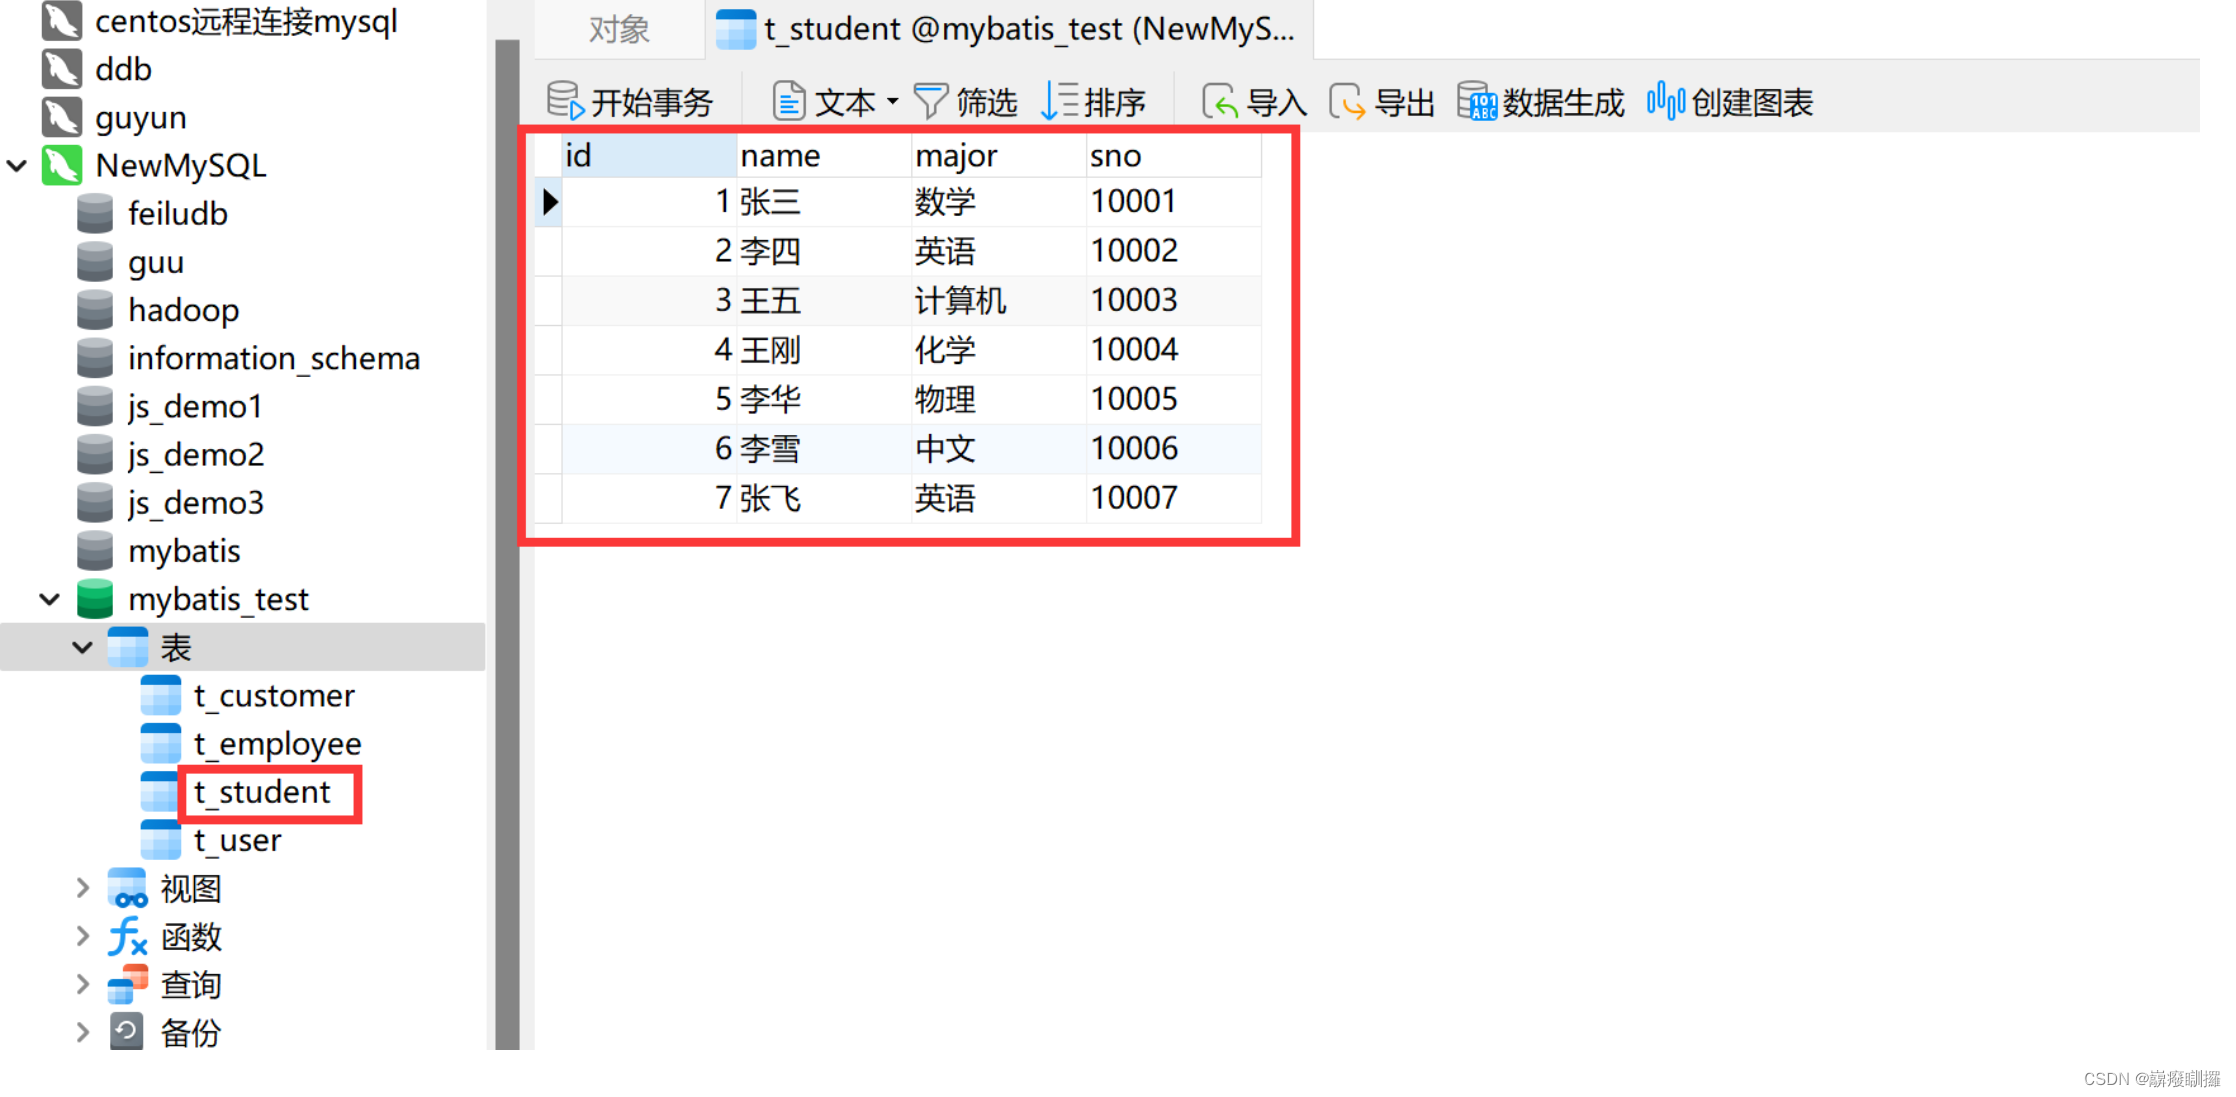
- 数据库环境
mybatis_test数据库、t_student表
- 引入依赖
pom.xml文件
- 数据库连接的配置文件
src/main/resources,数据库连接的配置文件db.properties
- mybatis核心配置文件
src/mian/resources, mybatis的核心配置文件mybatis-config.xml
- 数据封装
src/main/java,新建com.sw.pojo包,新建Student类
package com.sw.pojo;

public class Student {
    private Integer id;
    private String name;
    private String major;
    private String sno;

    public Integer getId() {
        return id;
    }

    public void setId(Integer id) {
        this.id = id;
    }

    public String getName() {
        return name;
    }

    public void setName(String name) {
        this.name = name;
    }

    public String getMajor() {
        return major;
    }

    public void setMajor(String major) {
        this.major = major;
    }

    public String getSno() {
        return sno;
    }

    public void setSno(String sno) {
        this.sno = sno;
    }

    @Override
    public String toString() {
        return "Student{" +
                "id=" + id +
                ", name='" + name + '\'' +
                ", major='" + major + '\'' +
                ", sno='" + sno + '\'' +
                '}';
    }
}
- mapper接口
src/main/java创建com.sw.mapper包,新建StudentMapper接口
- 映射文件
src/main/resources目录下,新建com/sw/mapper目录,StudentMapper.xml
2、单条件查询
查询出所有id值小于5的学生的信息;
- 修改接口CustomerMapper
// 单条件查询
List<Student> getListByIdCondition(List<Integer> ids);
- 修改映射文件CustomerMapper.xml
<select id="getListByIdCondition" parameterType="java.util.List" resultType="Student">
        select * from t_student where id in
        <foreach collection="list" index="index" item="id" open="(" separator="," close=")">
            #{id}
        </foreach>
    </select>
- 测试
// 单条件查询
        List<Integer> ids = new ArrayList<>();
        for (int i = 0; i < 4; i++) {
            ids.add(i+1);
        }
        List<Student> studentList = studentMapper.getListByIdCondition(ids);
        for (Student s : studentList) {
            System.out.println(s);
        }
3、多条件查询
当用户输入的学生姓名不为空,则只根据学生姓名进行学生信息的查询:
当用户输入的学生姓名为空,而学生专业不为空,则只根据学生专业进行学生的;
否则返回学号不为空的学生信息。
- 修改接口CustomerMapper
// 多条件查询
    List<Student> getListByStudent(Student student);
- 修改映射文件CustomerMapper.xml
<!-- 多条件查询 -->
    <select id="getListByChoose" parameterType="Student" resultType="Student">
        select * from t_student
        <where>
            <choose>
                <when test="name != null and name != ''">
                    and name like concat('%', #{name}, '%')
                </when>
                <when test="major != null and major != ''">
                    and major = #{major}
                </when>
                <otherwise>
                    and sno is not null and sno != ''
                </otherwise>
            </choose>
        </where>
    </select>
- 测试
// 多条件查询
    public void testGetListByChoose() {
        Student student = new Student();
//        student.setName("张");
//        student.setMajor("英语");
        List<Student> studentList = studentMapper.getListByChoose(student);
        for (Student s : studentList) {
            System.out.println(s);
        }
    }


 4万+
4万+


 被折叠的 条评论
为什么被折叠?
被折叠的 条评论
为什么被折叠?
 到【灌水乐园】发言


