


当在Android应用程序中使用网格布局(Grid Layout)时,有时候需要根据特定的需求设置不同数量的单元格,并且希望为每个单元格设置不同的点击事件。本篇博客将向您展示如何实现这些功能。
提示:以下是本篇文章正文内容,下面案例可供参考
一、设置布局
1.设置网格布局
<androidx.gridlayout.widget.GridLayout
            android:id="@+id/gridView"
            android:layout_width="376dp"
            android:layout_height="wrap_content"
            app:columnCount="4"
            app:layout_constraintBottom_toBottomOf="parent"
            app:layout_constraintEnd_toEndOf="parent"
            app:layout_constraintStart_toStartOf="parent"
            app:layout_constraintTop_toTopOf="parent"
            app:rowCount="3" />
2.设置单元格布局
<?xml version="1.0" encoding="utf-8"?>
<shape xmlns:android="http://schemas.android.com/apk/res/android">
    <solid android:color="#FEFEFE"/> <!-- 背景颜色 -->
    <corners android:radius="47dp"/> <!-- 圆角半径 -->
    <stroke android:width="10dp" android:color="#FFF6F1F8"/> <!-- 可选:边框 -->
</shape>
二、Acitivity代码
1.动态添加单元格,为不同的单元格设置不同的点击事件
GridLayout gridLayout = view.findViewById(R.id.gridView);
int numberOfCells = length; // 假设你想添加的单元格数量
for (int k = 0; k < numberOfCells; k++) {
Button cellButton = new Button(ShuatiActivity.this);
cellButton.setBackgroundResource(R.drawable.round_button);
cellButton.setText(Integer.toString(k+1));
cellButton.setTextSize(20);
cellButton.setGravity(Gravity.CENTER);
// 设置统一的LayoutParams
GridLayout.LayoutParams params = new GridLayout.LayoutParams(
GridLayout.spec(GridLayout.UNDEFINED, GridLayout.FILL), // 列规范
GridLayout.spec(GridLayout.UNDEFINED, GridLayout.FILL) // 行规范
);
//根据需要设置固定的宽高
params.width = dpToPx(ShuatiActivity.this,94);
params.height = dpToPx(ShuatiActivity.this, 94);
cellButton.setLayoutParams(params);
// 先设置标签
cellButton.setTag(k);
// 再添加点击事件监听器
cellButton.setOnClickListener(new View.OnClickListener() {
@Override
public void onClick(View v) {
}
});
// 最后添加到GridLayout中
gridLayout.addView(cellButton);
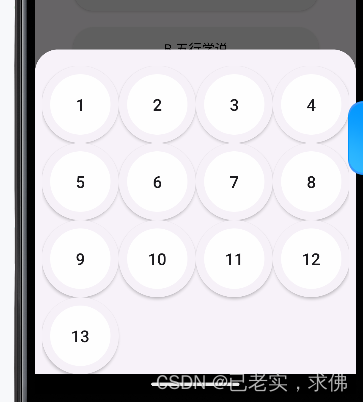
}三、运行效果
总结
通过以上步骤,您可以根据需要在Android应用程序中创建一个带有指定数量单元格的网格布局,并为每个单元格设置不同的点击事件。这种方法允许您根据具体的设计和功能要求来定制网格布局,并实现与用户交互相关的动作。
希望本篇博客对您有所帮助,如有任何问题或进一步的需求,请随时提出!


 778
778

 被折叠的 条评论
为什么被折叠?
被折叠的 条评论
为什么被折叠?
 到【灌水乐园】发言


