


 本文介绍如何在VQAv2数据集上使用预训练的Bert和MUTAN模型进行验证集评估,生成json结果,并演示如何在测试集上进行官方评估。
1.引言
近期在看关于Vision Question Answering的相关文章,使用的是VQAv2数据集。然后这个数据集是有一个官方的评估代码,但是对于新手而言,大概率是不知道怎么用的,而且我搜了很多的资料,至少目前没看到关于这方面的解读。
因此想写一篇博客,来帮助刚刚入门VQA的同学们,我们本篇博客假设你已经知道了VQA的数据是如何处理的,你得有一个自己的数据迭代器,也假设你的模型已经训练好了,是pt格式或者其他格式。
本文只教怎么使用,而不会去扣官方代码的细节。
2.对验证进行评估
我们的VQAv2数据集,对于test而言是没有annotations文件的,因此对于test的测试我们会放在后面讲。这一小节会讲:训练好的模型如何在val集上面进行评估。
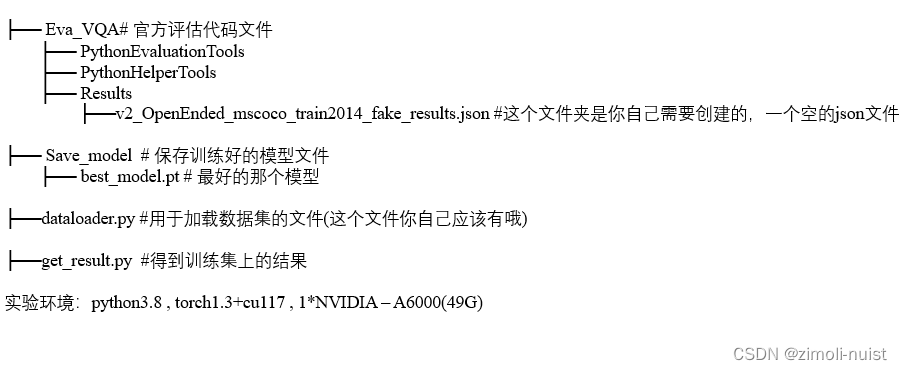
2.1 项目结构
2.2 get_result.py
这个脚本的目的就是为了得到一个json文件,得到的内容大致为:
{"question_id": 375951004, "answer": "skate park"}, {"question_id": 106329001, "answer": "no"}
#这个脚本的目的是为了得到(train2014/valid2014/test2015.npy)的答案,根据官网的数据格式存储,
import time
from torch.autograd import Variable
import torch
import json
import os
import argparse
import numpy as np
import torch
import torch.nn as nn
import torch.optim as optim
from torch.optim import lr_scheduler
from tqdm import tqdm
from data_loader_bert import get_loader
from baseline_models.bert_encoder import QuestionEncoder
from configs import config
from transformers import BertModel,BertTokenizer
from baseline_models.MUTANmodel import MutanModel
def test_model(model, dataloader, itoa, outputfile, use_gpu=False,phase='train'):
model.eval() # Set model to evaluate mode
example_count = 0
test_begin = time.time()
outputs = []
# Iterate over data.
for data in dataloader[phase]:
questions = data['question']
images = data['image']
question_id = data['qst_id']
if use_gpu:
questions, images = questions.cuda(), images.cuda()
questions, images = Variable(questions), Variable(images)
# zero grad
ans_scores = model(images, questions)
_, preds = torch.max(ans_scores, 1)
outputs.extend([{'question_id': question_id[i].item(), 'answer': itoa.idx2word(preds[i].item())} for i in range(question_id.size(0))])
if example_count % 100 == 0:
print('(Example Count: {})'.format(example_count))
# statistics
example_count += questions.size(0)
json.dump(outputs, open(outputfile, 'w'))
print('(Example Count: {})'.format(example_count))
test_time = time.time() - test_begin
print('Test Time: {:.0f}m {:.0f}s'.format(test_time // 60, test_time % 60))
if __name__ == '__main__':
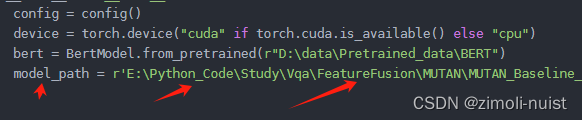
config = config()
device = torch.device("cuda" if torch.cuda.is_available() else "cpu")
bert = BertModel.from_pretrained(r"D:\data\Pretrained_data\BERT")
model_path = r'E:\Python_Code\Study\Vqa\FeatureFusion\MUTAN\MUTAN_Baseline_model_epoch_20\best_model.pt'
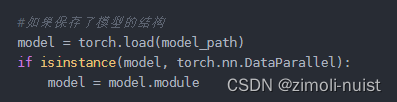
#如果保存了模型的结构
model = torch.load(model_path)
if isinstance(model, torch.nn.DataParallel):
model = model.module
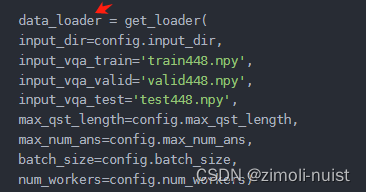
data_loader = get_loader(
input_dir=config.input_dir,
input_vqa_train='train448.npy',
input_vqa_valid='valid448.npy',
input_vqa_test='test448.npy',
max_qst_length=config.max_qst_length,
max_num_ans=config.max_num_ans,
batch_size=config.batch_size,
num_workers=config.num_workers)
itoa = data_loader['train'].dataset.ans_vocab
test_model(model,data_loader,itoa,r'E:\Python_Code\Study\Vqa\FeatureFusion\MUTAN\Evaluate_Vqav2\Results\v2_OpenEnded_mscoco_test2015_fake_results.json',use_gpu=True,phase='valid')(1)修改你训练好的模型路径:
(2)如果你保存的是模型的参数,请将下面代码修改
(3)加载你的数据迭代器:
请注意:我的数据迭代器会有train模式和val模式,如果你使用你自己的迭代器,你可能还要做如下改动:

(a)删除test_model函数的最后一个参数:phase="train"
(b)删除dataloader后面的[phase]
(c)在代码最后一行传参的时候,最后一个参数删除掉
(4)加载你的答案vocab
![]()
最后这些都设置完,请运行该脚本。等待运行结束,会在Eva_VQA/Results文件夹下的json文件写入内容。 然后这个文件保持别动!
另外说一下,如果您对您自己的代码不知道该怎么改,推荐你看看我之前复现的完整项目:MUTAN论文代码
在这里我对:如何下载数据 到 处理数据 再到 如何训练,最后到如何评估讲的比较清楚。
2.3 评估
首先我们来看一下Eva_VQA这个官方文档的目录结构,如下:
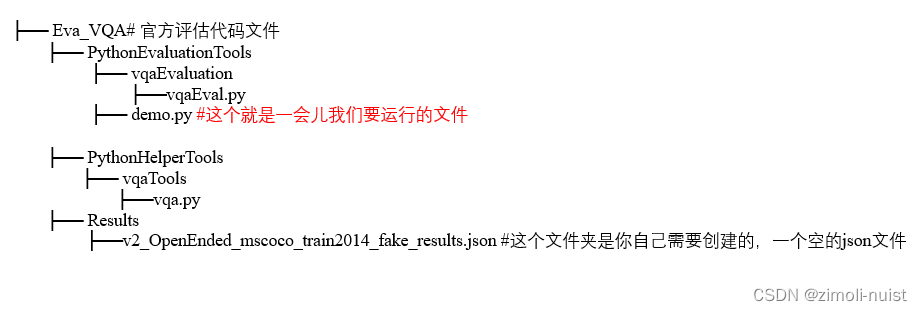
这个文件可以去官方下载:https://github.com/GT-Vision-Lab/VQA
然后打开demo.py文件
# coding: utf-8
import sys
dataDir = 'D:\data\VQA_data\VQAv2'
from PythonHelperTools.vqaTools.vqa import VQA
from PythonEvaluationTools.vqaEvaluation.vqaEval import VQAEval
import matplotlib.pyplot as plt
import skimage.io as io
import json
import random
import os

# set up file names and paths
versionType ='v2_' # this should be '' when using VQA v2.0 dataset
taskType    ='OpenEnded' # 'OpenEnded' only for v2.0. 'OpenEnded' or 'MultipleChoice' for v1.0
dataType    ='mscoco'  # 'mscoco' only for v1.0. 'mscoco' for real and 'abstract_v002' for abstract for v1.0.
dataSubType ='val2014'
annFile     ='%s/annotations/%s%s_%s_annotations.json'%(dataDir, versionType, dataType, dataSubType)
quesFile    ='%s/questions/%s%s_%s_%s_questions.json'%(dataDir, versionType, taskType, dataType, dataSubType)
imgDir      ='%s/images/%s/%s/' %(dataDir, dataType, dataSubType)
resultType  ='fake'
fileTypes   = ['results', 'accuracy', 'evalQA', 'evalQuesType', 'evalAnsType']
EvaDir = 'E:\Python_Code\Study\Vqa\FeatureFusion\MUTAN\Evaluate_Vqav2'
# An example result json file has been provided in './Results' folder.

[resFile, accuracyFile, evalQAFile, evalQuesTypeFile, evalAnsTypeFile] = ['%s\Results\%s%s_%s_%s_%s_%s.json'%(EvaDir, versionType, taskType, dataType, dataSubType, \
resultType, fileType) for fileType in fileTypes]

# create vqa object and vqaRes object
vqa = VQA(annFile, quesFile)
vqaRes = vqa.loadRes(resFile, quesFile)

# create vqaEval object by taking vqa and vqaRes
vqaEval = VQAEval(vqa, vqaRes, n=2)   #n is precision of accuracy (number of places after decimal), default is 2

# evaluate results
"""
If you have a list of question ids on which you would like to evaluate your results, pass it as a list to below function
By default it uses all the question ids in annotation file
"""
vqaEval.evaluate()

# print accuracies
print("\n")
print("Overall Accuracy is: %.02f\n" %(vqaEval.accuracy['overall']))
print("Per Question Type Accuracy is the following:")
for quesType in vqaEval.accuracy['perQuestionType']:
	print("%s : %.02f" %(quesType, vqaEval.accuracy['perQuestionType'][quesType]))
print("\n")
print("Per Answer Type Accuracy is the following:")
for ansType in vqaEval.accuracy['perAnswerType']:
	print("%s : %.02f" %(ansType, vqaEval.accuracy['perAnswerType'][ansType]))
print("\n")
# demo how to use evalQA to retrieve low score result
evals = [quesId for quesId in vqaEval.evalQA if vqaEval.evalQA[quesId]<35]   #35 is per question percentage accuracy
if len(evals) > 0:
	print('ground truth answers')
	randomEval = random.choice(evals)
	randomAnn = vqa.loadQA(randomEval)
	vqa.showQA(randomAnn)

	print('\n')
	print('generated answer (accuracy %.02f)'%(vqaEval.evalQA[randomEval]))
	ann = vqaRes.loadQA(randomEval)[0]
	print("Answer:   %s\n" %(ann['answer']))

	imgId = randomAnn[0]['image_id']
	imgFilename = 'COCO_' + dataSubType + '_'+ str(imgId).zfill(12) + '.jpg'
	if os.path.isfile(imgDir + imgFilename):
		I = io.imread(imgDir + imgFilename)
		plt.imshow(I)
		plt.axis('off')
		plt.show()

# plot accuracy for various question types
plt.bar(range(len(vqaEval.accuracy['perQuestionType'])), vqaEval.accuracy['perQuestionType'].values(), align='center')
plt.xticks(range(len(vqaEval.accuracy['perQuestionType'])), vqaEval.accuracy['perQuestionType'].keys(), rotation=0, fontsize=10)
plt.title('Per Question Type Accuracy', fontsize=10)
plt.xlabel('Question Types', fontsize=10)
plt.ylabel('Accuracy', fontsize=10)
plt.show()

# save evaluation results to ./Results folder
json.dump(vqaEval.accuracy,     open(accuracyFile,     'w'))
json.dump(vqaEval.evalQA,       open(evalQAFile,       'w'))
json.dump(vqaEval.evalQuesType, open(evalQuesTypeFile, 'w'))
json.dump(vqaEval.evalAnsType,  open(evalAnsTypeFile,  'w'))
(1)更改你存放数据的地址

(2)确定你是要评估哪个数据集:train2014或者是val2014

然后点击运行demo.py文件即可,运行结束后即可看完你的模型对val数据集的一个评估。
3.对测试集进行评估
(1)第一步:还是使用get_result.py得到一个json结果文件,具体操作和上面一样!记着把数据集改为test就行了。然后把运行后的json文件放在桌面!
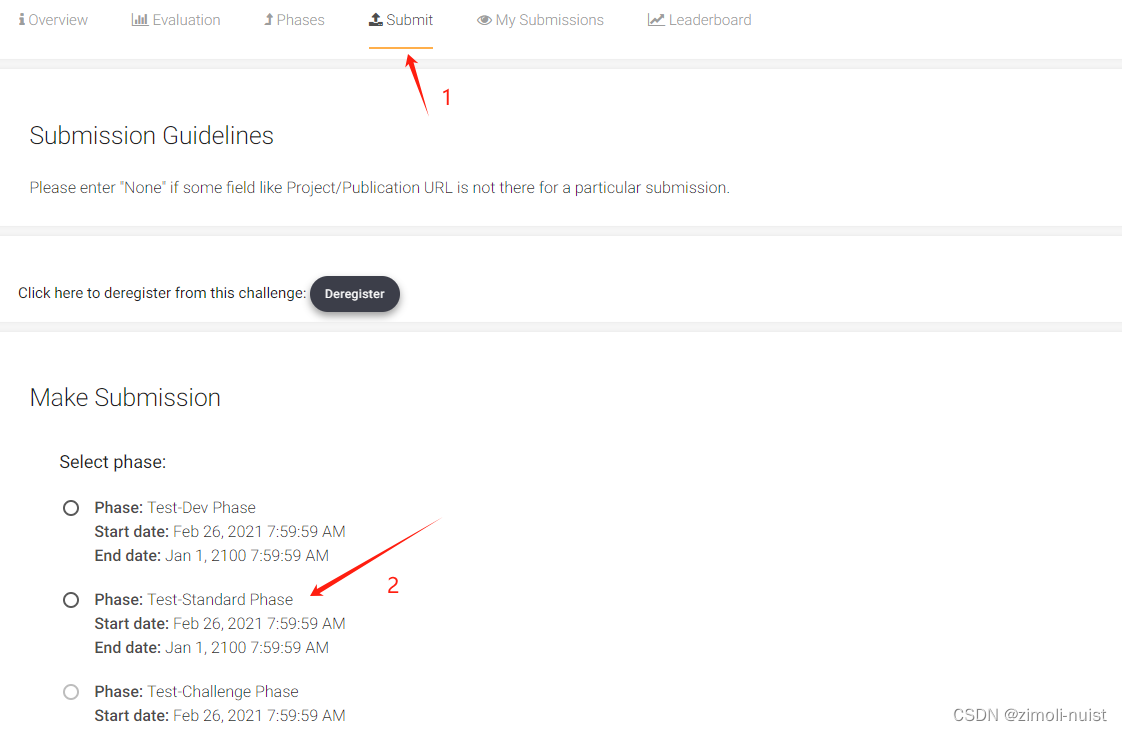
(2)第二步:打开官网:EvalAI: Evaluating state of the art in AI
在VQA官网注册一个账号
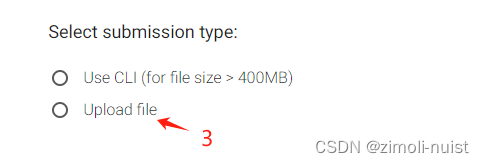
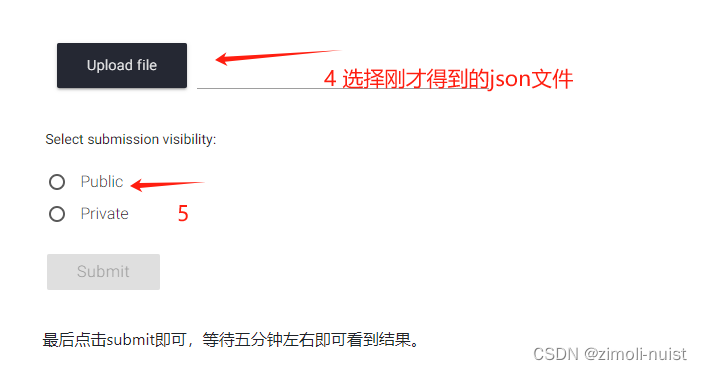
(3)第三步:依次按下面图片进行操作
---------------------------------------------------------------------------------------------------------------------------


 971
971

 被折叠的 条评论
为什么被折叠?
被折叠的 条评论
为什么被折叠?
 到【灌水乐园】发言


