


1.Spring框架发展史
1.1 Spring1.x时代
在Spring1.x时代,都是通过xml文件配置bean,随着项目的不断扩大,需要将xml配置分放到不同的配置文件中,需要频繁的在java类和xml配置文件中切换。
1.2 Spring2.x时代
随着JDK 1.5带来的注解支持,Spring2.x可以使用注解对Bean进行申明和注入,大大的减少了xml配置文件,同时也大大简化了项目的开发。
1.3.Spring3.x到Spring4.x再到Spring5.x
从Spring3.x开始提供了Java配置方式,使用Java配置方式可以更好的理解你配置的Bean,现在我们就处于这个时代,并且Spring4.x、Spring5.x和Spring Boot都推荐使用java配置的方式。
2.Spring5.x应用零配置开发
Spring框架从5.x版本推荐使用注解形式来对java应用程序进行开发与配置,并且可以完全替代原始的XML+注解形式的开发,在使用注解形式进行项目开发与环境配置时,Spring框架提供了针对环境配置与业务bean开发相关注解。
2.1注解
2.1.1 声明Bean注解
@Component:组件 没有明确规定其角色,作用在类级别上声明当前类为一个业务组件,被Spring Ioc 容器维护
@service:在业务逻辑层(Service层)类级别进行声明
@Repository:在数据访问层(dao 层)类级别声明
@Controller:在展现层(MVC)使用 标注当前类为一个控制器
2.1.2 注入Bean注解
@Autowired: Spring 官方提供注解
@Inject:JSR-330 提供注解(标准制定方)
@Resource:JSR-250 提供注解
以上三种注解在Set方法或属性上声明,一般情况下通用一般开发中更习惯声明在属性上,代码简洁清晰。基于5.x注解配置方式简化了xml配置,应用程序开发与xml环境配置均通过相应注解来实现。
2.1.3 Spring5.x中配置与获取Bean注解
@Configuration:作用与类上,将当前类声明为一个配置类,相当于一个xml 配置文件
@Componentscan:自动扫描指定包下标注有@Repository,@service,@controller
@Component:注解的类并由Ioc 容器进行实例化和维护
@Bean:作用于方法上,相当于xml 文件中<bean>声明当前方法返回值为一个bean
@value:获取properties 文件指定key value值
2.2实例1-IOC中Bean的实例化与获取
2.2.1 创建Sping普通工程并添加坐标相关配置
在pom.xml中添加坐标相关配置
<dependencies>
<!--
       spring的依赖坐标
-->
      <dependency>
      <groupId>org.springframework</groupId>
      <artifactId>spring-context</artifactId>
      <version>5.2.4.RELEASE</version>
      </dependency>
      </dependencies>

      <build>
      <plugins>
<!--
       指定Maven编译的JDK版本和编码
-->
      <plugin>
      <groupId>org.apache.maven.plugins</groupId>
      <artifactId>maven-compiler-plugin</artifactId>
      <version>2.3.2</version>
      <configuration>
<!--
       源代码使用的JDK版本
-->
      <source>1.8</source>
<!--
       需要生成的目标class文件的编译版本
-->
      <target>1.8</target>
<!--
       字符集编码
-->
      <encoding>utf-8</encoding>
      </configuration>
      </plugin>
      </plugins>
      </build>
2.2.2创建Bean对象
UserDao.java
@Repository
public class UserDao {
public void test(){
    System.out.println("UserDao Test...");
}
}
UserService.java
@Service
public class UserService {
    @Resource
private UserDao userDao;
public void test(){
    System.out.println("UserService Test...");
    userDao.test();
}

}
2.2.3 创建locConfig配置类
//将当前类声明为一个配置类
@Configuration
//设置扫描包范围
@ComponentScan("com.xxxx.springboot")
public class IocConfig {
}
2.2.4 创建启动类执行测试
public class Starter {
    public static void main(String[] args) {
        //基于Java配置类加载Spring应用的上下文环境
        AnnotationConfigApplicationContext ac=new AnnotationConfigApplicationContext(IocConfig.class);
    //得到指定的Bean对象
        UserService userService=ac.getBean(UserService.class);
//调用Bean对象方法
        userService.test();
    }
}

2.3 实例2-@Bean注解使用
2.3.1 创建Bean对象
Account.java
public class AccountDao {
public void test(){
    System.out.println("AccountDao Test...");
}
}
2.3.2 修改IocConfig配置类
添加返回AccountDao Bean对象方法
//将当前类声明为一个配置类
@Configuration
//设置扫描包范围
@ComponentScan("com.xxxx.springboot")
public class IocConfig02 {
    @Bean//将方法的返回值交给IOC维护
    public AccountDao accountDao(){
        return new AccountDao();
    }
}
2.3.3 创建启动类并执行测试
package com.xxxx.springboot;

import com.xxxx.springboot.config.IocConfig;
import com.xxxx.springboot.config.IocConfig02;
import com.xxxx.springboot.dao.AccountDao;
import com.xxxx.springboot.service.UserService;
import org.springframework.context.annotation.AnnotationConfigApplicationContext;

public class Starter02 {
    public static void main(String[] args) {
        //基于Java配置类加载Spring应用的上下文环境
        AnnotationConfigApplicationContext ac=new AnnotationConfigApplicationContext(IocConfig02.class);
//获取配置类对象
        IocConfig02 iocConfig02=ac.getBean(IocConfig02.class);
        //返回boolean类型,true表示是单例,false表示不是
        System.out.println(ac.isSingleton("iocConfig02"));
  //获取配置类中定义的方法(通过@Bean注解的标识的方法,方法的返回值会交给IOC维护
        AccountDao accountDao01=iocConfig02.accountDao();
        AccountDao accountDao02=iocConfig02.accountDao();
        System.out.println(accountDao01+","+accountDao02);
        accountDao01.test();
    }
}

2.4 实例3-读取外部配置文件
2.4.1 准备配置文件
src/main/resources,目录下添加user.properties,jdbc.properties文件
# user.properties
user.userName=admin
user.password=admin
# jdbc.properties
jdbc.driver=com.mysql.jdbc.Driver
jdbc.url=jdbc:mysql://127.0.0.1:3306/hr?useUnicode=true&characterEncoding=utf8
jdbc.username=root
jdbc.password=root
2.4.2 @PropertySource加载properties配置文件
//将当前类声明为一个配置类
@Configuration
//设置扫描包范围
@ComponentScan("com.xxxx.springboot")
//加载配置文件
@PropertySource(value={"classpath:jdbc.properties","classpath:user.properties"})
public class IocConfig03 {
    //获取properties文件中属性的值
    @Value("${jdbc.driver}")
    private String driver;
    @Value("${jdbc.url}")
    private String url;
    @Value("${jdbc.username}")
    private String username;
    @Value("${jdbc.password}")
    private String password;
    @Value("${user.userName}")
    private String userName;
    @Value("${user.password}")
    private String userPwd;
    public void printInfo(){
        System.out.println("driver:"+driver+","+"url"+url);
        System.out.println("username:"+username+","+"password:"+password);
        System.out.println("userName:"+userName+","+"userPwd:"+userPwd);
    }

}
2.4.3 其他Bean对象获取properties文件内容
@Service
public class UserService {

    @Value("${user.userName}")
    private String userName;
    @Value("${user.password}")
    private String userPwd;
public void test(){
    System.out.println("UserService Test...");
    userDao.test();
    //获取文件的属性
    System.out.println("userName:"+userName+","+"userPwd:"+userPwd);

}

2.5 组合注解与元注解
Spring 从2.x版本开始引入注解支持(目的是jdk1.5中推出注解功能),通过引入注解来消除大量xml配置,Spring 引入注解主要用来注入bean以及aop切面相关配置,但由于注解大量使用,就会造成大量重复注解代码出现,代码出现了重复,Spring为了消除重复注解,在元注解上引入了组合注解,其实可以理解为对代码的重构,相当于注解的注解,拥有元注解的原始功能,比如在定义配置类时用到的@Configuration注解就是组合注解,拥有@Component注解功能,即配置类本身也是一个被IOC维护的单例Bean。

2.5.1 自定义组合注解
定义MyCompScan注解,拥有@ComponentScan扫描器注解功能
/*
* 组合注解 MyCompScan 定义
拥有元注解@configuration +@componentScan 两者功能
覆盖 value 属性
*/
@Target({ElementType.TYPE})
@Retention(RetentionPolicy.RUNTIME)
@Documented
@ComponentScan()
public @interface MyCompScan {
    String []value() default {};
}
3.SpringMVC零配置创建与部署
3.1创建SpringMVC Web工程
创建maven的web项目
3.2 pom.xml添加坐标相关配置
<dependencies>
    <!--spring web-->
    <dependency>
      <groupId>org.springframework</groupId>
      <artifactId>spring-web</artifactId>
      <version>5.2.4.RELEASE</version>
    </dependency>

<!--spring mvc -->
    <dependency>
    <groupId>org.springframework</groupId>
    <artifactId>spring-webmvc</artifactId>
    <version>5.2.4.RELEASE</version>
    </dependency>
<!--   web servlet -->
    <dependency>
    <groupId>javax.servlet</groupId>
    <artifactId>javax.servlet-api</artifactId>
    <version>3.0.1</version>
    </dependency>

      </dependencies>

<build>
  <finalName>springboot02</finalName>
  <!-- 指定Maven编译的JDK版本和编码 -->
  <plugins>
    <plugin>
      <groupId>org.apache.maven.plugins</groupId>
      <artifactId>maven-compiler-plugin</artifactId>
      <version>2.3.2</version>
 <configuration>
   <source>1.8</source>
   <target>1.8</target>
   <encoding>utf-8</encoding>
 </configuration>
    </plugin>
  </plugins>
    </build>
3.3 添加源代码
@Controller
public class HelloController {
    @RequestMapping("/index")
public String index(){
    return "index";
}
}
3.4 添加视图
在WEB/INF/views目录下创建index.jsp
<html>
<head>
    <title>Title</title>
</head>
<body>
<h2>Hello MVC</h2>
</body>
</html>
3.5 SpringMVC配置类添加
//配置类
@Configuration
//在@Configuration注解的配置类添加,代表为当前应用添加SpringMVC的功能
@EnableWebMvc
//扫描包范围
@ComponentScan("com.xxxx.springboot")
public class MvcConfig {
    /*
    * 配置JSP视图解析器
    * @return
    * */
    @Bean //将方法的返回的结果交给IOC容器维护
    public InternalResourceViewResolver viewResolver(){
        //获取视图解析器
        InternalResourceViewResolver internalResourceViewResolve=new InternalResourceViewResolver();
       //设置前缀
        internalResourceViewResolve.setPrefix("/WEB-INF/views");
        //设置后缀
        internalResourceViewResolve.setSuffix(".jsp");
        //返回视图解析器(交给IOC容器维护)
        return internalResourceViewResolve;
    }
}
3.6 入口文件代码添加
/*
 * 实现WebApplicationInitializer接口的类,可以在web应用启动时加载
 * */
public class WebInitializer implements WebApplicationInitializer {
    @Override
    public void onStartup(ServletContext servletContext) throws ServletException {
        // 得到Spring应用的上下文环境
        AnnotationConfigWebApplicationContext ac = new AnnotationConfigWebApplicationContext();
        // 注册MVC配置类
        ac.register(MvcConfig.class);
        // 设置ServletContext的上下文信息
        ac.setServletContext(servletContext);
        // 配置转发器
        ServletRegistration.Dynamic servlet = servletContext.addServlet("dispatcher", new DispatcherServlet(ac));
        // 设置映射路径
        servlet.addMapping("/");
        // 启动时实例化Bean
        servlet.setLoadOnStartup(1);
    }
}
3.7 部署与测试
通过Tomcat启动项目访问

 /*配置拦截器到mvc环境
    * */
    @Override
    protected void addInterceptors(InterceptorRegistry registry) {
        super.addInterceptors(registry);
    }
//静态资源handler不进行处理,直接响应到客户端
    @Override
    protected void configureDefaultServletHandling(DefaultServletHandlerConfigurer configurer) {
        super.configureDefaultServletHandling(configurer);
    }
//配置拦截器
4.SpringBoot概念及特点
4.1 框架概念
随着动态语言流行(Ruby、Scala、NodeJs等),Java开发变得相对笨重,配置繁琐,开发效率低下,部署流程复杂,以及第三方集成难度也相对较大,针对该环境,Spring Boot被开发出来,其使用“习惯大于配置目标”,借助Spring Boot能够让项目快速运行起来,同时借助Spring Boot可以快速创建web应用并独立进行部署(jar包 war包方式,内嵌servlet容器),同时借助Spring Boot在开发应用时可以不用或很少去进行相关xml环境配置,简化了开发,大大提高项目开发效率。
Spring Boot是由Pivotal团队提供的全新框架,其设计目的是用来简化Spring应用的初始搭建以及开发过程。该框架使用了特定的方式来进行配置,从而使开发人员不再需要定义样板化的配置。通过这种方式,让Spring Boot在蓬勃发展的快速应用开发领域(rapid application development)成为领导者。
4.2.框架特点
创建独立Spring应用程序、嵌入式Tomcat、Jetty容器、无需部署WAR包、简化Maven及Gradle 配置、尽可能自动化配置Spring、直接植入产品环境下的实用功能,比如度量指标、健康检查及扩展配置、无需代码生成及XML配置等,同时Spring Boot不仅对web应用程序做了简化,还提供一系列的依赖包来把其它一些工作做成开箱即用。
5. SpringBoot应用
5.1 环境准备
IDEA,Maven,JDK1.8+ ,SpringBoot2.x
5.2 创建项目

5.3 添加依赖坐标
<parent>
  <groupId>org.springframework.boot</groupId>
  <artifactId>spring-boot-starter-parent</artifactId>
  <version>2.2.2.RELEASE</version>
</parent>
<dependencies>
  <dependency>
    <groupId>org.springframework.boot</groupId>
    <artifactId>spring-boot-starter-web</artifactId>

  </dependency>
</dependencies>
SpringBoot的项目必须要将parent设置为Spring Boot的parent,该parent包含大量默认的配置,简化程序的开发。
5.4 导入SrpingBoot的web坐标与相关插件
<plugin>
<groupId>org.springframework.boot</groupId>
    <artifactId>spring-boot-maven-plugin</artifactId>
  <version>2.2.2.RELEASE</version>
  </plugin>
5.5 添加源代码
@Controller
public class HelloController {
    @RequestMapping("/hello")
    @ResponseBody
    public String hello(){
        return "hello Springboot";
    }
}
5.6 创建启动程序
@SpringBootApplication
public class Starter {
    public static void main(String[] args) {
        SpringApplication.run(Starter.class);}
}
5.7 启动Spring Boot应用并测试


6.Spring Boot核心配置
6.1 设置Banner图标

在搭建Spring Boot项目环境时,程序启动后会在控制台打印醒目的SpringBoot图标,图标描述了SpringBoot版本信息,这是Spring Boot项目与Spring项目启动区别较大的地方,Spring Boot通过默认Banner在程序启动时显示应用启动图标,当然图标我们也可以进行自定义。
6.1.1 图标自定义
Spring Boot项目启动时默认加载 src/main/resources目录下的banner.txt图标文件,如果该目录文件未提供,则使用Spring Boot默认。在main目录下新建resources资源目录,并在该目录下新建banner.txt文本文件,可以设置自定义图标。
打开网址:http://patorjk.com/software/taag/#p=display&f=Graffiti&t=Type%20Something
在线生成图标对应文本并将文本内容copy到banner.txt中

启动SpringBoot的图标效果如下:

6.1.2 Bannner图标关闭
如果启动时不想要看到启动图标,这里也可以通过代码进行关闭操作,修改StarterApplication设置
BannerMode值为Banner.Mode.OFF,启动Spring Boot应用关闭图标输出功能即可
@SpringBootApplication
public class Starter {
    public static void main(String[] args) {
        // SpringApplication.run(Starter.class);}
        SpringApplication application = new SpringApplication(Starter.class);
        //设置Banner图标关闭
        application.setBannerMode(Banner.Mode.OFF);
   //启动
        application.run();
    }
}
6.2 Spring Boot配置文件
Spring Boot默认会读取全局配置文件,配置文件名固定为:application.properties或 application.yml,放置在src/main/resources资源目录下,使用配置文件来修改SpringBoot自动配置的默认值。在resources资源目录下添加 application.properties文件,配置信息如下:
# 项目启动端口号配置
#server.port=8989
# 项目访问上下文路径
server.servlet.context-path=/mvc
## 数据源配置
spring.datasource.driver-class-name=com.mysql.cj.jdbc.Driver
spring.datasource.url=jdbc:mysq1://127.0.0.1:3306/hr?
useUnicode=true&characterEncoding=utf8
spring.datasource.username=root
spring.datasource.password=root
或配置application.yml文件,配置信息如下
#设置项目启动的端口号
server:
  port: 8886
  servlet:
    ## 项目访问上下文路径
    context-path: /mvc02
## 数据源配置
spring:
datasource:
type: com.mchange.v2.c3p0.ComboPooledDataSource
driver-class-name: com.mysql.cj.jdbc.Driver
url: jdbc:mysq1://127.0.0.1:3306/hr
username: root
password: root
6.3 Starter坐标&自动化配置
6.3.1 Starter坐标配置
Spring Boot引入了全新的Starter坐标体系,简化企业项目开发大部分场景的Starter pom,应用程序引入指定场景的Start pom相关配置就可以消除,通过Spring Boot就可以得到自动配置的Bean。
6.3.1.1. Web starter
使用Spring MVC 来构建 RESTful Web应用,并使用Tomcat作为默认内嵌容器
<dependency>
<groupId>org.springframework.boot</groupId>
<artifactId>spring-boot-starter-wek</artifactId>
</dependency>
6.3.1.2. Freemarker Starter & Thymeleaf starter
集成视图技术,引入Freemarker Starter,Thymeleaf Starter
<dependency>
<groupId>org.springframework.boot</groupId>
<artifactId>spring-boot-starter-freemarker</artifactId>
</dependency>
<dependency>
<groupId>org.springframework.boot</groupId>
<artifactId>spring-boot-starter-thymeleaf</artifactId>
</dependency>
6.3.1.3.JavaMail邮件发送 Starter
<dependency>
<groupId>org.springframework.boot</groupId>
<artifactId>spring-boot-starter-mail</artifactId>
</dependency>
6.3.1.4.引入AOP环境
<dependency>
<groupId>org.springframework.boot</groupId>
<artifactId>spring-boot-starter-aop</artifactId>
</dependency>
6.3.2 自动化配置
6.3.2.1 Spring Boot Starter坐标版本查看
<dependency>
  <groupId>org.springframework.boot</groupId>
  <artifactId>spring-boot-starter-web</artifactId>

</dependency>
这里引入的web环境坐标不像传统的maven坐标那样包含坐标的版本号,项目中引入的starter系列坐标对应的版本库统一由父工程坐标统一控制即项目中引入的parent标签。
<parent>
  <groupId>org.springframework.boot</groupId>
  <artifactId>spring-boot-starter-parent</artifactId>
<!--父类项目对项目依赖版本统一控制-->
  <version>2.2.2.RELEASE</version>
</parent>
6.3.2.2 Spring Boot自动化配置
Spring Boot的项目一般都会有*Application的入口类,入口类中提供main方法,这是一个标准的Java应用程序的入口方法。@SpringBootApplication注解是Spring Boot的核心注解,它其实是一个组合注解:
@SpringBootApplication

可以看出该注解也是一个组合注解,组合了@Configuration注解,对于Spring Boot应用,@SpringBootConfiguration注解属于Boot项目的配置注解也是属于一个组合注解,Spring Boot项目中推荐使用@SpringBootConfiguration注解,因为其组合了@Configuration注解。
@EnableAutoConfiguration

@EnableAutoConfiguration 注解组合了@AutoConfigurationPackage、@lmport(AutoConfigurationlmportSelector.class)注解。
@AutoConfigurationPackage 底层也是一个@lmport(AutoConfigurationPackages.Registrar.class),其会把启动类的包下组件都扫描到Spring容器中。

6.4 Profile配置
Profile是Spring用来针对不同环境对不同配置提供支持的全局Profile配置使用 application-{profile}.yml,比如 application-dev.yml , application-test.yml.
通过在application.yml中设置spring.profiles.active=test|dev|prod来动态切换不同环境,具体配置如下:
· application-dev.yml 开发环境配置文件
server:
port: 8989
· application-test.yml 测试环境配置文件
server:
port: 9999
· application-prod.yml生产环境配置文件
server:
port: 8686
· application.yml 主配置文件
## 环境选择配置
spring:
profiles:
active: dev
6.5 日志配置
Spring Boot 默认使用LogBack日志系统,如果不需要更改为其他日志系统如Log4j2等,则无需多余的配置,LogBack默认将日志打印到控制台上。如果要使用LogBack,原则上是需要添加dependency依赖的。
<dependency>
  <groupId>org.springframework.boot</groupId>
  <artifactId>spring-boot-starter-logging</artifactId>
</dependency>

因为新建的Spring Boot项目一般都会引用 spring-boot-starter或者 spring-boot-starter-web,m0
这两个起步依赖中都已经包含了对于spring-boot-starter-logging的依赖,所以,无需额外添加依赖。
6.5.1项目中日志信息输出
Starter启动类中添加Log日志类,控制台打印日志信息。
import org.slf4j.Logger;
import org.slf4j.LoggerFactory;
import org.springframework.boot.Banner;
import org.springframework.boot.SpringApplication;
import org.springframework.boot.autoconfigure.SpringBootApplication;
@SpringBootApplication
public class Starter {
private static Logger logger= LoggerFactory.getLogger(Starter.class);
public static void main(String[] args) {
//使用日志
logger.info("SpringBoot 应该正在启动....");
// SpringApplication.run(Starter.class);}
SpringApplication application = new SpringApplication(Starter.class);
//设置Banner图标关闭
application.setBannerMode(Banner.Mode.OFF);
//启动
application.run();
}
}

6.5.2 日志输出格式配置
logging:
  pattern:
    console: "%d{yyyy-MM-dd HH:mm:ss} [%thread] %-5level %logger- %msg%n"
    level: debug
  file:
    path: "."
    name: "springboot. log"

7. Freemarker&Thymeleaf视图技术集成
7.1 Freemarker视图集成
SpringBoot内部支持Freemarker视图技术的集成,并提供了自动化配置类FreeMarkerAutoConfiguration,借助自动化配置可以很方便的集成 Freemarker基础到SpringBoot环境中。
· Starter 坐标引入
<dependency>
<groupId>org.springframework.boot</groupId>
<artifactId>spring-boot-starter-freemarker</artifactId>
</dependency>
· 添加Freemarker配置信息
Freemarker 默认默认视图路径文 resources/templates目录(由自动化配置类 FreemarkerProperties 决定),该目录可以进行在application.yml中进行修改。

修改application.yml添加freemarker基本配置如下:
spring:

    #freemarker配置
    freemarker:
    suffix: .ftl
    content-type: text/html
    charset: utf-8
    template-loader-path: classpath:/views/
· 编写IndexController控制器
import org.springframework.stereotype.Controller;
import org.springframework.web.bind.annotation.RequestMapping;

@Controller
public class IndexController {
@RequestMapping("index")
    public String index(){
    return "index";
}
}
·views目录下添加index.ftl视图

·启动Starter访问

7.2 Thymeleaf视图集成
·starter坐标引入
<dependency>
<groupId>org.springframework.boot</groupId>
<artifactId>spring-boot-starter-thymeleaf</artifactId>
</dependency>
· 添加Thymeleaf 配置信息
Thymeleaf 默认默认视图路径文 resources/templates 目录(由自动化配置类Thymeleaf Properties类决定),该目录可以进行在application.yml中进行修改。

在application.yml修改如下:
spring:
  thymeleaf:
    prefix: classpath:/html/
    #关闭thymeleaf视图缓存
    cache: false
· 编写IndexController控制器转发视图
@RequestMapping("index")
public String index(Model model){
    model.addAttribute("msg","Hello SpringBOOt");
    return "index";
}
· html 目录下添加 index.html 视图
修改Thymeleaf 模板默认存放路径(在resources目录下创建html文件夹)
<!DOCTYPE html>
<html lang="en" xmlns:th="http://www.thymeleaf.org">
<head>
    <meta charset="UTF-8">
    <title>Title</title>
</head>
<body>
<!--获取请求域的值-->
<h2 th:text="${msg}"></h2>
</body>
</html>
· 启动Starter访问

8.SpringBoot静态资源访问
从入门项目中可以看到:对于Spring Mvc请求拦截规则为‘/',Spring Boot默认静态资源路径如下:

即:我们可以在resources资源目录下存放web应用静态资源文件。
8.1 默认静态路径
在resources目录下创建static或者public目录,存放images,js,css等静态资源文件

浏览器访问:


8.2 自定义静态资源路径
 #设置静态资源的默认访问路径 多个路径之间用逗号隔开
resources:
  static-locations: classpath:/static/,classpath:/public/,classpath:/os/
9.SpringBoot应用打包与部署
9.1Jar包部署
9.1.1 配置打包命令
idea 下配置 clean compile package -Dmaven.test.skip=true 执行打包命令,target 目录得到待部署
的项目文件。


9.1.2 部署并访问
打开本地dos窗口,执行java -jar命令部署已打好的jar包文件。
命令如下:java -jar jar包所在目录


浏览器访问:

9.2 war包部署
9.2.1 pom.xml修改
· 应用类型修改
由于入门项目构建的项目默认为jar应用,所以这里打war需要作如下修改

· 忽略内嵌 Tomcat
构建SpringBoot应用时,引入的spring-boot-starter-web默认引入Tomcat容器,这里忽略掉内容Tomcat

9.2.2 Starter修改
添加容器启动加载文件(类似于读取web.xml),这里通过继承SpringBootServletlnitializer 类并重写
coniigure 方法来实现,在部署项目时指定外部Tomcat 读取项目入口方法。
@SpringBootApplication
public class Starter extends SpringBootServletInitializer {
    private static Logger logger= LoggerFactory.getLogger(Starter.class);
    public static void main(String[] args) {
        //使用日志
        logger.info("SpringBoot 应该正在启动....");

        // SpringApplication.run(Starter.class);}
        SpringApplication application = new SpringApplication(Starter.class);
        //设置Banner图标关闭
        application.setBannerMode(Banner.Mode.OFF);
   //启动
        application.run();

    }

    @Override
    protected SpringApplicationBuilder configure(SpringApplicationBuilder builder) {
        return builder.sources(Starter.class);
    }
}
9.2.3 打包操作
执行命令,生成相应的war包
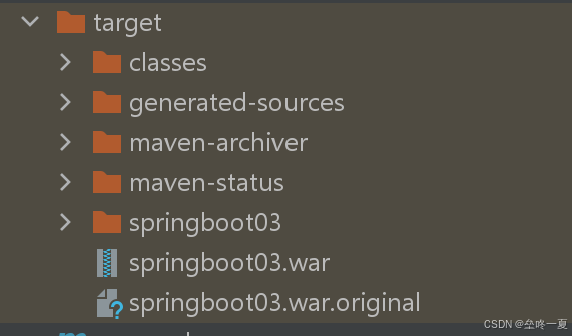
9.2.4 部署并访问
外部tomcat部署并访问


浏览器访问:


 1122
1122

 被折叠的 条评论
为什么被折叠?
被折叠的 条评论
为什么被折叠?
 到【灌水乐园】发言


