


public Handler(Callback callback, boolean async) {
mLooper = Looper.myLooper();
if (mLooper == null) {
throw new RuntimeException(
"Can’t create handler inside thread " + Thread.currentThread()
- " that has not called Looper.prepare()");
}
}
public static @Nullable Looper myLooper() {
return sThreadLocal.get();
}
那么 Looper.prepare 里做了什么事情呢?
private static void prepare(boolean quitAllowed) {
if (sThreadLocal.get() != null) {
throw new RuntimeException(“Only one Looper may be created per thread”);
}
sThreadLocal.set(new Looper(quitAllowed));
}
可以看到,Looper.prepare 就是创建了 Looper 并设置给 ThreadLocal,这里的一个细节是每个 Thread 只能有一个 Looper,否则也会抛出异常。
而 Looper.loop 就是开始读取 MessageQueue 中的消息,进行执行了。
这里一般会引申一个问题,就是主线程中为什么不用手动调用这两个方法呢?相信大家也都明白,就是 ActivityThread.main 中已经进行了调用。
通过这个问题,又可以引申到 ActivityThread 相关的知识,这里就不细说了。
3. MessageQueue 如何等待消息
上面说到 Looper.loop 其实就是开始读取 MessageQueue 中的消息了,那 MessageQueue 中没有消息的时候,Looper 在做什么呢?我们知道是在等待消息,那是怎么等待的呢?
通过 Looper.loop 方法,我们知道是 MessageQueue.next() 来获取消息的,如果没有消息,那就会阻塞在这里,MessageQueue.next 是怎么等待的呢?
public static void loop() {
final MessageQueue queue = me.mQueue;
for (;😉 {
Message msg = queue.next(); // might block
if (msg == null) {
// No message indicates that the message queue is quitting.
return;
}
}
}
Message next() {
for (;😉 {
nativePollOnce(ptr, nextPollTimeoutMillis);
// …
}
}
在 MessageQueue.next 里调用了 native 方法 nativePollOnce。
// android_os_MessageQueue.cpp
static void android_os_MessageQueue_nativePollOnce(JNIEnv* env, jobject obj,
jlong ptr, jint timeoutMillis) {
NativeMessageQueue* nativeMessageQueue = reinterpret_cast<NativeMessageQueue*>(ptr);
nativeMessageQueue->pollOnce(env, obj, timeoutMillis);
}
void NativeMessageQueue::pollOnce(JNIEnv* env, jobject pollObj, int timeoutMillis) {
// …
mLooper->pollOnce(timeoutMillis);
// …
}
// Looper.cpp
int Looper::pollOnce(int timeoutMillis, int* outFd, int* outEvents, void** outData) {
// …
result = pollInner(timeoutMillis);
// …
}
int Looper::pollInner(int timeoutMillis) {
// …
int eventCount = epoll_wait(mEpollFd, eventItems, EPOLL_MAX_EVENTS, timeoutMillis);
}
从上面代码中我们可以看到,在 native 侧,最终是使用了 epoll_wait 来进行等待的。
这里的 epoll_wait 是 Linux 中 epoll 机制中的一环,关于 epoll 机制这里就不进行过多介绍了,大家有兴趣可以参考 https://segmentfault.com/a/1190000003063859
那其实说到这里,又有一个问题,为什么不用 java 中的 wait / notify 而是要用 native 的 epoll 机制呢?
4. 为什么不用 wait 而用 epoll 呢?
说起来 java 中的 wait / notify 也能实现阻塞等待消息的功能,在 Android 2.2 及以前,也确实是这样做的。
可以参考这个 commit https://www.androidos.net.cn/android/2.1_r2.1p2/xref/frameworks/base/core/java/android/os/MessageQueue.java
那为什么后面要改成使用 epoll 呢?通过看 commit 记录,是需要处理 native 侧的事件,所以只使用 java 的 wait / notify 就不够用了。
具体的改动就是这个 commit https://android.googlesource.com/platform/frameworks/base/+/fa9e7c05c7be6891a6cf85a11dc635a6e6853078%5E%21/#F0
Sketch of Native input for MessageQueue / Looper / ViewRoot
MessageQueue now uses a socket for internal signalling, and is prepared
to also handle any number of event input pipes, once the plumbing is
set up with ViewRoot / Looper to tell it about them as appropriate.
Change-Id: If9eda174a6c26887dc51b12b14b390e724e73ab3
不过这里最开始使用的还是 select,后面才改成 epoll。
具体可见这个 commit https://android.googlesource.com/platform/frameworks/base/+/46b9ac0ae2162309774a7478cd9d4e578747bfc2%5E%21/#F16
至于 select 和 epoll 的区别,这里也不细说了,大家可以在上面的参考文章中一起看看。
5. 线程和 Handler Looper MessageQueue 的关系
这里的关系是一个线程对应一个 Looper 对应一个 MessageQueue 对应多个 Handler。
6. 多个线程给 MessageQueue 发消息,如何保证线程安全
既然一个线程对应一个 MessageQueue,那多个线程给 MessageQueue 发消息时是如何保证线程安全的呢?
说来简单,就是加了个锁而已。
// MessageQueue.java
boolean enqueueMessage(Message msg, long when) {
synchronized (this) {
// …
}
}
7. Handler 消息延迟是怎么处理的
Handler 引申的另一个问题就是延迟消息在 Handler 中是怎么处理的?定时器还是其他方法?
这里我们先从事件发起开始看起:
// Handler.java
public final boolean postDelayed(Runnable r, long delayMillis)
{
return sendMessageDelayed(getPostMessage®, delayMillis);
}
public final boolean sendMessageDelayed(Message msg, long delayMillis)
{
// 传入的 time 是 uptimeMillis + delayMillis
return sendMessageAtTime(msg, SystemClock.uptimeMillis() + delayMillis);
}
public boolean sendMessageAtTime(Message msg, long uptimeMillis) {
// …
return enqueueMessage(queue, msg, uptimeMillis);
}
private boolean enqueueMessage(MessageQueue queue, Message msg, long uptimeMillis) {
// 调用 MessageQueue.enqueueMessage
return queue.enqueueMessage(msg, uptimeMillis);
}
从上面的代码逻辑来看,Handler post 消息以后,一直调用到 MessageQueue.enqueueMessage 里,其中最重要的一步操作就是传入的时间是 uptimeMillis + delayMillis。
boolean enqueueMessage(Message msg, long when) {
synchronized (this) {
// …
msg.when = when;
Message p = mMessages; // 下一条消息
// 根据 when 进行顺序排序,将消息插入到其中
if (p == null || when == 0 || when < p.when) {
msg.next = p;
mMessages = msg;
needWake = mBlocked;
} else {
// 找到 合适的节点
Message prev;
for (;😉 {
prev = p;
p = p.next;
if (p == null || when < p.when) {
break;
}
}
// 插入操作
msg.next = p; // invariant: p == prev.next
prev.next = msg;
}
// 唤醒队列进行取消息
if (needWake) {
nativeWake(mPtr);
}
}
return true;
}
通过上面代码我们看到,post 一个延迟消息时,在 MessageQueue 中会根据 when 的时长进行一个顺序排序。
接着我们再看看怎么使用 when 的。
Message next() {
// …
for (;😉 {
// 通过 epoll_wait 等待消息,等待 nextPollTimeoutMillis 时长
nativePollOnce(ptr, nextPollTimeoutMillis);
synchronized (this) {
// 当前时间
final long now = SystemClock.uptimeMillis();
Message prevMsg = null;
Message msg = mMessages;
if (msg != null && msg.target == null) {
// 获得一个有效的消息
do {
prevMsg = msg;
msg = msg.next;
} while (msg != null && !msg.isAsynchronous());
}
if (msg != null) {
if (now < msg.when) { // 说明需要延迟执行,通过; nativePollOnce 的 timeout 来进行延迟
// 获取需要等待执行的时间
nextPollTimeoutMillis = (int) Math.min(msg.when - now, Integer.MAX_VALUE);
} else { // 立即执行的消息,直接返回
// Got a message.
mBlocked = false;
if (prevMsg != null) {
prevMsg.next = msg.next;
} else {
mMessages = msg.next;
}
msg.next = null;
msg.markInUse();
return msg;
}
} else {
// No more messages.
nextPollTimeoutMillis = -1;
}
if (pendingIdleHandlerCount < 0
&& (mMessages == null || now < mMessages.when)) {
// 当前没有消息要执行,则执行 IdleHandler 中的内容
pendingIdleHandlerCount = mIdleHandlers.size();
}
if (pendingIdleHandlerCount <= 0) {
// 如果没有 IdleHandler 需要执行,则去等待 消息的执行
mBlocked = true;
continue;
}
if (mPendingIdleHandlers == null) {
mPendingIdleHandlers = new IdleHandler[Math.max(pendingIdleHandlerCount, 4)];
}
mPendingIdleHandlers = mIdleHandlers.toArray(mPendingIdleHandlers);
}
// 执行 idle handlers 内容
for (int i = 0; i < pendingIdleHandlerCount; i++) {
final IdleHandler idler = mPendingIdleHandlers[i];
mPendingIdleHandlers[i] = null; // release the reference to the handler
boolean keep = false;
try {
keep = idler.queueIdle();
} catch (Throwable t) {
Log.wtf(TAG, “IdleHandler threw exception”, t);
}
if (!keep) {
synchronized (this) {
mIdleHandlers.remove(idler);
}
}
}
// Reset the idle handler count to 0 so we do not run them again.
pendingIdleHandlerCount = 0;
// 如果执行了 idle handlers 的内容,现在消息可能已经到了执行时间,所以这个时候就不等待了,再去检查一下消息是否可以执行, nextPollTimeoutMillis 需要置为 0
nextPollTimeoutMillis = 0;
}
}
通过上面的代码分析,我们知道了执行 Handler.postDelayd 时候,会执行下面几个步骤:
-
将我们传入的延迟时间转化成距离开机时间的毫秒数
-
MessageQueue 中根据上一步转化的时间进行顺序排序
-
在 MessageQueue.next 获取消息时,对比当前时间(now)和第一步转化的时间(when),如果 now < when,则通过 epoll_wait 的 timeout 进行等待
-
如果该消息需要等待,会进行 idel handlers 的执行,执行完以后会再去检查此消息是否可以执行
8. View.post 和 Handler.post 的区别
我们最常用的 Handler 功能就是 Handler.post,除此之外,还有 View.post 也经常会用到,那么这两个有什么区别呢?
我们先看下 View.post 的代码。
// View.java
public boolean post(Runnable action) {
final AttachInfo attachInfo = mAttachInfo;
if (attachInfo != null) {
return attachInfo.mHandler.post(action);
}
// Postpone the runnable until we know on which thread it needs to run.
// Assume that the runnable will be successfully placed after attach.
getRunQueue().post(action);
return true;
}
通过代码来看,如果 AttachInfo 不为空,则通过 handler 去执行,如果 handler 为空,则通过 RunQueue 去执行。
那我们先看看这里的 AttachInfo 是什么。
这个就需要追溯到 ViewRootImpl 的流程里了,我们先看下面这段代码。
// ViewRootImpl.java
final ViewRootHandler mHandler = new ViewRootHandler();
public ViewRootImpl(Context context, Display display) {
// …
mAttachInfo = new View.AttachInfo(mWindowSession, mWindow, display, this, mHandler, this,
context);
}
private void performTraversals() {
final View host = mView;
// …
if (mFirst) {
host.dispatchAttachedToWindow(mAttachInfo, 0);
mFirst = false;
}
// …
}
代码写了一些关键部分,在 ViewRootImpl 构造函数里,创建了 mAttachInfo,然后在 performTraversals 里,如果 mFirst 为 true,则调用 host.dispatchAttachedToWindow,这里的 host 就是 DecorView,如果有读者朋友对这里不太清楚,可以看看前面【面试官带你学安卓-从View的绘制流程】说起这篇文章复习一下。
这里还有一个知识点就是 mAttachInfo 中的 mHandler 其实是 ViewRootImpl 内部的 ViewRootHandler。
然后就调用到了 DecorView.dispatchAttachedToWindow,其实就是 ViewGroup 的 dispatchAttachedToWindow,一般 ViewGroup 中相关的方法,都是去依次调用 child 的对应方法,这个也不例外,依次调用子 View 的 dispatchAttachedToWindow,把 AttachInfo 传进去,在 子 View 中给 mAttachInfo 赋值。
// ViewGroup
void dispatchAttachedToWindow(AttachInfo info, int visibility) {
mGroupFlags |= FLAG_PREVENT_DISPATCH_ATTACHED_TO_WINDOW;
super.dispatchAttachedToWindow(info, visibility);
mGroupFlags &= ~FLAG_PREVENT_DISPATCH_ATTACHED_TO_WINDOW;
final int count = mChildrenCount;
final View[] children = mChildren;
for (int i = 0; i < count; i++) {
final View child = children[i];
child.dispatchAttachedToWindow(info,
combineVisibility(visibility, child.getVisibility()));
}
final int transientCount = mTransientIndices == null ? 0 : mTransientIndices.size();
for (int i = 0; i < transientCount; ++i) {
View view = mTransientViews.get(i);
view.dispatchAttachedToWindow(info,
combineVisibility(visibility, view.getVisibility()));
}
}
// View
void dispatchAttachedToWindow(AttachInfo info, int visibility) {
mAttachInfo = info;
// …
}
看到这里,大家可能忘记我们开始刚刚要做什么了。
我们是在看 View.post 的流程,再回顾一下 View.post 的代码:
// View.java
public boolean post(Runnable action) {
final AttachInfo attachInfo = mAttachInfo;
if (attachInfo != null) {
return attachInfo.mHandler.post(action);
}
getRunQueue().post(action);
return true;
}
现在我们知道 attachInfo 是什么了,是 ViewRootImpl 首次触发 performTraversals 传进来的,也就是触发 performTraversals 之后,View.post 都是通过 ViewRootImpl 内部的 Handler 进行处理的。
如果在 performTraversals 之前或者 mAttachInfo 置为空以后进行执行,则通过 RunQueue 进行处理。
那我们再看看 getRunQueue().post(action); 做了些什么事情。
这里的 RunQueue 其实是 HandlerActionQueue。
HandlerActionQueue 的代码看一下。
自我介绍一下,小编13年上海交大毕业,曾经在小公司待过,也去过华为、OPPO等大厂,18年进入阿里一直到现在。
深知大多数初中级Android工程师,想要提升技能,往往是自己摸索成长或者是报班学习,但对于培训机构动则近万的学费,着实压力不小。自己不成体系的自学效果低效又漫长,而且极易碰到天花板技术停滞不前!
因此收集整理了一份《2024年Android移动开发全套学习资料》,初衷也很简单,就是希望能够帮助到想自学提升又不知道该从何学起的朋友,同时减轻大家的负担。
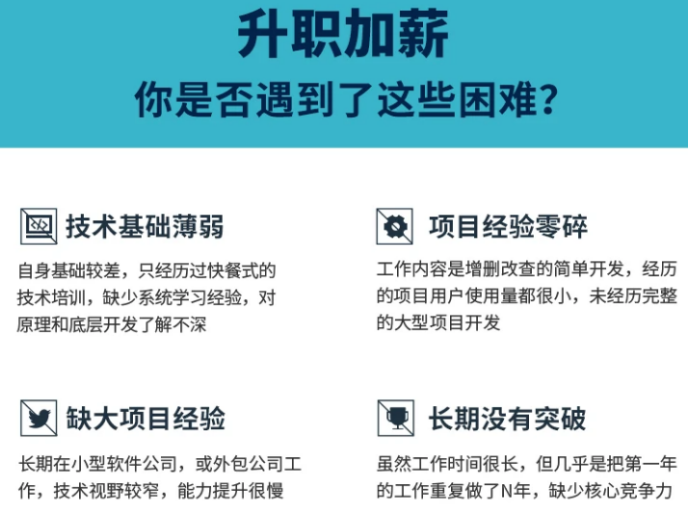
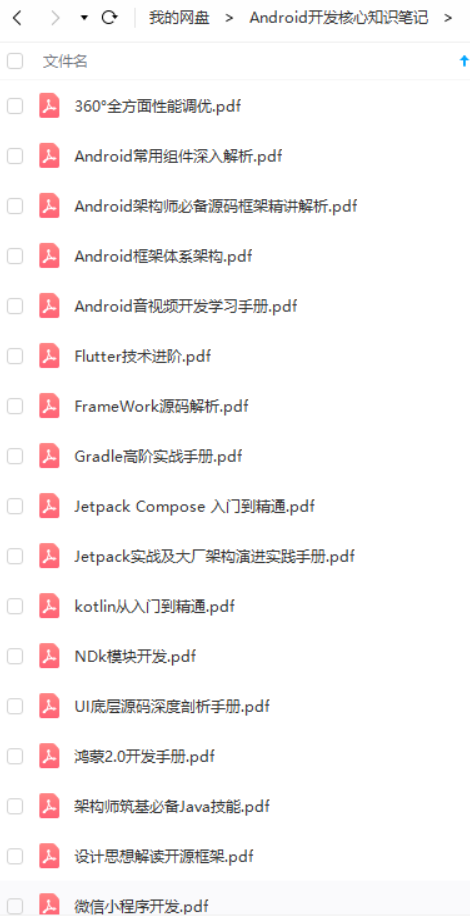

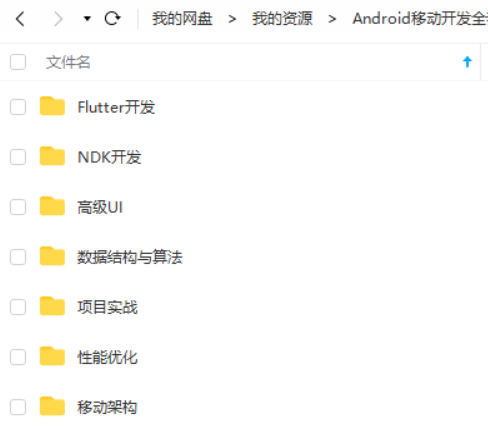
既有适合小白学习的零基础资料,也有适合3年以上经验的小伙伴深入学习提升的进阶课程,基本涵盖了95%以上Android开发知识点,真正体系化!
由于文件比较大,这里只是将部分目录截图出来,每个节点里面都包含大厂面经、学习笔记、源码讲义、实战项目、讲解视频,并且会持续更新!
如果你觉得这些内容对你有帮助,可以扫码获取!!(备注:Android)

尾声
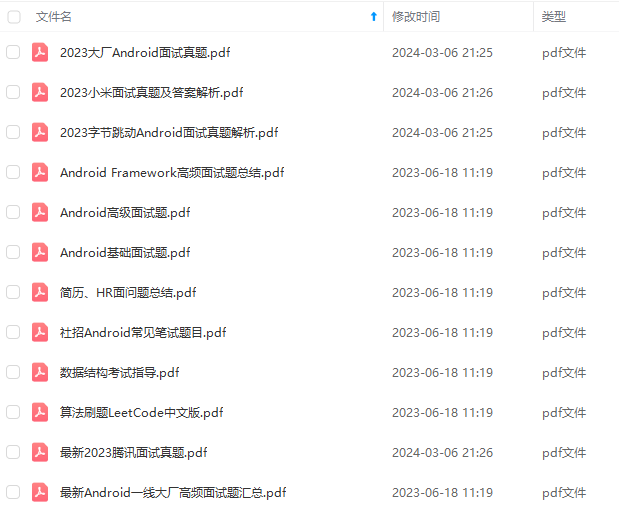
在我的博客上很多朋友都在给我留言,需要一些系统的面试高频题目。之前说过我的复习范围无非是个人技术博客还有整理的笔记,考虑到笔记是手写版不利于保存,所以打算重新整理并放到网上,时间原因这里先列出面试问题,题解详见:

展示学习笔记


《互联网大厂面试真题解析、进阶开发核心学习笔记、全套讲解视频、实战项目源码讲义》点击传送门即可获取!
升又不知道该从何学起的朋友,同时减轻大家的负担。**
[外链图片转存中…(img-8qSGvNRV-1713435184120)]
[外链图片转存中…(img-58Sw8iUw-1713435184122)]
[外链图片转存中…(img-1slVvK9t-1713435184123)]
[外链图片转存中…(img-vx4gIena-1713435184124)]
[外链图片转存中…(img-g3Apc7bk-1713435184125)]
既有适合小白学习的零基础资料,也有适合3年以上经验的小伙伴深入学习提升的进阶课程,基本涵盖了95%以上Android开发知识点,真正体系化!
由于文件比较大,这里只是将部分目录截图出来,每个节点里面都包含大厂面经、学习笔记、源码讲义、实战项目、讲解视频,并且会持续更新!
如果你觉得这些内容对你有帮助,可以扫码获取!!(备注:Android)
尾声
在我的博客上很多朋友都在给我留言,需要一些系统的面试高频题目。之前说过我的复习范围无非是个人技术博客还有整理的笔记,考虑到笔记是手写版不利于保存,所以打算重新整理并放到网上,时间原因这里先列出面试问题,题解详见:
[外链图片转存中…(img-MXSij8Pd-1713435184126)]
展示学习笔记
[外链图片转存中…(img-GuuNBo98-1713435184127)]
[外链图片转存中…(img-v9uouwfB-1713435184127)]
《互联网大厂面试真题解析、进阶开发核心学习笔记、全套讲解视频、实战项目源码讲义》点击传送门即可获取!


 2368
2368

 被折叠的 条评论
为什么被折叠?
被折叠的 条评论
为什么被折叠?
 到【灌水乐园】发言


