


 本文介绍了Kubernetes中的污点容忍度机制,如何通过taints和tolerations控制节点和Pod之间的交互,以及如何利用NoSchedule和NoExecute等效果定义节点排斥策略。通过实例展示了如何在节点上打上污点、设置pod的容忍度,以及调度决策过程。
污点容忍度
给了节点选则的主动权,我们给节点打一个污点,不容忍的 pod 就运行不上来,污点就是定义在节点上的键值属性数据,可以定决定拒绝那些 pod
taints 是键值数据,用在节点上,定义污点
tolerations 是键值数据,用在 pod 上,定义容忍度,能容忍哪些污点
pod 亲和性是 pod 属性;但是污点是节点的属性,污点定义在 nodeSelector 上
[root@k8smaster ~]# kubectl describe nodes k8smaster

Taints:             node-role.kubernetes.io/master:NoSchedule

[root@k8smaster ~]# kubectl explain node.spec.taints
KIND:     Node
VERSION:  v1

RESOURCE: taints <[]Object>

DESCRIPTION:
     If specified, the node's taints.

     The node this Taint is attached to has the "effect" on any pod that does
     not tolerate the Taint.

FIELDS:
   effect	<string> -required-
     Required. The effect of the taint on pods that do not tolerate the taint.
     Valid effects are NoSchedule, PreferNoSchedule and NoExecute.

   key	<string> -required-
     Required. The taint key to be applied to a node.

   timeAdded	<string>
     TimeAdded represents the time at which the taint was added. It is only
     written for NoExecute taints.

   value	<string>
     The taint value corresponding to the taint key.

#taints 的 effect 用来定义对 pod 对象的排斥等级(效果)
NoSchedule:
仅影响 pod 调度过程,当 pod 能容忍这个节点污点,就可以调度到当前节点,后来这个节点的污点改了,加了一个新的污点,使得之前调度的 pod 不能容忍了,那这个 pod 会怎么处理,对现存的 pod 对象不产生影响
NoExecute:
既影响调度过程,又影响现存的 pod 对象,如果现存的 pod 不能容忍节点后来加的污点,这个 pod 就会被驱逐
PreferNoSchedule:
最好不,也可以,是 NoSchedule 的柔性版本,如果没有定义容忍度会到这里
在 pod 对象定义容忍度的时候支持两种操作:
1.等值密钥:key 和 value 上完全匹配
2.存在性判断:key 和 effect 必须同时匹配,value 可以是空
在 pod 上定义的容忍度可能不止一个,在节点上定义的污点可能多个,需要琢个检查容忍度和污点能否匹配,每一个污点都能被容忍,才能完成调度,如果不能容忍怎么办,那就需要看 pod 的容忍度了
[root@k8smaster ~]# kubectl describe nodes k8smaster
查看 master 这个节点是否有污点,显示如下:

上面可以看到 master 这个节点的污点是 Noschedule
所以我们创建的 pod 都不会调度到 master 上,因为我们创建的 pod 没有容忍度
[root@k8smaster ~]# kubectl describe pods kube-apiserver-k8smaster -n kube-system
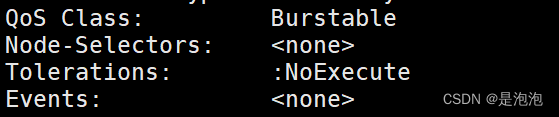
可以看到这个 pod 的容忍度是 NoExecute,则可以调度到 master1 上
#管理节点污点
[root@k8smaster ~]# kubectl taint --help
例:把 node2 当成是生产环境专用的,其他 node 是测试的
[root@k8smaster ~]# kubectl taint node k8snode2 nodetype=production:NoSchedule
node/k8snode2 tainted
给 node2 打污点,pod 如果不能容忍就不会调度过来
[root@k8smaster ~]# vim pod-taint.yaml
apiVersion: v1
kind: Pod
metadata:
name: taint-pod
namespace: default
labels:
tomcat: tomcat-pod
spec:
containers:
- name: taint-pod
ports:
- containerPort: 8080
image: tomcat
imagePullPolicy: IfNotPresent
#yaml没有写污点容忍,所以调度不过去。
[root@k8smaster ~]# kubectl apply -f pod-taint.yaml
pod/taint-pod created
[root@k8smaster ~]# kubectl get pods -o wide
NAME READY STATUS NODE NOMINATED NODE
taint-pod 1/1 Running k8snode <none>
可以看到都被调度到 node1 上了,因为 node2 这个节点打了污点,而我们在创建 pod 的时候没有容忍度,所以 node2 上不会有 pod 调度上去的。
给 node1 也打上污点
[root@k8smaster ~]# kubectl delete -f pod-taint.yaml
[root@k8smaster ~]# kubectl taint node xianchaonode1 node-type=dev:NoExecute
[root@k8smaster ~]# kubectl get pods -o wide
显示如下:
[root@k8smaster node]# kubectl get pods -o wide
NAME READY STATUS RESTARTS AGE IP NODE NOMINATED NODE
taint-pod 0/1 Pending 0 37s <none> k8snode <none>
上面可以看到已经存在的 pod 节点都被撵走了
[root@k8smaster node]# vim pod-demo-1.yaml
apiVersion: v1
kind: Pod
metadata:
name: myapp-deploy
namespace: default
labels:
app: myapp
release: canary
spec:
containers:
- name: myapp
image: nginx
ports:
- name: http
containerPort: 80
tolerations:
- key: "node-type"
operator: "Equal"
value: "production"
effect: "NoExecute"
tolerationSeconds: 3600
[root@k8smaster node]# kubectl apply -f pod-demo-1.yaml
pod/myapp-deploy created
[root@k8smaster node]# kubectl get pods
NAME READY STATUS RESTARTS AGE
myapp-deploy 0/1 Pending 0 16s
还是显示 pending,因为我们使用的是 equal(等值匹配),所以 key 和 value,effect 必须和node 节点定义的污点完全匹配才可以,把上面配置 effect: "NoExecute"变成 effect: "NoSchedule"成,tolerationSeconds: 3600 这行去掉.
[root@k8smaster node]# kubectl apply -f pod-demo-1.yaml
pod/myapp-deploy2 created
[root@k8smaster node]# kubectl get pods
myapp-deploy 1/1 Running 0 17s k8snode2
上面就可以调度到 node2 上了,因为在 pod 中定义的容忍度能容忍 node 节点上的污点
#再次修改
tolerations:
- key: "node-type"
operator: "Exists"
value: ""
effect: "NoSchedule"
只要对应的键是存在的,exists,其值被自动定义成通配符
[root@k8smaster node]# kubectl delete -f pod-demo-1.yaml
[root@k8smaster node]# kubectl apply -f pod-demo-1.yaml
[root@k8smaster node]# kubectl get pods
发现还是调度到 node2 上
myapp-deploy 1/1 Running 0 17s k8snode2
再次修改
tolerations:
- key: "node-type"
operator: "Exists"
value: ""


**既有适合小白学习的零基础资料,也有适合3年以上经验的小伙伴深入学习提升的进阶课程,涵盖了95%以上大数据知识点,真正体系化!**
**由于文件比较多,这里只是将部分目录截图出来,全套包含大厂面经、学习笔记、源码讲义、实战项目、大纲路线、讲解视频,并且后续会持续更新**
**[需要这份系统化资料的朋友,可以戳这里获取](https://bbs.csdn.net/topics/618545628)**
*既有适合小白学习的零基础资料,也有适合3年以上经验的小伙伴深入学习提升的进阶课程,涵盖了95%以上大数据知识点,真正体系化!**
**由于文件比较多,这里只是将部分目录截图出来,全套包含大厂面经、学习笔记、源码讲义、实战项目、大纲路线、讲解视频,并且后续会持续更新**
**[需要这份系统化资料的朋友,可以戳这里获取](https://bbs.csdn.net/topics/618545628)**


 2719
2719


 被折叠的 条评论
为什么被折叠?
被折叠的 条评论
为什么被折叠?
 到【灌水乐园】发言


