


文章目录

一、常见反爬机制及其破解方式
封禁IP,使用cookie等前面文章已经讲过
现在主要将下面的:
~ 验证码
—> 文字验证码 —> OCR(光学文字识别)—> 接口 / easyocr
程序自己解决不了的问题就可以考虑使用三方接口(付费/免费)
—> 行为验证码 —> 超级鹰
~ 手机号+短信验证码
—> 接码平台
~ 动态内容
—> JavaScript逆向 —> 找到提供数据的API接口
—> 手机抓接口 —> 抓包工具(Charles / Fiddler)
—> Selenium直接模拟浏览器操作获取动态内容
~ find_element_by_xxx / find_elements_by_xxx
~ page_source —> 获取包含动态内容的网页源代码
—> JavaScript加密和混淆技术 —> 读懂JavaScript是反反爬的前提
~ 字体反爬 / 内容来自于抠图
—> 例子
bytes —> 不变字节串 —> 二进制 —> BytesIO
str —> 不变字符串 —> 可阅读的字符 —> StringIO
二、调用三方API接口数据(天行数据)
import requests

for page in range(1, 6):
    response = requests.get(
        'http://api.tianapi.com/topnews/index',
        params={
            'key': 'd5eace66dccd771e36767ce3563efa09',
            'page': page,
            'num': 20,
            'word': '华为',
            'src': '人民日报'
        }
    )
    result = response.json()
    for news in result\['newslist'\]:
        print(news\['title'\])
        print(news\['url'\])
三、OCR(光学文字识别)库
python 自带的easyocr库
import easyocr
reader = easyocr.Reader(\['ch\_sim', 'en'\], gpu=False)
print(reader.readtext('./files/captcha.jpg', detail=0))
例子:阿里云邮箱自动登陆
import io

import easyocr

from PIL import Image
from selenium import webdriver
from selenium.webdriver.common.by import By
from selenium.webdriver.support import expected\_conditions
from selenium.webdriver.support.wait import WebDriverWait

browser = webdriver.Chrome()
browser.set\_window\_size(1280, 960)
browser.get('http://mail.1000phone.com/')
# 隐式等待(下面的方法在工作时如果取不到就等10秒)
browser.implicitly\_wait(10)
# 显式等待
wait = WebDriverWait(browser, 10)
wait.until(expected\_conditions.presence\_of\_element\_located((By.CSS\_SELECTOR, '.login\_panel\_iframe')))
iframe1 = browser.find\_element\_by\_css\_selector('.login\_panel\_iframe')
# 记录iframe1的位置(相对位置)
x1, y1 = iframe1.location\['x'\], iframe1.location\['y'\]
# Chrome对象的switch\_to属性的frame方法,可以从页面切换到iframe中
browser.switch\_to.frame(iframe1)
iframe2 = browser.find\_element\_by\_css\_selector('#ding-login-iframe')
x2, y2 = iframe2.location\['x'\], iframe2.location\['y'\]
browser.switch\_to.frame(iframe2)
username\_input = browser.find\_element\_by\_css\_selector('#username')
# 模拟用户输入
username\_input.send\_keys('xx@1000phone.com')
password\_input = browser.find\_element\_by\_css\_selector('#password')
password\_input.send\_keys('xxxxx!!')
# 创建一个等待对象
wait = WebDriverWait(browser, 10)
wait.until(expected\_conditions.element\_to\_be\_clickable((By.CSS\_SELECTOR, '#login\_checkcode\_ico')))
captcha\_img = browser.find\_element\_by\_css\_selector('#login\_checkcode\_ico')
# WebElement对象的size属性代表元素宽度和高度,location属性代表元素在窗口中的位置
size, location = captcha\_img.size, captcha\_img.location
x3, y3, width, height = location\['x'\], location\['y'\], size\['width'\], size\['height'\]
# 截取整个浏览器窗口的图片获得图片的二进制数据
image\_data = browser.get\_screenshot\_as\_png()
# bytes(只读字节串) ----> io.BytesIO(可写字节串)---> getvalue() ---> bytes
# str(只读字符串) ----> io.StringIO(可写字符串)---> getvalue() ---> str
browser\_image = Image.open(io.BytesIO(image\_data))
# 从截图上剪裁出验证码的图片
x, y = x1 + x2 + x3, y1 + y2 + y3
# Windows系统的写法 ---> 如果截图有问题就把坐标写死
# print(x, y, width, height)
checkcode\_image = browser\_image.crop((x \* 1.25, y \* 1.25, (x + width) \* 1.25, (y + height) \* 1.25))
# macOS系统的写法
# checkcode\_image = browser\_image.crop((x \* 2, y \* 2, (x + width) \* 2, (y + height) \* 2))
checkcode\_image.save('result.png')
# 通过easyocr做光学文字识别
reader = easyocr.Reader(\['en'\], gpu=False)
code = reader.readtext('result.png', detail=0)\[0\]
# 将识别出的验证码输入文本框
checkcode\_input = browser.find\_element\_by\_css\_selector('#login\_checkcode')
checkcode\_input.send\_keys(code)
login\_button = browser.find\_element\_by\_css\_selector('#login\_submit\_btn')
# 模拟用户点击
login\_button.click()
四、第三方打码平台(超级鹰打码平台)
补充:需要使用python 自带pillow库
"""
Pillow库 ---> PIL ---> Python Image Library
"""
from PIL import Image, ImageFilter

# 加载图像
guido\_image = Image.open('guido.jpg')
# 剪裁
guido\_image.crop((80, 40, 310, 350)).show()
# 滤镜
guido\_image.filter(ImageFilter.CONTOUR).show()
# 缩略图
guido\_image.thumbnail((125, 185))
# 显示图像
guido\_image.show()
编写超级鹰打码平台类
from hashlib import md5

import requests


class ChaojiyingClient:

    def \_\_init\_\_(self, username, password, soft\_id):
        self.username = username
        password = password.encode('utf8')
        self.password = md5(password).hexdigest()
        self.soft\_id = soft\_id
        self.base\_params = {
            'user': self.username,
            'pass2': self.password,
            'softid': self.soft\_id,
        }
        self.headers = {
            'Connection': 'Keep-Alive',
            'User-Agent': 'Mozilla/4.0 (compatible; MSIE 8.0; Windows NT 5.1; Trident/4.0)',
        }

    def post\_pic(self, image\_data, code\_type):
        """
        image\_data: 图片字节
        code\_type: 验证码类型 参考 http://www.chaojiying.com/price.html
        """
        params = {
            'codetype': code\_type,
        }
        params.update(self.base\_params)
        files = {'userfile': ('ccc.jpg', image\_data)}
        response = requests.post(
            url='http://upload.chaojiying.net/Upload/Processing.php',
            data=params,
            files=files,
            headers=self.headers
        )
        return response.json()

    # 超级鹰错误反馈函数(仅用于给超级鹰平台反馈)
    def report\_error(self, im\_id):
        """
        im\_id:报错题目的图片ID
        """
        params = {
            'id': im\_id,
        }
        params.update(self.base\_params)
        r = requests.post('http://upload.chaojiying.net/Upload/ReportError.php', data=params, headers=self.headers)
        return r.json()


if \_\_name\_\_ == '\_\_main\_\_':
    chaojiying = ChaojiyingClient('账户', '密码x', 'ID')  # 用户中心>>软件ID 生成一个替换 96001
    with open('img.png', 'rb') as file:
        image\_data = file.read()  # 本地图片文件路径 来替换 a.jpg 有时WIN系统须要//
        print(chaojiying.post\_pic(image\_data, 1902))  # 1902 验证码类型  官方网站>>价格体系 3.4+版 print 后要加()
例子:使用超级鹰进行阿里云邮箱自动登陆
import io

import easyocr

from PIL import Image
from selenium import webdriver
from selenium.webdriver.common.by import By
from selenium.webdriver.support import expected\_conditions
from selenium.webdriver.support.wait import WebDriverWait

from chaojiying import ChaojiyingClient

browser = webdriver.Chrome()
browser.set\_window\_size(1280, 960)
browser.get('http://mail.1000phone.com/')
# 隐式等待(下面的方法在工作时如果取不到就等10秒)
browser.implicitly\_wait(10)
# 显式等待
wait = WebDriverWait(browser, 10)
wait.until(expected\_conditions.presence\_of\_element\_located((By.CSS\_SELECTOR, '.login\_panel\_iframe')))
iframe1 = browser.find\_element\_by\_css\_selector('.login\_panel\_iframe')
# 记录iframe1的位置(相对位置)
x1, y1 = iframe1.location\['x'\], iframe1.location\['y'\]
# Chrome对象的switch\_to属性的frame方法,可以从页面切换到iframe中
browser.switch\_to.frame(iframe1)
iframe2 = browser.find\_element\_by\_css\_selector('#ding-login-iframe')
x2, y2 = iframe2.location\['x'\], iframe2.location\['y'\]
browser.switch\_to.frame(iframe2)
username\_input = browser.find\_element\_by\_css\_selector('#username')
# 模拟用户输入
username\_input.send\_keys('xxxx.com')
password\_input = browser.find\_element\_by\_css\_selector('#password')
password\_input.send\_keys('xxxx!!')
# 创建一个等待对象
wait = WebDriverWait(browser, 10)
wait.until(expected\_conditions.element\_to\_be\_clickable((By.CSS\_SELECTOR, '#login\_checkcode\_ico')))
captcha\_img = browser.find\_element\_by\_css\_selector('#login\_checkcode\_ico')
# WebElement对象的size属性代表元素宽度和高度,location属性代表元素在窗口中的位置
size, location = captcha\_img.size, captcha\_img.location
x3, y3, width, height = location\['x'\], location\['y'\], size\['width'\], size\['height'\]
# 截取整个浏览器窗口的图片获得图片的二进制数据
image\_data = browser.get\_screenshot\_as\_png()
# bytes(只读字节串) ----> io.BytesIO(可写字节串)---> getvalue() ---> bytes
# str(只读字符串) ----> io.StringIO(可写字符串)---> getvalue() ---> str
browser\_image = Image.open(io.BytesIO(image\_data))
# 从截图上剪裁出验证码的图片
x, y = x1 + x2 + x3, y1 + y2 + y3
# Windows系统的写法 ---> 如果截图有问题就把坐标写死
# print(x, y, width, height)
checkcode\_image = browser\_image.crop((x \* 1.25, y \* 1.25, (x + width) \* 1.25, (y + height) \* 1.25))
# macOS系统的写法
# checkcode\_image = browser\_image.crop((x \* 2, y \* 2, (x + width) \* 2, (y + height) \* 2))
checkcode\_image.save('result.png')
# 通过超级鹰打码平台打码
chaojiying = ChaojiyingClient('账户', '密码', 'ID')
with open('result.png', 'rb') as file:
    image\_data = file.read()
    result\_dict = chaojiying.post\_pic(image\_data, 1902)
# 将识别出的验证码输入文本框
checkcode\_input = browser.find\_element\_by\_css\_selector('#login\_checkcode')
checkcode\_input.send\_keys(result\_dict\['pic\_str'\])
login\_button = browser.find\_element\_by\_css\_selector('#login\_submit\_btn')
# 模拟用户点击
login\_button.click()
五、通过接码平台接收手机验证码(隐私短信平台)
通过隐私短信平台接收验证码(免费)
import re

import bs4
import requests

pattern = re.compile(r'\\d{4,6}')

resp = requests.get('https://www.yinsiduanxin.com/china-phone-number/verification-code-16521686439.html')
soup = bs4.BeautifulSoup(resp.text, 'html.parser')
# print(resp.text)
td = soup.select\_one('body > div.container > div:nth-child(4) > div:nth-child(3) > div.main > div.layui-row > table > tbody > tr:nth-child(1) > td:nth-child(2)')
results = pattern.findall(td.text)
print(results\[0\])
仅提供参考思路,网站在不断更新
关于Python技术储备
学好 Python 不论是就业还是做副业赚钱都不错,但要学会 Python 还是要有一个学习规划。最后大家分享一份全套的 Python 学习资料,给那些想学习 Python 的小伙伴们一点帮助!
保存图片微信扫描下方CSDN官方认证二维码免费领取【保证100%免费】

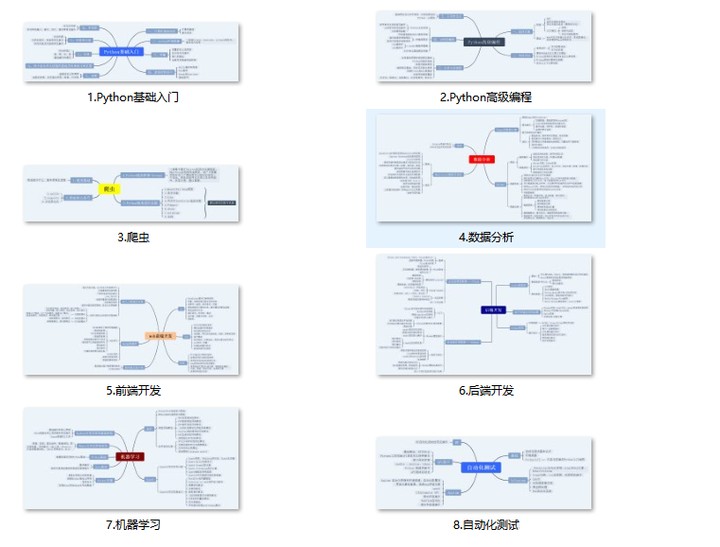
一、Python所有方向的学习路线
Python所有方向的技术点做的整理,形成各个领域的知识点汇总,它的用处就在于,你可以按照上面的知识点去找对应的学习资源,保证自己学得较为全面。
二、Python基础学习视频
② 路线对应学习视频
还有很多适合0基础入门的学习视频,有了这些视频,轻轻松松上手Python~在这里插入图片描述

③练习题
每节视频课后,都有对应的练习题哦,可以检验学习成果哈哈!

因篇幅有限,仅展示部分资料
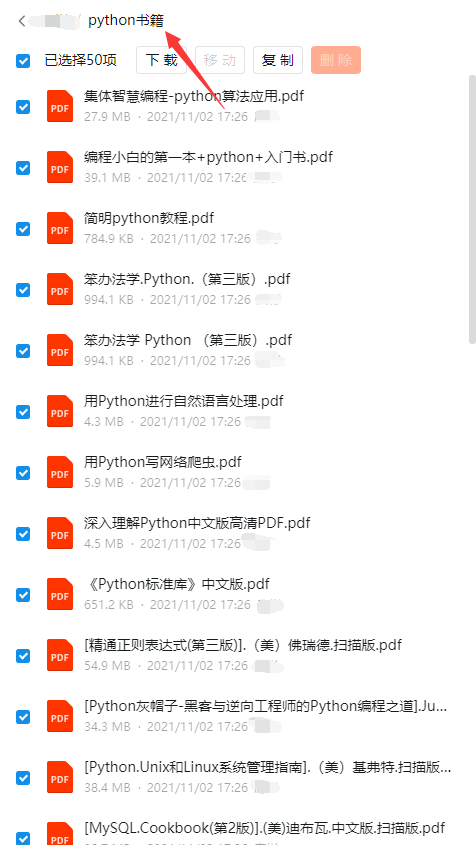
三、精品Python学习书籍
当我学到一定基础,有自己的理解能力的时候,会去阅读一些前辈整理的书籍或者手写的笔记资料,这些笔记详细记载了他们对一些技术点的理解,这些理解是比较独到,可以学到不一样的思路。
四、Python工具包+项目源码合集
①Python工具包
学习Python常用的开发软件都在这里了!每个都有详细的安装教程,保证你可以安装成功哦!

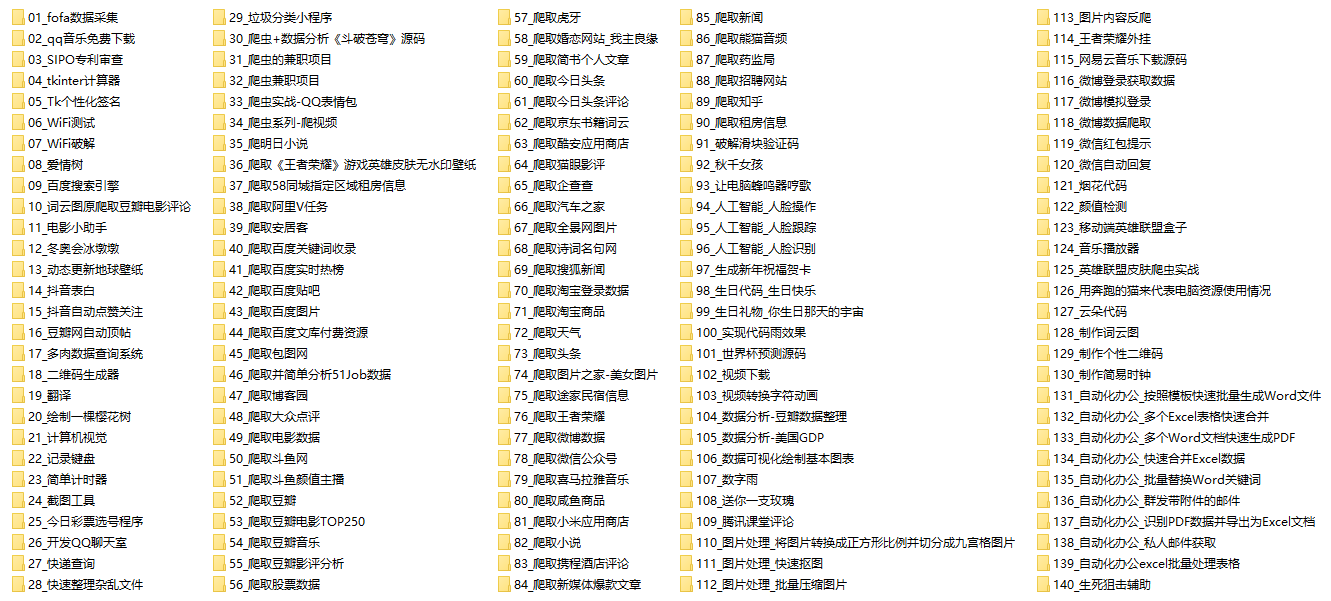
②Python实战案例
光学理论是没用的,要学会跟着一起敲代码,动手实操,才能将自己的所学运用到实际当中去,这时候可以搞点实战案例来学习。100+实战案例源码等你来拿!
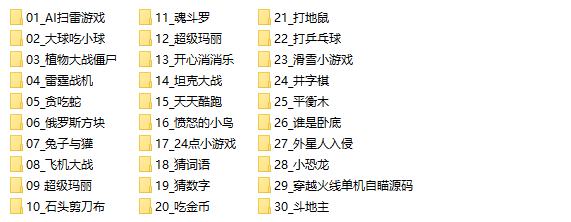
③Python小游戏源码
如果觉得上面的实战案例有点枯燥,可以试试自己用Python编写小游戏,让你的学习过程中增添一点趣味!
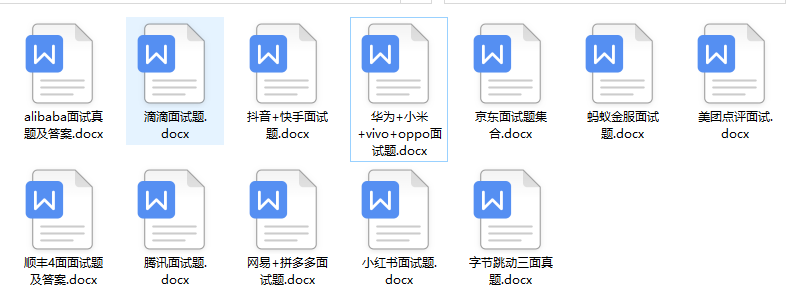
五、面试资料
我们学习Python必然是为了找到高薪的工作,下面这些面试题是来自阿里、腾讯、字节等一线互联网大厂最新的面试资料,并且有阿里大佬给出了权威的解答,刷完这一套面试资料相信大家都能找到满意的工作。
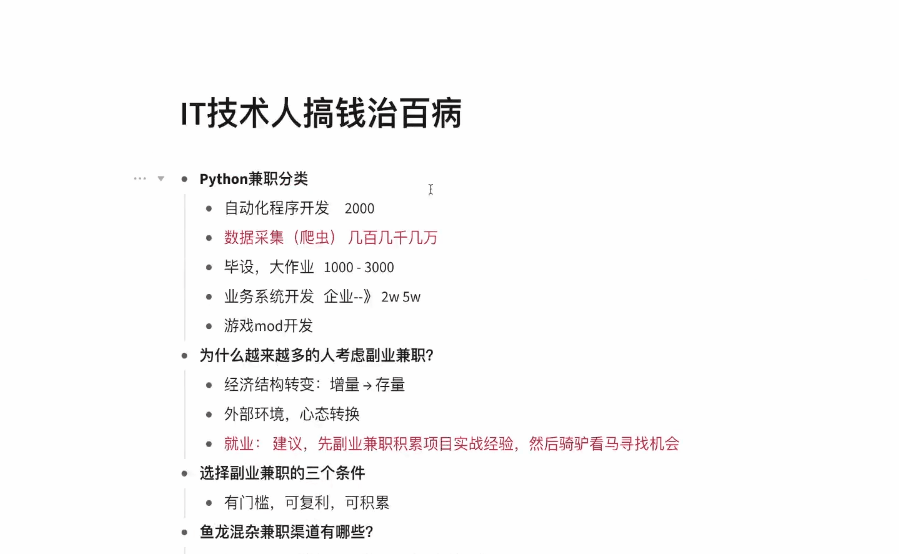
六、Python兼职渠道
而且学会Python以后,还可以在各大兼职平台接单赚钱,各种兼职渠道+兼职注意事项+如何和客户沟通,我都整理成文档了。

这份完整版的Python全套学习资料已经上传CSDN,朋友们如果需要可以保存图片微信扫描下方CSDN官方认证二维码免费领取【保证100%免费】


 1万+
1万+


 被折叠的 条评论
为什么被折叠?
被折叠的 条评论
为什么被折叠?
 到【灌水乐园】发言


