


nginx优化:
nginx应用配置文件的优化:
nginx的性能优化:
| 开启网页压缩 | gzip on; |
| 页面缓存 | expires 缓存时间; |
| 连接保持超时 | keepalive_timeout 服务端超时时间 客户端超时时间; |
| 设置工作进程数 | work_processes 与服务器CPU数量相同或auto |
| 设置工作进程连接数 | worker_connections worker_rlimit_nofile |
| 工作进程静态绑核 | worker_cpu_affinity |
| 开启高效文件传输模式 | sendfile on; tcp_nopush on; tcp_nodelay on; |
| IO多路复用 | use epoll; |
| 连接优化 | multi_accept on;(一个进程同时接受多个网络连接) accept_mutex on;(以串行方式接入新连接,防止惊群现象发生) |
nginx的安全优化:
| 隐藏版本号 | server_tokens off; 修改源代码 nginx.h |
| 防盗链 | valid_referers if ($invalid_referer) {rewrite ....} rewrite地址重写 |
| 访问控制 | deny/allow |
| 设置运行用户/组 | user 用户名 组名; |
| 限制请求数 | limit_req_zone limit_req |
| 限制连接数 | limit_conn_zone limit_conn |
日志分割
shell脚本 + crontab 
系统内核优化:
| /etc/sysctl.conf 内核参数配置文件 | #用于解决系统存在大量TIME WAIT状态连接的问题 |
| net.ipv4.tcp_syncookies=1 | 表示开启SYN Cookies。当出现SYN等待队列溢出时,启用cookies来处理,可防范少量SYN攻击 |
| net.ipv4.tcp_tw_reuse=1 | 表示开启重用。允许将TIME-WAIT sockets重新用于新的TCP连接 |
| net.ipv4.tcp_tw_recycle=1 | 表示开启TCP连接中TIME-WAIT sockets的快速回收 |
| net.ipv4.tcp_fin_timeout=30 | 修改MSL值,系统默认的TIMEOUT时间 |
#如果连接数本身就很多,可再优化TCP的可用端口范围,进一步提升服务器的并发能力
| net.ipv4.tcp_keepalive_time=1200 | #当keepalive启用时,TCP发送keepalive探测消息的频率,确认客户端是否断网 |
| net.ipv4.ip_local_port_range=1024 65535 | #用于向外连接的端口范围。缺省情况下很小,为32768 60999 |
| net.ipv4.tcp_max_syn_backlog=8192 | #SYN队列长度,默认为1024,加大队列长度为8192,可容纳更多等待连接的网络连接数 |
| net.ipv4.tcp_max_tw_buckets=5000 | #表示系统同时保持TIME WAIT的最大数量 |
| net.core.somaxconn=65535 | #一个端口能够监听的最大连接数 |
#如果需要IP路由转发 net.ipv4.ip_forward=1
/etc/security/limits.conf 内核资源限制文件
| * | soft | noproc | 65535 | 打开系统进程数 |
| * | hard | noproc | 65535 | |
| * | soft | nofile | 65535 | 进程打开文件数 |
| * | hard | nofile | 65535 |
你用过哪些nginx模块?
| http_stub_status_module | 访问状态统计模块 |
| http_gzip_module | 网页压缩模块 |
| http_rewrite_module | URL地址重写模块 |
| http_ssl_module | https安全加密模块 |
| http_auth_basic_module | 网页用户认证模块 |
| http_fastcgi_module | fastcgi转发模块 |
| http_image_filter_module | 图片处理模块 |
| http_mp4/flv_module | mp4/flv视频格式模块 |
| http_limit_req_module | 限制请求数模块 |
| http_limit_conn_module | 限制连接数模块 |
| http_proxy_module | 代理转发模块 |
| http_upstream_*_module | 负载均衡模块 |
| stream | 四层代理转发模块 |
一、配置Nginx隐藏版本号
- 隐藏Nginx版本号,避免安全漏洞泄露
- Nginx隐藏版本号的方法
#####################  快速配置一台nginx服务器   #######################


systemctl stop firewalld.service
setenforce 0


df
mount /dev/sr0 /mnt
yum -y install pcre-devel zlib-devel openssl-devel gcc gcc-c++ make

useradd -M -s /sbin/nologin nginx
cat /etc/passwd | grep nginx:


cd /opt/

[root@l1 opt]# ls
nginx-1.26.0.tar.gz  rh

tar xf nginx-1.26.0.tar.gz


cd nginx-1.26.0/

_______________________________________________________________________________________

./configure \
--prefix=/usr/local/nginx \
--user=nginx \
--group=nginx \
--with-http_stub_status_module

_______________________________________________________________________________________

make -j2 && make install


cd /usr/local/nginx/

ls sbin/
ln -s /usr/local/nginx/sbin/nginx /usr/local/sbin/

nginx -t


cd /usr/lib/systemd/system

vim nginx.service


——————————————————————————————————————————————————————————————————————————————————

[Unit]
Description=nginx
After=network.target

[Service]
Type=forking
PIDFile=/usr/local/nginx/logs/nginx.pid
ExecStart=/usr/local/nginx/sbin/nginx
ExecReload=/bin/kill -s HUP $MAINPID
ExecStop=/bin/kill -s QUIT $MAINPID
PrivateTmp=true

[Install]
WantedBy=multi-user.target


——————————————————————————————————————————————————————————————————————————————————


systemctl daemon-reload
systemctl start nginx
systemctl enable nginx
netstat -lntp | grep nginx
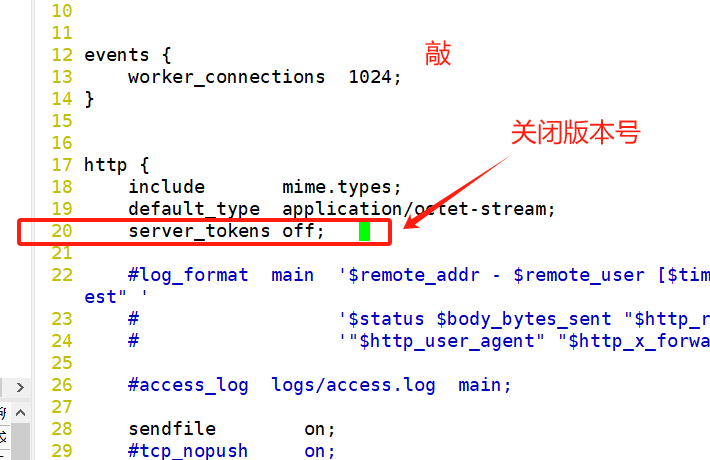
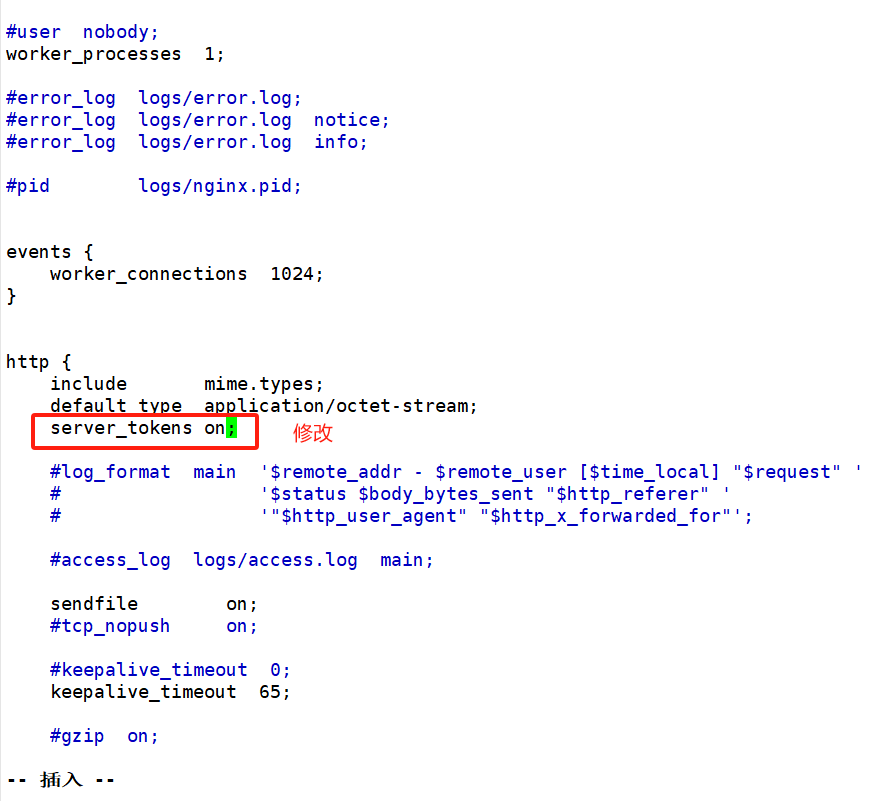
方法一: 修改配置文件法
将nginx的配置文件中server_tokens选项的值设置为off
[root@l1 conf]# cd /usr/local/nginx/conf/
[root@l1 conf]# ls
fastcgi.conf            koi-win             scgi_params
fastcgi.conf.default    mime.types          scgi_params.default
fastcgi_params          mime.types.default  uwsgi_params
fastcgi_params.default  nginx.conf          uwsgi_params.default
koi-utf                 nginx.conf.default  win-utf
[root@l1 conf]# vim nginx.conf
关闭版本号
[root@l1 conf]# nginx -t
nginx: [emerg] unknown directive "server_token" in /usr/local/nginx/conf/nginx.conf:20
nginx: configuration file /usr/local/nginx/conf/nginx.conf test failed
[root@l1 conf]# systemctl reload nginx.service   //重新加载
[root@l1 conf]#
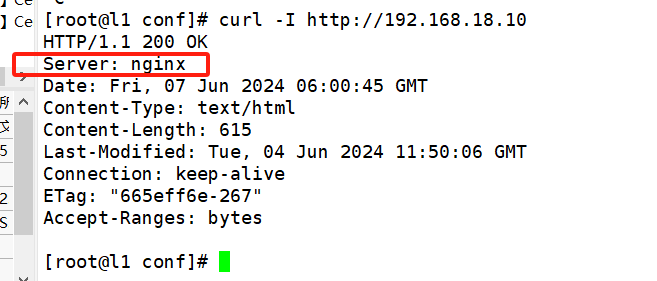
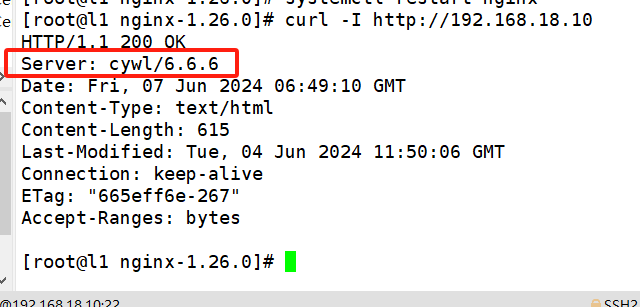
重启服务,访问网站使用curl -l命令检测
systemctl restart ngnix
curl -l ...
[root@l1 conf]# systemctl reload nginx.service
[root@l1 conf]# curl -I http://192.168.18.10
HTTP/1.1 200 OK
Server: nginx
Date: Fri, 07 Jun 2024 06:00:45 GMT
Content-Type: text/html
Content-Length: 615
Last-Modified: Tue, 04 Jun 2024 11:50:06 GMT
Connection: keep-alive
ETag: "665eff6e-267"
Accept-Ranges: bytes
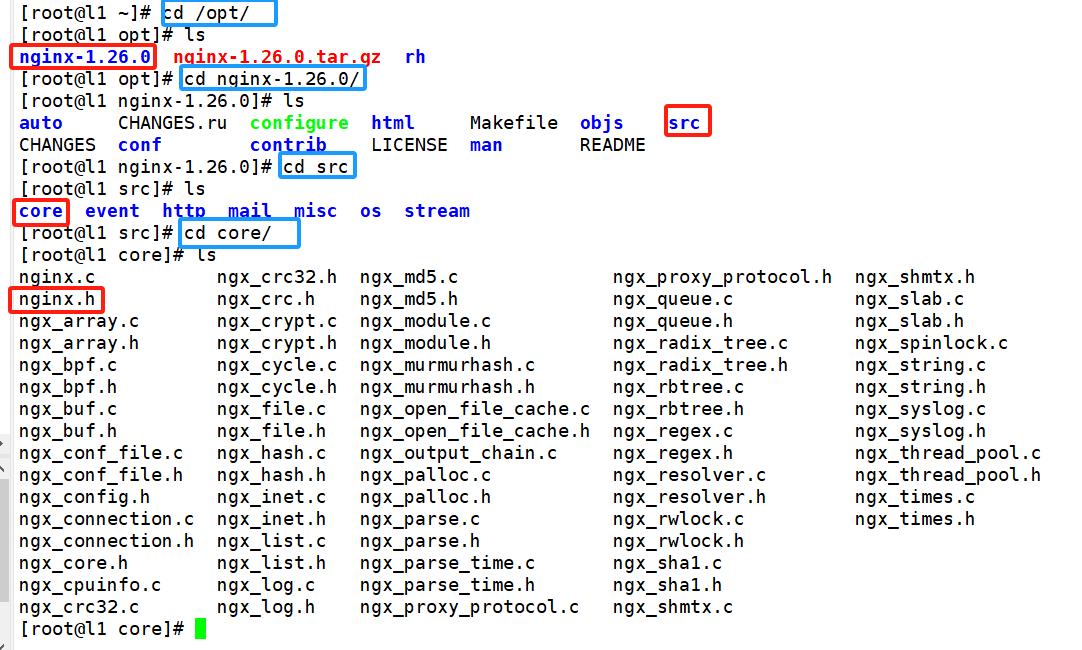
方法二:修改源代码
cd /opt/
ls

cd nginx-1.26.0/
ls

cd src/
ls

cd core/
ls

vim nginx.h
[root@l1 core]# pwd
/opt/nginx-1.26.0/src/core
[root@l1 core]# cp nginx.h nginx.h_bak
[root@l1 core]# vim nginx.h
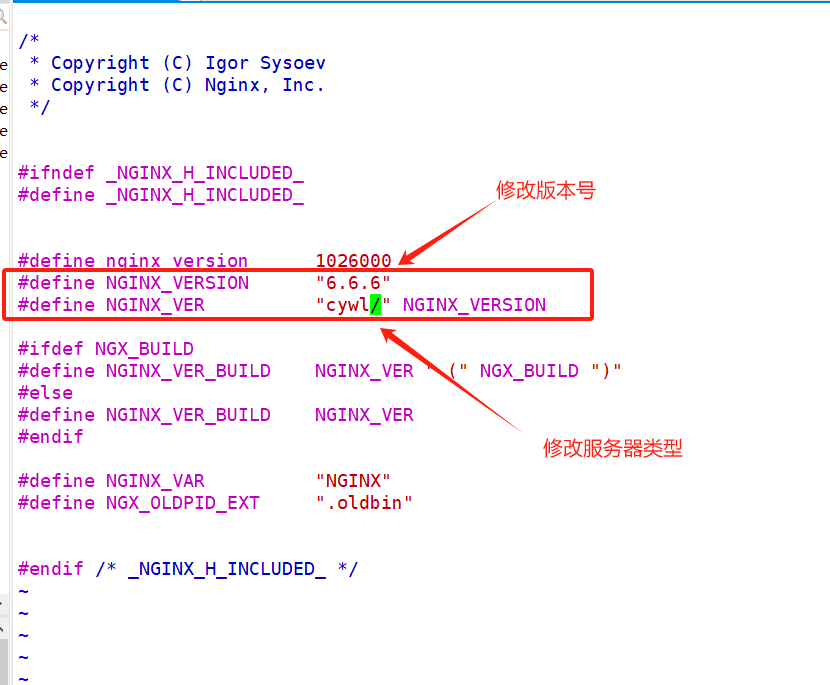
重新编译安装
cd /opt/nginx-1.26.0/

——————————————————————————————————————————————————————————————————————————————
./configure \
--prefix=/usr/local/nginx \
--user=nginx \
--group=nginx \
--with-http_stub_status_module

——————————————————————————————————————————————————————————————————————————————
make -j2 && make install
vim /usr/local/nginx/conf/nginx.conf
systemctl restart nginx

curl -I http://192.168.18.10
方法三 模块法:
headers-more-nginx-module-0.34.tar.gz 插件包,解压到一个目录,编译安装 nginx, ./configure --add-module='模块路径' && make && make install
修改 nginx.conf 文件,在 http 配置块加   more_clear_headers '响应头字段';
即可去除 nginx 响应头任何想去除的字段
二、配置Nginx网页缓存时间
当Nginx将网页数据返回给客户端后,可设置缓存的时间,以方便在日后进行相同内容的请求时直接返回,避免重复请求,加快了访问速度
一般针对静态网页设置,对动态网页不设置缓存时间
设置方法:修改配置文件,在http段、或者server段、或者location段加入对特定内容的过期参数


 824
824

 被折叠的 条评论
为什么被折叠?
被折叠的 条评论
为什么被折叠?
 到【灌水乐园】发言


