


<LinearLayout
android:id=“@+id/linearLayout”
android:layout_width=“match_parent”
android:layout_height=“wrap_content”
android:orientation=“horizontal”
app:layout_constraintEnd_toEndOf=“parent”
app:layout_constraintStart_toStartOf=“parent”
app:layout_constraintTop_toTopOf=“parent”>
<Button
android:id=“@+id/button1”
android:layout_width=“wrap_content”
android:layout_height=“wrap_content”
android:layout_weight=“1”
android:text=“button1”>
<Button
android:id=“@+id/button2”
android:layout_width=“wrap_content”
android:layout_height=“wrap_content”
android:layout_weight=“1”
android:visibility=“gone” //gone 表示控件不可见,也不会占任何的位置,也不会有任何响应。
android:text=“button2”>
<Button
android:id=“@+id/button3”
android:layout_width=“wrap_content”
android:layout_height=“wrap_content”
android:layout_weight=“1”
android:text=“button3”>
效果如图:
学习过HTML的都会知道CSS里的盒模式有个外边距和内边距。
外边距可以设置视图距离父视图上下左右的距离。
内边距可以设置视图内部内容距离自己边框上下左右的距离。
Android 的控件布局其实也用的是这个盒模式。
如果距离父视图上下左右的外边距相同,可以这么设置:
android:layout_margin=“10dp”
我们也可以单独的设置某个外边距:
android:layout_marginTop=“10dp”
android:layout_marginBottom=“10dp”
android:layout_marginLeft=“10dp”
android:layout_marginRight=“10dp”
统一设置上下左右内边距:
android:padding=“5dp”
各自设置内边距:
android:paddingTop=“5dp”
android:paddingBottom=“5dp”
android:paddingLeft=“5dp”
android:paddingRight=“5dp”
====================================================================================
LinearLayout 核心属性:
(1) android:orientation:两个属性值:“vertical” 垂直 “horizontal”水平
(2) android:layout_weight 将父控件的剩余空间按照设置的权重比例再分配

<LinearLayout
android:id=“@+id/linearLayout”
android:layout_width=“match_parent”
android:layout_height=“wrap_content”
android:orientation=“horizontal”
app:layout_constraintEnd_toEndOf=“parent”
app:layout_constraintStart_toStartOf=“parent”
app:layout_constraintTop_toTopOf=“parent”>
<Button
android:id=“@+id/button1”
android:layout_width=“wrap_content”
android:layout_height=“wrap_content”
android:text=“button1”>
<Button
android:id=“@+id/button2”
android:layout_width=“wrap_content”
android:layout_height=“wrap_content”
android:text=“button2”>
<Button
android:id=“@+id/button3”
android:layout_width=“wrap_content”
android:layout_height=“wrap_content”
android:text=“button3”>

<LinearLayout xmlns:android=“http://schemas.android.com/apk/res/android”
xmlns:app=“http://schemas.android.com/apk/res-auto”
xmlns:tools=“http://schemas.android.com/tools”
android:layout_width=“match_parent”
android:orientation=“vertical”
android:layout_height=“match_parent”
tools:context=“.MainActivity”>
<TextView
android:layout_width=“wrap_content”
android:layout_height=“wrap_content”
android:text=“×”
android:textSize=“50dp”
android:layout_marginLeft=“5dp”/>
<TextView
android:layout_width=“wrap_content”
android:layout_height=“wrap_content”
android:layout_marginLeft=“20dp”
android:layout_marginTop=“5dp”
android:text=“微信号/QQ/邮箱登录”
android:textColor=“@color/black”
android:textSize=“30dp”/>
<LinearLayout
android:layout_width=“match_parent”
android:layout_height=“wrap_content”
android:layout_marginTop=“30dp”>
<LinearLayout
android:layout_width=“wrap_content”
android:layout_height=“wrap_content”
android:layout_weight=“1”
android:layout_marginTop=“6dp”
android:orientation=“horizontal”>
<TextView
android:layout_width=“wrap_content”
android:layout_height=“wrap_content”
android:layout_marginLeft=“25dp”
android:text=“账号”
android:textColor=“@color/black”
android:textSize=“25dp” />
<LinearLayout
android:layout_width=“wrap_content”
android:layout_height=“wrap_content”
android:layout_weight=“0”>
<EditText
android:layout_width=“wrap_content”
android:layout_height=“match_parent”
android:text="请填写微信号/QQ号/邮箱 "/>
<LinearLayout
android:layout_width=“match_parent”
android:layout_height=“45dp”
android:layout_marginTop=“10dp”
android:orientation=“horizontal”>
<LinearLayout
android:layout_width=“wrap_content”
android:layout_height=“wrap_content”
android:layout_weight=“1”>
<TextView
android:layout_width=“wrap_content”
android:layout_height=“wrap_content”
android:layout_marginLeft=“25dp”
android:text=“密码”
android:textColor=“@color/black”
android:textSize=“25dp” />
<LinearLayout
android:layout_width=“wrap_content”
android:layout_height=“wrap_content”
android:layout_weight=“0”>
<EditText
android:layout_width=“wrap_content”
android:layout_height=“wrap_content”
android:text="请填写密码 "/>
自我介绍一下,小编13年上海交大毕业,曾经在小公司待过,也去过华为、OPPO等大厂,18年进入阿里一直到现在。
深知大多数初中级Android工程师,想要提升技能,往往是自己摸索成长或者是报班学习,但对于培训机构动则近万的学费,着实压力不小。自己不成体系的自学效果低效又漫长,而且极易碰到天花板技术停滞不前!
因此收集整理了一份《2024年Android移动开发全套学习资料》,初衷也很简单,就是希望能够帮助到想自学提升又不知道该从何学起的朋友,同时减轻大家的负担。
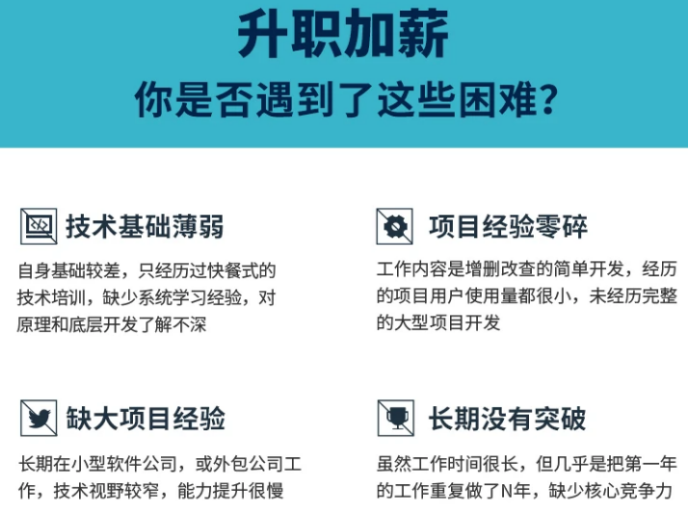
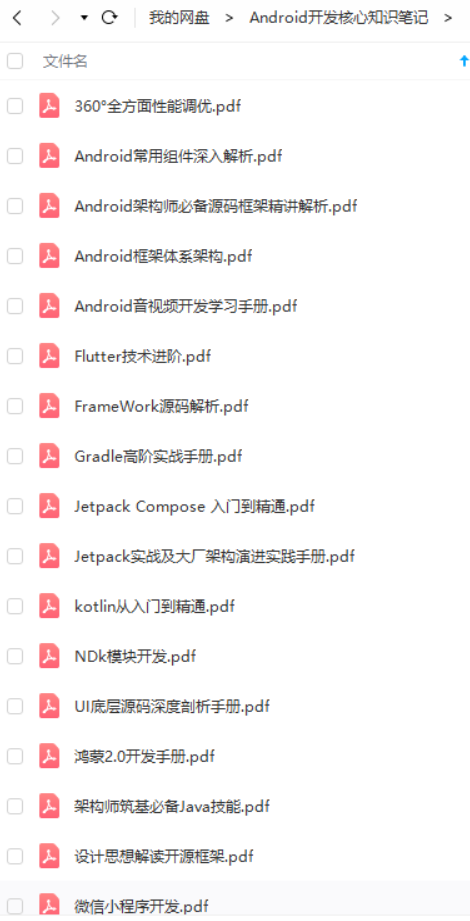
既有适合小白学习的零基础资料,也有适合3年以上经验的小伙伴深入学习提升的进阶课程,基本涵盖了95%以上Android开发知识点,真正体系化!
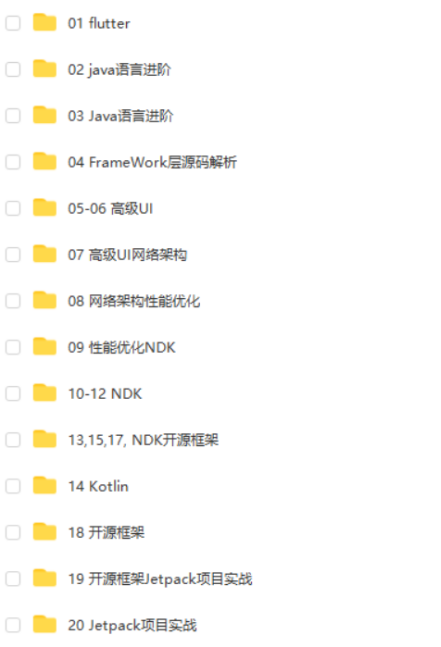
由于文件比较大,这里只是将部分目录截图出来,每个节点里面都包含大厂面经、学习笔记、源码讲义、实战项目、讲解视频,并且会持续更新!
如果你觉得这些内容对你有帮助,可以扫码获取!!(资料价值较高,非无偿)

总结:
各行各样都会淘汰一些能力差的,不仅仅是IT这个行业,所以,不要被程序猿是吃青春饭等等这类话题所吓倒,也不要觉得,找到一份工作,就享受安逸的生活,你在安逸的同时,别人正在奋力的向前跑,这样与别人的差距也就会越来越遥远,加油,希望,我们每一个人,成为更好的自己。
-
BAT大厂面试题、独家面试工具包,
-
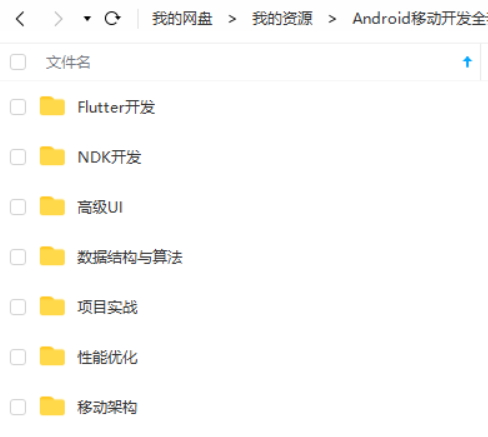
资料包括 数据结构、Kotlin、计算机网络、Framework源码、数据结构与算法、小程序、NDK、Flutter

《Android学习笔记总结+移动架构视频+大厂面试真题+项目实战源码》,点击传送门即可获取!
战项目、讲解视频,并且会持续更新!**
如果你觉得这些内容对你有帮助,可以扫码获取!!(资料价值较高,非无偿)
总结:
各行各样都会淘汰一些能力差的,不仅仅是IT这个行业,所以,不要被程序猿是吃青春饭等等这类话题所吓倒,也不要觉得,找到一份工作,就享受安逸的生活,你在安逸的同时,别人正在奋力的向前跑,这样与别人的差距也就会越来越遥远,加油,希望,我们每一个人,成为更好的自己。
-
BAT大厂面试题、独家面试工具包,
-
资料包括 数据结构、Kotlin、计算机网络、Framework源码、数据结构与算法、小程序、NDK、Flutter
[外链图片转存中…(img-W1yah4oM-1711559321207)]


 1295
1295


 被折叠的 条评论
为什么被折叠?
被折叠的 条评论
为什么被折叠?
 到【灌水乐园】发言


