


一、布局
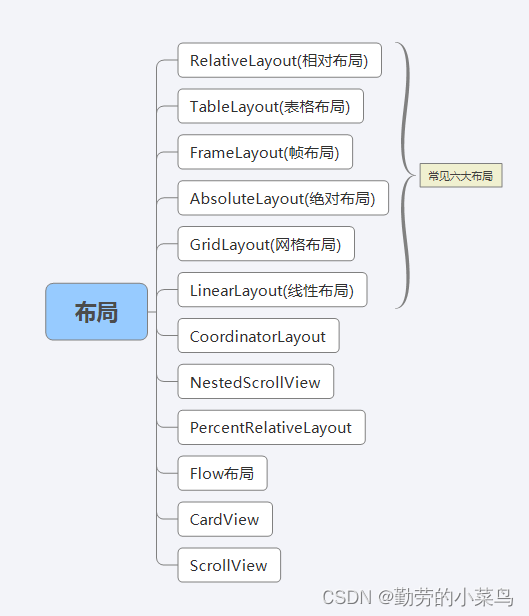
认识了解一下Android中的布局,分别是: LinearLayout(线性布局),RelativeLayout(相对布局),TableLayout(表格布局), FrameLayout(帧布局),AbsoluteLayout(绝对布局),GridLayout(网格布局) 等。
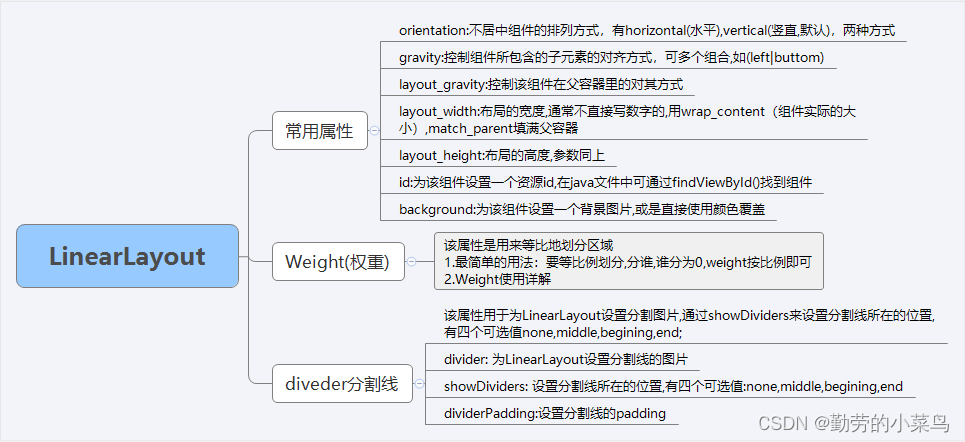
二、LinearLayout详解
1.常见属性
(1)id值: android:id="@+id/"
id相当于一个标识,方便后期写代码时找到
android:id="@+id/linearlayuot"(2)布局宽度:android:layout_width;布局高度:android:layout_height
这两个属性一般放在一起写,且必须设定,里面的值可以任意进行调整,可以是与父组件相同的match_parent,也可以是适应自身大小的wrap_content,还可以是各种数值,如50dp,100dp;其中dp是一种屏幕密度的抽象单位。
// match_parent:与父组件相同
// wrap_content:适应自身大小

android:layout_width="match_parent"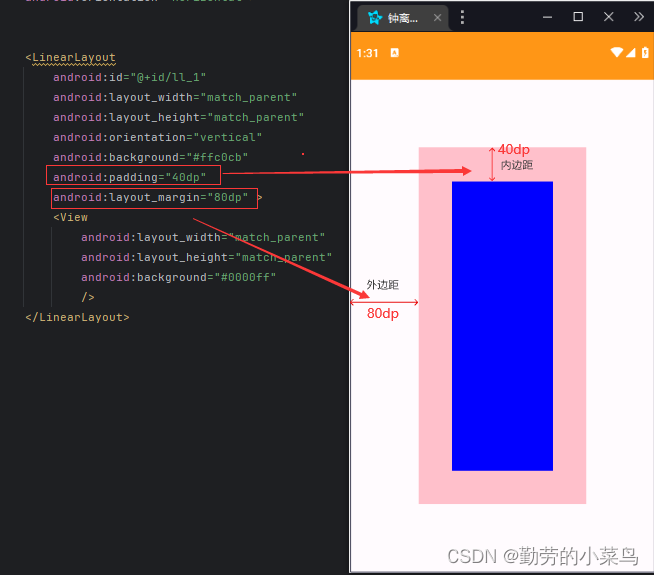
android:layout_height="wrap_content"(3)外边距:android:layout_margin;内边距:android:padding
| 外边距 | |
| android:layout_margin | 整体距离 |
| android:layout_marginTop | 顶部距离 |
| android:layout_marginLeft / android:layout_marginStart | 左部距离 |
| android:layout_marginRight / android:layout_marginEnd | 右部距离 |
| android:layout_marginBottom | 底部距离 |
| 内边距 | |
| android:padding | 整体距离 |
| android:paddingTop | 顶部距离 |
| android:paddingLeft / android:paddingStart | 左部距离 |
| android:paddingRight / android:paddingEnd | 右部距离 |
| android:paddingBottom | 底部距离 |
标注:左右的距离有两种表现形式,以左为例,一种是Left一种是Start,这里主要是跟版本有关,4.2以上用Start代替Left,同理右部。
(4)定位:andorid:orientation
简单明了就是控件怎么布局,它有两个属性,水平的horizontal,垂直的vertical。
<!-- android:orientation="vertical" 垂直-->
    <LinearLayout
        android:layout_width="match_parent"
        android:layout_height="400dp"
        android:orientation="vertical"
        >
        <androidx.appcompat.widget.AppCompatButton
            android:layout_width="wrap_content"
            android:layout_height="wrap_content"
            android:background="@color/blue"
            />
        <androidx.appcompat.widget.AppCompatButton
            android:layout_width="wrap_content"
            android:layout_height="wrap_content"
            android:background="@color/pink"
            />
        <androidx.appcompat.widget.AppCompatButton
            android:layout_width="wrap_content"
            android:layout_height="wrap_content"
            android:background="#00FF99"
            />
        <androidx.appcompat.widget.AppCompatButton
            android:layout_width="wrap_content"
            android:layout_height="wrap_content"
            android:background="#AA6699"
            />
    </LinearLayout>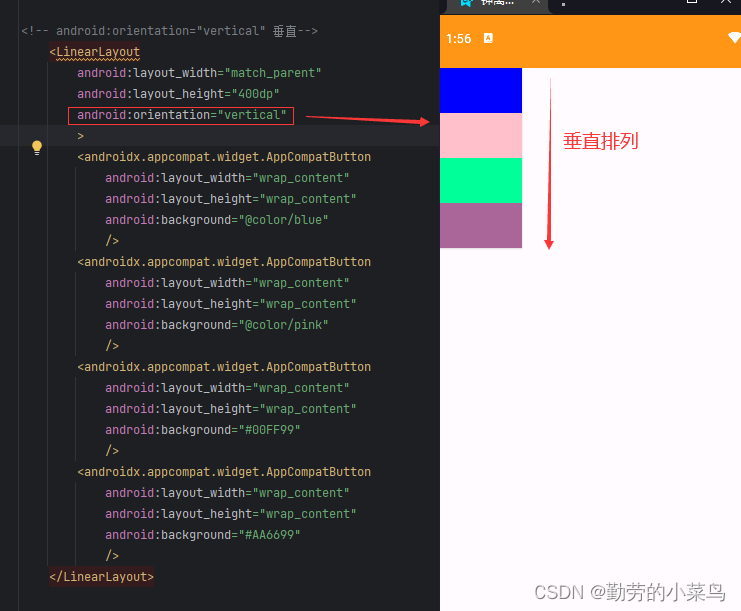
<!-- android:orientation="horizontal" 水平-->
    <LinearLayout
        android:layout_width="match_parent"
        android:layout_height="400dp"
        android:orientation="horizontal"
        >
        <androidx.appcompat.widget.AppCompatButton
            android:layout_width="wrap_content"
            android:layout_height="wrap_content"
            android:background="@color/blue"
            />
        <androidx.appcompat.widget.AppCompatButton
            android:layout_width="wrap_content"
            android:layout_height="wrap_content"
            android:background="@color/pink"
            />
        <androidx.appcompat.widget.AppCompatButton
            android:layout_width="wrap_content"
            android:layout_height="wrap_content"
            android:background="#00FF99"
            />
        <androidx.appcompat.widget.AppCompatButton
            android:layout_width="wrap_content"
            android:layout_height="wrap_content"
            android:background="#AA6699"
            />
    </LinearLayout>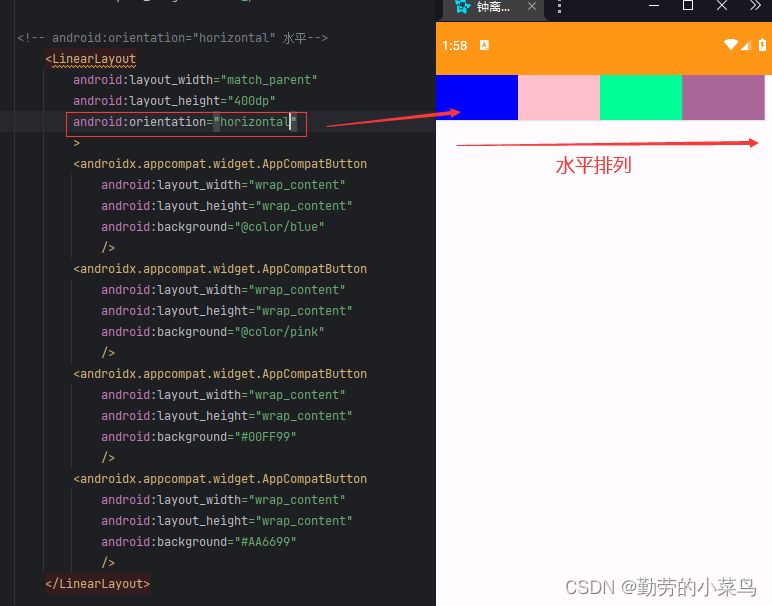
在一个布局中只能有一种排列方式,要么垂直要么水平,如果想多实现,可以多用几个布局,分模块的进行布局管理 。
(5)对齐方式:andorid:gravity
对齐方式就是布局中的控件所在的位置,我们现在主要的阅读方式为从左向右,从上向下,所以,再添加控件时,会自动的放于左上角,切记第一条属性是写在大布局中的,而不是单个的控件中,以此段代码为例,第二个可以放置在控件中调整位置,在此处我们以第一种方式为例,因为内容大同小异,只是编写的位置不同罢了
    <LinearLayout
        android:layout_width="match_parent"
        android:layout_height="400dp"
        android:orientation="vertical"
        android:gravity="center"
        >
        <androidx.appcompat.widget.AppCompatButton
            android:layout_width="wrap_content"
            android:layout_height="wrap_content"
            android:background="@color/blue"
            />
        <androidx.appcompat.widget.AppCompatButton
            android:layout_width="wrap_content"
            android:layout_height="wrap_content"
            android:background="@color/pink"
            />
        <androidx.appcompat.widget.AppCompatButton
            android:layout_width="wrap_content"
            android:layout_height="wrap_content"
            android:background="#00FF99"
            />
        <androidx.appcompat.widget.AppCompatButton
            android:layout_width="wrap_content"
            android:layout_height="wrap_content"
            android:background="#AA6699"
            />
</LinearLayout>| 对齐方式 | ||
| andorid:gravity="center" | 整体居中 | 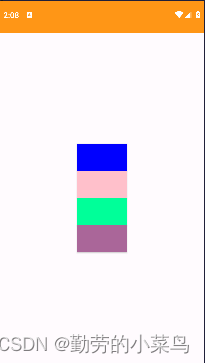 |
| andorid:gravity="left" / andorid:gravity="start" / andorid:gravity="top" | 左部 | 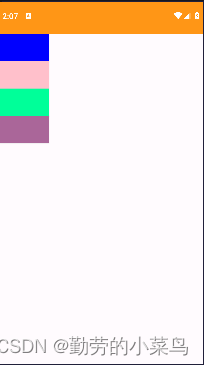 |
| andorid:gravity="right" / andorid:gravity="end" | 右部 | 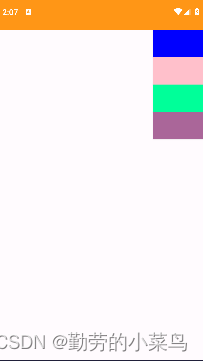 |
| andorid:gravity="bottom" | 底部 | 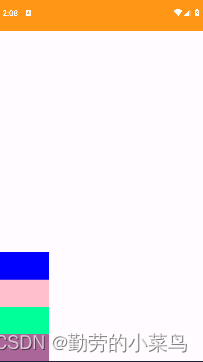 |
| andorid:gravity="center_horizontal" | 水平居中 | 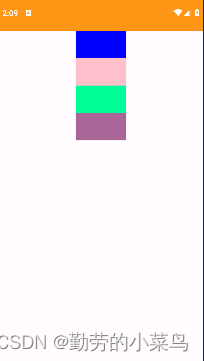 |
| andorid:gravity="center_vertical" | 垂直居中 |  |
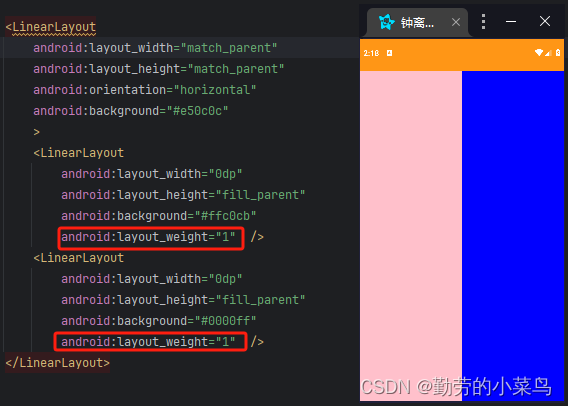
2.权重:andorid:layout_weight
权重就是控件所占剩余布局的比例问题,怎样分配问题
    <LinearLayout
        android:layout_width="match_parent"
        android:layout_height="match_parent"
        android:orientation="horizontal"
        android:background="#e50c0c"
        >
        <LinearLayout
            android:layout_width="0dp"
            android:layout_height="fill_parent"
            android:background="#ffc0cb"
            android:layout_weight="1"  />
        <LinearLayout
            android:layout_width="0dp"
            android:layout_height="fill_parent"
            android:background="#0000ff"
            android:layout_weight="1"  />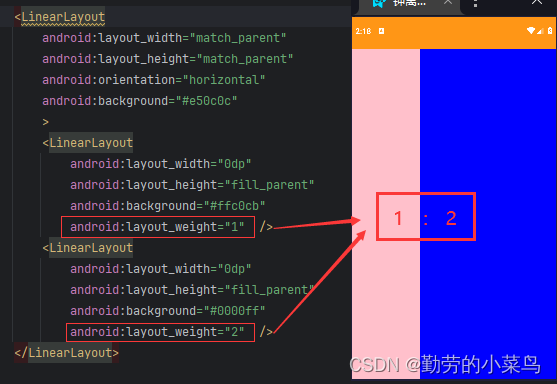
</LinearLayout>权重andorid:layout_weight=”“的值是可以随便定义的,里面的数字相当于权重,设置的数字相加为整个布局的大小,比如以上代码为例,第一个控件权重为1,第二个也为1,也就是说整个布局大小为2,两个控件各占1,数字可以任意更改,控件也可以任意添加,重要的是美观如下图
将一个控件的权重设置为2,则它 占整个布局的三分之二
0dp的设置一般情况都是因为权重问题,这样便可以按照自己所设置的比例进行显示,水平布局设置width,垂直布局设置height=0dp。
前面提到了权重是占剩余部分的占据比例,是因为我们在设计时不一定都是0dp,有可能提前某个控件设置了长度或是高度,这时,如果我们再用权重属性,分开的就是整个布局剩下没有占用的部分,例如:同样的代码,我将第一个LinearLayout的宽度提前设置了200dp。现在来看看效果
    <LinearLayout
        android:layout_width="match_parent"
        android:layout_height="match_parent"
        android:orientation="horizontal"
        android:background="#e50c0c"
        >
        <LinearLayout
            android:layout_width="200dp"
            android:layout_height="fill_parent"
            android:background="#ffc0cb"
            android:layout_weight="1"  />
        <LinearLayout
            android:layout_width="0dp"
            android:layout_height="fill_parent"
            android:background="#0000ff"
            android:layout_weight="2"  />
    </LinearLayout>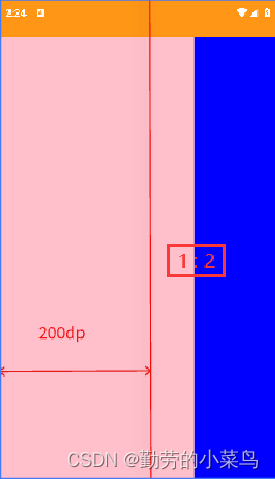
第一个控件先占了整个布局的一部分,剩余的部再进行分割。
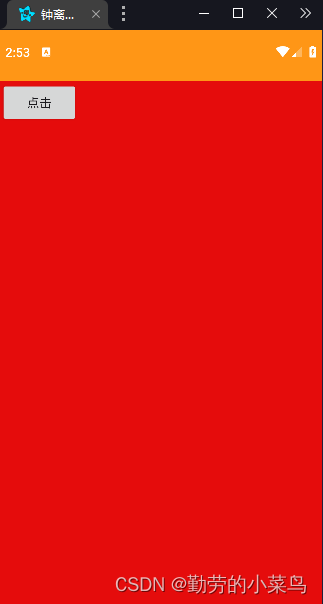
附加:Java代码中设置weight属性
1.在activity_main.xml文件中新建一个<LinearLayout>
    <LinearLayout
        android:id="@+id/abc"
        android:layout_width="match_parent"
        android:layout_height="match_parent"
        android:orientation="horizontal"
        android:background="#e50c0c"
        >
    </LinearLayout>
2.在 MainActivity.java 文件中设置weight
package com.example.example;

import android.os.Bundle;
import android.widget.Button;
import android.widget.LinearLayout;
import androidx.appcompat.app.AppCompatActivity;
public class MainActivity extends AppCompatActivity {

    @Override
    protected void onCreate(Bundle savedInstanceState) {
        super.onCreate(savedInstanceState);
        setContentView(R.layout.activity_main);

        // 创建一个 LinearLayout 对象
        LinearLayout linearLayout = new LinearLayout(MainActivity.this);
        // 设置 LinearLayout 的布局方向为垂直
        linearLayout.setOrientation(LinearLayout.VERTICAL);
        // 创建一个按钮对象
        Button button = new Button(MainActivity.this);
        button.setText("点击");
        // 创建 LinearLayout.LayoutParams 对象并设置相应参数
        LinearLayout.LayoutParams layoutParams = new LinearLayout.LayoutParams(
                LinearLayout.LayoutParams.MATCH_PARENT,
                LinearLayout.LayoutParams.WRAP_CONTENT
        );
        layoutParams.weight = 1.0f;
        // 将布局参数应用到按钮上
        button.setLayoutParams(layoutParams);
        // 将按钮添加到 LinearLayout 中
        linearLayout.addView(button);
        LinearLayout rootLayout = findViewById(R.id.abc);
        // 将 LinearLayout 添加到活动的根布局中
        rootLayout.addView(linearLayout);
    }
}
3.运行应用 即可
3. 为LinearLayout设置分割线
(1)直接在布局中添加一个view
<LinearLayout
    android:layout_width="match_parent"
    android:layout_height="wrap_content"
    android:orientation="vertical"
    android:layout_marginTop="16dp"
    android:layout_marginBottom="16dp">

    <!-- 添加一条细线作为背景 -->
    <View
        android:layout_width="match_parent"
        android:layout_height="1dp"
        android:background="#000000" />

    <!-- 在这里添加其他布局元素 -->

</LinearLayout>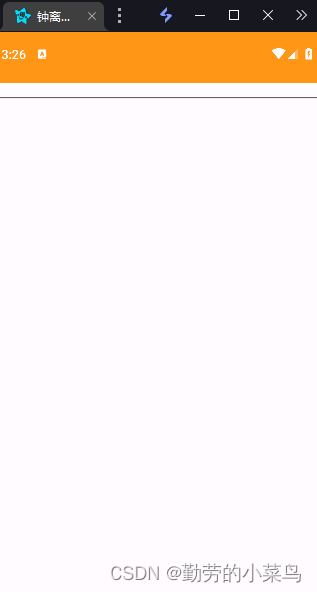
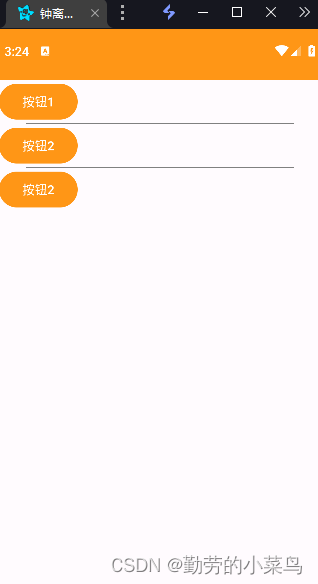
(2)第二种是使用LinearLayout的一个divider属性
直接为LinearLayout设置分割线 这里就需要自己准备一张线的图片了
a. android:divider 设置作为分割线的图片
src/main/res/drawable 下面创建 ktv_line_div.xml 内容为:
<?xml version="1.0" encoding="utf-8"?>
<shape xmlns:android="http://schemas.android.com/apk/res/android"
    android:shape="rectangle">
    <solid android:color="#808080" /> <!-- 灰色背景 -->
    <size android:height="1dp" /> <!-- 定义细线高度为1dp -->
</shape>
b. android:showDividers 设置分割线的位置,none(无),beginning(开始),end(结束),middle(每两个组件间)
c. android:dividerPadding 设置分割线的可以控制分隔线与子视图之间的间距,使布局在显示分隔线时具有更灵活的外观效果,主要用于 AdapterView(如ListView、GridView)中的分隔线样式
<LinearLayout xmlns:android="http://schemas.android.com/apk/res/android"
    android:id="@+id/LinearLayout1"
    android:layout_width="match_parent"
    android:layout_height="match_parent"
    android:divider="@drawable/ktv_line_div"
    android:orientation="vertical"
    android:showDividers="middle"
    android:dividerPadding="10dp"  >
    <Button
        android:layout_width="wrap_content"
        android:layout_height="wrap_content"
        android:text="按钮1" />

    <Button
        android:layout_width="wrap_content"
        android:layout_height="wrap_content"
        android:text="按钮2" />

</LinearLayout>
应用之后就可以看到细线
4. 注意事项
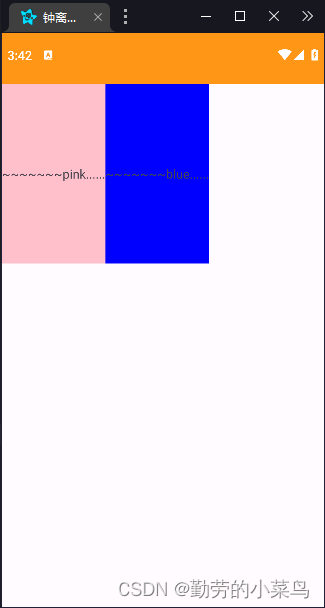
使用Layout_gravity的一个很重要的问题
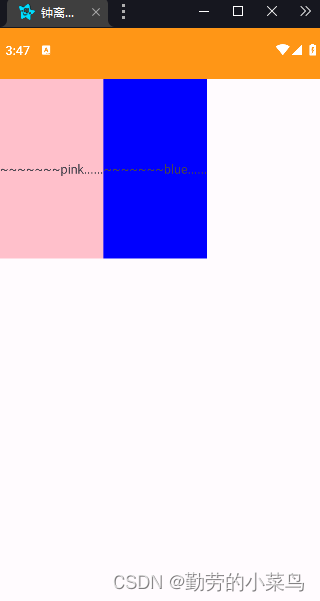
问题内容: 在一个LinearLayout的水平方向中布置两个TextView,想让一个左,一个右,怎么搞?
<LinearLayout xmlns:android="http://schemas.android.com/apk/res/android"
    xmlns:tools="http://schemas.android.com/tools"
    android:layout_width="match_parent"
    android:layout_height="match_parent"
    android:orientation="horizontal"  >

    <TextView
        android:layout_width="wrap_content"
        android:layout_height="200dp"
        android:layout_gravity="left"
        android:background="#ffc0cb"
        android:gravity="center"
        android:text="~~~~~~~pink......" />

    <TextView
        android:layout_width="wrap_content"
        android:layout_height="200dp"
        android:layout_gravity="right"
        android:background="#0000ff"
        android:gravity="center"
        android:text="~~~~~~~blue......" />
</LinearLayout>
运行结果:
看到这里,可能会想在外层LinearLayout加个 android:gravity="left" 的属性,然后设置第二个 TextView的 android:layout_gravity 为 android:layout_gravity=“right"
<LinearLayout xmlns:android="http://schemas.android.com/apk/res/android"
    xmlns:tools="http://schemas.android.com/tools"
    android:layout_width="match_parent"
    android:layout_height="match_parent"
    android:orientation="horizontal"
    android:gravity="left"   >

    <TextView
        android:layout_width="wrap_content"
        android:layout_height="200dp"
        android:layout_gravity="left"
        android:background="#ffc0cb"
        android:gravity="center"
        android:text="~~~~~~~pink......" />

    <TextView
        android:layout_width="wrap_content"
        android:layout_height="200dp"
        android:layout_gravity="right"
        android:background="#0000ff"
        android:gravity="center"
        android:text="~~~~~~~blue......" />
</LinearLayout>
运行结果没变化:
小编想说当 android:orientation="vertical" 时, 只有水平方向的设置才起作用,垂直方向的设置不起作用。 即: left , right , center_horizontal 是生效的。 当 android:orientation="horizontal" 时, 只有垂直方向的设置才起作用,水平方向的设置不起作用。 即: top , bottom , center_vertical 是生效的。
当改成 android:orientation="vertical" 时,看一下效果:
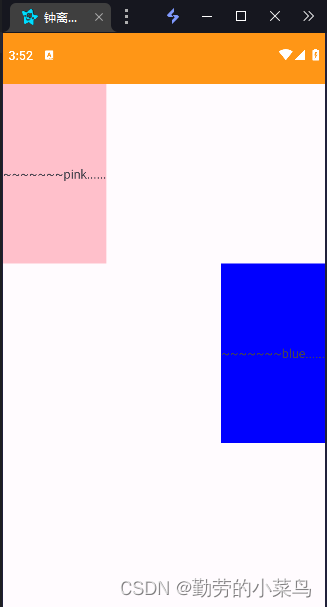
综上可看出,仍然没有实现想要对结果,像这种情况是建议使用 RelativeLayout(相对布局)
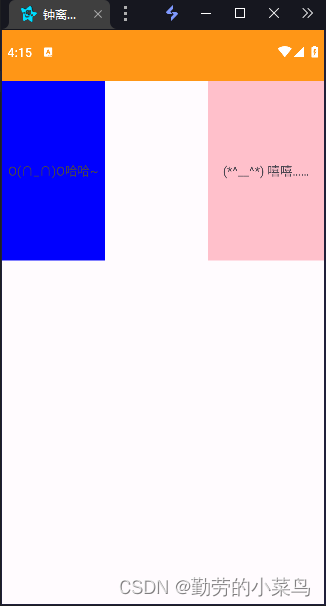
非要用LinearLayout的解决的话也可以:
<LinearLayout xmlns:android="http://schemas.android.com/apk/res/android"
    android:id="@+id/LinearLayout1"
    android:layout_width="match_parent"
    android:layout_height="match_parent"
    android:orientation="horizontal" >

    <TextView
        android:layout_width="0dp"
        android:layout_height="200dp"
        android:layout_weight="1"
        android:background="#0000ff"
        android:gravity="center"
        android:text="O(∩_∩)O哈哈~" />

    <View
        android:layout_width="0dp"
        android:layout_height="0dp"
        android:layout_weight="1" />

    <TextView
        android:layout_width="130dp"
        android:layout_height="200dp"
        android:background="#ffc0cb"
        android:gravity="center"
        android:text="(*^__^*) 嘻嘻……" />

</LinearLayout>
在两个 TextView 之间添加了一个空的 View,并将它的 layout_weight 设置为 1。这样第二个 TextView 就会被挤到右边,并且两个 TextView 以及中间的 View 将占据同样的空间,实现了水平方向上的靠右对齐。
三、总结


 4450
4450

 被折叠的 条评论
为什么被折叠?
被折叠的 条评论
为什么被折叠?
 到【灌水乐园】发言


