} else {
false
}
}
}
extendView?.setOnClickListener {
clearEditInputStatus()
it.postDelayed({ extend = if (extend == null) “各种扩展菜单” else null }, 200)
}
}
else -> ExtendViewHolder(parent)
}
}
然后给消息列表加一个滑动关闭输入法的检测
addOnScrollListenerBy(onScrollStateChanged = { _: RecyclerView, newState: Int ->
if (newState == RecyclerView.SCROLL_STATE_DRAGGING) {
(mMessageInput?.findViewHolderForAdapterPosition(0) as? InputAdapter.InputViewHolder)?.apply {
clearEditInputStatus()
}
mInput.extend = null
}
})
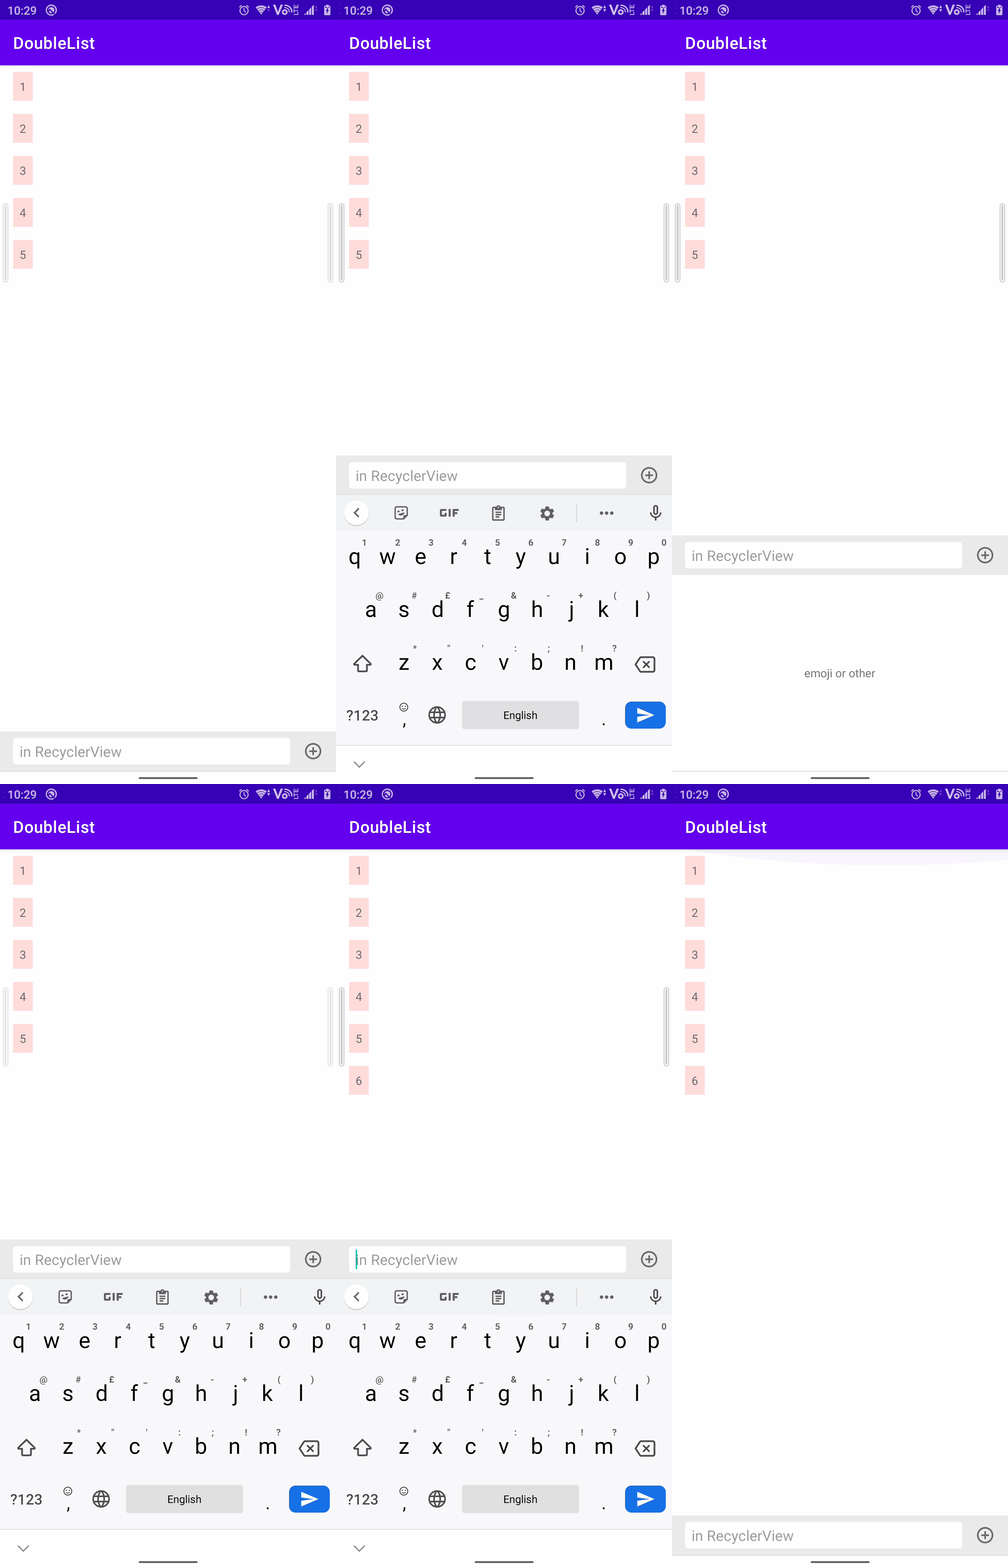
最终效果如图,可以看出相比方案一至少菜单显示起来方便了,缺点就是交互和View的切换不够平滑。(GIF压制原因可能不太流畅,请以实机效果为准)

关联方案:弹窗式输入框
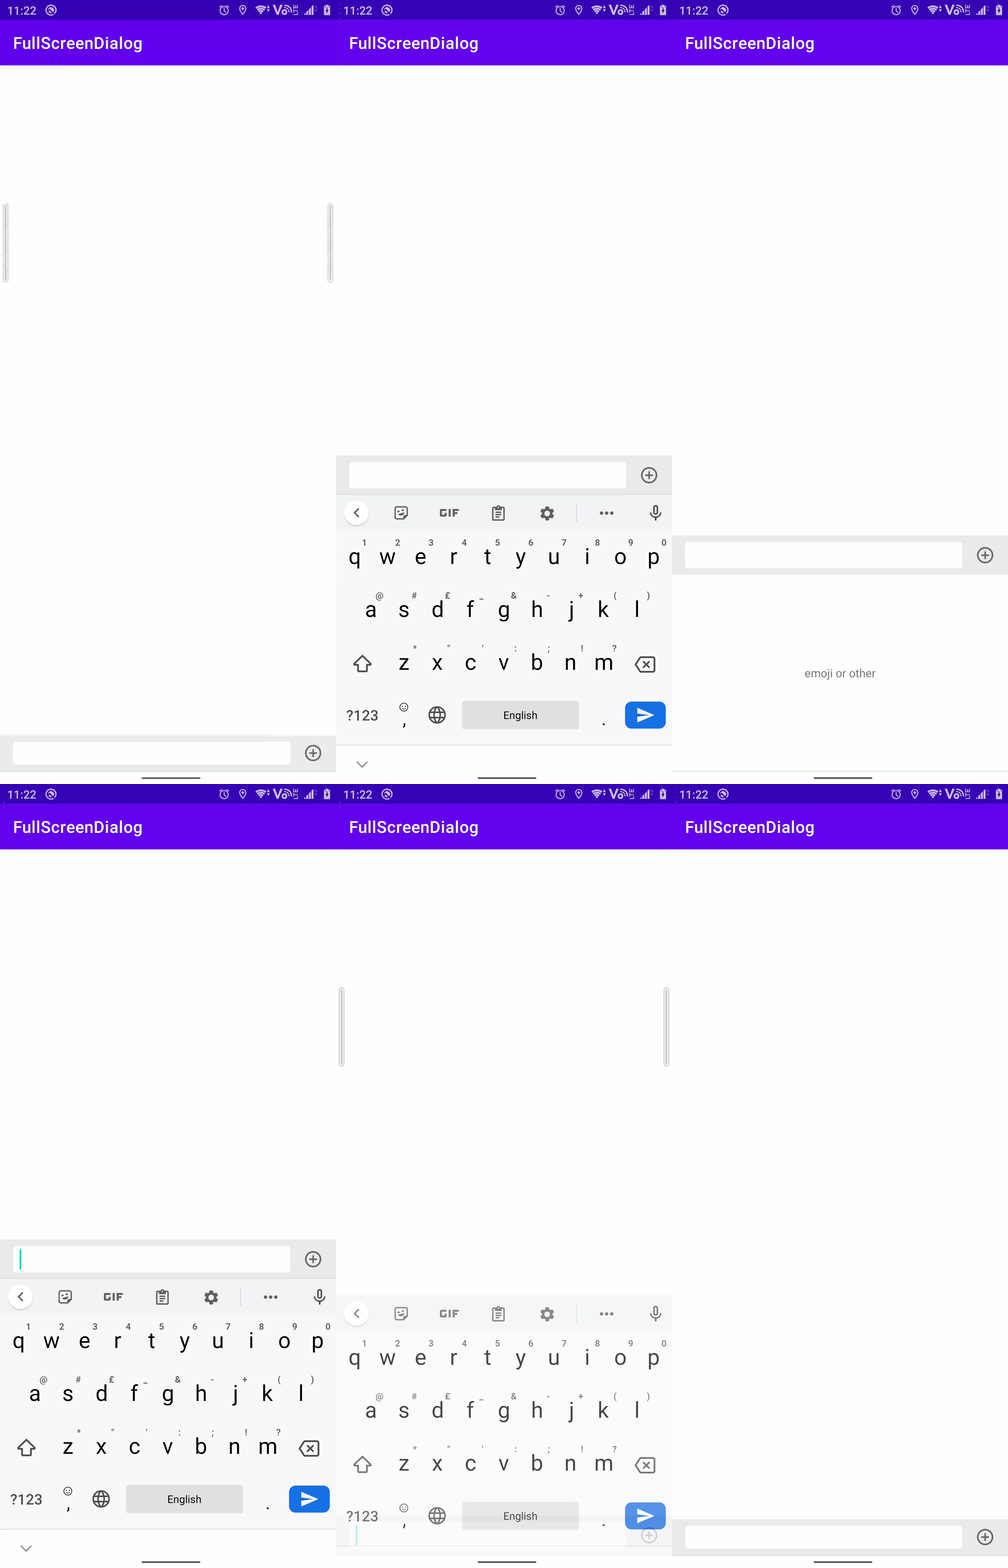
某些场景(例如发表评论)下底部的输入框不再适用,需要点击某些按钮之后再弹出输入框以及输入法,这时候采用弹窗式输入法就比较好。
关于这个弹窗有一些比较注意的点:
- 弹窗的根布局要使用
RelativeLayout保证能够撑开整个页面,同时为根布局添加该点击事件来保证点击外部时能够关闭弹窗
findViewById(R.id.input_outside)?.setOnClickListener {
if (it.id != R.id.input_layout) dismiss()
}
- 搭配相应的主题模式和代码来保证弹窗能够全屏显示
弹窗创建的时候赋予window的Layout参数
window?.setLayout(ViewGroup.LayoutParams.MATCH_PARENT, ViewGroup.LayoutParams.MATCH_PARENT)
最后在显示弹窗的时候需要给予相应的宽度
inputDialog.window?.attributes?.apply {
width = screenWidth
inputDialog.window?.attributes = this
}
inputDialog.setCancelable(true)
inputDialog.window?.setSoftInputMode(WindowManager.LayoutParams.SOFT_INPUT_STATE_VISIBLE)
inputDialog.show()
- 通过
OnLayoutChangeListener监听输入法的变化,实现对弹窗的自动关闭

方案三:仿微信式交互
微信的输入法交互是真的不错,流畅的弹出以及回落,特别是在扩展菜单的切换。微信具体是怎么实现的研究半天也研究不明白,不过好在有其他大佬做相关研究,后续内容大致参照FreddyChen/KulaKeyboard以及相关issues,本文会做相关解析。其实现的基本原理是通过一个看不见的popwindow来测量输入法的高度,而activity本身则是adjustNothing的,其弹出交互动画则是围绕测量出的输入法高度进行的。
首先在activity创建的时候为acitivty添加一个看不见的popwindow,并且它的高度是填充满整个activity的。为其注册onLayout监听实现测量输入法高度的事件,并且通过lifecycle绑定生命周期,在activity被销毁的时候关闭popwindow。
init {
val contentView = View(activity)
width = 0
height = ViewGroup.LayoutParams.MATCH_PARENT
setBackgroundDrawable(ColorDrawable(Color.TRANSPARENT))
softInputMode = WindowManager.LayoutParams.SOFT_INPUT_ADJUST_RESIZE
inputMethodMode = INPUT_METHOD_NEEDED
contentView.viewTreeObserver.addOnGlobalLayoutListener(this)
setContentView(contentView)
activity.window.decorView.post {
showAtLocation(activity.window.decorView, Gravity.NO_GRAVITY, 0, 0)
}
activity.lifecycle.addObserver(this)
}
然后在onGlobalLayout中实现输入法高度的测量,关于这部分的处理在FreddyChen/KulaKeyboard issue 5中有其他开发者提出了相关优化方案,并给出了相关优化代码示例,我个人也只能稍作理解与处理,目前也没法测试相关的优化行为是否能正常运作。
关于输入法高度测量结合上述issue我个人认为的一些需要优化的点:
- 横竖屏不同状态下需要考虑的导航栏的高度。
- 在调整
decorView的systemUiVisibility导致导航栏高度变动对输入法高度测量的影响,以及对状态栏变动触发的layout事件的过滤。 - 重复触发的layout事件的过滤。
- 极少部分存在物理导航栏的手机对输入法高度测量的影响
说实话我认为可能还存在没有考虑到的问题,以及对相关问题的处理方案并不完全正确,所以如有错误欢迎指教,相关实现说明均在注释中。
override fun onGlobalLayout() {
//这部分是参照 FreddyChen/KulaKeyboard issue 5 中给出的代码编写的,属于半懂不懂的部分
val min = displayRect.bottom.coerceAtMost(displayRect.right)
val max = displayRect.bottom.coerceAtLeast(displayRect.right)
if (max.toDouble() / min.toDouble() >= 1.2) {
when (activity.requestedOrientation) {
ActivityInfo.SCREEN_ORIENTATION_PORTRAIT,
ActivityInfo.SCREEN_ORIENTATION_SENSOR_PORTRAIT -> {
if (displayRect.right > displayRect.bottom) return
}
ActivityInfo.SCREEN_ORIENTATION_LANDSCAPE,
ActivityInfo.SCREEN_ORIENTATION_SENSOR_LANDSCAPE -> {
if (displayRect.bottom > displayRect.right) return
}
}
}
//过滤重复触发onGlobalLayout的事件
contentView.getWindowVisibleDisplayFrame(currentDisplayRect)
if (currentDisplayRect.bottom == lastDisplayRect.bottom) return
//判断导航栏的高度
//HIDE_NAVIGATION 的时候导航栏是被隐藏的
//displayRect.height() != screenRect.height() 是对存在物理导航栏的手机的判断
//这一点能否在所有手机上正常运作还待确定,目前手头上的测试机工作正常
//以及横屏状态下导航栏在侧边
val isShowNavigation =
(0 == (activity.window.decorView.systemUiVisibility and View.SYSTEM_UI_FLAG_HIDE_NAVIGATION)) ||
displayRect.height() != screenRect.height()
val navigationBarHeight = when (activity.rotation) {
Surface.ROTATION_0, Surface.ROTATION_180 -> if (isShowNavigation) context.navigationBarHeight() else 0
else -> 0
}
// 先不管导航栏显示不显示,先减去导航栏的高度
// 这个高度是最小限度,在输入法没有显示的时候,当前显示矩阵的bottom无论如何都不会小于这个高度
val excludeNavigation = screenRect.bottom - navigationBarHeight
// 当 currentHeightDiff >= 0 的时候软键盘可能隐藏,否则软键盘可能处于显示状态
// 还要综合判断是不是状态栏和导航栏改变导致的
// 如果存在虚拟导航栏的时候,不显示输入法是一般都是为0,但是是物理导航栏的话,存在导航栏高度,那么这个值会大于0
val currentHeightDiff = currentDisplayRect.bottom - excludeNavigation
//前后两次显示矩阵的高度差
val aroundHeightDiff = currentDisplayRect.bottom - lastDisplayRect.bottom
if (
(currentHeightDiff >= 0 && aroundHeightDiff <= mDeviationHeight) ||//两次高度变动属于状态栏或导航栏的变动
(currentHeightDiff >= 0 && currentDisplayRect.bottom < excludeNavigation) || //当前的高度在最低线内部
(currentHeightDiff < 0 && currentDisplayRect.bottom >= (screenRect.bottom - mDeviationHeight) && excludeNavigation != 0) //存在一个最低的显示高度
) {
//这些都是状态栏或者导航栏发生变化的事件过滤
return
}
keyboardHeight =
if (currentHeightDiff == 0) screenRect.bottom - lastDisplayRect.bottom - navigationBarHeight
else screenRect.bottom - currentDisplayRect.bottom - navigationBarHeight
//当界面首次打开的时候由于没有lastDisplayRect,所以键盘高度会变成整个屏幕的高度,其实这个回调是没必要的,所以通过一个flag直接过滤掉
if (currentHeightDiff >= 0 && !isFirst) {
isFirst = true
} else {
onKeyBoardEvent?.invoke(currentHeightDiff < 0, keyboardHeight)
}
lastDisplayRect.set(currentDisplayRect)
}
其中部分相关变量说明
- displayRect:这里的高度是排除了排除了导航栏的高度,无论导航栏是否显示。
private val displayRect by lazy { Rect(0, 0, activity.displayWidth, activity.displayHeight) }
val Activity.displayWidth: Int
get() =
if (Build.VERSION.SDK_INT >= Build.VERSION_CODES.R)
windowManager.currentWindowMetrics.bounds.width()
else
DisplayMetrics().apply { windowManager.defaultDisplay.getMetrics(this) }.widthPixels
val Activity.displayHeight: Int
get() =
if (Build.VERSION.SDK_INT >= Build.VERSION_CODES.R)
windowManager.currentWindowMetrics.bounds.height()
else
DisplayMetrics().apply { windowManager.defaultDisplay.getMetrics(this) }.heightPixels
- screenRect:这个高度是整个屏幕的高度。
private val displayRect by lazy { Rect(0, 0, activity.displayWidth, activity.displayHeight) }
val Activity.screenWidth: Int
get() =
if (Build.VERSION.SDK_INT >= Build.VERSION_CODES.R)
DisplayMetrics().apply { display?.getRealMetrics(this) }.widthPixels
else
DisplayMetrics().apply { windowManager.defaultDisplay.getRealMetrics(this) }.widthPixels
val Activity.screenHeight: Int
get() =
if (Build.VERSION.SDK_INT >= Build.VERSION_CODES.R)
DisplayMetrics().apply { display?.getRealMetrics(this) }.heightPixels
else
DisplayMetrics().apply { windowManager.defaultDisplay.getRealMetrics(this) }.heightPixels
在完成输入法高度的测量后,需要针对相应事件来通过动画展示相关内容,详细布局为以下内容。在输入法弹出时需要改变相关View(这里是input_extend_container)的高度,然后配置相关View(这里是input_bottom)的translationY保证动画起始状态时需要展示的View处于不可见状态,然后通过相关动画进行展示操作。与此同时需要按需调整额外相关联View(这里是message_pool)的translationY防止遮挡。
<androidx.recyclerview.widget.RecyclerView
android:id=“@+id/message_pool”
android:layout_width=“match_parent”
android:layout_height=“match_parent”
android:background=“#220000ff”
android:layout_marginBottom=“48dp” />
<androidx.fragment.app.FragmentContainerView
android:id=“@+id/input_extend_container”
android:layout_width=“match_parent”
android:layout_height=“wrap_content” />
这里直接使用了一个类来辅助动画行为,关于动画的addListener可以通过扩展方法来减少代码量,不过这里还没有这么做。
class TransAnimate(private val referValue: ReferValue) {
private var lastAnimatorSet: AnimatorSet? = null
companion object {
private const val DURATION = 100L
}
fun transHeight(targetHeight: Int, companionAnimator: Animator? = null) {
lastAnimatorSet?.cancel()
var mainAnimator: ObjectAnimator? = null
val currentHeight = referValue.currentDisplayHeight
when {
targetHeight > currentHeight -> {
//展示高度增高(展示)
//先调整目标View的高度以及translationY,然后通过动画进行展示
referValue.updateTargetHeight(targetHeight)
referValue.updateTargetTranslationY(targetHeight - currentHeight)
mainAnimator = ObjectAnimator.ofFloat(
referValue.translationYTarget(),
“translationY”,
referValue.referTranslationY(),
0f
).apply {
addListener(object : Animator.AnimatorListener {
override fun onAnimationStart(animation: Animator?) { }
override fun onAnimationRepeat(animation: Animator?) { }
override fun onAnimationEnd(animation: Animator?) {
mainAnimator?.removeAllListeners()
}
override fun onAnimationCancel(animation: Animator?) {
mainAnimator?.removeAllListeners()
}
})
}
}
targetHeight < currentHeight -> {
//展示高度减少(隐藏)
//直接进行相关动画展示
mainAnimator = ObjectAnimator.ofFloat(
referValue.translationYTarget(),
“translationY”,
referValue.referTranslationY(),
referValue.referHeight() - targetHeight
).apply {
addListener(object : Animator.AnimatorListener {
override fun onAnimationStart(animation: Animator?) { }
override fun onAnimationRepeat(animation: Animator?) { }
override fun onAnimationEnd(animation: Animator?) {
mainAnimator?.removeAllListeners()
//在动画展示完毕后清除相关状态以及设定最终高度
referValue.updateTargetHeight(targetHeight)
referValue.updateTargetTranslationY(0f)
}
override fun onAnimationCancel(animation: Animator?) {
mainAnimator?.removeAllListeners()
}
})
}
}
}
if (mainAnimator == null) return
lastAnimatorSet = AnimatorSet()
.apply {
duration = DURATION
addListener(object : Animator.AnimatorListener {
override fun onAnimationStart(animation: Animator?) {
}
override fun onAnimationEnd(animation: Animator?) {
lastAnimatorSet?.removeAllListeners()
}
override fun onAnimationCancel(animation: Animator?) {
lastAnimatorSet?.removeAllListeners()
}
override fun onAnimationRepeat(animation: Animator?) {
}
})
//这里主要是处理相关伴随的联动动画
play(mainAnimator).apply { if (companionAnimator != null) with(companionAnimator) }
start()
}
}
}
最后还是通过一个变量来控制相关动画的触发(关于其中的一些固定高度因为是demo图省力,实际请按需并使用dp2px来计算)
private var mMenu: Menu? = null
set(value) {
if (value != field) {
field = value
when (value) {
Menu.Normal -> {
//展示normal
mInputView?.hideSoftKeyboard()
supportFragmentManager.commit {
结尾
最后小编想说:不论以后选择什么方向发展,目前重要的是把Android方面的技术学好,毕竟其实对于程序员来说,要学习的知识内容、技术有太多太多,要想不被环境淘汰就只有不断提升自己,从来都是我们去适应环境,而不是环境来适应我们!
当程序员容易,当一个优秀的程序员是需要不断学习的,从初级程序员到高级程序员,从初级架构师到资深架构师,或者走向管理,从技术经理到技术总监,每个阶段都需要掌握不同的能力。早早确定自己的职业方向,才能在工作和能力提升中甩开同龄人。
想要拿高薪实现技术提升薪水得到质的飞跃。最快捷的方式,就是有人可以带着你一起分析,这样学习起来最为高效,所以为了大家能够顺利进阶中高级、架构师,我特地为大家准备了一套高手学习的源码和框架视频等精品Android架构师教程,保证你学了以后保证薪资上升一个台阶。
当你有了学习线路,学习哪些内容,也知道以后的路怎么走了,理论看多了总要实践的。

高级UI,自定义View
UI这块知识是现今使用者最多的。当年火爆一时的Android入门培训,学会这小块知识就能随便找到不错的工作了。
不过很显然现在远远不够了,拒绝无休止的CV,亲自去项目实战,读源码,研究原理吧!

《Android学习笔记总结+移动架构视频+大厂面试真题+项目实战源码》,点击传送门,即可获取!
阶中高级、架构师,我特地为大家准备了一套高手学习的源码和框架视频等精品Android架构师教程,保证你学了以后保证薪资上升一个台阶。
当你有了学习线路,学习哪些内容,也知道以后的路怎么走了,理论看多了总要实践的。
[外链图片转存中…(img-iP3oUanp-1715364656705)]
高级UI,自定义View
UI这块知识是现今使用者最多的。当年火爆一时的Android入门培训,学会这小块知识就能随便找到不错的工作了。
不过很显然现在远远不够了,拒绝无休止的CV,亲自去项目实战,读源码,研究原理吧!
[外链图片转存中…(img-ezmPQ9vx-1715364656706)]
《Android学习笔记总结+移动架构视频+大厂面试真题+项目实战源码》,点击传送门,即可获取!


 5558
5558

 被折叠的 条评论
为什么被折叠?


