


void runApp(Widget app) {
WidgetsFlutterBinding.ensureInitialized()
…attachRootWidget(app)
…scheduleWarmUpFrame();
}
首先参数(Widget app)是一个widget,下面一行一行分析,进入**WidgetsFlutterBinding.ensureInitialized()**方法:
/// A concrete binding for applications based on the Widgets framework.
/// This is the glue that binds the framework to the Flutter engine.
//意思:基于widget framework的应用程序的具体绑定
//这是将framework widget和Flutter engine绑定的桥梁
class WidgetsFlutterBinding extends BindingBase with GestureBinding, ServicesBinding, SchedulerBinding, PaintingBinding, SemanticsBinding, RendererBinding, WidgetsBinding {
/// Returns an instance of the [WidgetsBinding], creating and
/// initializing it if necessary. If one is created, it will be a
/// [WidgetsFlutterBinding]. If one was previously initialized, then
/// it will at least implement [WidgetsBinding].
///
/// You only need to call this method if you need the binding to be
/// initialized before calling [runApp].
///
/// In the flutter_test framework, [testWidgets] initializes the
/// binding instance to a [TestWidgetsFlutterBinding], not a
/// [WidgetsFlutterBinding].
//上面注释意思是:返回[WidgetsBinding]的具体实例,必须创建和初始化,如果已//经创建了,那么它就是一个[WidgetsFlutterBinding],如果已经初始化了,那么//至少要实现[WidgetsBinding]
//如果你只想调用这个方法,那么你需要在调用runApp之前绑定并且初始化
static WidgetsBinding ensureInitialized() {
if (WidgetsBinding.instance == null)
WidgetsFlutterBinding();
return WidgetsBinding.instance;
}
}
看到这个WidgetsFlutterBinding混入(with)很多的Binding,下面先看父类BindingBase:
abstract class BindingBase {
BindingBase() {
developer.Timeline.startSync(‘Framework initialization’);
assert(!_debugInitialized);
initInstances();
assert(_debugInitialized);
assert(!_debugServiceExtensionsRegistered);
initServiceExtensions();
assert(_debugServiceExtensionsRegistered);
developer.postEvent(‘Flutter.FrameworkInitialization’, <String, String>{});
developer.Timeline.finishSync();
}
static bool _debugInitialized = false;
static bool _debugServiceExtensionsRegistered = false;
ui.Window get window => ui.window;//获取window实例
@protected
@mustCallSuper
void initInstances() {
assert(!_debugInitialized);
assert(() { _debugInitialized = true; return true; }());
}
}
看到有句代码ui.Window get window => ui.window;,在Android中所有的视图都是通过window来呈现的,那Flutter中也有window,那看看window在Flutter中的作用看看官方对它的定义:

意思是:链接宿主操作系统的接口,也就是Flutter framework 链接宿主操作系统的接口。系统中有一个Window实例,可以从window属性来获取,看看源码:
class Window {
Window._();
//返回DPI,DPI是每英寸的像素点数,是设备屏幕的固件属性
//获取可能不准确
double get devicePixelRatio => _devicePixelRatio;
double _devicePixelRatio = 1.0;
//绘制UI的区域大小
Size get physicalSize => _physicalSize;
Size _physicalSize = Size.zero;
//获取矩形的物理像素
WindowPadding get viewInsets => _viewInsets;
WindowPadding _viewInsets = WindowPadding.zero;
//获取内边距
WindowPadding get padding => _padding;
WindowPadding _padding = WindowPadding.zero;
//当绘制区域改变时触发
VoidCallback get onMetricsChanged => _onMetricsChanged;
VoidCallback _onMetricsChanged;
Zone _onMetricsChangedZone;
set onMetricsChanged(VoidCallback callback) {
_onMetricsChanged = callback;
_onMetricsChangedZone = Zone.current;
}
//当系统语言发生变化时触发回调
Locale get locale {
if (_locales != null && _locales.isNotEmpty) {
return _locales.first;
}
return null;
}
//获取系统语言
List get locales => _locales;
List _locales;
//当Local发生改变时触发回调
VoidCallback get onLocaleChanged => _onLocaleChanged;
VoidCallback _onLocaleChanged;
Zone _onLocaleChangedZone;
set onLocaleChanged(VoidCallback callback) {
_onLocaleChanged = callback;
_onLocaleChangedZone = Zone.current;
}
//当系统字体大小改变时触发回调
VoidCallback get onTextScaleFactorChanged => _onTextScaleFactorChanged;
VoidCallback _onTextScaleFactorChanged;
Zone _onTextScaleFactorChangedZone;
set onTextScaleFactorChanged(VoidCallback callback) {
_onTextScaleFactorChanged = callback;
_onTextScaleFactorChangedZone = Zone.current;
}
//屏幕亮度改变时触发回调
VoidCallback get onPlatformBrightnessChanged => _onPlatformBrightnessChanged;
VoidCallback _onPlatformBrightnessChanged;
Zone _onPlatformBrightnessChangedZone;
set onPlatformBrightnessChanged(VoidCallback callback) {
_onPlatformBrightnessChanged = callback;
_onPlatformBrightnessChangedZone = Zone.current;
}
//屏幕刷新时会回调
FrameCallback get onBeginFrame => _onBeginFrame;
FrameCallback _onBeginFrame;
Zone _onBeginFrameZone;
set onBeginFrame(FrameCallback callback) {
_onBeginFrame = callback;
_onBeginFrameZone = Zone.current;
}
//绘制屏幕时回调
VoidCallback get onDrawFrame => _onDrawFrame;
VoidCallback _onDrawFrame;
Zone _onDrawFrameZone;
set onDrawFrame(VoidCallback callback) {
_onDrawFrame = callback;
_onDrawFrameZone = Zone.current;
}
//点击或者指针事件触发回调
PointerDataPacketCallback get onPointerDataPacket => _onPointerDataPacket;
PointerDataPacketCallback _onPointerDataPacket;
Zone _onPointerDataPacketZone;
set onPointerDataPacket(PointerDataPacketCallback callback) {
_onPointerDataPacket = callback;
_onPointerDataPacketZone = Zone.current;
}
//获取请求的默认路由
String get defaultRouteName => _defaultRouteName();
String _defaultRouteName() native ‘Window_defaultRouteName’;
//该方法被调用后,onBeginFrame和onDrawFrame将紧连着会在合适时机调用
void scheduleFrame() native ‘Window_scheduleFrame’;
//更新应用在GPU上的渲染,这方法会直接调用Flutter engine的Window_render方法
void render(Scene scene) native ‘Window_render’;
//窗口的语义内容是否改变
bool get semanticsEnabled => _semanticsEnabled;
bool _semanticsEnabled = false;
//当窗口语言发生改变时回调
VoidCallback get onSemanticsEnabledChanged => _onSemanticsEnabledChanged;
VoidCallback _onSemanticsEnabledChanged;
Zone _onSemanticsEnabledChangedZone;
set onSemanticsEnabledChanged(VoidCallback callback) {
_onSemanticsEnabledChanged = callback;
_onSemanticsEnabledChangedZone = Zone.current;
}
//当用户表达写的动作时回调
SemanticsActionCallback get onSemanticsAction => _onSemanticsAction;
SemanticsActionCallback _onSemanticsAction;
Zone _onSemanticsActionZone;
set onSemanticsAction(SemanticsActionCallback callback) {
_onSemanticsAction = callback;
_onSemanticsActionZone = Zone.current;
}
//启用其他辅助功能回调
VoidCallback get onAccessibilityFeaturesChanged => _onAccessibilityFeaturesChanged;
VoidCallback _onAccessibilityFeaturesChanged;
Zone _onAccessibilityFlagsChangedZone;
set onAccessibilityFeaturesChanged(VoidCallback callback) {
_onAccessibilityFeaturesChanged = callback;
_onAccessibilityFlagsChangedZone = Zone.current;
}
//更新此窗口的语义数据
void updateSemantics(SemanticsUpdate update) native ‘Window_updateSemantics’;
//设置Isolate调试名称
void setIsolateDebugName(String name) native ‘Window_setIsolateDebugName’;
//向特定平台发送消息
void sendPlatformMessage(String name,
ByteData data,
PlatformMessageResponseCallback callback) {
final String error =
_sendPlatformMessage(name, _zonedPlatformMessageResponseCallback(callback), data);
if (error != null)
throw new Exception(error);
}
String _sendPlatformMessage(String name,
PlatformMessageResponseCallback callback,
ByteData data) native ‘Window_sendPlatformMessage’;
//获取平台消息的回调
PlatformMessageCallback get onPlatformMessage => _onPlatformMessage;
PlatformMessageCallback _onPlatformMessage;
Zone _onPlatformMessageZone;
set onPlatformMessage(PlatformMessageCallback callback) {
_onPlatformMessage = callback;
_onPlatformMessageZone = Zone.current;
}
//由_dispatchPlatformMessage调用
void _respondToPlatformMessage(int responseId, ByteData data)
native ‘Window_respondToPlatformMessage’;
//平台信息响应回调
static PlatformMessageResponseCallback _zonedPlatformMessageResponseCallback(PlatformMessageResponseCallback callback) {
if (callback == null)
return null;
// Store the zone in which the callback is being registered.
final Zone registrationZone = Zone.current;
return (ByteData data) {
registrationZone.runUnaryGuarded(callback, data);
};
}
}
可以知道window包含当前设备系统的一些信息和回调,那么现在看看混入的各种Binding:
- GestureBinding:绑定手势子系统,提供
onPointerDataPacket回调。 - ServicesBinding:绑定平台消息通道,提供
onPlatformMessage回调。 - SchedulerBinding:绑定绘制调度子系统,提供
onBeginFrame和onDrawFrame回调。 - PaintingBinding:绑定绘制库,处理图像缓存。
- SemanticsBinding:语义层和flutter engine的桥梁,对辅助功能的底层支持。
- RendererBinding:是渲染树和Flutter engine的桥梁,提供
onMetricsChanged和onTextScaleFactorChanged回调。 - WidgetsBinding:是Flutter widget和engine的桥梁,提供
onLocaleChanged,onBuildSchedule回调。
也就是WidgetsFlutterBinding.ensureInitialized()这行代码看名字是将WidgetsFlutterBinding实例初始化。其实并非那么简单,另外获取一些系统基本信息和初始化监听window对象的一些事件,然后将这些事件按照上层Framework模型规则进行包装、抽象最后分发。简而言之WidgetsFlutterBinding是Flutter engine和Framework的桥梁。
2.attachRootWidget(app)
第二行是attachRootWidget(app),看名字意思是将根RootWidget挂载。点进去看:
//如果这个widget有必要创建,就将它附加到[renderViewElement]
void attachRootWidget(Widget rootWidget) {
_renderViewElement = RenderObjectToWidgetAdapter(
container: renderView,
debugShortDescription: ‘[root]’,
child: rootWidget,
).attachToRenderTree(buildOwner, renderViewElement);
}
renderView是UI渲染树的根节点:
// The render tree that’s attached to the output surface.
//挂载在渲染树 rootNode根节点
RenderView get renderView => _pipelineOwner.rootNode;
rootWidget是外面所传进来的根Widget,这里不用管它,下面看attachToRenderTree(buildOwner, renderViewElement)这个方法,根据意思,这个方法应该构建RenderTree,这个方法需要两个参数,首先看buildOwner这个参数:
/// The [BuildOwner] in charge of executing the build pipeline for the
/// widget tree rooted at this binding.
BuildOwner get buildOwner => _buildOwner;
final BuildOwner _buildOwner = BuildOwner();
看官网对它的定义:

意思是:是widget framework的管理类,用来跟踪哪些widget需要重建,并处理widget树的其他任务,例如管理树的非活动元素列表,并在调试时在热重载期间在必要时触发“重组”命令,下面看另外一个参数renderViewElement,代码注释如下:
/// The [Element] that is at the root of the hierarchy (and which wraps the
/// [RenderView] object at the root of the rendering hierarchy).
///
/// This is initialized the first time [runApp] is called.
Element get renderViewElement => _renderViewElement;
Element _renderViewElement;
renderViewElement是renderView对应的Element对象,因为renderView是树的根,所以renderViewElement位于层次结构的根部,那下面点击attachToRenderTree的源码看:
/// Inflate this widget and actually set the resulting [RenderObject] as the
/// child of [container].
///
/// If element is null, this function will create a new element. Otherwise,
/// the given element will have an update scheduled to switch to this widget.
///
/// Used by [runApp] to bootstrap applications.
RenderObjectToWidgetElement attachToRenderTree(BuildOwner owner, [ RenderObjectToWidgetElement element ]) {
if (element == null) {
owner.lockState(() {
element = createElement();
assert(element != null);
element.assignOwner(owner);
});
owner.buildScope(element, () {
element.mount(null, null);
});
} else {
element._newWidget = this;
element.markNeedsBuild();
}
return element;
}
跟着代码往下走如果根element没有创建,那么就调用createElement创建根element,element和widget进行关联。接着调用element.assignOwner(owner),这个方法其实就是设置这个element的跟踪,最后调用owner.buildScope这个方法,这个方法是确定更新widget的范围。如果element已经创建了,将根element和关联的widget设为新的,并且重新构建这个element,为了后面的复用。
3.scheduleWarmUpFrame
runApp()方法最后一行执行scheduleWarmUpFrame方法:
/// Schedule a frame to run as soon as possible, rather than waiting for
/// the engine to request a frame in response to a system “Vsync” signal.
///
/// This is used during application startup so that the first frame (which is
/// likely to be quite expensive) gets a few extra milliseconds to run.
///
/// Locks events dispatching until the scheduled frame has completed.
///
/// If a frame has already been scheduled with [scheduleFrame] or
/// [scheduleForcedFrame], this call may delay that frame.
///
/// If any scheduled frame has already begun or if another
/// [scheduleWarmUpFrame] was already called, this call will be ignored.
///
/// Prefer [scheduleFrame] to update the display in normal operation.
void scheduleWarmUpFrame() {
if (_warmUpFrame || schedulerPhase != SchedulerPhase.idle)
return;
_warmUpFrame = true;
Timeline.startSync(‘Warm-up frame’);
final bool hadScheduledFrame = _hasScheduledFrame;
// We use timers here to ensure that microtasks flush in between.
Timer.run(() {
assert(_warmUpFrame);
handleBeginFrame(null);—>1
});
Timer.run(() {
assert(_warmUpFrame);
handleDrawFrame(); ---->2
// We call resetEpoch after this frame so that, in the hot reload case,
// the very next frame pretends to have occurred immediately after this
// warm-up frame. The warm-up frame’s timestamp will typically be far in
// the past (the time of the last real frame), so if we didn’t reset the
// epoch we would see a sudden jump from the old time in the warm-up frame
// to the new time in the “real” frame. The biggest problem with this is
// that implicit animations end up being triggered at the old time and
// then skipping every frame and finishing in the new time.
resetEpoch();
_warmUpFrame = false;
if (hadScheduledFrame)
scheduleFrame();
});
// Lock events so touch events etc don’t insert themselves until the
// scheduled frame has finished.
lockEvents(() async {
await endOfFrame;
Timeline.finishSync();
});
}
首先这个方法在SchedulerBinding里,这两个方法主要执行了handleBeginFrame和handleDrawFrame方法:
3.1.handleBeginFrame
void handleBeginFrame(Duration rawTimeStamp) {
…
try {
// TRANSIENT FRAME CALLBACKS
Timeline.startSync(‘Animate’, arguments: timelineWhitelistArguments);
_schedulerPhase = SchedulerPhase.transientCallbacks;
final Map<int, _FrameCallbackEntry> callbacks = _transientCallbacks;
_transientCallbacks = <int, _FrameCallbackEntry>{};
callbacks.forEach((int id, _FrameCallbackEntry callbackEntry) {
if (!_removedIds.contains(id))
_invokeFrameCallback(callbackEntry.callback, _currentFrameTimeStamp, callbackEntry.debugStack);
});
_removedIds.clear();
} finally {
_schedulerPhase = SchedulerPhase.midFrameMicrotasks;
}
}
可以看到主要是对transientCallbacks队列操作,这个集合主要是放一些临时回调,存放动画回调。
3.2.handleDrawFrame
void handleDrawFrame() {
assert(_schedulerPhase == SchedulerPhase.midFrameMicrotasks);
Timeline.finishSync(); // end the “Animate” phase
try {
// PERSISTENT FRAME CALLBACKS ----->
_schedulerPhase = SchedulerPhase.persistentCallbacks;
for (FrameCallback callback in _persistentCallbacks)
_invokeFrameCallback(callback, _currentFrameTimeStamp);
// POST-FRAME CALLBACKS ------>
_schedulerPhase = SchedulerPhase.postFrameCallbacks;
final List localPostFrameCallbacks =
List.from(_postFrameCallbacks);
_postFrameCallbacks.clear();
for (FrameCallback callback in localPostFrameCallbacks)
_invokeFrameCallback(callback, _currentFrameTimeStamp);
} finally {
_schedulerPhase = SchedulerPhase.idle;
Timeline.finishSync(); // end the Frame
profile(() {
_profileFrameStopwatch.stop();
_profileFramePostEvent();
});
assert(() {
if (debugPrintEndFrameBanner)
debugPrint(‘▀’ * _debugBanner.length);
_debugBanner = null;
return true;
}());
_currentFrameTimeStamp = null;
}
}
可以看到执行persistentCallbacks队列,这个队列用于存放一些持久的回调,不能再此类回调中在请求新的绘制帧,持久回调一经注册则不能移除。接着执行postFrameCallbacks这个队列在每一Frame(一次绘制)结束时只会调用一次,调用后被系统移除。
也就是scheduleWarmUpFrame这个方法安排帧尽快执行,当一次帧绘制结束之前不会响应各种事件,这样保证绘制过程中不触发重绘。上面说过:
RendererBinding:是渲染树和Flutter engine的桥梁,提供onMetricsChanged和onTextScaleFactorChanged回调
Flutter真正渲染和绘制是在这个绑定里:
4.渲染绘制
void initInstances() {
super.initInstances();
_instance = this;//初始化
_pipelineOwner = PipelineOwner(
onNeedVisualUpdate: ensureVisualUpdate,
onSemanticsOwnerCreated: _handleSemanticsOwnerCreated,
onSemanticsOwnerDisposed: _handleSemanticsOwnerDisposed,
);
//添加设置监听
window
…onMetricsChanged = handleMetricsChanged
…onTextScaleFactorChanged = handleTextScaleFactorChanged
…onPlatformBrightnessChanged = handlePlatformBrightnessChanged
…onSemanticsEnabledChanged = _handleSemanticsEnabledChanged
…onSemanticsAction = _handleSemanticsAction;
initRenderView();
_handleSemanticsEnabledChanged();
assert(renderView != null);
//添加persistentFrameCallback
addPersistentFrameCallback(_handlePersistentFrameCallback);
//创建触摸管理
_mouseTracker = _createMouseTracker();
}
addPersistentFrameCallback这个方法主要向persistentFrameCallback添加了回调:
void addPersistentFrameCallback(FrameCallback callback) {
_persistentCallbacks.add(callback);
}
再看_handlePersistentFrameCallback这个回调做了什么:
void _handlePersistentFrameCallback(Duration timeStamp) {
drawFrame();
}
@protected
void drawFrame() {
assert(renderView != null);
pipelineOwner.flushLayout();//更新布局信息
pipelineOwner.flushCompositingBits();//在flushLayout只后调用,在flushPaint之前调用,更新RenderObject是否需要重绘
pipelineOwner.flushPaint();//更新绘制RenderObject
renderView.compositeFrame(); // 发送bit数据给GPU
pipelineOwner.flushSemantics(); // 发送语义数据给操作系统
}
下面一个一个方法走:
4.1.flushLayout
void flushLayout() {
profile(() {
Timeline.startSync(‘Layout’, arguments: timelineWhitelistArguments);
});
assert(() {
_debugDoingLayout = true;
return true;
}());
try {
// TODO(ianh): assert that we’re not allowing previously dirty nodes to redirty themselves
while (_nodesNeedingLayout.isNotEmpty) {
final List dirtyNodes = _nodesNeedingLayout;
_nodesNeedingLayout = [];
for (RenderObject node in dirtyNodes…sort((RenderObject a, RenderObject b) => a.depth - b.depth)) {
if (node._needsLayout && node.owner == this)
node._layoutWithoutResize();
}
}
} finally {
assert(() {
_debugDoingLayout = false;
return true;
}());
profile(() {
Timeline.finishSync();
});
}
}
看源码得知首先获取哪些标记为脏的RenderObject的布局信息,然后通过ode._layoutWithoutResize();重新调整这些RenderObject。
4.2.flushCompositingBits
void flushCompositingBits() {
profile(() { Timeline.startSync(‘Compositing bits’); });
_nodesNeedingCompositingBitsUpdate.sort((RenderObject a, RenderObject b) => a.depth - b.depth);
for (RenderObject node in _nodesNeedingCompositingBitsUpdate) {
if (node._needsCompositingBitsUpdate && node.owner == this)
node._updateCompositingBits();
}
_nodesNeedingCompositingBitsUpdate.clear();
profile(() { Timeline.finishSync(); });
}
检查RenderObject是否需要重绘,并且通过node._updateCompositingBits();更新_needsCompositing这个属性,若为true就要重新绘制,否则不需要。
4.3.flushPaint
void flushPaint() {
profile(() { Timeline.startSync(‘Paint’, arguments: timelineWhitelistArguments); });
assert(() {
_debugDoingPaint = true;
return true;
}());
try {
final List dirtyNodes = _nodesNeedingPaint;
_nodesNeedingPaint = [];
// Sort the dirty nodes in reverse order (deepest first).
//方向遍历这些标记过的node
for (RenderObject node in dirtyNodes…sort((RenderObject a, RenderObject b) => b.depth - a.depth)) {
assert(node._layer != null);
if (node._needsPaint && node.owner == this) {
if (node._layer.attached) {
//重新绘制
PaintingContext.repaintCompositedChild(node);
} else {
node._skippedPaintingOnLayer();
}
}
}
assert(_nodesNeedingPaint.isEmpty);
} finally {
assert(() {
_debugDoingPaint = false;
return true;
}());
profile(() { Timeline.finishSync(); });
}
}
这个方法通过反向遍历(dirty标记)取得需要重绘的RenderObject,最后通过PaintingContext.repaintCompositedChild(node);重绘。
4.4.compositeFrame
void compositeFrame() {
Timeline.startSync(‘Compositing’, arguments: timelineWhitelistArguments);
try {
//创建Scene对象
final ui.SceneBuilder builder = ui.SceneBuilder();
final ui.Scene scene = layer.buildScene(builder);
if (automaticSystemUiAdjustment)
_updateSystemChrome();
//使用render方法将Scene对象显示在屏幕上
_window.render(scene);//调用flutter engine的渲染API
scene.dispose();
assert(() {
if (debugRepaintRainbowEnabled || debugRepaintTextRainbowEnabled)
debugCurrentRepaintColor = debugCurrentRepaintColor.withHue((debugCurrentRepaintColor.hue + 2.0) % 360.0);
return true;
}());
} finally {
Timeline.finishSync();
}
}
Scene是用来保存渲染后的最终像素信息,这个方法将Canvas画好的Scene对象传给window.render()方法,该方法会直接将Scene信息发送给Flutter engine,最终Flutter engine将图像画在设备屏幕上,这样整个绘制流程就算完了。
注意:RendererBinding只是混入对象,最终混入到WidgetsBinding,回到最开始来看:
class WidgetsFlutterBinding extends BindingBase with GestureBinding, ServicesBinding, SchedulerBinding, PaintingBinding, SemanticsBinding, RendererBinding, WidgetsBinding {
/// Returns an instance of the [WidgetsBinding], creating and
自我介绍一下,小编13年上海交大毕业,曾经在小公司待过,也去过华为、OPPO等大厂,18年进入阿里一直到现在。
深知大多数初中级Android工程师,想要提升技能,往往是自己摸索成长或者是报班学习,但对于培训机构动则近万的学费,着实压力不小。自己不成体系的自学效果低效又漫长,而且极易碰到天花板技术停滞不前!
因此收集整理了一份《2024年Android移动开发全套学习资料》,初衷也很简单,就是希望能够帮助到想自学提升又不知道该从何学起的朋友,同时减轻大家的负担。
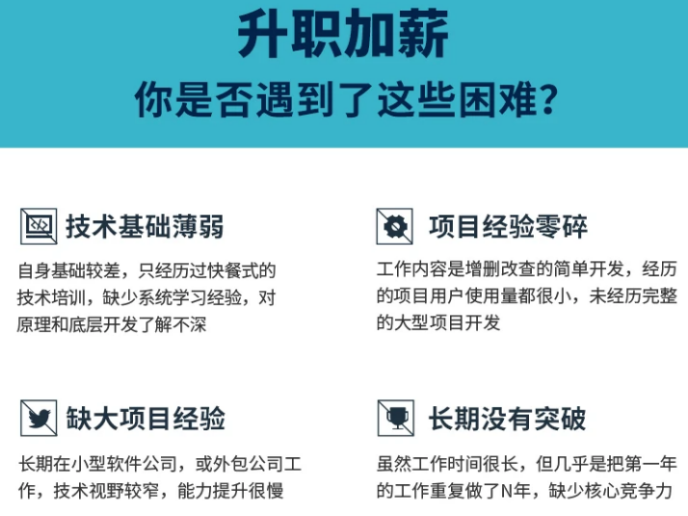
既有适合小白学习的零基础资料,也有适合3年以上经验的小伙伴深入学习提升的进阶课程,基本涵盖了95%以上Android开发知识点,真正体系化!
由于文件比较大,这里只是将部分目录截图出来,每个节点里面都包含大厂面经、学习笔记、源码讲义、实战项目、讲解视频,并且会持续更新!
如果你觉得这些内容对你有帮助,可以扫码获取!!(备注:Android)

题外话
不管怎么样,不论是什么样的大小面试,要想不被面试官虐的不要不要的,只有刷爆面试题题做好全面的准备,当然除了这个还需要在平时把自己的基础打扎实,这样不论面试官怎么样一个知识点里往死里凿,你也能应付如流啊
这里我为大家准备了一些我工作以来以及参与过的大大小小的面试收集总结出来的一套进阶学习的视频及面试专题资料包,主要还是希望大家在如今大环境不好的情况下面试能够顺利一点,希望可以帮助到大家~

欢迎评论区讨论。
《互联网大厂面试真题解析、进阶开发核心学习笔记、全套讲解视频、实战项目源码讲义》点击传送门即可获取!
mg-GyMbSPhw-1712512908660)]
既有适合小白学习的零基础资料,也有适合3年以上经验的小伙伴深入学习提升的进阶课程,基本涵盖了95%以上Android开发知识点,真正体系化!
由于文件比较大,这里只是将部分目录截图出来,每个节点里面都包含大厂面经、学习笔记、源码讲义、实战项目、讲解视频,并且会持续更新!
如果你觉得这些内容对你有帮助,可以扫码获取!!(备注:Android)
题外话
不管怎么样,不论是什么样的大小面试,要想不被面试官虐的不要不要的,只有刷爆面试题题做好全面的准备,当然除了这个还需要在平时把自己的基础打扎实,这样不论面试官怎么样一个知识点里往死里凿,你也能应付如流啊
这里我为大家准备了一些我工作以来以及参与过的大大小小的面试收集总结出来的一套进阶学习的视频及面试专题资料包,主要还是希望大家在如今大环境不好的情况下面试能够顺利一点,希望可以帮助到大家~
[外链图片转存中…(img-lucnWryR-1712512908660)]
欢迎评论区讨论。
《互联网大厂面试真题解析、进阶开发核心学习笔记、全套讲解视频、实战项目源码讲义》点击传送门即可获取!


 569
569


 被折叠的 条评论
为什么被折叠?
被折叠的 条评论
为什么被折叠?
 到【灌水乐园】发言


