


Matrix matrix = new Matrix();
matrix.postRotate(angle);
return Bitmap.createBitmap(bitmap, 0, 0, bitmap.getWidth(),
bitmap.getHeight(), matrix, true);
}
/**
- 圆形图片
*@param source 位图
-
@param strokeWidth 裁剪范围 0表示最大
-
@param bl 是否需要描边
-
@param bl 画笔粗细
-
@param bl 颜色代码
-
@return bitmap
*/
public static Bitmap createCircleBitmap(Bitmap source, int strokeWidth, boolean bl,int edge,int color) {
int diameter = source.getWidth() < source.getHeight() ? source.getWidth() : source.getHeight();
Bitmap target = Bitmap.createBitmap(diameter, diameter, Config.ARGB_8888);
Canvas canvas = new Canvas(target);//创建画布
Paint paint = new Paint();
paint.setAntiAlias(true);
canvas.drawCircle(diameter / 2, diameter / 2, diameter / 2, paint);//绘制圆形
paint.setXfermode(new PorterDuffXfermode(PorterDuff.Mode.SRC_IN));//取相交裁剪
canvas.drawBitmap(source, strokeWidth, strokeWidth, paint);
if(bl) {
if (color == 0) color = 0xFFFEA248;//默认橘黄色
paint.setColor(color);
paint.setStyle(Paint.Style.STROKE);//描边
paint.setStrokeWidth(edge);
canvas.drawCircle(diameter / 2, diameter / 2, diameter / 2, paint);
}
return target;
}
/**
-
圆角图片
-
@param bitmap 位图
-
@param rx x方向上的圆角半径
-
@param ry y方向上的圆角半径
-
@param bl 是否需要描边
-
@param bl 画笔粗细
-
@param bl 颜色代码
-
@return bitmap
*/
public static Bitmap createCornerBitmap(Bitmap bitmap,int rx,int ry,boolean bl,int edge,int color) {
Bitmap output = Bitmap.createBitmap(bitmap.getWidth(), bitmap.getHeight(), Config.ARGB_8888);
Canvas canvas = new Canvas(output);//创建画布
Paint paint = new Paint();
paint.setAntiAlias(true);
Rect rect = new Rect(0, 0, bitmap.getWidth(), bitmap.getHeight());
RectF rectF = new RectF(rect);
canvas.drawRoundRect(rectF, rx, ry, paint);//绘制圆角矩形
paint.setXfermode(new PorterDuffXfermode(Mode.SRC_IN));//取相交裁剪
canvas.drawBitmap(bitmap, rect, rect, paint);
if(bl) {
if (color == 0) color = 0xFFFEA248;//默认橘黄色
paint.setColor(color);
paint.setColor(color);
paint.setStyle(Paint.Style.STROKE);//描边
paint.setStrokeWidth(edge);
canvas.drawRoundRect(rectF, rx, ry, paint);
}
return output;
}
/**
-
按比例裁剪图片
-
@param bitmap 位图
-
@param wScale 裁剪宽 0~100%
-
@param hScale 裁剪高 0~100%
-
@return bitmap
*/
public static Bitmap cropBitmap(Bitmap bitmap, float wScale, float hScale) {
int w = bitmap.getWidth();
int h = bitmap.getHeight();
int wh = (int) (w * wScale);
int hw = (int) (h * hScale);
int retX = (int) (w * (1 - wScale) / 2);
int retY = (int) (h * (1 - hScale) / 2);
return Bitmap.createBitmap(bitmap, retX, retY, wh, hw, null, false);
}
/**
-
获得带倒影的图片方法
-
@param bitmap 位图
-
@param region 倒影区域 0.1~1
-
@return bitmap
*/
public static Bitmap createReflectionBitmap(Bitmap bitmap,float region) {
int width = bitmap.getWidth();
int height = bitmap.getHeight();
Matrix matrix = new Matrix();
matrix.preScale(1, -1);//镜像缩放
Bitmap reflectionBitmap = Bitmap.createBitmap(
bitmap,0
, (int)(height*(1-region))//从哪个点开始绘制
, width
,(int) (height*region)//绘制多高
, matrix, false);
Bitmap reflectionWithBitmap = Bitmap.createBitmap(width,height+ (int) (height*region),
Config.ARGB_8888);
Canvas canvas = new Canvas(reflectionWithBitmap);
canvas.drawBitmap(bitmap, 0, 0, null);
canvas.drawBitmap(reflectionBitmap, 0, height , null);
LinearGradient shader = new LinearGradient(0, bitmap.getHeight(), 0,
reflectionWithBitmap.getHeight()
, 0x70ffffff, 0x00ffffff, TileMode.CLAMP);
Paint paint = new Paint();
paint.setShader(shader);
paint.setXfermode(new PorterDuffXfermode(Mode.DST_IN));//取两层绘制交集。显示下层。
canvas.drawRect(0, height, width, reflectionWithBitmap.getHeight() , paint);
return reflectionWithBitmap;
}
/**
-
图片质量压缩
-
@param bitmap
-
@param many 百分比
-
@return
*/
public static Bitmap compressBitmap(Bitmap bitmap, float many){
ByteArrayOutputStream baos = new ByteArrayOutputStream();
bitmap.compress(Bitmap.CompressFormat.JPEG, (int)many*100, baos);
ByteArrayInputStream isBm = new ByteArrayInputStream(baos.toByteArray());
return BitmapFactory.decodeStream(isBm, null, null);
}
/**
- 高级图片质量压缩
*@param bitmap 位图
- @param maxSize 压缩后的大小,单位kb
*/
public static Bitmap imageZoom(Bitmap bitmap, double maxSize) {
// 将bitmap放至数组中,意在获得bitmap的大小(与实际读取的原文件要大)
ByteArrayOutputStream baos = new ByteArrayOutputStream();
// 格式、质量、输出流
bitmap.compress(Bitmap.CompressFormat.PNG, 70, baos);
byte[] b = baos.toByteArray();
// 将字节换成KB
double mid = b.length / 1024;
// 获取bitmap大小 是允许最大大小的多少倍
double i = mid / maxSize;
// 判断bitmap占用空间是否大于允许最大空间 如果大于则压缩 小于则不压缩
doRecycledIfNot(bitmap);
if (i > 1) {
// 缩放图片 此处用到平方根 将宽带和高度压缩掉对应的平方根倍
// (保持宽高不变,缩放后也达到了最大占用空间的大小)
return scaleWithWH(bitmap,bitmap.getWidth() / Math.sqrt(i),
bitmap.getHeight() / Math.sqrt(i));
}
return null;
}
/***
- 图片缩放
*@param bitmap 位图
-
@param w 新的宽度
-
@param h 新的高度
-
@return Bitmap
*/
public static Bitmap scaleWithWH(Bitmap bitmap, double w, double h) {
if (w == 0 || h == 0 || bitmap == null) {
return bitmap;
} else {
int width = bitmap.getWidth();
int height = bitmap.getHeight();
Matrix matrix = new Matrix();
float scaleWidth = (float) (w / width);
float scaleHeight = (float) (h / height);
matrix.postScale(scaleWidth, scaleHeight);
return Bitmap.createBitmap(bitmap, 0, 0, width, height,
matrix, true);
}
}
/**
-
YUV视频流格式转bitmap
-
@param data YUV视频流格式
-
@return width 设置宽度
-
@return width 设置高度
*/
public static Bitmap getBitmap(byte[] data, int width, int height) {
Bitmap bitmap;
YuvImage yuvimage = new YuvImage(data, ImageFormat.NV21, width, height, null);
//data是onPreviewFrame参数提供
ByteArrayOutputStream baos = new ByteArrayOutputStream();
yuvimage.compressToJpeg(new Rect(0, 0, yuvimage.getWidth(), yuvimage.getHeight()), 100, baos);//
// 80–JPG图片的质量[0-100],100最高
byte[] rawImage = baos.toByteArray();
BitmapFactory.Options options = new BitmapFactory.Options();
SoftReference softRef = new SoftReference(BitmapFactory.decodeByteArray(rawImage, 0, rawImage
.length, options));
bitmap = softRef.get();
return bitmap;
}
/**
-
图片资源文件转bitmap
-
@param file 图片的绝对路径
-
@return bitmap
*/
public static Bitmap getBitmapResources(Context context,int resId){
return BitmapFactory.decodeResource(context.getResources(),resId);
}
/**
-
将图片路径转Bitmap
-
@Param path 图片路径
-
@return Bitmap
*/
public static Bitmap getBitmapPath(String path){
return BitmapFactory.decodeFile(path);
}
/**
-
bitmap保存到指定路径
-
@param file 图片的绝对路径
-
@param file 位图
-
@return bitmap
*/
public static boolean saveFile(String file, Bitmap bmp) {
if(TextUtils.isEmpty(file) || bmp == null) return false;
File f = new File(file);
if (f.exists()) {
f.delete();
}else {
File p = f.getParentFile();
if(!p.exists()) {
p.mkdirs();
}
}
try {
FileOutputStream out = new FileOutputStream(f);
bmp.compress(Bitmap.CompressFormat.JPEG, 100, out);
out.flush();
out.close();
} catch (IOException e) {
// TODO Auto-generated catch block
e.printStackTrace();
return false;
}
return true;
}
自我介绍一下,小编13年上海交大毕业,曾经在小公司待过,也去过华为、OPPO等大厂,18年进入阿里一直到现在。
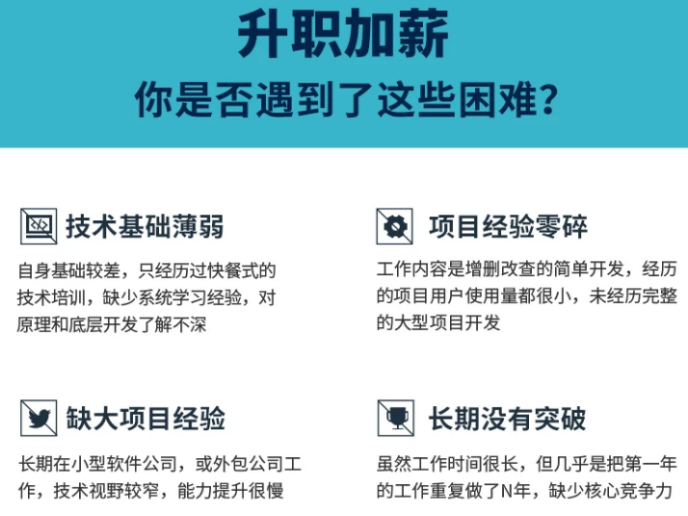
深知大多数初中级Android工程师,想要提升技能,往往是自己摸索成长或者是报班学习,但对于培训机构动则近万的学费,着实压力不小。自己不成体系的自学效果低效又漫长,而且极易碰到天花板技术停滞不前!
因此收集整理了一份《2024年Android移动开发全套学习资料》,初衷也很简单,就是希望能够帮助到想自学提升又不知道该从何学起的朋友,同时减轻大家的负担。


既有适合小白学习的零基础资料,也有适合3年以上经验的小伙伴深入学习提升的进阶课程,基本涵盖了95%以上Android开发知识点,真正体系化!
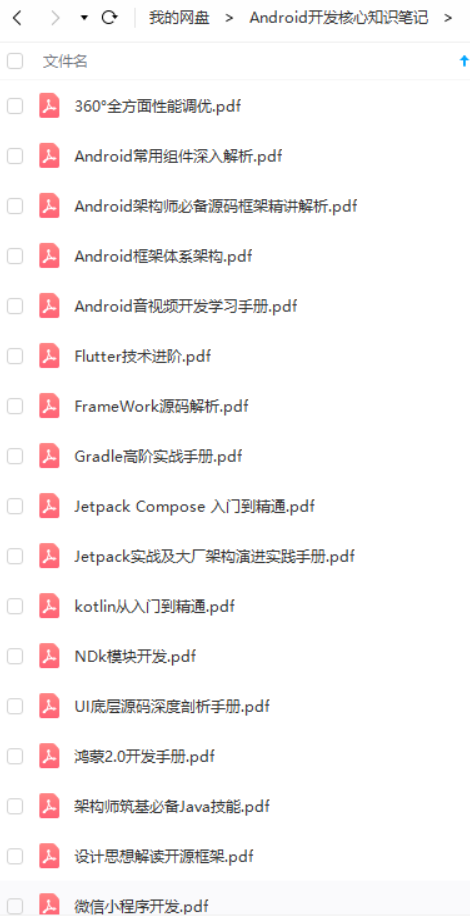
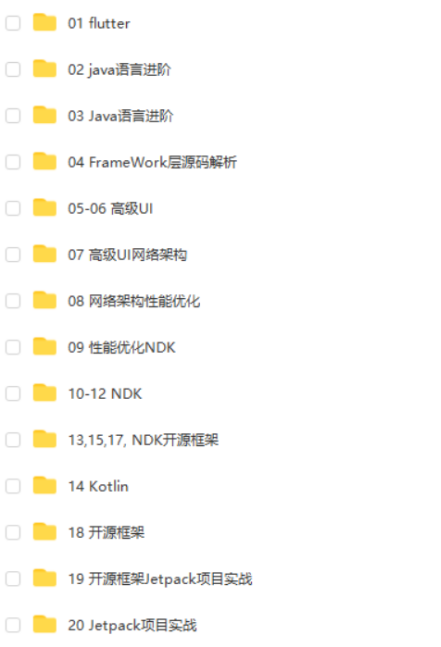
由于文件比较大,这里只是将部分目录截图出来,每个节点里面都包含大厂面经、学习笔记、源码讲义、实战项目、讲解视频,并且会持续更新!
如果你觉得这些内容对你有帮助,可以扫码获取!!(备注:Android)

最后
为了方便有学习需要的朋友,我把资料都整理成了视频教程(实际上比预期多花了不少精力)
当程序员容易,当一个优秀的程序员是需要不断学习的,从初级程序员到高级程序员,从初级架构师到资深架构师,或者走向管理,从技术经理到技术总监,每个阶段都需要掌握不同的能力。早早确定自己的职业方向,才能在工作和能力提升中甩开同龄人。
- 无论你现在水平怎么样一定要 持续学习 没有鸡汤,别人看起来的毫不费力,其实费了很大力,这四个字就是我的建议!!
- 我希望每一个努力生活的IT工程师,都会得到自己想要的,因为我们很辛苦,我们应得的。
当程序员容易,当一个优秀的程序员是需要不断学习的,从初级程序员到高级程序员,从初级架构师到资深架构师,或者走向管理,从技术经理到技术总监,每个阶段都需要掌握不同的能力。早早确定自己的职业方向,才能在工作和能力提升中甩开同龄人。
无论你现在水平怎么样一定要 持续学习 没有鸡汤,别人看起来的毫不费力,其实费了很大力,没有人能随随便便成功。
加油,共勉。
《互联网大厂面试真题解析、进阶开发核心学习笔记、全套讲解视频、实战项目源码讲义》点击传送门即可获取!
教程(实际上比预期多花了不少精力)
当程序员容易,当一个优秀的程序员是需要不断学习的,从初级程序员到高级程序员,从初级架构师到资深架构师,或者走向管理,从技术经理到技术总监,每个阶段都需要掌握不同的能力。早早确定自己的职业方向,才能在工作和能力提升中甩开同龄人。
- 无论你现在水平怎么样一定要 持续学习 没有鸡汤,别人看起来的毫不费力,其实费了很大力,这四个字就是我的建议!!
- 我希望每一个努力生活的IT工程师,都会得到自己想要的,因为我们很辛苦,我们应得的。
当程序员容易,当一个优秀的程序员是需要不断学习的,从初级程序员到高级程序员,从初级架构师到资深架构师,或者走向管理,从技术经理到技术总监,每个阶段都需要掌握不同的能力。早早确定自己的职业方向,才能在工作和能力提升中甩开同龄人。
无论你现在水平怎么样一定要 持续学习 没有鸡汤,别人看起来的毫不费力,其实费了很大力,没有人能随随便便成功。
加油,共勉。
《互联网大厂面试真题解析、进阶开发核心学习笔记、全套讲解视频、实战项目源码讲义》点击传送门即可获取!


 954
954


 被折叠的 条评论
为什么被折叠?
被折叠的 条评论
为什么被折叠?
 到【灌水乐园】发言


