


《一线大厂Java面试题解析+核心总结学习笔记+最新讲解视频+实战项目源码》,点击传送门,即可获取!
AutoConfigurationImportSelector.AutoConfigurationEntry autoConfigurationEntry = this.getAutoConfigurationEntry(annotationMetadata);
return StringUtils.toStringArray(autoConfigurationEntry.getConfigurations());
}
}
}
这个方法是用来选择导入哪些组件的,该方法又调用了getAutoConfigurationEntry()方法得到需要导入的组件,所以我们查看该方法:
protected AutoConfigurationImportSelector.AutoConfigurationEntry getAutoConfigurationEntry(AnnotationMetadata annotationMetadata) {
if (!this.isEnabled(annotationMetadata)) {
return EMPTY_ENTRY;
} else {
AnnotationAttributes attributes = this.getAttributes(annotationMetadata);
List configurations = this.getCandidateConfigurations(annotationMetadata, attributes);
configurations = this.removeDuplicates(configurations);
Set exclusions = this.getExclusions(annotationMetadata, attributes);
this.checkExcludedClasses(configurations, exclusions);
configurations.removeAll(exclusions);
configurations = this.getConfigurationClassFilter().filter(configurations);
this.fireAutoConfigurationImportEvents(configurations, exclusions);
return new AutoConfigurationImportSelector.AutoConfigurationEntry(configurations, exclusions);
}
}
在getCandidateConfigurations()方法处打一个断点,通过debug运行后我们可以发现,configurations集合中就已经得到了127个自动配置类:

那么这些类究竟从何而来呢?我们需要探究一下getCandidateConfigurations()方法做了什么操作,它其实是调用了loadFactoryNames()方法:
List configurations = SpringFactoriesLoader.loadFactoryNames(this.getSpringFactoriesLoaderFactoryClass(), this.getBeanClassLoader());
最终调用的是loadSpringFactories()方法来得到一个Map集合:
private static Map<String, List> loadSpringFactories(@Nullable ClassLoader classLoader) {
MultiValueMap<String, String> result = (MultiValueMap)cache.get(classLoader);
if (result != null) {
return result;
} else {
try {
Enumeration urls = classLoader != null ? classLoader.getResources(“META-INF/spring.factories”) : ClassLoader.getSystemResources(“META-INF/spring.factories”);
LinkedMultiValueMap result = new LinkedMultiValueMap();
}
}
}
可以看到,它其实是从 META-INF/spring.factories 文件中获取的组件,我们可以看看导入的依赖中:

在spring-boot-autoconfigure-2.3.7.RELEASE.jar的META-INF目录下就有一个spring.factories文件,打开看看文件内容:
# Initializers
org.springframework.context.ApplicationContextInitializer=\
org.springframework.boot.autoconfigure.SharedMetadataReaderFactoryContextInitializer,\
org.springframework.boot.autoconfigure.logging.ConditionEvaluationReportLoggingListener
# Application Listeners
org.springframework.context.ApplicationListener=\
org.springframework.boot.autoconfigure.BackgroundPreinitializer
# Auto Configuration Import Listeners
org.springframework.boot.autoconfigure.AutoConfigurationImportListener=\
org.springframework.boot.autoconfigure.condition.ConditionEvaluationReportAutoConfigurationImportListener
# Auto Configuration Import Filters
org.springframework.boot.autoconfigure.AutoConfigurationImportFilter=\
org.springframework.boot.autoconfigure.condition.OnBeanCondition,\
org.springframework.boot.autoconfigure.condition.OnClassCondition,\
org.springframework.boot.autoconfigure.condition.OnWebApplicationCondition
# Auto Configure
org.springframework.boot.autoconfigure.EnableAutoConfiguration=\
org.springframework.boot.autoconfigure.admin.SpringApplicationAdminJmxAutoConfiguration,\
org.springframework.boot.autoconfigure.aop.AopAutoConfiguration,\
org.springframework.boot.autoconfigure.amqp.RabbitAutoConfiguration,\
org.springframework.boot.autoconfigure.batch.BatchAutoConfiguration,\
…
文件里的内容其实就是在最开始需要注册的组件,这些组件都是一些配置类,只要项目一启动,Spring Boot就会将这些配置类全部注册到容器中。
按需开启自动配置
虽然配置类会被 Spring Boot 自动注册到容器中,但并不是每个配置类都会默认生效,SpringBoot会根据当前的场景按需开启自动配置。比如Thymeleaf模板引擎的自动配置类:

@ConditionalOnClass注解的作用是检查当前项目是否有指定的.class文件,若有则生效;否则不生效。因为我们并未引入Thymeleaf的依赖,导致TemplateMode.class和SpringTemplatengine.class都是不存在的,所以ThymeleafAutoCinfiguration并不会生效。
修改默认配置
既然SpringBoot帮助我们进行了大量的自动配置,那么对于特殊的一些应用场景,我们该如何修改它的默认配置呢?如果你不了解SpringBoot的配置原理,那么当你需要修改默认配置时,你肯定是束手无策的。我们可以找到SpringMVC的默认配置,看看SpringBoot是如何帮我们进行配置的:

@EnableConfigurationPropertie(WebMvcProperties.class)注解在之前也有介绍,它是用来开启指定类的配置绑定的,所以我们来看看WebMvcProperties类:
@ConfigurationProperties(prefix = “spring.mvc”)
public class WebMvcProperties {
}
配置绑定的前缀时spring.mvc,所以我们若是想修改SpringBoot的默认配置,则必须要将前缀写为spring.mvc,至于我们可以修改哪些配置,只需要查看该类中有哪些成员变量即可,比如:
public static class View {
private String prefix;
private String suffix;
public String getPrefix() {
return this.prefix;
}
public void setPrefix(String prefix) {
this.prefix = prefix;
}
public String getSuffix() {
return this.suffix;
}
public void setSuffix(String suffix) {
this.suffix = suffix;
}
}
在WebMvcProperties类中有这样一个内部类,内部类中有prefix和suffix两个成员变量,它们是分别用来设置视图的前缀和后缀的,所以我们若想进行配置,则需要在配置文件中这样编写:
spring.mvc.view.prefix=/views/
spring.mvc.view.suffix=.html
传统的Spring开发Web需要编写大量的配置,而使用SpringBoot将免去编写配置的操作,直接面向业务逻辑开发,一起来看看该如何使用SpringBoot进行Web开发吧!
03
Web开发
静态资源处理
Spring Boot默认设置了几个静态资源目录:
-
/static
-
/public
-
/resources
-
/META-INF/resources
这几个目录需要建立在类路径下,若如此做,则放置在这些目录下的静态资源可以被直接访问到。

也可以通过配置来设置资源的访问前缀:
spring.mvc.static-path-pattern=/res
此时若想访问静态资源,就必须添加res前缀才行。
我们还可以修改Spring Boot的默认资源路径,只需添加配置:
spring.web.resources.static-locations=classpath:/myImg
若如此做,则我们只能将静态资源放在myImg目录下,之前的所有静态资源目录都将失效。
欢迎页
Spring Boot提供了两种方式来实现欢迎页,第一种便是在资源目录放置欢迎页:
SpringBoot Index!
访问结果:

第二种方式是通过Controller处理/index请求:
@Controller
public class HelloController {
@RequestMapping(“/”)
public String toIndex(){
return “hello”;
}
}
Favicon
Spring Boot也提供了自动设置网站图标的方式,只需要将名为 favicon.ico 的图片放在静态资源目录下即可:

Rest映射
在Spring Boot中,默认已经注册了HiddenHttpMethodFilter,所以可以直接编写Rest风格的url,只需在表单中添加一个_method属性的请求域即可:
编写Controller处理请求:
@RestController
public class HelloController {
@GetMapping(“/user”)
public String getUser(){
return “Get”;
}
@PostMapping(“/user”)
public String postUser(){
return “Post”;
}
@DeleteMapping(“/user”)
public String deleteUser(){
return “Delete”;
}
@PutMapping(“/user”)
public String putUser(){
return “Put”;
}
}
最后需要在配置文件中开启对Rest的支持:
spring.mvc.hiddenmethod.filter.enabled=true
04
常用参数及注解
下面介绍Web开发中的一些常用参数和注解。
@PathVariable
该注解用于获取路径变量,比如:
@GetMapping(“/user/{id}”)
public String getUser(@PathVariable(“id”) Integer id){
return id + “”;
}
此时若请求url为http://localhost:8080/user/2,则获取到id值为2。
@RequestHeader
该注解用于获取请求头,比如:
@GetMapping(“/header”)
public String getHeader(@RequestHeader(“User-Agent”) String userAgent){
return userAgent;
}
它还能够通过一个Map集合获取所有的请求头信息:
@GetMapping(“/header”)
public Map<String, String> getHeader(@RequestHeader Map<String,String> headers){
return headers;
}
@RequestParam
该注解用于获取请求参数,比如:
@GetMapping(“/param”)
public String getParam(@RequestParam(“name”) String name,
@RequestParam(“age”) Integer age){
return name + “:” + age;
}
此时若请求url为http://localhost:8080/param?name=zhangsan&age=20,则得到值 zhangsan:20 。
@CookieValue
该注解用于获取Cookie值,比如:
@GetMapping(“/cookie”)
public String getCookie(@CookieValue(“Idea-8296e76f”) String cookie) {
return cookie;
}
它还可以通过Cookie键名获取一个Cookie对象:
@GetMapping(“/cookie”)
public String getCookie(@CookieValue(“Idea-8296e76f”) Cookie cookie) {
return cookie.getName();
}
@RequestBody
该注解用于获取获取请求体的值,比如:
@PostMapping(“/body”)
public String getBody(@RequestBody String content) {
return content;
}
既然是获取请求体的值,那么只有Post请求才有请求体,所以编写一个表单:
账号:
密码:
通过该表单提交数据后,得到 username=admin&password=123 。
@RequestAttribute
该注解用于获取request域的数据,比如:
@GetMapping(“/success”)
public String success(@RequestAttribute(“msg”) String msg){
return msg;
}
通过键名即可获取request域中的数据。
@MatrixVariable
该注解用于获取矩阵变量,比如:
@GetMapping(“/matrix/{path}”)
public String getMatrix(@MatrixVariable(“name”) String name,
@MatrixVariable(“age”) Integer age,
@PathVariable(“path”) String path) {
return path + “—” + name + “:” + age;
对于该注解的使用,需要注意几点,首先矩阵变量是绑定在路径中的,所以请求映射中一定要携带一个${path};其次在SpringBoot中默认禁用掉了矩阵变量的功能,所以我们还需要手动去开启该功能:
@Configuration
public class MyConfig {
@Bean
public WebMvcConfigurer webMvcConfigurer(){
return new WebMvcConfigurer() {
@Override
public void configurePathMatch(PathMatchConfigurer configurer) {
UrlPathHelper urlPathHelper = new UrlPathHelper();
urlPathHelper.setRemoveSemicolonContent(false);
configurer.setUrlPathHelper(urlPathHelper);
}
};
}
}
此时访问请求url:http://localhost:8080/matrix/test;name=zhangsan;age=20, 得到结果:test---zhangsan:20 。
05
拦截器
一个完善的Web应用一定要考虑安全问题,比如,只有登录上系统的用户才能查看系统内的资源,或者只有具备相关权限,才能访问对应的资源,为此,我们需要学习一下拦截器,通过拦截器我们就能够实现这些安全认证。
这里以登录检查为例:
public class LoginInterceptor implements HandlerInterceptor {
@Override
public boolean preHandle(HttpServletRequest request, HttpServletResponse response, Object handler) throws Exception {
HttpSession session = request.getSession();
Object user = session.getAttribute(“user”);
if(user != null){
return true;
}
response.sendRedirect(“/toLogin”);
return false;
}
@Override
public void postHandle(HttpServletRequest request, HttpServletResponse response, Object handler, ModelAndView modelAndView) throws Exception {
}
@Override
public void afterCompletion(HttpServletRequest request, HttpServletResponse response, Object handler, Exception ex) throws Exception {
}
}
编写好拦截器后需要将其配置到容器中:
@Configuration
public class MyWebMvcConfig implements WebMvcConfigurer {
@Override
public void addInterceptors(InterceptorRegistry registry) {
registry.addInterceptor(new LoginInterceptor())
.addPathPatterns(“/**”)
.excludePathPatterns(“toLogin”, “/css/", "/js/”, “/fonts/", "/images/”);
}
}
需要指定该拦截器需要拦截哪些资源,需要放行哪些资源,这样一个简单的登录校验就完成了。
06
文件上传
Spring Boot中该如何实现文件上传呢?现有如下的一个表单:
编写控制方法:
@RestController
public class FileController {
@PostMapping(“/upload”)
public String upload(@RequestPart(“f”) MultipartFile file){
String name = file.getOriginalFilename();
long size = file.getSize();
return name + “:” + size;
}
}
通过@RequestPart注解即可将上传的文件封装到MultipartFile中,通过该对象便可以获取到文件的所有信息。输出结果:

若是上传多个文件,则先修改表单信息:
在文件框位置添加multiple属性即可支持多文件上传,然后修改控制器代码:
@PostMapping(“/upload”)
public String upload(@RequestPart(“f”) MultipartFile[] file){
return file.length + “”;
}
若是需要将上传的文件保存到服务器,则可以如此做:
@PostMapping(“/upload”)
public String upload(@RequestPart(“f”) MultipartFile[] file) throws IOException {
for (MultipartFile multipartFile : file) {
if(!multipartFile.isEmpty()){
String filename = multipartFile.getOriginalFilename();
multipartFile.transferTo(new File(“E:\” + filename));
}
}
return “success”;
}
因为Spring Boot默认的文件上传大小限制为1MB,所以只要文件稍微大了一点就会上传失败,为此,可以修改SpringBoot的默认配置:
spring.servlet.multipart.max-file-size=30MB # 配置单个文件上传大小限制
spring.servlet.multipart.max-request-size=100MB # 配置总文件上传大小限制
07
错误处理
默认情况下,SpringBoot应用出现了异常或错误会自动跳转至/error页面,也就是这个熟悉的页面:

然而一般情况下,我们都不会选择出异常时显示这个页面,而是想要显示我们自己定制的页面,为此,我们可以在/static或/templates目录下新建一个error目录,并在/error目录下放置命名为4xx、5xx的页面,SpringBoot会自动帮助我们解析。
此时当出现5xx的异常时,SpringBoot会自动跳转至5xx.html页面,当然你也可以对每个状态码都做一个页面进行对应,比如放置500.html、501.html、502.html文件,当服务器出现对应的异常时,就会跳转至对应的页面。
08
数据层
下面, 我们将探究SpringBoot与数据访问层框架的整合与使用。Spring Boot 与其他第三方中间件整合的技术文章也发布过,我整理成了 PDF,关注微信公众号「Java后端」回复「666」下载这一本技术栈手册。
JDBC
若想使用原生的JDBC进行开发,SpringBoot已经为我们配置好了JDBC的相关信息,只需要引入依赖:
org.springframework.boot
spring-boot-starter-data-jdbc
mysql
mysql-connector-java
5.1.49
Spring Boot 底层自动配置了HikariDataSource数据源,所以我们只需指定数据源的地址、用户名和密码即可:
spring.datasource.url=jdbc:mysql:
spring.datasource.username=root
spring.datasource.password=123456
spring.datasource.driver-class-name=com.mysql.jdbc.Driver
因为SpringBoot已经自动配置好了JdbcTemplate,所以我们直接使用就可以了:
@SpringBootTest
class SpringbootApplicationTests {
@Autowired
private JdbcTemplate jdbcTemplate;
@Test
void contextLoads() {
List names = jdbcTemplate.queryForList(“select name from student”,String.class);
for (String name : names) {
System.out.println(name);
}
}
}
Druid
若是不想使用Spring Boot底层的数据源,我们也可以修改默认配置,以Druid数据源为例,首先引入依赖:
com.alibaba
druid-spring-boot-starter
1.1.10
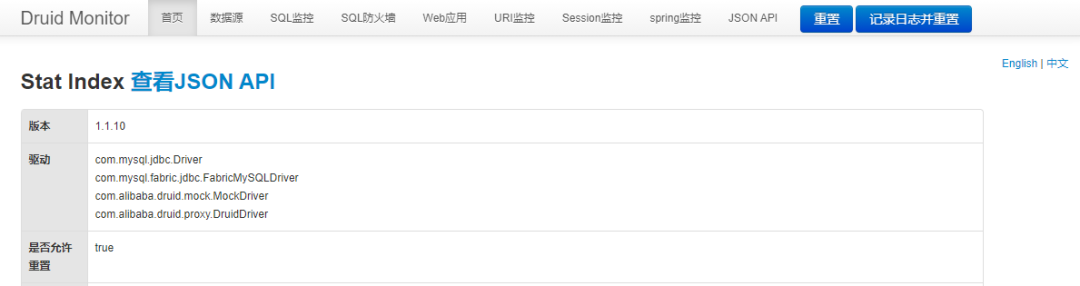
并对Druid进行配置:
# 开启Druid的监控页功能
spring.datasource.druid.stat-view-servlet.enabled=true
# 开启防火墙功能
spring.datasource.druid.filter-class-names=stat,wall
# 配置监控页的用户名和密码
spring.datasource.druid.stat-view-servlet.login-username=admin
spring.datasource.druid.stat-view-servlet.login-password=123
# 开启Druid的Web监控功能
spring.datasource.druid.web-stat-filter.enabled=true
# 配置监控哪些请求
spring.datasource.druid.web-stat-filter.url-pattern=…
此时访问http://localhost:8080/druid,将会来到Druid的监控页:
MyBatis
接下来我们将整合MyBatis框架,并介绍它的简单使用。首先引入依赖:
org.mybatis.spring.boot
mybatis-spring-boot-starter
2.1.4
然后编写Mapper接口:
@Mapper
public interface StudentMapper {
Student getStu(Integer id);
}
编写Mappe配置文件:
<?xml version="1.0" encoding="UTF-8"?>select * from student where id = #{id}
最后配置一下MyBatis:
# 配置Mapper配置文件的位置
mybatis.mapper-locations=classpath:mappers
这样就可以使用MyBatis了:
@SpringBootTest
class SpringbootApplicationTests {
@Autowired
private StudentMapper studentMapper;
@Test
void contextLoads() {
Student stu = studentMapper.getStu(1);
System.out.println(stu);
}
}
Redis
若是想要整合Redis,也非常地简单,首先引入依赖:
org.springframework.boot
spring-boot-starter-data-redis
然后进行配置:
# 主机地址
spring.redis.host=172.16.136.196
只需要配置Redis的主机地址就可以操作Redis了,操作步骤如下:
@SpringBootTest
class SpringbootApplicationTests {
@Autowired
private StringRedisTemplate redisTemplate;
@Test
void contextLoads() {
ValueOperations<String, String> operations = redisTemplate.opsForValue();
operations.set(“name”,“zhangsan”);
String name = operations.get(“name”);
System.out.println(name);
}
}
若是想使用Jedis操作Redis,则需要导入Jedis的依赖:
redis.clients
jedis
并配置:
spring.redis.client-type=jedis
推荐文章
最后
分享一些系统的面试题,大家可以拿去刷一刷,准备面试涨薪。
这些面试题相对应的技术点:
- JVM
- MySQL
- Mybatis
- MongoDB
- Redis
- Spring
- Spring boot
- Spring cloud
- Kafka
- RabbitMQ
- Nginx
- …
大类就是:
- Java基础
- 数据结构与算法
- 并发编程
- 数据库
- 设计模式
- 微服务
- 消息中间件


《一线大厂Java面试题解析+核心总结学习笔记+最新讲解视频+实战项目源码》,点击传送门,即可获取!
进行配置:
# 主机地址
spring.redis.host=172.16.136.196
只需要配置Redis的主机地址就可以操作Redis了,操作步骤如下:
@SpringBootTest
class SpringbootApplicationTests {
@Autowired
private StringRedisTemplate redisTemplate;
@Test
void contextLoads() {
ValueOperations<String, String> operations = redisTemplate.opsForValue();
operations.set(“name”,“zhangsan”);
String name = operations.get(“name”);
System.out.println(name);
}
}
若是想使用Jedis操作Redis,则需要导入Jedis的依赖:
redis.clients
jedis
并配置:
spring.redis.client-type=jedis
推荐文章
最后
分享一些系统的面试题,大家可以拿去刷一刷,准备面试涨薪。
这些面试题相对应的技术点:
- JVM
- MySQL
- Mybatis
- MongoDB
- Redis
- Spring
- Spring boot
- Spring cloud
- Kafka
- RabbitMQ
- Nginx
- …
大类就是:
- Java基础
- 数据结构与算法
- 并发编程
- 数据库
- 设计模式
- 微服务
- 消息中间件
[外链图片转存中…(img-rJ8x4fXd-1714377620886)]
[外链图片转存中…(img-JMsnHX3D-1714377620886)]
[外链图片转存中…(img-oGyj0R1k-1714377620887)]
[外链图片转存中…(img-Qm1RYjNV-1714377620887)]
[外链图片转存中…(img-oBJjH5Cn-1714377620887)]
[外链图片转存中…(img-hfjIyEQw-1714377620887)]
[外链图片转存中…(img-wV3KFvOe-1714377620887)]
[外链图片转存中…(img-Bk5YXBdm-1714377620888)]
[外链图片转存中…(img-I2I2yDY2-1714377620888)]
《一线大厂Java面试题解析+核心总结学习笔记+最新讲解视频+实战项目源码》,点击传送门,即可获取!


 1274
1274

 被折叠的 条评论
为什么被折叠?
被折叠的 条评论
为什么被折叠?
 到【灌水乐园】发言


