


这里总结一下,对于当前传入的context是application或当前线程是子线程时,请求的生命周期和ApplicationLifecycle关联,否则,context是FragmentActivity或Fragment时,在当前组件添加一个SupportFragment(SupportRequestManagerFragment),context是Activity时,在当前组件添加一个Fragment(RequestManagerFragment)。
6、GlideApp#with小结
1、初始化各式各样的配置信息(包括缓存,请求线程池,大小,图片格式等等)以及glide对象。
2、将glide请求和application/SupportFragment/Fragment的生命周期绑定在一块。
这里我们再回顾一下with方法的执行流程。

三、load(url)源码详解
1、GlideRequest(RequestManager)#load
return (GlideRequest<Drawable>) super.load(string);


return asDrawable().load(string);


// 1、asDrawable部分

return (GlideRequest<Drawable>) super.asDrawable();


return as(Drawable.class);


// 最终返回了一个GlideRequest(RequestManager的子类)

return new GlideRequest<>(glide, this, resourceClass, context);


// 2、load部分

return (GlideRequest<TranscodeType>) super.load(string);


return loadGeneric(string);


@NonNull

private RequestBuilder<TranscodeType> loadGeneric(@Nullable Object model) {

    // model则为设置的url

    this.model = model;

    // 记录url已设置

    isModelSet = true;

    return this;

}

复制代码
可以看到,load这部分的源码很简单,就是给GlideRequest(RequestManager)设置了要请求的mode(url),并记录了url已设置的状态。
这里,我们再看看load方法的执行流程。

四、into(iv)源码详解
前方预警,真正复杂的地方开始了。
1、RequestBuilder.into
 @NonNull

public ViewTarget<ImageView, TranscodeType>   into(@NonNull ImageView view) {

  Util.assertMainThread();

  Preconditions.checkNotNull(view);


  RequestOptions requestOptions =     this.requestOptions;

  if (!requestOptions.isTransformationSet()

      && requestOptions.isTransformationAllowed()

      && view.getScaleType() != null) {

    // Clone in this method so that if we use this   RequestBuilder to load into a View and then

    // into a different target, we don't retain the   transformation applied based on the previous

    // View's scale type.

    switch (view.getScaleType()) {

      // 这个RequestOptions里保存了要设置的scaleType,Glide自身封装了CenterCrop、CenterInside、

      // FitCenter、CenterInside四种规格。

      case CENTER_CROP:

        requestOptions =   requestOptions.clone().optionalCenterCrop();

        break;

      case CENTER_INSIDE:

        requestOptions =   requestOptions.clone().optionalCenterInside()  ;

        break;

      case FIT_CENTER:

      case FIT_START:

      case FIT_END:

        requestOptions =   requestOptions.clone().optionalFitCenter();

        break;

      case FIT_XY:

        requestOptions =   requestOptions.clone().optionalCenterInside()  ;

        break;

      case CENTER:

      case MATRIX:

      default:

        // Do nothing.

    }

  }


  // 注意,这个transcodeClass是指的drawable或bitmap

  return into(

      glideContext.buildImageViewTarget(view,     transcodeClass),

      /*targetListener=*/ null,

      requestOptions);

}

复制代码
2、GlideContext#buildImageViewTarget
return imageViewTargetFactory.buildTarget(imageView, transcodeClass);


复制代码
3、ImageViewTargetFactory#buildTarget
@NonNull

@SuppressWarnings("unchecked")

public <Z> ViewTarget<ImageView, Z>   buildTarget(@NonNull ImageView view,

    @NonNull Class<Z> clazz) {

  // 返回展示Bimtap/Drawable资源的目标对象

  if (Bitmap.class.equals(clazz)) {

    return (ViewTarget<ImageView, Z>) new   BitmapImageViewTarget(view);

  } else if (Drawable.class.isAssignableFrom(clazz))     {

    return (ViewTarget<ImageView, Z>) new   DrawableImageViewTarget(view);

  } else {

    throw new IllegalArgumentException(

        "Unhandled class: " + clazz + ", try   .as*(Class).transcode(ResourceTranscoder)");

  }

}

复制代码
可以看到,Glide内部只维护了两种target,一种是BitmapImageViewTarget,另一种则是DrawableImageViewTarget,接下来继续深入。
4、RequestBuilder#into
private <Y extends Target<TranscodeType>> Y into(

      @NonNull Y target,

      @Nullable RequestListener<TranscodeType>   targetListener,

      @NonNull RequestOptions options) {

    Util.assertMainThread();

    Preconditions.checkNotNull(target);

    if (!isModelSet) {

      throw new IllegalArgumentException("You must call   #load() before calling #into()");

    }


    options = options.autoClone();

    // 分析1.建立请求

    Request request = buildRequest(target,     targetListener, options);


    Request previous = target.getRequest();

    if (request.isEquivalentTo(previous)

        && !isSkipMemoryCacheWithCompletePreviousReques    t(options, previous)) {

      request.recycle();

      // If the request is completed, beginning again   will ensure the result is re-delivered,

      // triggering RequestListeners and Targets. If   the request is failed, beginning again will

      // restart the request, giving it another chance   to complete. If the request is already

      // running, we can let it continue running   without interruption.

      if (!Preconditions.checkNotNull(previous).isRunni  ng()) {

        // Use the previous request rather than the new     one to allow for optimizations like skipping

        // setting placeholders, tracking and     un-tracking Targets, and obtaining View     dimensions

        // that are done in the individual Request.

        previous.begin();

      }

      return target;

    }


    requestManager.clear(target);

    target.setRequest(request);

    // 分析2.真正追踪请求的地方

    requestManager.track(target, request);


    return target;

}


// 分析1

private Request buildRequest(

      Target<TranscodeType> target,

      @Nullable RequestListener<TranscodeType>   targetListener,

      RequestOptions requestOptions) {

    return buildRequestRecursive(

        target,

        targetListener,

        /*parentCoordinator=*/ null,

        transitionOptions,

        requestOptions.getPriority(),

        requestOptions.getOverrideWidth(),

        requestOptions.getOverrideHeight(),

        requestOptions);

}


// 分析1

private Request buildRequestRecursive(

      Target<TranscodeType> target,

      @Nullable RequestListener<TranscodeType>   targetListener,

      @Nullable RequestCoordinator parentCoordinator,

      TransitionOptions<?, ? super TranscodeType>   transitionOptions,

      Priority priority,

      int overrideWidth,

      int overrideHeight,

      RequestOptions requestOptions) {


    // Build the ErrorRequestCoordinator first if     necessary so we can update parentCoordinator.

    ErrorRequestCoordinator errorRequestCoordinator =     null;

    if (errorBuilder != null) {

      // 创建errorRequestCoordinator(异常处理对象)

      errorRequestCoordinator = new   ErrorRequestCoordinator(parentCoordinator);

      parentCoordinator = errorRequestCoordinator;

    }


    // 递归建立缩略图请求

    Request mainRequest =

        buildThumbnailRequestRecursive(

            target,

            targetListener,

            parentCoordinator,

            transitionOptions,

            priority,

            overrideWidth,

            overrideHeight,

            requestOptions);


    if (errorRequestCoordinator == null) {

      return mainRequest;

    }


    ...


    Request errorRequest =     errorBuilder.buildRequestRecursive(

        target,

        targetListener,

        errorRequestCoordinator,

        errorBuilder.transitionOptions,

        errorBuilder.requestOptions.getPriority(),

        errorOverrideWidth,

        errorOverrideHeight,

        errorBuilder.requestOptions);

    errorRequestCoordinator.setRequests(mainRequest,     errorRequest);

    return errorRequestCoordinator;

}


// 分析1

private Request buildThumbnailRequestRecursive(

      Target<TranscodeType> target,

      RequestListener<TranscodeType> targetListener,

      @Nullable RequestCoordinator parentCoordinator,

      TransitionOptions<?, ? super TranscodeType> transitionOptions,

      Priority priority,

      int overrideWidth,

      int overrideHeight,

      RequestOptions requestOptions) {

    if (thumbnailBuilder != null) {

      // Recursive case: contains a potentially recursive thumbnail request builder.


      ...


      ThumbnailRequestCoordinator coordinator = new ThumbnailRequestCoordinator(parentCoordinator);

      // 获取一个正常请求对象

      Request fullRequest =

          obtainRequest(

              target,

              targetListener,

              requestOptions,

              coordinator,

              transitionOptions,

              priority,

              overrideWidth,

              overrideHeight);

      isThumbnailBuilt = true;

      // Recursively generate thumbnail requests.

      // 使用递归的方式建立一个缩略图请求对象

      Request thumbRequest =

          thumbnailBuilder.buildRequestRecursive(

              target,

              targetListener,

              coordinator,

              thumbTransitionOptions,

              thumbPriority,

              thumbOverrideWidth,

              thumbOverrideHeight,

              thumbnailBuilder.requestOptions);

      isThumbnailBuilt = false;

      // coordinator(ThumbnailRequestCoordinator)是作为两者的协调者,

      // 能够同时加载缩略图和正常的图的请求

      coordinator.setRequests(fullRequest, thumbRequest);

      return coordinator;

    } else if (thumbSizeMultiplier != null) {

      // Base case: thumbnail multiplier generates a thumbnail request, but cannot recurse.

      // 当设置了缩略的比例thumbSizeMultiplier(0 ~  1)时,

      // 不需要递归建立缩略图请求

      ThumbnailRequestCoordinator coordinator = new ThumbnailRequestCoordinator(parentCoordinator);

      Request fullRequest =

          obtainRequest(

              target,

              targetListener,

              requestOptions,

              coordinator,

              transitionOptions,

              priority,

              overrideWidth,

              overrideHeight);

      RequestOptions thumbnailOptions = requestOptions.clone()

          .sizeMultiplier(thumbSizeMultiplier);


      Request thumbnailRequest =

          obtainRequest(

              target,

              targetListener,

              thumbnailOptions,

              coordinator,

              transitionOptions,

              getThumbnailPriority(priority),

              overrideWidth,

              overrideHeight);


      coordinator.setRequests(fullRequest, thumbnailRequest);

      return coordinator;

    } else {

      // Base case: no thumbnail.

      // 没有缩略图请求时,直接获取一个正常图请求

      return obtainRequest(

          target,

          targetListener,

          requestOptions,

          parentCoordinator,

          transitionOptions,

          priority,

          overrideWidth,

          overrideHeight);

    }

}


private Request obtainRequest(

      Target<TranscodeType> target,

      RequestListener<TranscodeType> targetListener,

      RequestOptions requestOptions,

      RequestCoordinator requestCoordinator,

      TransitionOptions<?, ? super TranscodeType>   transitionOptions,

      Priority priority,

      int overrideWidth,

      int overrideHeight) {

    // 最终实际返回的是一个SingleRequest对象(将制定的资源加载进对应的Target

    return SingleRequest.obtain(

        context,

        glideContext,

        model,

        transcodeClass,

        requestOptions,

        overrideWidth,

        overrideHeight,

        priority,

        target,

        targetListener,

        requestListeners,

        requestCoordinator,

        glideContext.getEngine(),

        transitionOptions.getTransitionFactory());

}

复制代码
从上源码分析可知,我们在分析1处的buildRequest()方法里建立了请求,且最多可同时进行缩略图和正常图的请求,最后,调用了requestManager.track(target, request)方法,接着看看track里面做了什么。
5、RequestManager#track
// 分析2

void track(@NonNull Target<?> target, @NonNull Request request) {

    // 加入一个target目标集合(Set)

    targetTracker.track(target);


    requestTracker.runRequest(request);

}

复制代码
6、RequestTracker#runRequest
/**

* Starts tracking the given request.

*/

// 分析2

public void runRequest(@NonNull Request request) {

    requests.add(request);

    if (!isPaused) {

      // 如果不是暂停状态则开始请求

      request.begin();

    } else {

      request.clear();

      if (Log.isLoggable(TAG, Log.VERBOSE)) {

        Log.v(TAG, "Paused, delaying request");

      }

      // 否则清空请求,加入延迟请求队列(为了对这些请求维持一个强引用,使用了ArrayList实现)

      pendingRequests.add(request);

    }

}

复制代码
7、SingleRequest#begin
// 分析2

@Override

public void begin() {


  ...


  if (model == null) {


    ...

    // model(url)为空,回调加载失败

    onLoadFailed(new GlideException("Received null   model"), logLevel);

    return;

  }


  if (status == Status.RUNNING) {

    throw new IllegalArgumentException("Cannot   restart a running request");

  }


  if (status == Status.COMPLETE) {

    onResourceReady(resource,   DataSource.MEMORY_CACHE);

    return;

  }


  status = Status.WAITING_FOR_SIZE;

  if (Util.isValidDimensions(overrideWidth, overrideHeight)) {

    // 当使用override() API为图片指定了一个固定的宽高时直接执行onSizeReady,

    // 最终的核心处理位于onSizeReady

    onSizeReady(overrideWidth, overrideHeight);

  } else {

    // 根据imageView的宽高算出图片的宽高,最终也会走到onSizeReady

    target.getSize(this);

  }


  if ((status == Status.RUNNING || status ==     Status.WAITING_FOR_SIZE)

      && canNotifyStatusChanged()) {

    // 预先加载设置的缩略图

    target.onLoadStarted(getPlaceholderDrawable());

  }

  if (IS_VERBOSE_LOGGABLE) {

    logV("finished run method in " +   LogTime.getElapsedMillis(startTime));

  }

}

复制代码
从requestManager.track(target, request)开始,最终会执行到SingleRequest#begin()方法的onSizeReady,可以猜到(因为后面只做了预加载缩略图的处理),真正的请求就是从这里开始的,咱们进去一探究竟~
8、SingleRequest#onSizeReady
// 分析2

@Override

public void onSizeReady(int width, int height) {

  stateVerifier.throwIfRecycled();


  ...


  status = Status.RUNNING;


  float sizeMultiplier =     requestOptions.getSizeMultiplier();

  this.width = maybeApplySizeMultiplier(width,     sizeMultiplier);

  this.height = maybeApplySizeMultiplier(height,     sizeMultiplier);


  ...


  // 根据给定的配置进行加载,engine是一个负责加载、管理活跃和缓存资源的引擎类

  loadStatus = engine.load(

      glideContext,

      model,

      requestOptions.getSignature(),

      this.width,

      this.height,

      requestOptions.getResourceClass(),

      transcodeClass,

      priority,

      requestOptions.getDiskCacheStrategy(),

      requestOptions.getTransformations(),

      requestOptions.isTransformationRequired(),

      requestOptions.isScaleOnlyOrNoTransform(),

      requestOptions.getOptions(),

      requestOptions.isMemoryCacheable(),

      requestOptions.getUseUnlimitedSourceGeneratorsP    ool(),

      requestOptions.getUseAnimationPool(),

      requestOptions.getOnlyRetrieveFromCache(),

      this);


  ...

}

复制代码
终于看到Engine类了,感觉距离成功不远了,继续~
9、Engine#load
public <R> LoadStatus load(

    GlideContext glideContext,

    Object model,

    Key signature,

    int width,

    int height,

    Class<?> resourceClass,

    Class<R> transcodeClass,

    Priority priority,

    DiskCacheStrategy diskCacheStrategy,

    Map<Class<?>, Transformation<?>> transformations,

    boolean isTransformationRequired,

    boolean isScaleOnlyOrNoTransform,

    Options options,

    boolean isMemoryCacheable,

    boolean useUnlimitedSourceExecutorPool,

    boolean useAnimationPool,

    boolean onlyRetrieveFromCache,

    ResourceCallback cb) {


  ...


  // 先从弱引用中查找,如果有的话回调onResourceReady并直接返回

  EngineResource<?> active = loadFromActiveResources(key, isMemoryCacheable);

  if (active != null) {

    cb.onResourceReady(active,   DataSource.MEMORY_CACHE);

    if (VERBOSE_IS_LOGGABLE) {

      logWithTimeAndKey("Loaded resource from active     resources", startTime, key);

    }

    return null;

  }


  // 没有再从内存中查找,有的话会取出并放到ActiveResources(内部维护的弱引用缓存map)里面

  EngineResource<?> cached = loadFromCache(key,     isMemoryCacheable);

  if (cached != null) {

    cb.onResourceReady(cached,   DataSource.MEMORY_CACHE);

    if (VERBOSE_IS_LOGGABLE) {

      logWithTimeAndKey("Loaded resource from cache",     startTime, key);

    }

    return null;

  }


  EngineJob<?> current = jobs.get(key,     onlyRetrieveFromCache);

  if (current != null) {

    current.addCallback(cb);

    if (VERBOSE_IS_LOGGABLE) {

      logWithTimeAndKey("Added to existing load",     startTime, key);

    }

    return new LoadStatus(cb, current);

  }


  // 如果内存中没有,则创建engineJob(decodejob的回调类,管理下载过程以及状态)

  EngineJob<R> engineJob =

      engineJobFactory.build(

          key,

          isMemoryCacheable,

          useUnlimitedSourceExecutorPool,

          useAnimationPool,

          onlyRetrieveFromCache);


  // 创建解析工作对象

  DecodeJob<R> decodeJob =

      decodeJobFactory.build(

          glideContext,

          model,

          key,

          signature,

          width,

          height,

          resourceClass,

          transcodeClass,

          priority,

          diskCacheStrategy,

          transformations,

          isTransformationRequired,

          isScaleOnlyOrNoTransform,

          onlyRetrieveFromCache,

          options,

          engineJob);


  // 放在Jobs内部维护的HashMap中

  jobs.put(key, engineJob);


  // 关注点8 后面分析会用到

  // 注册ResourceCallback接口

  engineJob.addCallback(cb);

  // 内部开启线程去请求

  engineJob.start(decodeJob);


  if (VERBOSE_IS_LOGGABLE) {

    logWithTimeAndKey("Started new load", startTime,   key);

  }

  return new LoadStatus(cb, engineJob);

}


public void start(DecodeJob<R> decodeJob) {

    this.decodeJob = decodeJob;

    // willDecodeFromCache方法内部根据不同的阶段stage,如果是RESOURCE_CACHE/DATA_CACHE则返回true,使用diskCacheExecutor,否则调用getActiveSourceExecutor,内部会根据相应的条件返回sourceUnlimitedExecutor/animationExecutor/sourceExecutor

    GlideExecutor executor =

    decodeJob.willDecodeFromCache()

        ? diskCacheExecutor

        : getActiveSourceExecutor();

    executor.execute(decodeJob);

}

复制代码
可以看到,最终Engine(引擎)类内部会执行到自身的start方法,它会根据不同的配置采用不同的线程池使用diskCacheExecutor/sourceUnlimitedExecutor/animationExecutor/sourceExecutor来执行最终的解码任务decodeJob。
10、DecodeJob#run
runWrapped();


private void runWrapped() {

    switch (runReason) {

      case INITIALIZE:

        stage = getNextStage(Stage.INITIALIZE);

        // 关注点1

        currentGenerator = getNextGenerator();

        // 关注点2 内部会调用相应Generator的startNext()

        runGenerators();

        break;

      case SWITCH_TO_SOURCE_SERVICE:

        runGenerators();

        break;

      case DECODE_DATA:

        // 关注点3 将获取的数据解码成对应的资源

        decodeFromRetrievedData();

        break;

      default:

        throw new IllegalStateException("Unrecognized     run reason: " + runReason);

    }

}


// 关注点1,完整情况下,会异步依次生成这里的ResourceCacheGenerator、DataCacheGenerator和SourceGenerator对象,并在之后执行其中的startNext()

private DataFetcherGenerator getNextGenerator() {

    switch (stage) {

      case RESOURCE_CACHE:

        return new ResourceCacheGenerator(decodeHelper, this);

      case DATA_CACHE:

        return new DataCacheGenerator(decodeHelper, this);

      case SOURCE:

        return new SourceGenerator(decodeHelper, this);

      case FINISHED:

        return null;

      default:

        throw new IllegalStateException("Unrecognized     stage: " + stage);

    }

}

复制代码
11、SourceGenerator#startNext
// 关注点2

@Override

public boolean startNext() {

  // dataToCache数据不为空的话缓存到硬盘(第一执行该方法是不会调用的)

  if (dataToCache != null) {

    Object data = dataToCache;

    dataToCache = null;

    cacheData(data);

  }


  if (sourceCacheGenerator != null &&     sourceCacheGenerator.startNext()) {

    return true;

  }

  sourceCacheGenerator = null;


  loadData = null;

  boolean started = false;

  while (!started && hasNextModelLoader()) {

    // 关注点4 getLoadData()方法内部会在modelLoaders里面找到ModelLoder对象

    // (每个Generator对应一个ModelLoader),

    // 并使用modelLoader.buildLoadData方法返回一个loadData列表

    loadData =   helper.getLoadData().get(loadDataListIndex++);

    if (loadData != null

        && (helper.getDiskCacheStrategy().isDataCache  able(loadData.fetcher.getDataSource())

        || helper.hasLoadPath(loadData.fetcher.getDat  aClass()))) {

      started = true;

      // 关注点6 通过loadData对象的fetcher对象(有关注点3的分析可知其实现类为HttpUrlFetcher)的

      // loadData方法来获取图片数据

      loadData.fetcher.loadData(helper.getPriority(),     this);

    }

  }

  return started;

}

复制代码
12、DecodeHelper#getLoadData
List<LoadData<?>> getLoadData() {

    if (!isLoadDataSet) {

      isLoadDataSet = true;

      loadData.clear();

      List<ModelLoader<Object, ?>> modelLoaders =   glideContext.getRegistry().getModelLoaders(model)  ;

      //noinspection ForLoopReplaceableByForEach to   improve perf

      for (int i = 0, size = modelLoaders.size(); i <   size; i++) {

        ModelLoader<Object, ?> modelLoader =     modelLoaders.get(i);

        // 注意:这里最终是通过HttpGlideUrlLoader的buildLoadData获取到实际的loadData对象

        LoadData<?> current =

            modelLoader.buildLoadData(model, width,     height, options);

        if (current != null) {

          loadData.add(current);

        }

      }

    }

    return loadData;

}

复制代码
13、HttpGlideUrlLoader#buildLoadData
@Override

public LoadData<InputStream> buildLoadData(@NonNull   GlideUrl model, int width, int height,

    @NonNull Options options) {

  // GlideUrls memoize parsed URLs so caching them     saves a few object instantiations and time

  // spent parsing urls.

  GlideUrl url = model;

  if (modelCache != null) {

    url = modelCache.get(model, 0, 0);

    if (url == null) {

      // 关注点5

      modelCache.put(model, 0, 0, model);

      url = model;

    }

  }

  int timeout = options.get(TIMEOUT);

  // 注意,这里创建了一个DataFetcher的实现类HttpUrlFetcher

  return new LoadData<>(url, new HttpUrlFetcher(url,     timeout));

}


// 关注点5

public void put(A model, int width, int height, B value) {

    ModelKey<A> key = ModelKey.get(model, width,     height);

    // 最终是通过LruCache来缓存对应的值,key是一个ModelKey对象(由model、width、height三个属性组成)

    cache.put(key, value);

}

复制代码
从这里的分析,我们明白了HttpUrlFetcher实际上就是最终的请求执行者,而且,我们知道了Glide会使用LruCache来对解析后的url来进行缓存,以便后续可以省去解析url的时间。
14、HttpUrlFetcher#loadData
@Override

public void loadData(@NonNull Priority priority,

    @NonNull DataCallback<? super InputStream>   callback) {

  long startTime = LogTime.getLogTime();

  try {

    // 关注点6

    // loadDataWithRedirects内部是通过HttpURLConnection网络请求数据

    InputStream result =   loadDataWithRedirects(glideUrl.toURL(), 0, null,   glideUrl.getHeaders());

    // 请求成功回调onDataReady()

    callback.onDataReady(result);

  } catch (IOException e) {

    if (Log.isLoggable(TAG, Log.DEBUG)) {

      Log.d(TAG, "Failed to load data for url", e);

    }

    callback.onLoadFailed(e);

  } finally {

    if (Log.isLoggable(TAG, Log.VERBOSE)) {

      Log.v(TAG, "Finished http url fetcher fetch in     " + LogTime.getElapsedMillis(startTime));

    }

  }

}


private InputStream loadDataWithRedirects(URL url, int redirects, URL lastUrl,

  Map<String, String> headers) throws IOException {


    ...


    urlConnection.connect();

    // Set the stream so that it's closed in cleanup to avoid resource leaks. See #2352.

    stream = urlConnection.getInputStream();

    if (isCancelled) {

      return null;

    }

    final int statusCode = urlConnection.getResponseCode();

    // 只要是2xx形式的状态码则判断为成功

    if (isHttpOk(statusCode)) {

      // 从urlConnection中获取资源流

      return getStreamForSuccessfulRequest(urlConnection);

    } else if (isHttpRedirect(statusCode)) {


      ...


      // 重定向请求

      return loadDataWithRedirects(redirectUrl, redirects + 1, url,   headers);

    } else if (statusCode == INVALID_STATUS_CODE) {

      throw new HttpException(statusCode);

    } else {

      throw new HttpException(urlConnection.getResponseMessage(),   statusCode);

    }

}


private InputStream getStreamForSuccessfulRequest(HttpURLConnection urlConnection)

  throws IOException {

    if (TextUtils.isEmpty(urlConnection.getContentEncoding())) {

      int contentLength = urlConnection.getContentLength();

      stream = ContentLengthInputStream.obtain(urlConnection.getInputStr  eam(), contentLength);

    } else {

      if (Log.isLoggable(TAG, Log.DEBUG)) {

        Log.d(TAG, "Got non empty content encoding: " +     urlConnection.getContentEncoding());

      }

      stream = urlConnection.getInputStream();

    }

    return stream;

}

复制代码
在HttpUrlFetcher#loadData方法的loadDataWithRedirects里面,Glide通过原生的HttpURLConnection进行请求后,并调用getStreamForSuccessfulRequest()方法获取到了最终的图片流。
15、DecodeJob#run
在我们通过HtttpUrlFetcher的loadData()方法请求得到对应的流之后,我们还必须对流进行处理得到最终我们想要的资源。这里我们回到第10步DecodeJob#run方法的关注点3处,这行代码将会对流进行解码。
decodeFromRetrievedData();

复制代码
接下来,继续看看他内部的处理。
private void decodeFromRetrievedData() {

    if (Log.isLoggable(TAG, Log.VERBOSE)) {

      logWithTimeAndKey("Retrieved data", startFetchTime,

          "data: " + currentData

              + ", cache key: " + currentSourceKey

              + ", fetcher: " + currentFetcher);

    }

    Resource<R> resource = null;

    try {

      //  核心代码

      // 从数据中解码得到资源

      resource = decodeFromData(currentFetcher, currentData,   currentDataSource);

    } catch (GlideException e) {

      e.setLoggingDetails(currentAttemptingKey, currentDataSource);

      throwables.add(e);

    }

    if (resource != null) {

      // 关注点8

      // 编码和发布最终得到的Resource<Bitmap>对象

      notifyEncodeAndRelease(resource, currentDataSource);

    } else {

      runGenerators();

    }

}


 private <Data> Resource<R> decodeFromData(DataFetcher<?> fetcher, Data data,

  DataSource dataSource) throws GlideException {

    try {

      if (data == null) {

        return null;

      }

      long startTime = LogTime.getLogTime();

      // 核心代码

      // 进一步包装了解码方法

      Resource<R> result = decodeFromFetcher(data, dataSource);

      if (Log.isLoggable(TAG, Log.VERBOSE)) {

        logWithTimeAndKey("Decoded result " + result, startTime);

      }

      return result;

    } finally {

      fetcher.cleanup();

    }

}


@SuppressWarnings("unchecked")

private <Data> Resource<R> decodeFromFetcher(Data data, DataSource dataSource)

  throws GlideException {

    LoadPath<Data, ?, R> path = decodeHelper.getLoadPath((Class<Data>) data.getClass());

    // 核心代码

    // 将解码任务分发给LoadPath

    return runLoadPath(data, dataSource, path);

}


private <Data, ResourceType> Resource<R> runLoadPath(Data data, DataSource dataSource,

  LoadPath<Data, ResourceType, R> path) throws GlideException {

    Options options = getOptionsWithHardwareConfig(dataSource);

    // 将数据进一步包装

    DataRewinder<Data> rewinder =     glideContext.getRegistry().getRewinder(data);

    try {

      // ResourceType in DecodeCallback below is required for   compilation to work with gradle.

      // 核心代码

      // 将解码任务分发给LoadPath

      return path.load(

          rewinder, options, width, height, new   DecodeCallback<ResourceType>(dataSource));

    } finally {

      rewinder.cleanup();

    }

}

复制代码
16、LoadPath#load
public Resource<Transcode> load(DataRewinder<Data> rewinder, @NonNull Options options, int width,

  int height, DecodePath.DecodeCallback<ResourceType> decodeCallback) throws GlideException {

List<Throwable> throwables = Preconditions.checkNotNull(listPool.acquire());

try {

  // 核心代码

  return loadWithExceptionList(rewinder, options, width, height, decodeCallback, throwables);

} finally {

  listPool.release(throwables);

}

复制代码
}
private Resource<Transcode> loadWithExceptionList(DataRewinder<Data> rewinder,
@NonNull Options options,
int width, int height, DecodePath.DecodeCallback<ResourceType> decodeCallback,
List<Throwable> exceptions) throws GlideException {
Resource<Transcode> result = null;
//noinspection ForLoopReplaceableByForEach to improve perf
for (int i = 0, size = decodePaths.size(); i < size; i++) {
DecodePath<Data, ResourceType, Transcode> path = decodePaths.get(i);
try {
// 核心代码
// 将解码任务又进一步分发给DecodePath的decode方法去解码
result = path.decode(rewinder, width, height, options, decodeCallback);
} catch (GlideException e) {
exceptions.add(e);
}
if (result != null) {
break;
}
**自我介绍一下,小编13年上海交大毕业,曾经在小公司待过,也去过华为、OPPO等大厂,18年进入阿里一直到现在。**
**深知大多数Android工程师,想要提升技能,往往是自己摸索成长或者是报班学习,但对于培训机构动则几千的学费,着实压力不小。自己不成体系的自学效果低效又漫长,而且极易碰到天花板技术停滞不前!**
**因此收集整理了一份《2024年Android移动开发全套学习资料》,初衷也很简单,就是希望能够帮助到想自学提升又不知道该从何学起的朋友,同时减轻大家的负担。**


**既有适合小白学习的零基础资料,也有适合3年以上经验的小伙伴深入学习提升的进阶课程,基本涵盖了95%以上Android开发知识点,真正体系化!**
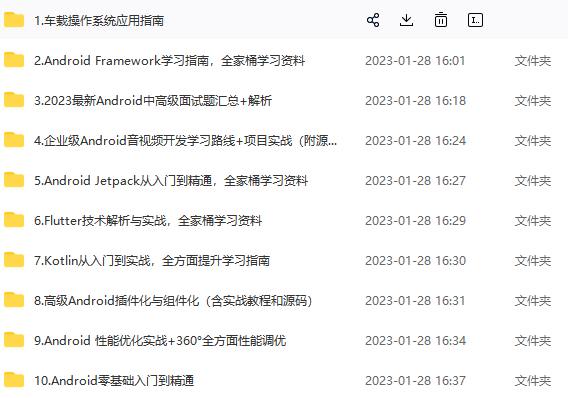
**由于文件比较大,这里只是将部分目录大纲截图出来,每个节点里面都包含大厂面经、学习笔记、源码讲义、实战项目、讲解视频,并且后续会持续更新**
**如果你觉得这些内容对你有帮助,可以添加V获取:vip204888 (备注Android)**

## 总结
**【Android 详细知识点思维脑图(技能树)】**
> 
其实Android开发的知识点就那么多,面试问来问去还是那么点东西。所以面试没有其他的诀窍,只看你对这些知识点准备的充分程度。so,出去面试时先看看自己复习到了哪个阶段就好。
虽然 Android 没有前几年火热了,已经过去了会四大组件就能找到高薪职位的时代了。这只能说明 Android 中级以下的岗位饱和了,**现在高级工程师还是比较缺少的**,很多高级职位给的薪资真的特别高(钱多也不一定能找到合适的),所以努力让自己成为高级工程师才是最重要的。
> 这里附上上述的面试题相关的几十套字节跳动,京东,小米,腾讯、头条、阿里、美团等公司19年的面试题。把技术点整理成了视频和PDF(实际上比预期多花了不少精力),包含知识脉络 + 诸多细节。
由于篇幅有限,这里以图片的形式给大家展示一小部分。

网上学习 Android的资料一大堆,但如果学到的知识不成体系,遇到问题时只是浅尝辄止,不再深入研究,那么很难做到真正的技术提升。希望这份系统化的技术体系对大家有一个方向参考。
**一个人可以走的很快,但一群人才能走的更远。不论你是正从事IT行业的老鸟或是对IT行业感兴趣的新人,都欢迎扫码加入我们的的圈子(技术交流、学习资源、职场吐槽、大厂内推、面试辅导),让我们一起学习成长!**

) {
DecodePath<Data, ResourceType, Transcode> path = decodePaths.get(i);
try {
// 核心代码
// 将解码任务又进一步分发给DecodePath的decode方法去解码
result = path.decode(rewinder, width, height, options, decodeCallback);
} catch (GlideException e) {
exceptions.add(e);
}
if (result != null) {
break;
}
**自我介绍一下,小编13年上海交大毕业,曾经在小公司待过,也去过华为、OPPO等大厂,18年进入阿里一直到现在。**
**深知大多数Android工程师,想要提升技能,往往是自己摸索成长或者是报班学习,但对于培训机构动则几千的学费,着实压力不小。自己不成体系的自学效果低效又漫长,而且极易碰到天花板技术停滞不前!**
**因此收集整理了一份《2024年Android移动开发全套学习资料》,初衷也很简单,就是希望能够帮助到想自学提升又不知道该从何学起的朋友,同时减轻大家的负担。**
[外链图片转存中...(img-wlsRUZJm-1712773175573)]
[外链图片转存中...(img-ZMGnzi37-1712773175574)]
[外链图片转存中...(img-MkMZ4l0e-1712773175574)]
[外链图片转存中...(img-4acGt75H-1712773175574)]
[外链图片转存中...(img-RQ6rF9XC-1712773175574)]
[外链图片转存中...(img-QfhJM7E2-1712773175575)]

**既有适合小白学习的零基础资料,也有适合3年以上经验的小伙伴深入学习提升的进阶课程,基本涵盖了95%以上Android开发知识点,真正体系化!**
**由于文件比较大,这里只是将部分目录大纲截图出来,每个节点里面都包含大厂面经、学习笔记、源码讲义、实战项目、讲解视频,并且后续会持续更新**
**如果你觉得这些内容对你有帮助,可以添加V获取:vip204888 (备注Android)**
[外链图片转存中...(img-ZxTvLYp5-1712773175575)]
## 总结
**【Android 详细知识点思维脑图(技能树)】**
> [外链图片转存中...(img-BxN2somr-1712773175575)]
其实Android开发的知识点就那么多,面试问来问去还是那么点东西。所以面试没有其他的诀窍,只看你对这些知识点准备的充分程度。so,出去面试时先看看自己复习到了哪个阶段就好。
虽然 Android 没有前几年火热了,已经过去了会四大组件就能找到高薪职位的时代了。这只能说明 Android 中级以下的岗位饱和了,**现在高级工程师还是比较缺少的**,很多高级职位给的薪资真的特别高(钱多也不一定能找到合适的),所以努力让自己成为高级工程师才是最重要的。
> 这里附上上述的面试题相关的几十套字节跳动,京东,小米,腾讯、头条、阿里、美团等公司19年的面试题。把技术点整理成了视频和PDF(实际上比预期多花了不少精力),包含知识脉络 + 诸多细节。
由于篇幅有限,这里以图片的形式给大家展示一小部分。
[外链图片转存中...(img-6lcgzIdZ-1712773175576)]
网上学习 Android的资料一大堆,但如果学到的知识不成体系,遇到问题时只是浅尝辄止,不再深入研究,那么很难做到真正的技术提升。希望这份系统化的技术体系对大家有一个方向参考。
**一个人可以走的很快,但一群人才能走的更远。不论你是正从事IT行业的老鸟或是对IT行业感兴趣的新人,都欢迎扫码加入我们的的圈子(技术交流、学习资源、职场吐槽、大厂内推、面试辅导),让我们一起学习成长!**
[外链图片转存中...(img-chInwReL-1712773175576)]


 5372
5372

 被折叠的 条评论
为什么被折叠?
被折叠的 条评论
为什么被折叠?
 到【灌水乐园】发言


